December 30, 2012

10 Most Popular Recipes of 2012

Happy holidays!  I feel like it's been forever since I last posted; I'd intended on posting more over my Christmas break but I've been pretty lazy lately (and I'm loving it)!  I've been spending a lot of time hanging out with family over the last week, enjoying my parents' fabulous cooking, reading my new cookbooks, and learning how to use the new camera I bought myself on Boxing Day! 

With New Year's quickly approaching, I thought it'd be a good time to recap the year's most popular recipes on this blog.  I always love reading these posts on other blogs because it helps me find new recipes or reminds me of ones I'd forgotten that I need to try, and I love going through my own blog stats at the end of the year to find out which recipes you guys loved most!  The one thing that stood out from the ten most popular recipes was that you guys love quinoa - 4 of the top 10 posts were for quinoa recipes!  This makes me very happy because I love trying new ways to eat quinoa, and I'm looking forward to sharing new recipes with you guys in the new year!

Without further ado, here are your favourite recipes from 2012.  I'll be back in 2013 to recap some of my own favourite recipes from the year.  Until then, Happy New Year! :)

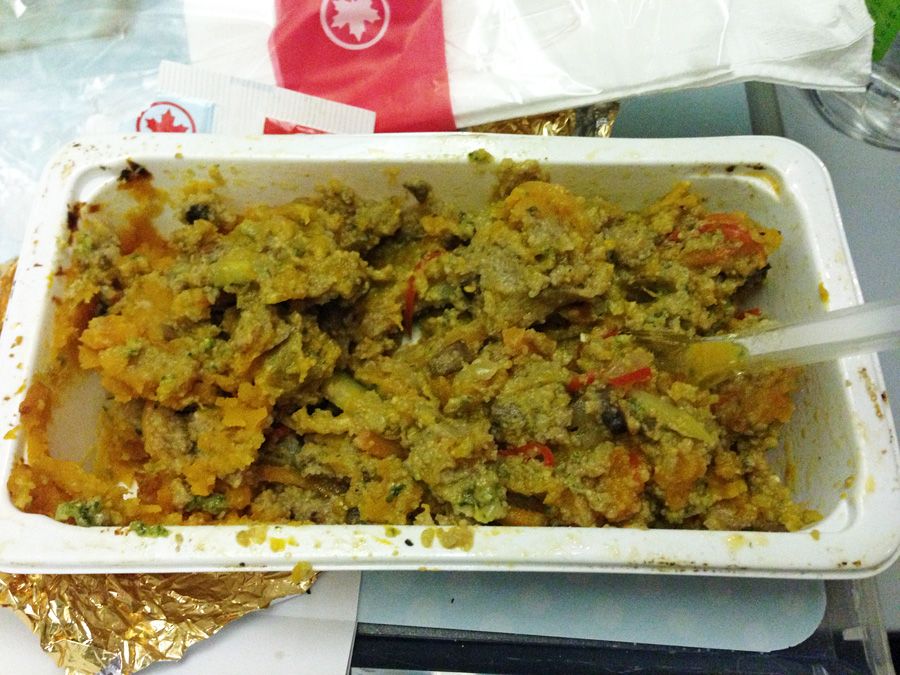
10. Pasta with Chicken and Broccoli in a Mushroom White Wine Sauce

Pasta with Chicken and Broccoli in a Mushroom White Wine Sauce

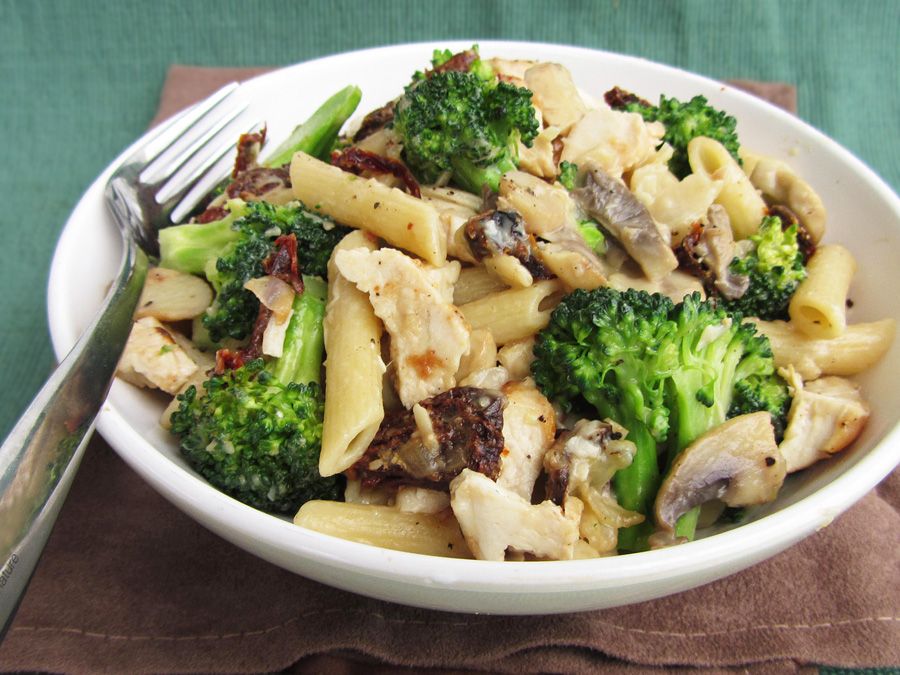
... and roasted garlic, and sundried tomatoes .. There's a lot going on in this pasta but that's what makes it so good!

9. Quinoa-Stuffed Poblano Peppers with Chipotle Sauce

Quinoa stuffed poblano peppers

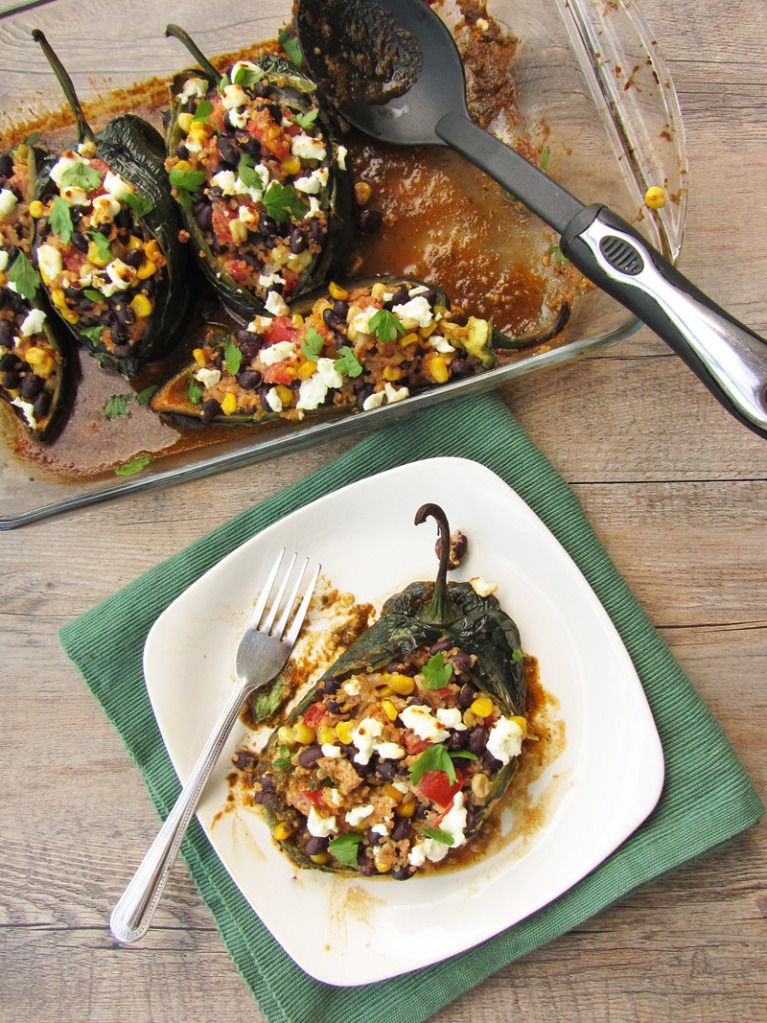
This was my first time trying poblano peppers and I loved how they paired together with the spicy chipotle sauce and creamy goat cheese quinoa. Healthy and flavourful!

8. Sesame Soy Spaghetti Squash with Broccoli & Edamame

Sesame Soy Spaghetti Squash with Broccoli & Edamame

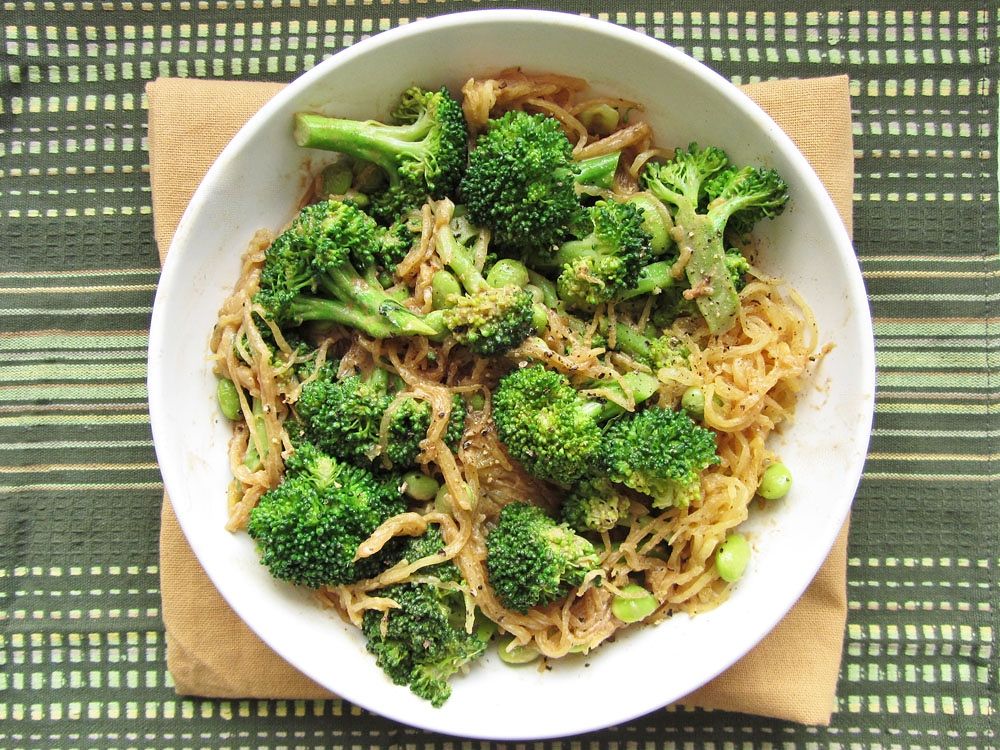
This recipe was the result of a lot of trial and error that eventually turned into a dish I loved. If you're looking for a new way to eat spaghetti squash, give this a try!

7. Banana Layer Cake with Peanut Butter Cream Cheese Frosting

Banana Layer Cake with Peanut Butter Cream Cheese Frosting

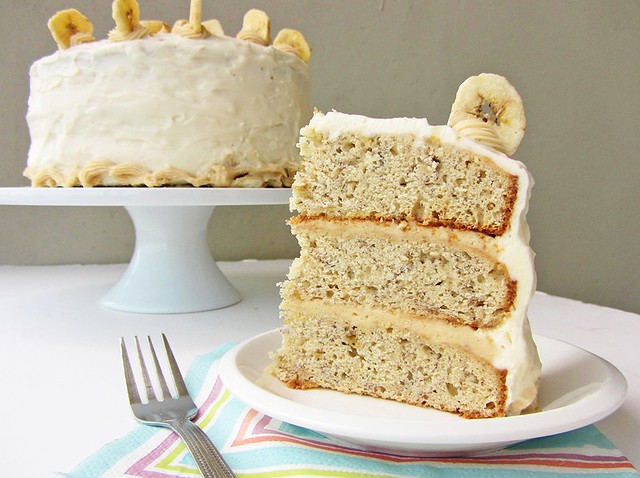
Every year I look forward to planning and making my own birthday cake that's completely suited to my own tastes. This did not disappoint!

6. Quinoa Risotto with Mushrooms, Spinach, and Goat Cheese

Quinoa Risotto with Mushrooms, Spinach, and Goat Cheese

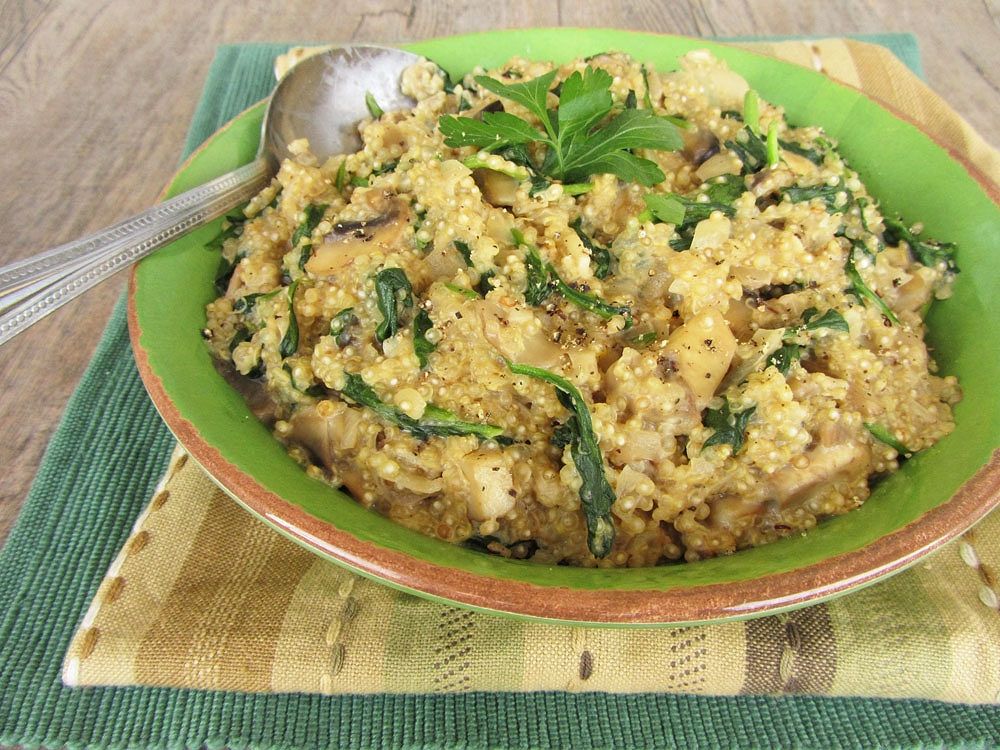
If you think you don't like quinoa, you might learn to love it with this recipe - the risotto method of cooking and the addition of goat cheesy make it nice and creamy, and the mushrooms and spinach keep it healthy!

5. Cheesy Pizza Pull Apart Bread (and other Superbowl Ideas)

Cheesy Pizza Pull Apart Bread

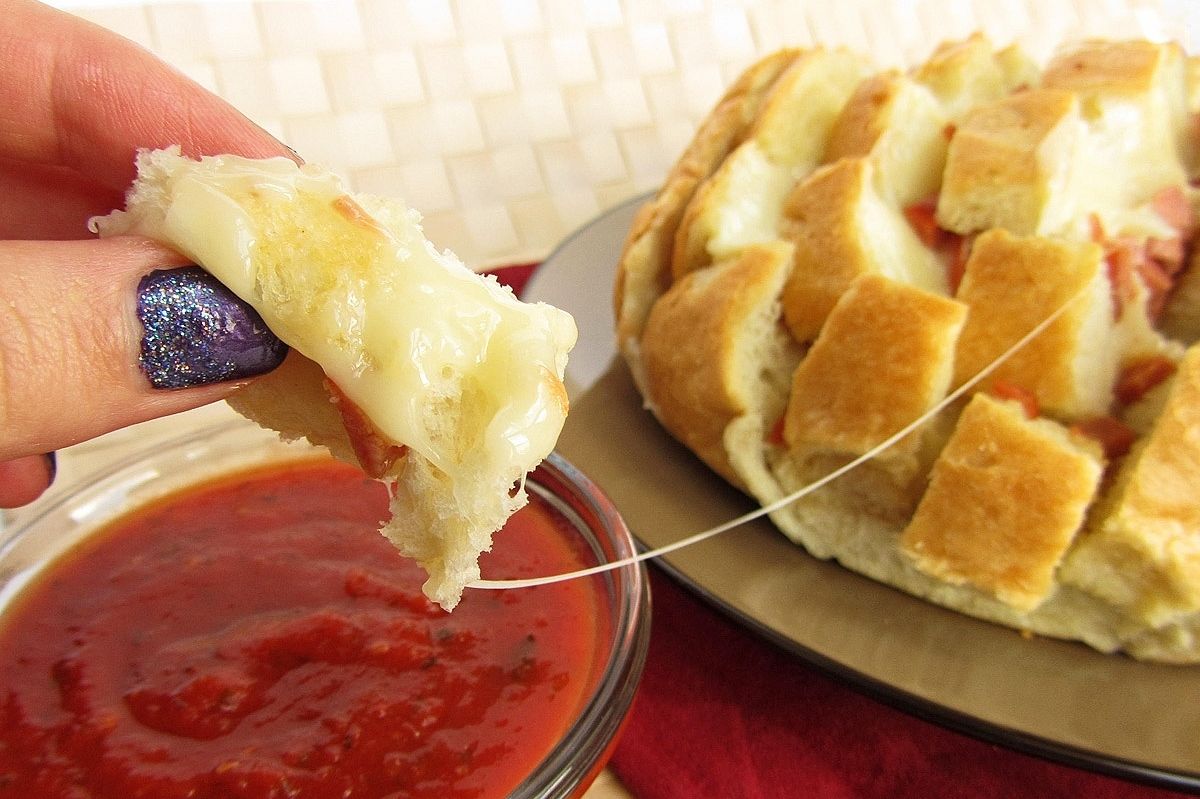
The pull-apart bread technique (which is ridiculously easy) was very popular this year, and I jumped on the bandwagon with this pizza version! I also rounded up a bunch of Superbowl recipe ideas which you might want to check out with playoffs coming up soon!

4. Sweet Potato, Kale, and Cranberry Quinoa Salad

Sweet Potato, Kale, and Cranberry Quinoa Salad

Another quinoa recipe that's full of healthy ingredients (try using pomegranates instead of cranberries for an added superfood!) to start off the New Year right!

3. 5 Healthy Summer Quinoa Salads

5 Healthy Summer Quinoa Salads

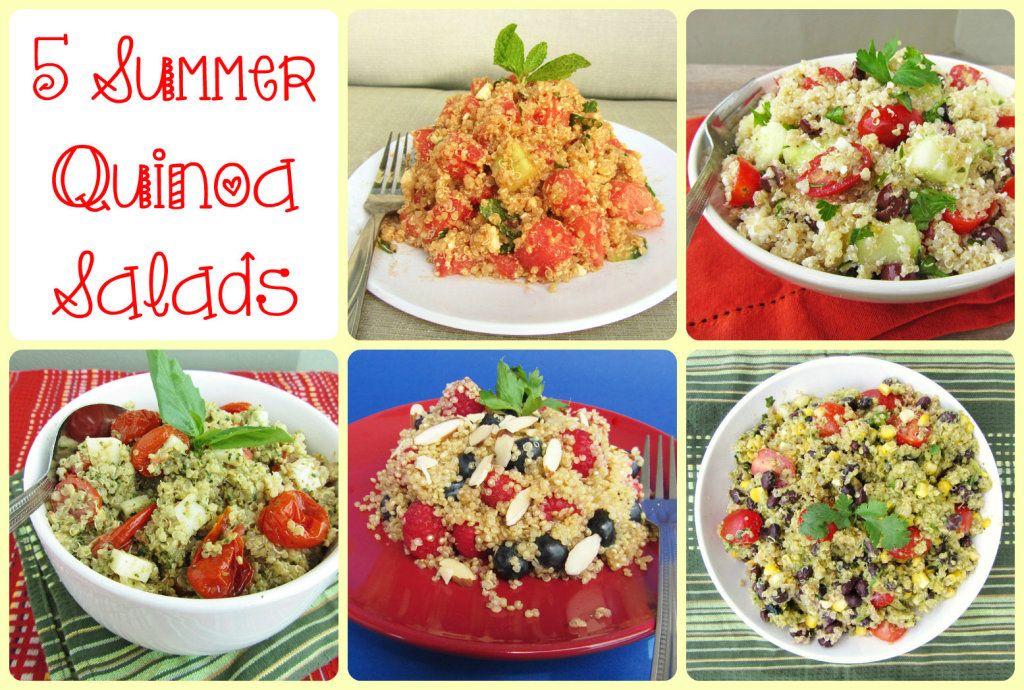
I told you quinoa was popular! These were some of my favourite quinoa salads I ate during the summer, but most can be enjoyed any time of the year.

2. 5 Ways to Eat Avocado for Breakfast (+ More Recipes from Other Blogs)

5 Ways to Eat Avocado for Breakfast (+ More Recipes from Other Blogs)

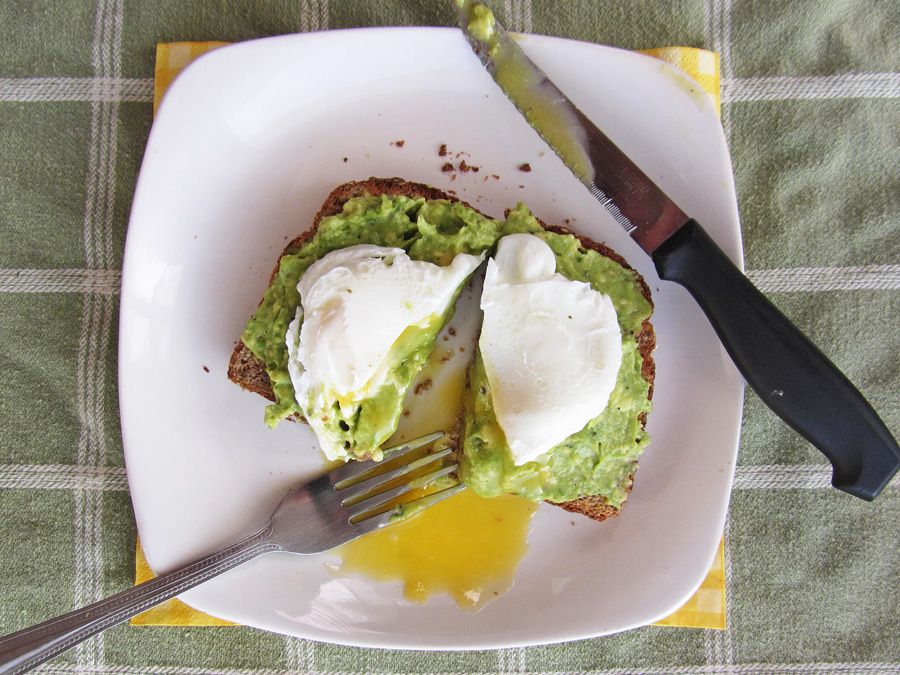
I'm so glad you guys support my avocado addiction and I hope you were willing to try out some of these breakfast combinations that may seems weird but are delicious!

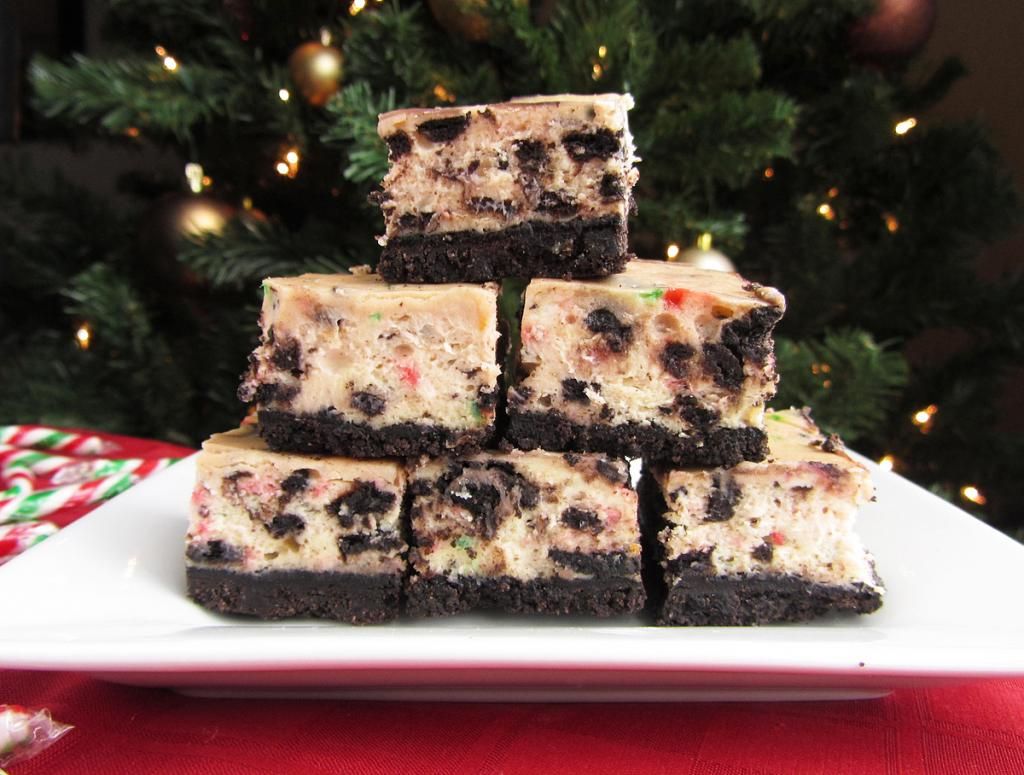
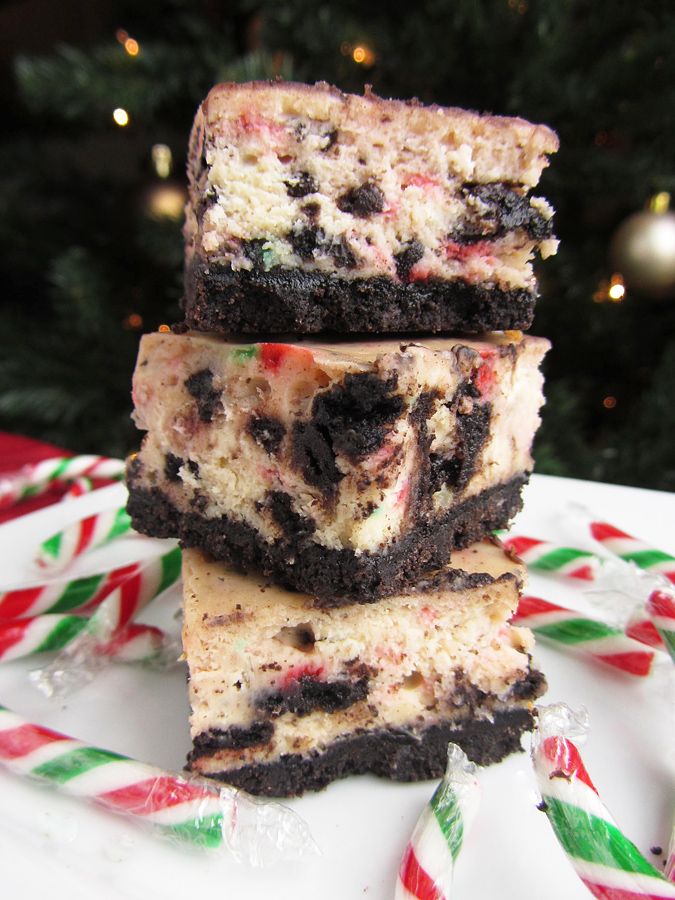
1. Toblerone Cheesecake Bars

Toblerone Cheesecake Bars

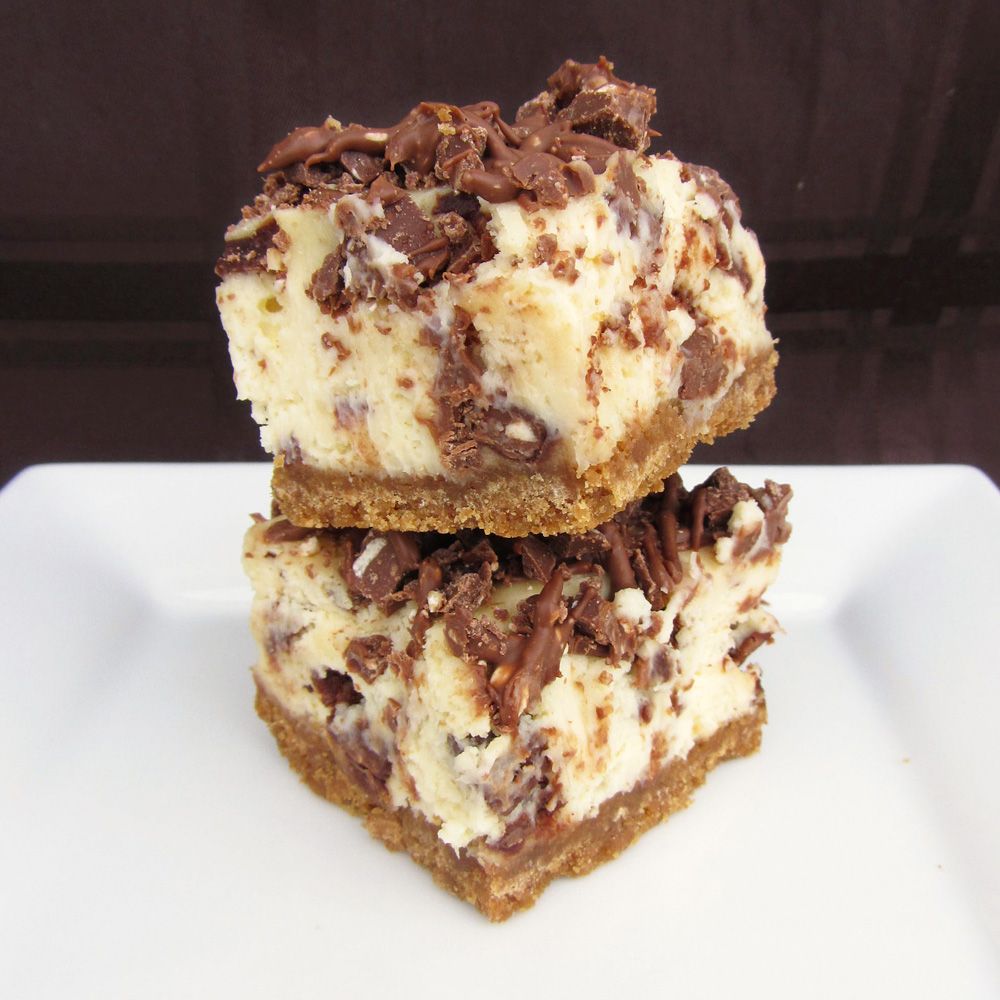
This is by far the most popular recipe on my blog, and it's easy to see why - Toblerone chocolate + cheesecake = amazing!

December 21, 2012

Warm Quinoa Salad with Brussels Sprouts, Chickpeas & Cranberries

Warm Quinoa Salad with Brussels Sprouts, Chickpeas & Cranberries

I’m guessing that a lot of people are busy today either running around doing last minute shopping for the holidays, staring at the clock waiting for work to be over and holidays to start, or working more than ever during the busy retail season, so I’ll try to keep today’s post short and to the point!

This warm quinoa salad has lots of roasted brussels sprouts, some toasted walnuts for crunch, dried cranberries for sweetness, and chickpeas for added protein (although quinoa is a complete protein itself), all tossed in a light balsamic dressing. It’s healthy and light but still pretty filling and satisfying. I’ve been enjoying it as a nutritious meal in between holiday indulgences, but it would also make a great dish to serve at a big holiday meal – it’s both vegan and gluten-free, so it’s perfect if you’re looking for something that everyone at the table can enjoy! And I didn’t think of this until after but it would look even more festive with some pomegranate seeds thrown in there!

Warm Quinoa Salad with Brussels Sprouts, Chickpeas & Cranberries


If brussels sprouts aren’t your thing, you could try this sweet potato and kale quinoa salad I made around this time last year – I know I’ll be making big batches of both of these over the next couple weeks!

Hope you all have a great weekend!

Warm Quinoa Salad with Brussels Sprouts, Chickpeas & Cranberries

Warm Quinoa Salad with Brussels Sprouts, Chickpeas & Cranberries

Adapted from Vegetarian Times, October 2012

Serves 3-4 as a main dish

Ingredients:

1-1/4 pounds brussels sprouts, trimmed and quartered
1 tablespoon olive oil
Salt and Pepper
1-1/2 cups water
3/4 cup uncooked quinoa
2/3 cup chopped walnuts, toasted
1/2 cup dried cranberries
1-1/2 cups chickpeas, drained and rinsed

For the Dressing:
2 tablespoons white balsamic vinegar
1 tablespoon pure maple syrup
1 tablespoon olive oil
1/4 teaspoon each salt and pepper

Directions:

Preheat oven to 475°F.  Toss brussels sprouts with olive oil and season with salt and pepper.  Spread on a foil-lined baking sheet and roast in preheated oven for 20-25 minutes, until browned and tender, tossing once.

Meanwhile, bring water to a boil in a medium saucepan.  Add quinoa, cover, reduce heat to simmer and let simmer 15 minutes.  Remove from heat and let sit 5 minutes, covered, then fluff with a fork.

Prepare the dressing by whisking together the balsamic vinegar, maple syrup, oil, salt, and pepper in a small bowl.  Taste and adjust any amounts to your liking.  Note that this makes a small amount (just enough) of dressing because I don’t like to add too much to my quinoa, but if you like more dressing you can double the ingredients and use as much as you like.

Mix together the quinoa, brussels sprouts, walnuts, cranberries, and chickpeas.  Drizzle the dressing overtop and toss.  Serve warm.

December 19, 2012

Mini Baked Peppermint Mocha Doughnuts

Mini Baked Peppermint Mocha Doughnuts

First I made cheesecake bars, then there were shortbread cookies, and now here I am with another peppermint holiday dessert, this time doughnuts! For those of you who hate peppermint, I promise this is the last one (at least for a little while)!

These go a step further than basic peppermint by adding chocolate and coffee flavours to resemble one of my favourite Starbucks’ holiday drinks, the peppermint mocha. (Although I’ve since discovered white peppermint mocha frappucinos and that is now my new favourite drink – try it!)

Mini Baked Peppermint Mocha Doughnuts

Though I don’t often make doughnuts because they’re better eaten fresh and I don’t usually have a big group of people to feed fresh doughnuts to, I do love them because they’re so cute and easy to eat, plus they’re a little better for you than their full-sized, fried counterpart.

These little guys have a coffee chocolate base covered in a peppermint white chocolate glaze with a sprinkle of crushed candy canes on top. They’re so festive looking and reminded me a lot of a peppermint mocha!

These had just the right amount of subtle coffee flavour for me, but you could add more coffee or espresso powder if you want a strong coffee taste. Or you could eliminate it and just go with a chocolate base if you don’t like coffee. Similarly, you could eliminate the peppermint extract from the icing if you’re not into minty things – I know some people who tried these weren’t really a fan and I assume it’s because they either don’t like coffee baked goods or minty baked goods or the combination of the two. If you’re not sure if you do, just leave out the coffee and peppermint and you’ll have a chocolate doughnut with a little crunch of candy cane that will be just as good!

Mini Baked Peppermint Mocha Doughnuts

In other news, my holiday preparations are in a lot better shape than the last time I wrote – all but one of my gifts I ordered online have now arrived and I’ve finished my shopping for all but two people. I’m sure people who finished their shopping in November would scoff at that, but it’s pretty good for me! I’m also done with school for the semester (though I’ll still have work to do from home over the holidays) and am looking forward to spending lots of time with my family and boyfriend and doing lots of Christmassy activities over the next week!

Mini Baked Peppermint Mocha Doughnuts

Mini Baked Peppermint Mocha Doughnuts

Idea inspired by Starbucks’ peppermint mocha; glaze recipe my own; chocolate doughnut recipe adapted from Buns in My Oven

Makes 24 mini doughnuts

Ingredients:

For the Chocolate Coffee Doughnuts:
1 cup all purpose flour
1/4 cup + 2 tablespoons sugar
1 teaspoons baking powder
1/4 cup cocoa powder
1/4 teaspoon salt
1 tablespoon instant coffee
1 large egg
1/2 cup buttermilk (or regular milk with a teaspoon of white vinegar added)
1/2 teaspoon vanilla extract
1 tablespoon vegetable oil

For the White Chocolate Peppermint Glaze:
1/4 cup white chocolate chips
1/2 cup powdered sugar
1/2 teaspoon peppermint extract - optional for peppermint flavour, but you could leave out and just use the candy canes if you like
1-2 tablespoons milk
Crushed candy canes (about 1/4 cup total)

Directions:

Preheat oven to 325°F.  Lightly spray a mini doughnut pan with non-stick cooking spray.

In a large bowl, whisk together the flour, sugar, baking powder, cocoa, salt, and instant coffee.  In a medium bowl, whisk the egg, then whisk in the buttermilk, vanilla, and vegetable oil.  Add the wet ingredients to the dry ingredients and stir with a wooden spoon or spatula until just incorporated.  Transfer mixture to a ziplock bag, snip off the corner, and squeeze the batter into the doughnut pan, only filling each mold halfway full (they will puff up when baking).  It's a lot easier to fill the molds by squeezing it out of a bag, trust me.

Bake in preheated oven for 6-8 minutes, until cooked through and the top springs back when touched.  Remove from pan and let cool on a wire rack.

Prepare icing by melting the chocolate chips in a small bowl in the microwave, then stirring in the icing sugar and peppermint extract (if using).  Add 1 tablespoon of milk, stir, and add up to 1 additional tablespoon of milk until desired consistency is reached (I used the full 2 tablespoons, which makes a thin glaze).

Once doughnuts have cooled, dip the top of each doughnut in the icing, then set back on the wire rack, which should be placed over a baking sheet or sheet or parchment paper to catch drippings.  I like to coat each doughnut twice to ensure there is enough glaze.  Only coat a few doughnuts at a time the second time, then sprinkle crushed candy cane over the top while the icing is still wet so it sticks.

These are best served immediately and eaten on the same day, but note that after about half a day, the candy canes may start to melt into the icing.

December 16, 2012

Shortbread Cookies with Candy Cane & Dark Chocolate

Shortbread Cookies with Candy Cane & Dark Chocolate

Even though I don't like candy canes, I love them in cookies and other baked goods, and lately I feel like I've been putting candy canes and peppermint extract in everything! And as my favourite cookies are shortbread, it didn't take long for me to think of making candy cane shortbread!

Shortbread Cookies with Candy Cane & Dark Chocolate

My first try at candy cane shortbread turned out to be more of the crunchier shortbread than the melt-in-your-mouth variety.  Still good, but not quite what I wanted.  So I tried again with this recipe and ended up with just what I wanted!

These are just a standard buttery shortbread cookie with crushed candy cane sprinkles throughout the dough, along with a dip in dark chocolate and sprinkle of candy cane for a festive chocolate peppermint flavour.  They're really easy to make and look so pretty with all their red and green and sparkles!

Shortbread Cookies with Candy Cane & Dark Chocolate

I cannot believe there's only about a week until Christmas!  I just got back from a little weekend trip and realized that I still have about a billion recipes I had planned on trying out before Christmas, I've only bought about half the gifts I need to, and almost none of the ones I have purchased have arrived yet, as I ordered most of them online.  You'd think I'd have learned my lesson from last year when a couple of my gifts didn't arrive on time, but I just can't resist the convenience of online shopping! 

So I'm going to be a busy girl this week baking, shopping, and constantly checking the mail for parcels, but hopefully I'll be able to squeeze in a few more recipes to share with you guys!

Shortbread Cookies with Candy Cane & Dark Chocolate

Shortbread Cookies with Candy Cane & Dark Chocolate

Adapted from Naked Cupcakes

Makes about 2 dozen cookies

Ingredients:

3/4 cup unsalted butter, softened
1 cup all-purpose flour
1/2 cup cornstarch
1/2 cup icing sugar
1/4 teaspoon salt
~1/4 cup crushed candy canes (I crush mine in a food processor so I have a mix of fine powder and chunks)
~1/3 cup dark chocolate chips

Directions:

In a large bowl, beat the butter until light and fluffy.  In a separate medium bowl, whisk together the flour, cornstarch, icing sugar and salt.  Add the dry ingredients to the butter in two additions, blending after each to combine into a soft dough.  Stir in the candy cane.

Refrigerate mixture for at least 30 minutes.  Preheat oven to 300°F.

Roll cookies into 1” round balls and place on cookie sheets lined with parchment paper, a couple of inches apart.  Note that the parchment paper is important – I tried baking some on an ungreased cookie sheet and some on Silpat and both spread, but the ones I baked on parchment paper kept their shape.  Use a fork to flatten each ball. 

Bake for 15-20 minutes, until edges are light golden brown.  Let cool on cookie sheet for 5 minutes before carefully transferring to a wire rack to finish cooling.

Once cookies are cool, melt chocolate chips in a small bowl.  Dip the edge of each cookie into the chocolate and set back on the wire rack, over a pan or parchment paper to catch any mess.  Sprinkle crushed candy cane over the chocolate.  Let chocolate harden before storing cookies in a container.

December 11, 2012

Rudolph Gingerbread Cookies

Rudolph Gingerbread Cookies

Our department had our holiday cookie swap last Friday, and as usual, I made two types of cookies because I love experimenting with new holiday recipes!  Last year I brought these hidden candy cane kiss cookies and eggnog cake cookies, both of which I loved, but I wanted to try something different this year.  So I decided to make one cookie that was simple but tasted good (recipe to come later), and one that would stand out more for having a ‘cute factor’, like  the popular melting snowmen cookies from last year’s cookie swap (Google it, they’re adorable!).

Rudolph Gingerbread Cookies

When I saw these peanut butter reindeer cookies, I knew I’d found my cute factor!  But since I like to keep things nut-free when I’m bringing them somewhere for lots of people to share, I decided to make them into gingerbread cookies instead – not only are they nut-free but they’re also more festive and reindeer-coloured!

I used Bakergirl’s gingerbread cookie recipe, cut the dough into ovals for the reindeer heads, then stuck some pretzels on for antlers, chocolate chips for eyes, and red Mike & Ike’s for the nose (though I’ve heard that Mike and Ike have recently split up, so I’m not sure who the red colour is supposed to represent, if it even works that way – mine just came from a bulk bin where all the Mike & Ikes still live happily together).

Rudolph Gingerbread Cookies

These turned out to be so adorable and got lots of compliments!  I also really liked the gingerbread recipe – while they were a bit hard coming out of the oven, they softened up and stayed soft for days in a container.  True that the pretzels and candy don’t exactly go with the taste of gingerbread, but you can pick them off and eat them separately if you like, and I don’t think kids would mind the mesh of flavours!  If you’re very concerned though, you could always replace the red nose with an m&m – I just liked the 3D effect of the candy! You could also try using chocolate-covered pretzels, they'll just be a little more expensive.

Rudolph Gingerbread Cookies

Rudolph Gingerbread Cookies

Adapted from Bakergirl (reindeer cookie idea here, gingerbread cookie recipe here)

Makes around 35 cookies

Ingredients:

1/4 cup + 2 tablespoons unsalted butter, at room temperature
1/2 cup packed dark brown sugar
1/2 a large egg (whisk one large egg in a bowl then use only half)
1/4 cup + 2 tablespoons molasses
2 cups all-purpose flour
3/4 teaspoon baking soda
1 teaspoon ground ginger
1/2 teaspoon cinnamon
1/4 teaspoon nutmeg
1/8 teaspoon ground cloves
1/8 teaspoon salt
Around 40 small pretzel twists (this is only a few handfuls from a bag)
Around 70 chocolate chips (again this is only about a handful from a bag)
Around 20 red Mike & Ike candies (I got these from a bulk bin)

Directions:

Cream together the butter and sugar in the bowl of an electric mixer, on medium speed, until light and fluffy.  Add the egg and molasses (tip: coat your measuring cup/spoon with non-stick oil spray before measuring the molasses so it pours out easier) and mix until combined.  In a separate bowl, whisk together the flour, baking soda, ginger, cinnamon, nutmeg, cloves, and salt.  Add the dry ingredients to the mixing bowl in small additions, mixing on low speed until incorporated.  Cover the dough and refrigerate for 2 hours.

Preheat oven to 325°F.

On a lightly floured surface, roll the dough into 1/8-inch thickness.  Don’t worry if the dough’s a little crumbly, you may need to work the dough with your hands for a bit first to get it to roll out smoothly.  Cut out 2-inch ovals with a cookie cutter (I just bent my circle cutter slightly to form an oval).  Place oval cookies two inches apart on a parchment-lined baking sheet.

Break pretzels in half to form antlers, and cut Mike & Ike’s in half so each candy makes two noses.  Press two antler halves onto the top of each cookie oval to form the antlers.  Press two chocolate chips pointy tip facing down into the cookies to form the eyes, and press one Mike & Ike ‘nose’ below the eyes. 

Bake cookies for 7-9 minutes or until edges are firm.  Let cool on baking sheet for a couple minutes then transfer to a wire rack to cool completely.

Reroll remaining scraps of dough and continue cutting out circles and baking cookies until the dough is used up.  I had to bake mine in 3 rounds.

Store cookies in an airtight container.  They may be hard after baking but they will soften up in the container. 
---------------------------------------------------------------------------------------------------------------------

And just so you don't think I only chose the cutest cookies for the pictures (although I did try to do that), here are my phone pics of all the cookies right out of the oven (except for my last batch of 6) - they were all cute and each slightly different!

Rudolph Gingerbread Cookies

December 06, 2012

Curried Chickpea & Kale Soup

Curried Chickpea & Kale Soup

I’ve made three holiday cookies/dessert recipes over the last week, I’ll be making two more for our annual department cookie swap tomorrow, and I’ll be coming home from the cookie swap with an entire container full of about a million more cookies… I’m certainly not complaining, but around this time of year I always try to make sure I make my meals as healthy and nourishing as possible to help balance out the excessive cookie consumption a little!

When I saw this pretty green soup in Clean Eating magazine, I knew it was just what I needed, plus it featured a flavour combination – curry powder, kale, chickpeas, and coconut milk – that I hadn’t seen before in a soup!  And it used beans as a thickener, which I liked so much from the roasted tomato & white bean soup I tried last week.

The flavours in this soup all work together and make a thick and filling soup that you can feel good about eating!  You could probably fit a lot more kale in there too if you want to feel even better about it! The original recipe had a quick, 15 minute preparation, but I decided to sauté some onions, garlic, and ginger first to add some flavour.  This made my version slightly longer to prepare, but it’s still really easy to make on a weeknight, leaving you plenty of time left in the evening to bake some cookies :)

Curried Chickpea & Kale Soup

Curried Chickpea & Kale Soup

Adapted from Clean Eating Magazine, Quick & Easy Meals Special Issue

Serves 4

Ingredients:

1 teaspoon olive oil
1 medium yellow onion, diced
2 cloves garlic, minced
2 teaspoons minced fresh ginger
1 tablespoon curry powder
1 teaspoon cumin
2 cups vegetable stock
2 cups low fat coconut milk (canned)
2 cans (15-19 fl oz each) chickpeas, rinsed and drained
2 cups packed torn kale leaves
1 teaspoon honey or agave
Salt & Pepper

Directions:

Heat oil in a large saucepan over medium-high heat. Add onion and sauté until soft and translucent, about 4-5 minutes. Add garlic and ginger and sauté for another 30 seconds to 1 minute, stirring occasionally. Add curry powder and cumin and stir together for about 30 seconds, until fragrant. Add vegetable stock, coconut milk, chickpeas, and kale, and let simmer for about 10 minutes, stirring occasionally.

Transfer soup to a blender in two batches, remove the plastic stopper from the top of the blender and cover with a paper towel to allow steam to escape. Puree until smooth, then return to saucepan. Add honey and season with salt and pepper to taste, reheating the soup for a couple of minutes. If the soup is too thick, add more vegetable stock or water to thin it out to desired consistency.

Serve warm with naan bread.

December 03, 2012

Candy Cane Oreo Cheesecake Bars

Candy Cane Oreo Cheesecake Bars

I think it’s safe to say that after this past weekend, I’m now officially in the holiday spirit.  True, I had already started listening to Christmas music long ago, I’d already bought a few gifts, and had already decorated two trees, but this weekend I helped decorate a real tree at my parents’ house, I watched my first Christmas movie of the season (Arthur Christmas – loved it!), I saw the CP Holiday Train (check their schedule to see if it’s coming to your city, it was amazing!), and the real kicker is that I started my holiday baking!

When I saw candy cane Oreos in the store, I knew I had to bake something with them.  Okay, technically I didn't use Oreos, as the candy cane version isn’t available in Canada, but PC’s “Eat the Middle First” cookies are just as good, and since their name is longer, I’m just going to stick with calling them Oreos.

Candy Cane Oreo Cheesecake Bars

The first idea that popped into my head was using the candy cane Oreos to make cheesecake.  I had made these cheesecake bars before and loved them, so I knew I would love them even more with a festive twist!

These are really easy to make – you use the candy cane Oreos in the crust and mixed into the batter, then throw in some peppermint extract and crushed candy canes for extra peppermint flavour!  I love cheesecake bars because they’re portable and bite sized, and everyone I shared them with loved them too!

For some reason I’m really into making candy cane flavoured treats so far this year (though I have lots of ideas for gingerbread and eggnog flavours too!), so you can probably expect a few more peppermint baked goods to appear soon!

Candy Cane Oreo Cheesecake Bars

Candy Cane Oreo Cheesecake Bars

Adapted from Annie’s Eats

Makes about 16 bars

*Note, I used PC’s Candy Cane Eat the Middle First cookies instead of Oreos, and the package comes with 31 cookies, so rather than having to buy two boxes, I just reduced the amount of cookies I used in the crust and filling.  I wrote the original suggested number of cookies in the ingredients list, with the amount I used (which worked fine) in brackets.

Ingredients:

For the Crust:
23 Candy Cane Oreos (I used 21)
2 tablespoons unsalted butter, melted

For the Filling:
12 oz (one and a half bricks) cream cheese, softened
1/4 cup + 2 tablespoons sugar
1/4 cup + 2 tablespoons sour cream, at room temperature
1 teaspoon peppermint extract
1/4 teaspoon salt
1 large egg + 1 egg yolk
12 Candy Cane Oreos, roughly chopped (I used 10)
1 tablespoons finely crushed candy cane, optional

Directions

Preheat oven to 325°F.  Line an 8x8-inch baking dish with aluminum foil, leaving an overhang around the edges to easily lift the bars out of the pan later.   Lightly spray the foil with non-stick cooking spray.

To make the crust, finely crush the Oreos in a food processor.  Add the melted butter and pulse until cookie crumbs are moistened.  Pour mixture into the prepared pan and press crumbs into an even layer over the bottom of the pan.  Bake in preheated oven for 10 minutes, then set aside.  Leave the oven on.

To make the filling, beat the cream cheese in the bowl of an electric mixer on medium-high until smooth, about 2 minutes.  Mix in the sugar until well combined.  Mix in the sour cream, peppermint extract, and salt.  Beat in the egg and egg yolk until incorporated.  Stir in the chopped oreos and crushed candy cane with a rubber spatula.  (Note that the crushed candy cane may slightly tint the cheesecake pink, so if you don’t want that effect than you can leave it out.  I liked the extra sprinkle of colour it added!)

Pour the cheesecake batter over the baked crust, smoothing the top with a spatula.  Bake for 40 minutes, until the cheesecake is set around the edges but slightly jiggles in the middle.  Transfer to a wire rack to cool at room temperature for about one hour, then refrigerate until well chilled, at least 3 hours (I chilled mine overnight).

To cut the bars, pull the entire cheesecake out of the pan by lifting the foil edges, then peel away foil and slice into bars.  Keep refrigerated until ready to serve.

November 28, 2012

Roasted Tomato and White Bean Soup

Roasted Tomato & White Bean Soup

So I have one piece of disappointing (but not bad) news and two pieces of good news to share. The not-so-good news is that I’ve been super busy lately and this is the only recipe I have to share with you guys this week. I feel like I've been cooking a lot, but I’ve just been making easy meals (like egg sandwiches), or things that just aren’t special enough to share on the blog (like a mushroom bolognese dish that didn’t work out that well), or things that I’ve already shared before (like this tuna pasta I just made a big batch of!)

Now the good news is that I have a ton of recipe ideas that I want to try out (especially when it comes to holiday baking!), I just need to find the time!

And the second piece of good news is that this one recipe I do have to share this week is really good!

Roasted Tomato & White Bean Soup

This is a warm and comforting winter soup with a rich flavour from the roasted tomatoes, and the added health benefits of protein and fibre from the addition of white beans. When I first saw this recipe, I pictured a smooth and creamy soup where the beans would be like an undetectable replacement for heavy cream. Mine didn’t turn out quite like that – I could still taste the beans and they gave the soup more of a chunky than smooth texture – but I actually liked it better that way!

Roasting the tomatoes and garlic takes some time, but very little effort, so it’s worth it! I highly recommend eating this with lots of grated parmesan cheese and a loaf of hearty bread for soaking up every last drop from the bowl!

Roasted Tomato & White Bean Soup

Roasted Tomato & White Bean Soup

Adapted from Clean Eating Magazine, October 2012

Serves 2-4, depending on desired serving size

Ingredients:

Cooking spray
1 medium yellow onion, peeled and quartered
1-1/2 pounds roma (plum) tomatoes, halved lengthwise
Salt and pepper
1 head garlic
1 (19 fl oz) can cannellini beans, rinsed and drained
2 cups low sodium chicken or vegetable broth, divided
1/2 teaspoon dried Italian seasoning
1 bay leaf
1/2 teaspoon kosher salt
1/4 teapsoon ground pepper
1/2 teaspoon sugar
Grated parmesan cheese for topping, if desired

Directions:

Preheat oven to 400°F. Line a baking sheet with aluminum foil and lightly spray with non-stick cooking spray. Spread onion and tomatoes, cut side up, in a single layer on the baking sheet. Spray with cooking spray and season with salt and pepper. Cut the tops off the head of garlic so the cloves are exposed, spray with cooking spray, and wrap with foil into an enclosed packet. Add foil packet to the baking sheet with the onions and tomatoes, and bake everything together for one hour. Set aside to cool for 10 minutes once done.

Add the roasted onion, tomatoes, and garlic (squeeze out the cloves from the skins) to a food processor and blend until smooth. Transfer to a medium saucepan.

Add beans and 1 cup stock to the food processor and blend until smooth. Add to the saucepan that holds the tomato mixture, and add the remaining 1 cup stock. Add seasonings (Italian seasoning, bay leaf, salt, pepper, sugar), bring to a boil, then reduce heat to low, cover and simmer gently for 20 minutes.

Remove bay leaf, and serve warm, with lots of grated parmesan cheese if desired (though recommended!)

*Note that if you really want a smooth texture for the soup, you may be able to achieve that by using a blender instead of the food processor, but you may have to blend in batches.

November 21, 2012

Onion Flowers

Onion Flowers

When I saw these onion flowers in LCBO’s Food & Drink magazine, I knew I had to make them. They were so pretty and I’d never seen anything like them before, but they sounded so easy to make! Growing up, I always hated onions with a passion, but now I’ve learned that onions can actually be quite sweet and delicious - but only when cooked, I still pick out raw onions!

These flowers are made by simply slicing an onion into eighths, without cutting all the way through the onion so that it stays intact on the bottom, but the ‘petals’ fall down when baking to create a beautiful flower shape. The other ingredients are basic – just olive oil, balsamic vinegar, salt, and pepper – but the roasting gives the onions a really nice flavour, too!

Onion Flowers

I admit that the first time I made these, I wasn’t completely successful – all of the petals fell down without anything remaining upright in the center, which is really what gives these a flower-like look. But I realized that my mistake was slicing a little off both ends of the onions. What you should do is slice a bit off the root end of the onion so that it can stay in place, but leave the stem end intact (see the helpful diagrams at the Soup Addict if you need help determining which end is the root and which is the stem!).

There are also some helpful step-by-step photos on making these at The Project Table if you need help after reading the recipe, and there’s also a Youtube video with video instructions! (but notice how one of the onions in that video has a bit too much sliced off the top, and that one didn’t turn out as well after baking)

Onion Flowers

As you can tell from the pictures, I tried making these with both red and yellow onions, and while I liked the taste of both, I do think the red onions look a little prettier! If you want to have a mix of colours at the table though, try using a few yellow onions in addition to red!

Onion Flowers

Once you’ve got the hang of it, you’ll realize that these are really easy to make, and they make for an elegant side dish to serve at a special gathering or holiday meal.  I realize that it’s probably too late for my American friends to incorporate these into their Thanksgiving dinner tomorrow, but there are still plenty of holiday meals coming up, or you can make them any other time you want to impress your family or guests!

And while us Canadians have already celebrated Thanksgiving long ago, I’d just like to wish my American readers a very happy (and tasty!) Thanksgiving!

Onion Flowers

Recipe and Instructions can be found at the LCBO's Food & Drink website.  

I followed the directions exactly, but I added extra balsamic vinegar before serving and omitted the capers because I didn't have any.
Also, you may need to pull the 'petals' apart a little after baking to make them more flower-like! 
One more note is that while it's best to serve the onions whole for presentation, your guests may want to divide them in half at the table, as a whole onion may be a lot for some people to eat!

November 19, 2012

Brief Recap of My Brief Seoul Trip!

Sorry for the lack of posts in the last week, but I was away at a conference in Seoul, South Korea!  After my last post about some of the Korean dishes I tried in preparation for my trip, a few people expressed interest in hearing what I ended up eating in Seoul.  Unfortunately, I didn't end up eating much Korean food, or any food at all for that matter, but I thought I'd still share my experience while I work on making some new recipes to share later this week!

We (my sister and I) arrived in Seoul late Saturday night, then attended the conference from Sunday to Friday, and left Saturday morning.  Every day, the shuttle to the conference left at 6:45am (so I would wake up by 5:30), then the last meeting ended at 7:30pm, so we would get back to the hotel around 8pm.  On those nights, we could either choose to walk 20 minutes to find a restaurant, sit down to eat, and then get home late and miss out on sleep, or just eat some snacks and crash, and we always chose the latter because we were so tired!  The last couple of nights, the conference didn't end until 10 or 10:30pm, so we would get a 15 minute break around 6 to run and find food, and on those days all I had time to grab was yogurt, bananas, granola bars, and coffee!

The good news is the conference was very successful, and I still did get to try some great food at lunchtime.  I also don't mean to complain, as I still wasn't working nearly as hard as most of the other people there!  Here are some of the few pictures I took on the trip - excuse the bad quality, most were just taken quickly with my phone!

Gangnam

On the first night that we arrived, we were very tired after many hours of travelling, but still wanted to eat some dinner so we wandered around the neighbourhood (Gangnam) in search of food.  All we wanted was something to take back to the hotel, but the only restaurants we found were sit-down, and all only had Korean menus, which is a problem for a vegetarian (my sister) who can't be sure what she's ordering!  We ended up just grabbing bagels from a coffee shop, but it was actually the best bagel I've ever had!  So soft and filled with cream cheese and fig jam - yum!

fig and cream cheese bagel

At the conference, they had boxed lunches (both meat and vegetarian) available.  On the first day, I tried the vegetarian option, which was a pumpkin sandwich. 

pumpkin sandwich lunch

I was pretty disappointed when I opened it up to find a teeny tiny sandwich that had pumpkin, pickles, raisins, and mayonnaise on it (very strange!), a little orange, and that's it!  Definitely not enough food to sustain me until 8pm!

So on the following days we tried the restaurant lunch option, which had a couple different set meals available.  The vegetarian option was either a vegetable sandwich (which was pretty much just lettuce on bread) or bibimbap, so my sister and I tried the bibimbap a few days, and it was delicious!

bibimbap

The meal came with rice and a ton of different side dishes, some of which I'm not even sure what they were, and gochujang, a spicy red pepper paste.  From what I was told, you just mix everything together in the big bowl and eat!  It was much more filling than the sandwiches and I liked that I got to try some authentic Korean food!  If anyone knows what those little black things are in the top left corner, I'd love to know, as they were very tasty!

I also tried another version of bibimbap at the opening reception:

bibimbap

They had a bibimbap station, which was the only vegetarian option at the reception aside from salad, so I filled up on it!  (I'm not vegetarian, as most of you know, but I am very picky about what meat I do eat!)

On one of the conference days, our session went so late in the morning that lunch was already sold out before we could get it, so we went down to the underground mall below our conference center (COEX Mall) to find something to eat.  We ended up choosing a Japanese restaurant because it had big servings, lots of vegetarian options, and good prices! 

I loved how most restaurants in Seoul had displays in their front window so you could see the food options before choosing to eat there - so helpful!

Korean store window

My sister ordered a buckwheat (soba) noodle meal, which you can see in the back of the picture below.  I chose a kimchi udon bowl, so that I was still incorporating some Korean flavours into my lunch!

Japanese lunch

The udon bowl was HUGE and I couldn't finish it all, but it was very tasty! 

kimchi udon bowl

It also came with tons of side dishes, including tempura.  I think this was the first time I'd ever seen a fried (basil?) leaf as part of tempura!

tempura

The rest of my meals were usually just grabbed from a 7-11 or supermarket.  I always love looking at groceries in other countries though, as you can usually spot some interesting finds!  One of the more unusual items I saw in a few stores was silkworm pupa.  I have no idea what you do with it, and did not buy one to find out!

silkwork pupa

My favourite snack I tried was these sweet potato chips.  They were like a cross between candy and chips, and they were so good - I wish I bought more!

sweet potato chips

Coffee and tea seem to be very popular in Seoul.  Almost every second store was a coffee shop (I had enough flavoured lattes and coffees there to last me a while!), and every store had so many types of instant coffee and tea drinks.  I bought this yam tea to bring back with me because it was so unusual.

yam tea

Unfortunately when I got home I realized it was not traditional tea as I imagined, but a white powder that you add to hot water, and I wasn't a fan!

I'm more looking forward to trying the other souvenir I brought back - soju and rice wine!

soju and rice wine

Soju is a clear, slightly sweet distilled liquor that's native to Korea.  I bought that small (around 300mL) bottle on the left for just over a dollar, so it's really cheap too!  There were also a lot of rice wines and fruit wines for sale; we bought some plum wine and black raspberry wine as gifts for others, and I bought sansachun rice wine for myself.  I'm looking forward to trying both!

On the way back home, my sister and I were craving "Western" comfort food, and treated ourselves to a large rocket pizza at the airport.  It was just what we needed!

rocket pizza

A tip for travelers that most people probably know but I didn't until recently - 'rocket' is the same thing as arugula.  When I went to Australia a couple years ago, I saw 'rocket' everywhere on menus but avoided it because I had no idea what it was.  When I found out it was just arugula I was kicking myself, because I love arugula!

One more pic I had to share was this plane meal I had on the way home:

Plane food

It was probably the most disgusting looking thing I've ever eaten, but it was surprisingly delicious!  I know there was mashed sweet potato and vegetables in there, but I have no idea what the rest of it was made of.  I wish I knew because I almost want to try recreating it at home!

Another tip for vegetarians or veggie-friendly travelers - request a vegetarian meal for the plane when you book your ticket.  My sister and I do this for every flight we take - the meat on planes creeps me out and the vegetarian meals are usually pretty good, plus you always get delivered your special meal before everyone else!

That's it from my trip - sorry it's a bit disappointing!  I never ventured into the city center (it was a far subway ride from where we were staying), so I'm sure Seoul has a lot more to offer and you certainly shouldn't take my limited experience as representative of the food there!  I'd love to go back one day and try more!

I've spent the last couple of days catching up on sleep (I slept 12 glorious hours my first night back!) and will soon start catching up on recipes - I hope to have a new one to share later this week!

Ingredient Index

Related Posts Plugin for WordPress, Blogger...