June 25, 2013

Canada Day Cheesecake Bars

Canada Day Cheesecake Bars

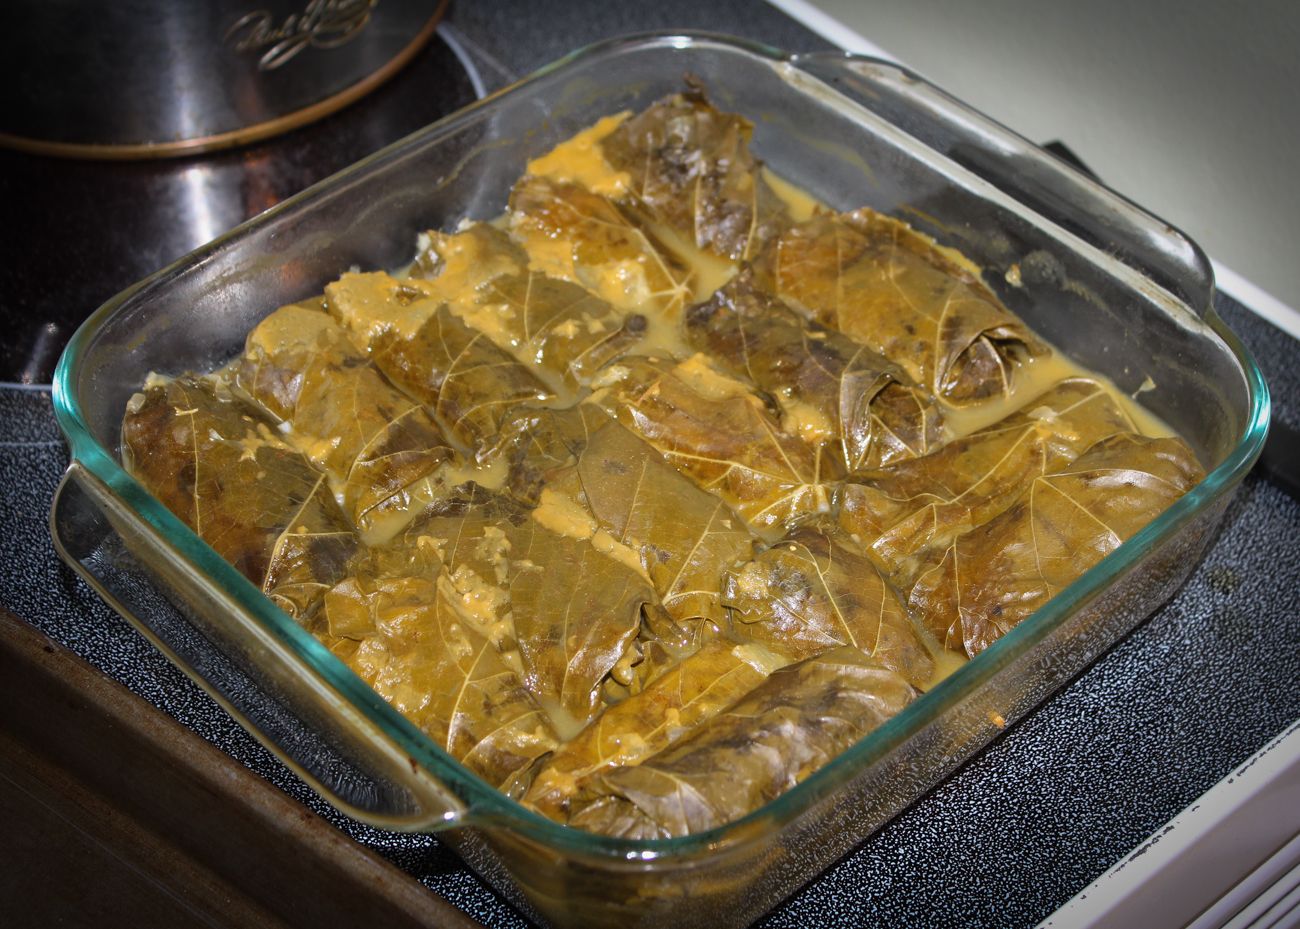
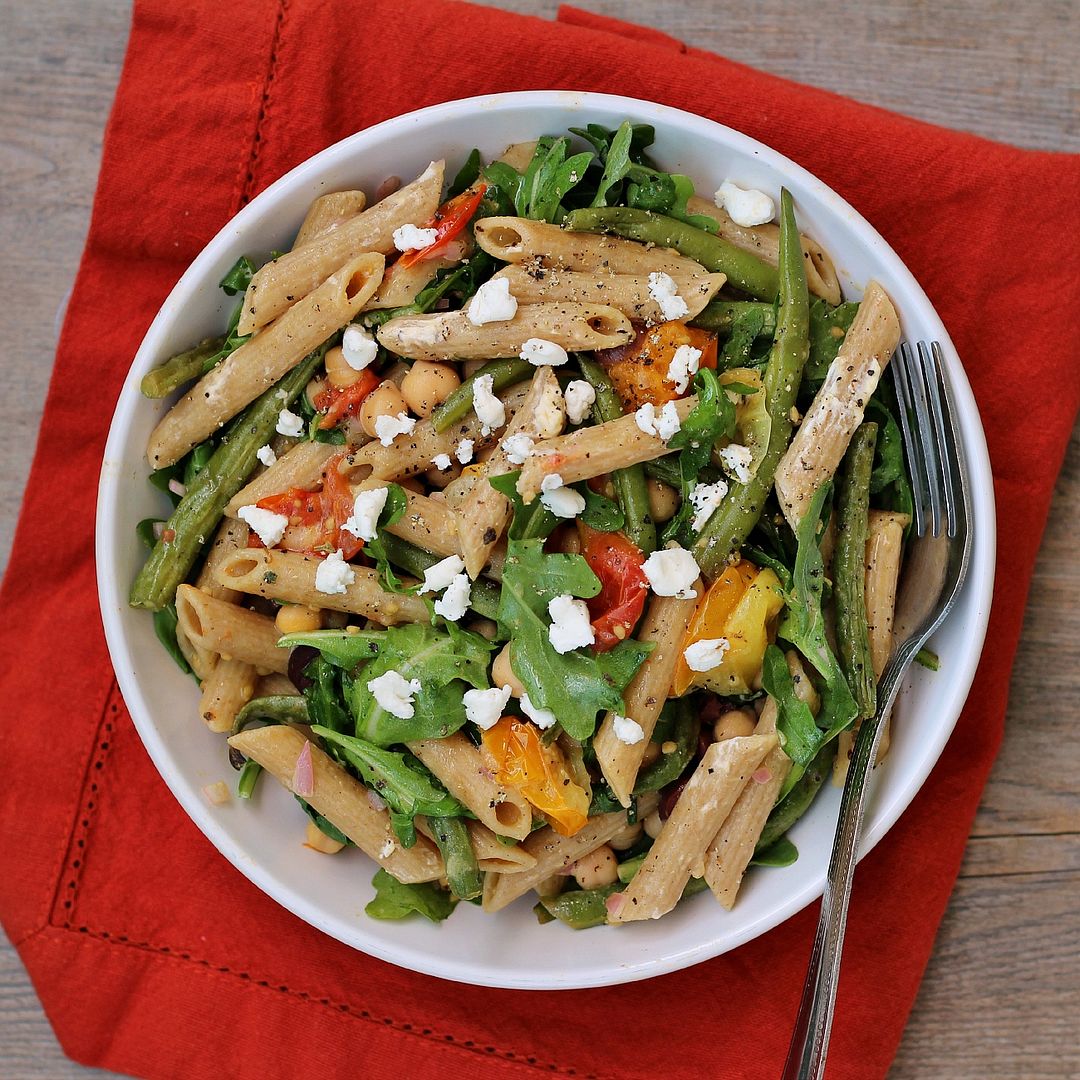
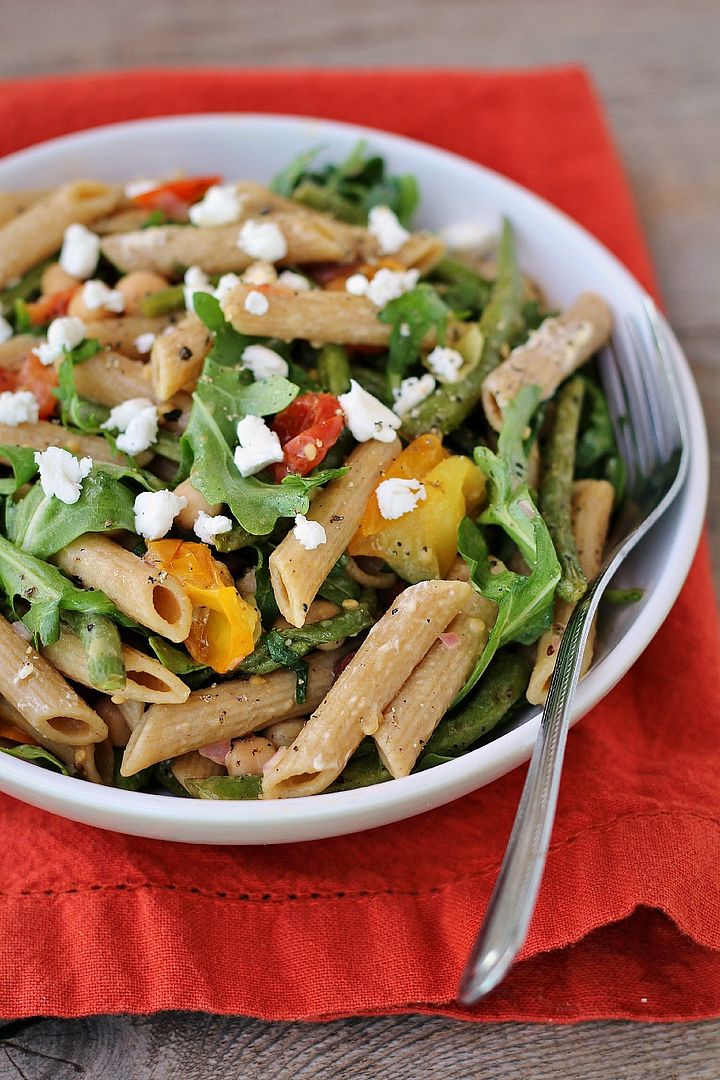
Canada Day (which will be our country’s 146th birthday this year) is coming up on July 1st – yay long weekend!  I love coming up with recipes for Canada Day because there aren’t really a lot of ideas out there (especially compared to the number of red, white, and blue recipes!) so it’s easy to be creative, plus we’re lucky that our flag is fairly simple to represent using food because it has only two colours - red and white.

Canada Day Cheesecake Bars

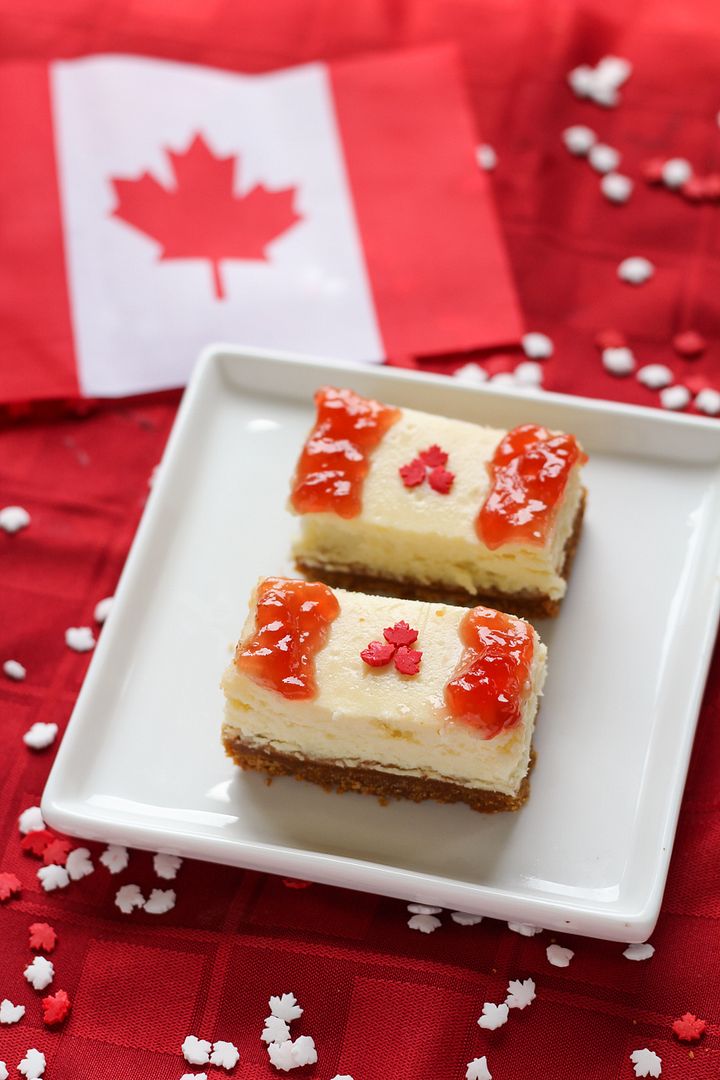
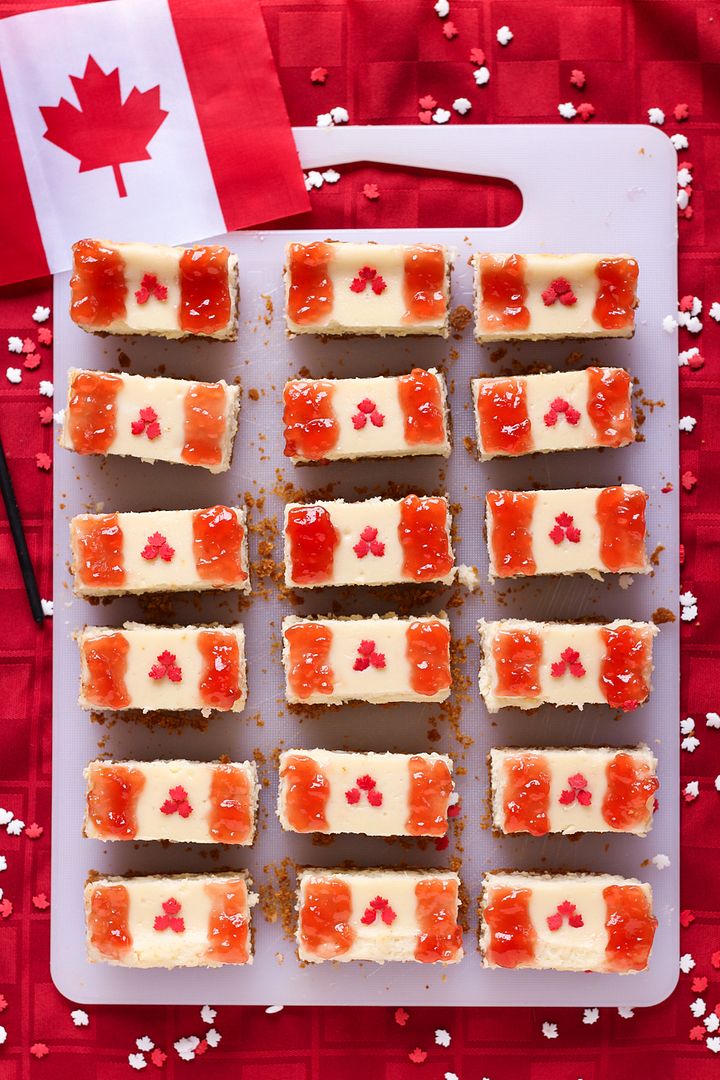
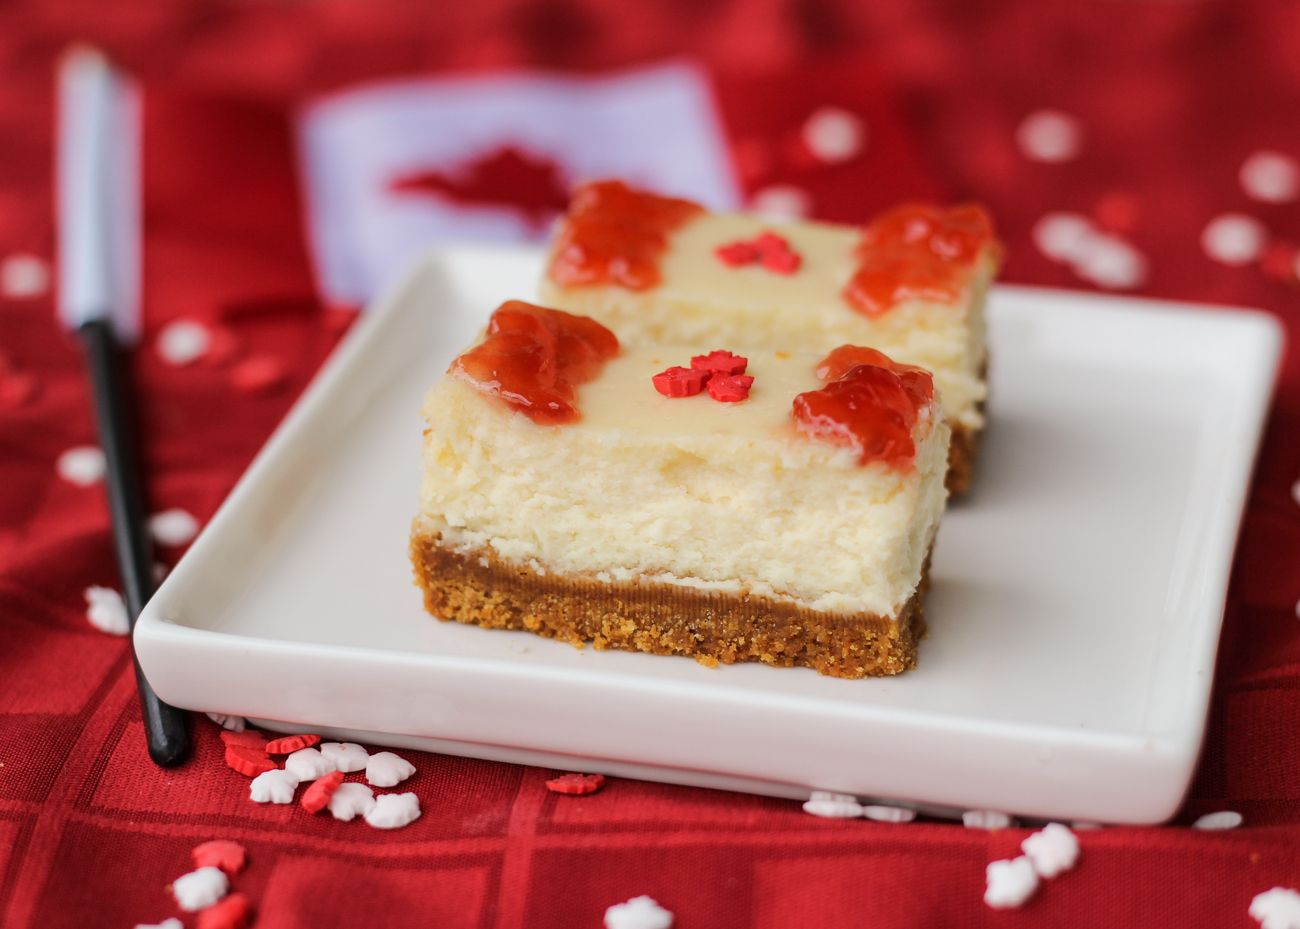
One idea I had last year but never had time to try was to make plain white cheesecake bars and top them with strawberry jam to create little Canada flags.  So I decided to give them a try this past weekend for a family get together, where I knew there would be lots of people to help me eat them all!  Plus my cousin is about to leave Canada for a few years, so Canadian flags were very appropriate!  

 I was a little behind in trying to finish and photograph these before I had to leave, so they were done in a bit of a rush, but I was so happy that they turned out just how I’d imagined in my head!

Canada Day Cheesecake Bars

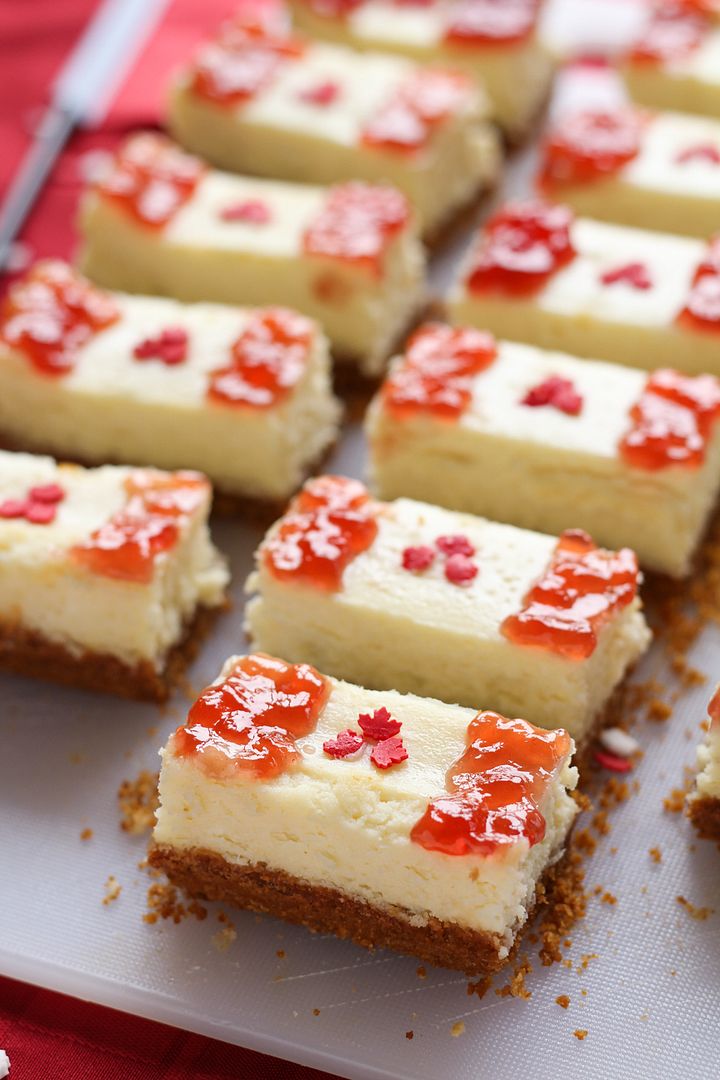
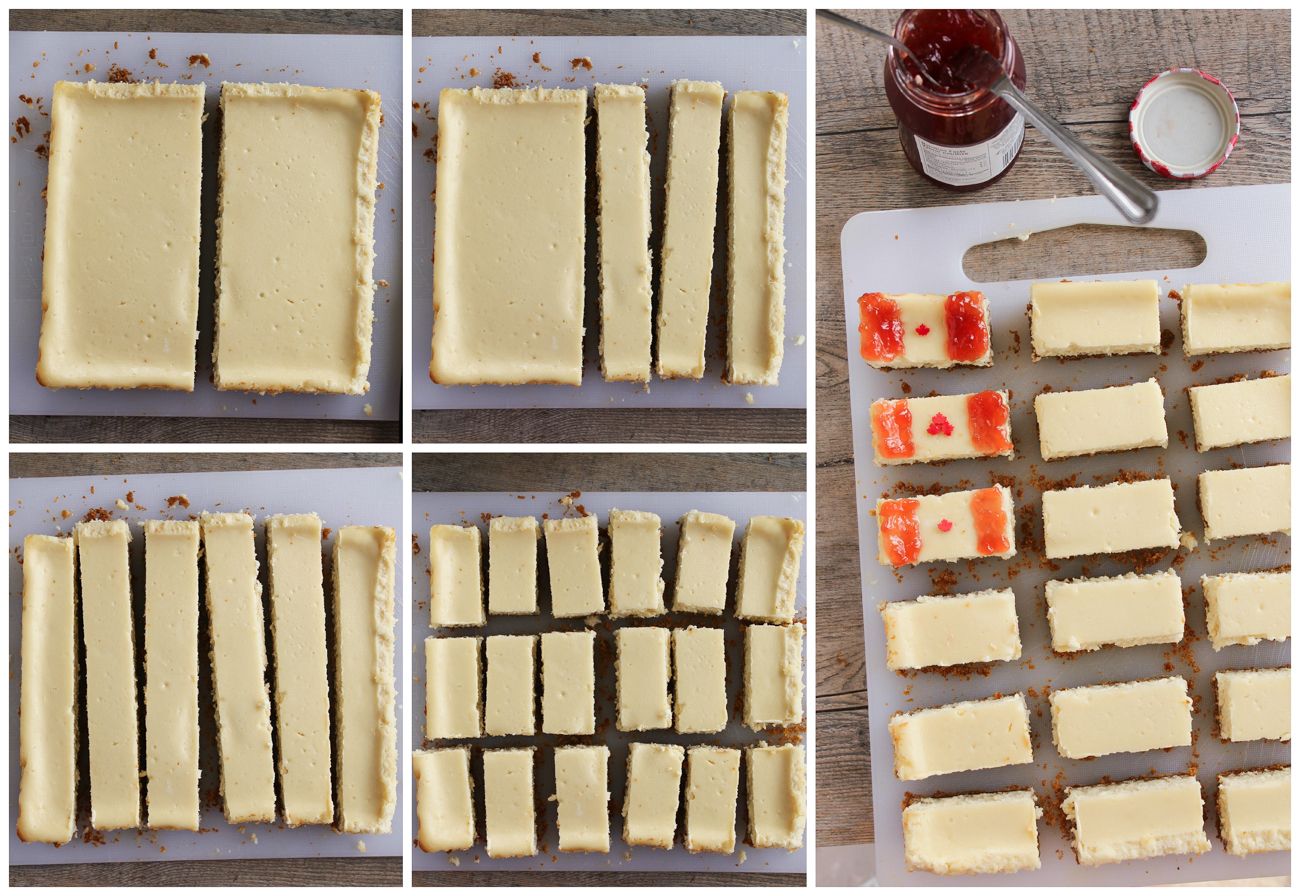
The filling for these bars is plain vanilla cheesecake that’s rich and creamy (and didn’t crack at all, which I was thrilled about!).  Once I sliced it into bars, I just spread strawberry jam on the edges and placed maple leaf quins in the center to resemble the flag.  The quins (like these) are available at Bulk Barn this time of year, but if you can’t find them anywhere, you could just use more jam or another type of red sprinkle arranged in the shape of a leaf.

I got lots of compliments from my family on these bars, and I think they would be the perfect treat to bring to a Canada Day gathering this weekend!

Canada Day Cheesecake Bars

Canada Flag Cheesecake Bars

Flag idea my own; Cheesecake recipe adapted from here, here, and here

Makes one 8x8 pan; cut into 18 bars

Ingredients:

For the Crust:
1-1/2 cups graham cracker crumbs
3 tablespoons light brown sugar
2 tablespoons all-purpose flour
1/8 teaspoon salt
1/4 cup unsalted butter, melted and cooled

For the Cheesecake:
16 oz (2 bricks) cream cheese, softened
2/3 cup sugar
2 large eggs
1/4 cup sour cream
1 teaspoon vanilla

For the Topping:
Seedless strawberry jam (~1/4 cup)
Canada Day maple leaf quins (available at Bulk Barn)

Directions:

Preheat oven to 325°F.

Line an 8-inch square baking pan with aluminum foil, leaving a few inches of foil draping over the sides of the pan (which will help with removal later).

Make the crust: Whisk the graham cracker crumbs, brown sugar, flour, and salt.  Pour the melted butter over the mixture, and stir together with a fork until all crumbs are moistened.  Transfer the mixture into the prepared pan and press evenly to form the crust.  Bake in preheated oven for 12-15 minutes, until crust is beginning to brown.  Transfer to a cooling rack to cool for about 30 minutes.
Meanwhile, prepare cheesecake filling.  In a large bowl or bowl of an electric mixer, beat the cream cheese until smooth, about 3 minutes.  Beat in the sugar until well combined, about 1 minute.  Beat in eggs one at a time, fully incorporating each egg into the mixture. Beat in sour cream and vanilla until fully combined, about 30 seconds.

Pour mixture over cooled crust and return to oven.  Bake for 35-40 minutes, until edges are set but the middle jiggles slightly (as a whole) when you shake the pan.  Transfer to a cooling rack and let cool to room temperature, about 2 hours.  Transfer to a refrigerator (I don’t cover mine because I find the cheesecake ‘sweats’) to cool completely, for at least 3 hours or preferably overnight.

On the day you will serve the cheesecake bars, use the aluminum foil to lift the cheesecake out of the pan, then slice them into 18 small rectangles (6 columns and 3 rows - see picture below).  Stir jam first, then use a small butter knife or spoon to spread strawberry jam on the edges of each rectangle to resemble the Canada flag.  Use enough jam so it shows up well but not too much that it will fall off – you’ll get a feel for what amount to use after a couple tries.  Place three Canada leaf quins in the center to complete the flag (or if you don’t have any, you could use a blob of jam or red sprinkles if you can shape it into something that resembles a maple leaf!).  Keep bars refrigerated until ready to serve.  Don’t decorate them more than a day ahead.

Canada Day Cheesecake Bars

June 19, 2013

Father's Day 2013 Recap

Since I told you guys all about the food we ate on Mother's Day this year, it seems only fair that I share our Father's Day eats with you too!

Instead of making breakfast like we did on Mother's Day, we decided to go out for Father's Day breakfast to one of our dad's favourite spots, Organic Works Bakery.  They have a great menu with all organic and gluten-free baked goods and cafe-like meals, including many vegetarian and vegan options, plus a really cool dining room to eat in with all different types of tables and chairs that almost make you feel like you're eating in a furniture store!

breakfast at organic works

For my breakfast, I chose a fried egg sandwich on an amazing brown rice bread, along with a mango elixir smoothie that had coconut milk, mango, kale, banana, blueberries, lemon, ginger, dates, and a shot of camu camu, which apparently is some type of fruit that's super high in Vitamin C.  I was hoping it would help me get rid of this nagging cold, and I think it actually helped - I'm feeling much better now!

The day started off cold and wet, but the sun broke through in the afternoon and it turned into a warm and sunny day that lasted through dinnertime so we could enjoy our meal outside.  Almost as soon as we'd all finished eating and gone inside a crazy thunderstorm rolled in, so we were really lucky!

june flowers

Our mom made a batch of delicious sangria for everyone to enjoy as we hung out in the backyard.  Having a cocktail that everyone can enjoy together is always a great way to start an evening!

sangria

Then it was time for gifts!  This year, we all pitched in a little to get our dad a fig tree, as he's been talking about wanting one for a while.  We got a black jack fig tree, which should produce large, sweet, and juicy figs, assuming all goes well!

Every time I look at it I think I'll be reminded of my friend Courtney's food blog, The Fig Tree!

fig tree

Another gift I gave to my dad was The Flavor Bible, which is basically a reference book that allows you to look up any ingredient and find a list of all other ingredients/flavours that go with it.  My dad's an amazing chef and is often responsible for planning and cooking dinner, so I thought this would help inspire him!  Annnd I may have to sneak peeks at it every time I go visit because I've wanted it for myself for a while too!

The Flavour Bible

For dinner, we sort of went with a Middle Eastern-inspired menu for something a little different and special.  I actually can't take credit for the majority of the meal - some was bought and the rest was prepared by my mom and sister; I only had to help with a couple components so I got off pretty easy this year!

The big salad pictured below was a fattoush salad that we bought from a Middle Eastern restaurant called Barakat to make things a little easier on everyone.  I've been wanting to try fattoush after seeing a recipe for a southern version on Eats Well With Others recently, and I'm so glad I got to try it - I loved the lemony flavour and the crunch of the pita bread.  If you're looking for an authentic recipe to try yourself, Bon Appetit and Jerusalem cookbook (as seen on 101 Cookbooks) have versions that sound pretty similar to what we ate (or I'm open to suggestions for your favourite recipe!)

fattoush salad

As another side dish, we made this cherry and herb salad from Saveur magazine

cherry salad

It combined cherries, cilantro, walnuts, chiles, and a pomegranate molasses and lemon dressing for a simple but really tasty salad that also looked quite beautiful with the red and green colours (please forgive all the photos in this post that don't do the food justice - most of them were taken very quickly as we prepared the meal and some are just cellphone pics).

For bread, we served pita bread with baba ghanoush for dipping - both storebought again, but still good!

pitas with dip

As what I guess would be called the main dish, we made dolma - or grape leaves stuffed with a vegetarian rice mixture - from the same issue of Saveur.  The rice had a mixture of herbs, onions and garlic, apricots, raisins, lemon juice, and other ingredients that gave it lots of flavour (we used vegetable stock instead of chicken stock to make it vegetarian).  The picture below makes it look disgusting, but I swear it was actually good!

stuffed grape leaves

This was our first time making stuffed grape leaves and my sister and I had a bit of a hard time figuring out how much rice mixture to add and how to roll the leaves, so we're not sure if we did it right, but they at least stayed together!  We all agreed that we liked the filling a lot better than the grape leaf itself though, so next time I'd save the effort of rolling it and just eat the rice mixture on its own!

The meal was so good that we even attracted a hungry little visitor who wanted to join the party :)

raccoon

For dessert, our mom made her famous rhubarb sour cream pie, which I don't have the recipe for but it is everyone's favourite dessert!  My sister Genevieve made a rhubarb coconut milk ice cream to go along with it, which was a bit on the runny side but still tasted good!

rhubarb pie and ice cream

And that's it!  I hope you all had as great a weekend as we did!

June 14, 2013

Strawberries & Cream Baked Protein Oatmeal

Strawberries & Cream Baked Protein Oatmeal

I was recently contacted by the nice folks at Visalus to see if I wanted to participate in their '90 for 90' series, where 90 bloggers will create 90 recipes using their Vi-Shape Shake Mix.  For those who haven’t heard of Vi-Shape or their Body by Vi 90 Day Challenge, the shake mix is a low-fat, low-calorie, gluten-free, lactose-free, high protein nutritional shake (like a protein powder but with more vitamins, from my understanding) that tastes and smells like cake mix!

I haven’t loved a lot of protein powders I’ve tried before, but this one actually smells just like cake mix, and I liked that it had more than just protein in it, so I was intrigued to try it in a recipe!

Strawberries & Cream Baked Protein Oatmeal

I came up with a few ideas before settling on my favourite one, this baked strawberries & cream oatmeal.  I love having oatmeal in the morning because it’s healthy and filling, but I’m usually too lazy to stand over a pot and wait for it to cook in the morning (and the instant stuff doesn’t usually cut it for me).  Baked oatmeal is so much better because you can mix together a batch, throw it in the oven to cook (hands-off), then have a bunch leftover for breakfasts through the week!

Strawberries & Cream Baked Protein Oatmeal

I looked at a lot of baked oatmeal recipes in developing this recipe, and most seemed to use a technique where they dump the oats and dry ingredients into the baking pan, then pour the wet on top and throw it in the oven, so the wet ingredients would slowly seep down through the oatmeal as it cooks.  The problem I had with this was that all the finer dry ingredients just fell right to the bottom, so you’d get super strong bites of cinnamon and salt when you got to the bottom, and the wet ingredients didn’t sink all the way down so I ended up with little bits of cooked egg on top, which wasn’t very appealing.

So the next time I just mixed all the wet and dry ingredients together before going in the pan, and it worked so much better, giving me firm, evenly mixed, and evenly baked delicious oatmeal.  The pictures I took were of the first version, but since they turned out well I didn’t bother redoing them because the next version looks almost the exact same.  Just picture this but a little more evenly cooked :)

Strawberries & Cream Baked Protein Oatmeal

Because the mix tastes like cake mix, it almost seems like you’re eating dessert for breakfast, and yet this is a healthy way to start the day, with only minimal sugar, no butter or oil, and lots of protein and vitamins from the Vi-Shape.  Some baked oatmeal recipes require lots of sugar and butter, and I tried this with more sugar and some olive oil instead of butter at first, but found I could reduce the sugar a lot and that the olive oil wasn’t even necessary.

I’m in love with this breakfast now, but I might have to use the rest of my Vi-Shape in some of the other amazing recipes I’ve been seeing, like individual vanilla cakes from Running to the Kitchen, yogurt covered blueberries from The Hungry Housewife, power waffles with cinnamon cream syrup from The Family Feed, or breakfast strawberry shortcake from A Nutritionist Eats - yum!

Strawberries & Cream Baked Protein Oatmeal

Strawberries & Cream Baked Protein Oatmeal

Makes 4-6 servings

Ingredients:

2 cups large-flake rolled oats (old fashioned oats)
1/4 cup light brown sugar
1 teaspoon baking powder
1/2 teaspoon salt
1 teaspoon cinnamon
1/2 cup Vi-Shape nutritional shake mix
1-1/2 cups sliced strawberries
2 cups low-fat milk (any type, as long as it's unsweetened - I’ve used almond milk and coconut-almond milk)
1 large egg
2 teaspoons vanilla extract

Directions:

Preheat oven to 375°F and spray an 8x8-inch square baking dish with non-stick cooking spray.

In a large bowl, whisk together the oats, sugar, baking powder, salt, cinnamon, and Vi-Shape.  In a separate medium bowl, whisk together the milk, egg, vanilla.  Add the wet ingredients to the dry ingredients and fold together with a flexible spatula until combined.  Stir in about 1 cup of the strawberries.  Pour mixture into prepared pan and spread out evenly as best as possible with your spatula.  Arrange remaining strawberries evenly on top (don’t press down on them so they stay on top).

Bake in preheated oven for 35-40 minutes until golden brown and set.  Let cool for a few minutes before slicing.  Serve warm, with maple syrup if desired.

------------------------------------------------------------------------------------------------------------------------
Disclosure: This post was sponsored by Visalus.  I'm happy to talk about their product, but they didn't tell me to - all thoughts and opinions I share on this blog are completely my own. :)  If you have any questions about Vi-Shape, please check out this page.

June 11, 2013

Lemon Chickpea Quinoa Burgers

Lemon Chickpea Quinoa Burgers

I love those free little newspaper/magazines that grocery stores put out to advertise their new products every season, mostly because I love anything that’s free, but also because I’m always looking for new sources of inspiration for ingredients and recipes.  It’s not often that I find a recipe I actually like in there, but when I saw these lemon chickpea quinoa burgers in the latest issue of Inspired (by Sobeys), I was intrigued because I’ve never seen anything quite like it.

So, I got right to work making my own version, with shallots instead of red onion, basil instead of parsley, more oats to firm the mixture up a bit, and a lemon yogurt sauce to serve with them.  I also refrained from processing the whole mixture to keep some texture in them, and I pan-fried my burgers instead of barbequing them (because I don’t have a bbq), but I think they’d be firm enough to bbq if you want to give it a try!

Lemon Chickpea Quinoa Burgers

I loved the texture of the burgers, which held their shape and had a bit of crunch from the quinoa, and I loved the bright lemon flavour that really shone through in both the burgers and yogurt sauce.  I also think they would work really well as cute little vegetarian sliders at a bbq!

And as far as burgers go, these are pretty darn healthy!  They’re full of protein from the addition of chickpeas, quinoa, and Greek yogurt, as well as fiber from the oats and whole grain buns, and vitamins from the veggies and lemon.  

Lemon Chickpea Quinoa Burgers

After tasting them, I did think they needed a little something extra to balance out all the lemony-ness, so the next night I added feta cheese on top of the burger, and the saltiness of the feta was the perfect thing to balance out the sour lemon.  So don’t leave out the feta!

(I had to take a quick shot the next night to document the feta since it wasn’t in any of the other pictures.  I went a little heavy with the feta, but a lot of it falls out anyway!  The sauce is still there, on top of the lettuce):

Lemon Chickpea Quinoa Burgers

Of course, the boyfriend said that these were good, but that next time I should maybe make them with buffalo or chipotle sauce instead of lemon (he’s not much of a lemon person, except for lemon poppy seed bread). 

But while these may not be much of a manly burger, I think the fact that he was willing to eat them for dinner three nights in a row shows that they’re still pretty tasty!

Lemon Chickpea Quinoa Burgers

Lemon Chickpea Quinoa Burgers

Adapted from Inspired

Makes 5 burgers

Ingredients:

For the Burgers:
1/4 cup uncooked quinoa
1 (540mL) can of chickpeas, drained and rinsed
1/2 cup rolled oats
1/4 cup minced shallot
2 garlic cloves, minced
1 tablespoon lemon zest
2 tablespoons fresh lemon juice
1 large egg, lightly beaten
1 teaspoon cumin
1/2 teaspoon salt
1/2 teaspoon pepper
2-3 tablespoons packed minced basil (or parsley if you like)

For the Sauce:
1/2 cup plain Greek yogurt
1 tablespoon fresh lemon juice
1 tablespoon minced basil
Salt and pepper

For Assembly:
5 whole grain hamburger buns
Lettuce
Feta cheese (low-fat, if desired)

Directions:

Bring 1/2 cup water to a boil.  Add quinoa, cover, reduce heat and let simmer 15 minutes.  Remove from heat and keep covered for 5 minutes.  Fluff with a fork and let cool slightly.

Meanwhile, add chickpeas to the bowl of a food processor or mini chopper and pulse until they are finely ground.  Transfer to a large bowl.  Add oats to same food processor and pulse a few times to break them down into fine crumbs (but not a powder).  Add to chickpeas in large bowl.  Add to the bowl the shallots, garlic, lemon zest, lemon juice, egg, cumin, salt, pepper, and basil.  Add quinoa.  Mix everything together with a large fork until well combined.  (note: leave the egg to mix in last if you want to be able to taste the mixture first and adjust seasonings or lemon juice to your liking). Divide and shape into 5 patties.

Heat a non-stick skillet over medium-high heat and cook patties for about 4-5 minutes per side.

Meanwhile, prepare yogurt sauce by mixing yogurt, lemon juice, and basil, and seasoning with salt and pepper to taste.

Assemble burgers with yogurt sauce, lettuce, and feta on whole grain buns.

June 06, 2013

Salmon Spinach Salad with Strawberries and Avocado

Salmon Spinach Salad with Strawberries and Avocado

I never used to get a lot of colds other than the usual back-to-school cold that seems unavoidable and the odd winter cold, but in the past couple of years I feel like I have been getting sick ALL THE TIME.  I can’t even count the number of colds I’ve had in the past year or the amount of cold medicine I’ve had to buy.  And I'm once again sick this week, despite the fact that it’s summer and I don’t know anyone else that has a cold right now.  I don’t know what I’m doing wrong – I eat lots of fruits and vegetables, exercise, take vitamins, and wash my hands regularly – so if you have any good tips for keeping viruses away, I’m all ears!

In the meantime, I’m taking even more vitamins, along with Echinacea and zinc lozenges, and just the other day I bought oil of oregano, which a couple people I know swear by for preventing colds (though I’m a little late for that at this stage!)

Salmon Spinach Salad with Strawberries and Avocado

I’m also squeezing even more vitamins into my meals, like this salmon spinach salad with strawberries and avocado.  Though the combination of ingredients may seem a little strange, they all work really well together and are very nutritious, making this sort of like a superfood salad!  Spinach has plenty of antioxidants, iron, calcium, and vitamins; strawberries provide lots of Vitamin C, as well as fiber, antioxidants, and other good things; and while avocados and salmon are high in fat, it’s the good kind of fat (that can lower your bad cholesterol and increase your good cholesterol), plus avocados are rich in potassium, fiber, folic acid, and Vitamin K, and salmon is full of protein, omega-3s, and Vitamins B and D.  Even the dressing is healthful from the addition of lime juice, shallot, and poppy seeds.

Bottom line: this salad is good for you, easy to make, tastes great, and will fill you up, making it a great summertime meal (whether you’re prone to colds or not!)

Salmon Spinach Salad with Strawberries and Avocado

Salmon Spinach Salad with Strawberries and Avocado

Makes 2 main course servings

Ingredients:

2 (5oz each) salmon fillets (preferably wild)
1 teaspoon olive oil
1 teaspoon fresh lime juice
Salt & Pepper
~4 cups baby spinach*
1-1/2 cups sliced strawberries
1 ripe avocado, cubed

For the Dressing:
2 tablespoons extra-virgin olive oil
1 tablespoon fresh lime juice
1/2 tablespoon white wine vinegar
1/2 tablespoon honey
1 tablespoon minced shallot
1 teaspoon poppy seeds

Directions:

Preheat oven to 400°F.  Place each salmon fillet skin side down on a piece of aluminum foil (on a baking sheet).  Rub each fillet with the olive oil and lime juice and season with salt and pepper.  Wrap each fillet with foil to form two packets.  Bake in preheated oven for about 25 minutes, until cooked through.  Be very careful opening packets after as hot steam will be released.  Let salmon cool slightly.

Meanwhile, add spinach, strawberries, and avocado to a large bowl, and prepare dressing by whisking together the oil, lime juice, vinegar, honey, shallot, and poppy seeds.  Toss salad with the dressing, then divide among two plates or bowls.  Place each cooked salmon fillet on top of each salad and serve.

*Note: I used regular spinach from the market (pictured) but I think baby spinach works better (as written in the recipe).

June 03, 2013

Arugula Pasta Salad with Chickpeas, Veggies, and Goat Cheese

Arugula Pasta Salad with Goat Cheese, Olives, Chickpeas, and Roasted Veggies

As I mentioned in my last post for this mandarin quinoa salad (which is already my most popular recipe this year – note to self: keep posting quinoa recipes!), I’ve been trying out lots of different exercise classes this term in an effort to stay active.  Last Wednesday I tried my first AquaZumba class, which was the first time I’ve taken a class in the water since my swimming lessons days as a kid.  It was kind of what I expected in that our beautiful instructor looked unfairly cool doing all her dance moves at the side of the pool while I likely looked like a floundering sea monster attempting to keep up in the water, but it was also better than I expected in that I actually had a lot of fun (and loved the fact that I could exercise without sweating)!

The success of AquaZumba has now given me the courage to try out Aqua Fit, which I’m guessing won’t be nearly as much fun.  I’m slightly dreading the idea that it might involve treading water, which I haven’t done since swimming lessons because I hated it so much.  I could never seem to keep my head above water, and the swimming instructor would always tell us our homework while we were treading water at the end of class and I would panic because my ears would be underwater so I couldn’t hear what they were saying.  But now that I'm older (and already have failing joints), I'm hoping my body will be a little more appreciative that I'm letting it work out in the water and won't fail me when it comes to the treading water part!

Arugula Pasta Salad with Goat Cheese, Olives, Chickpeas, and Roasted Veggies

One of the nice things about water classes is that they make you super tired at the end of the night, giving you a good night’s sleep.  They also make you super hungry, which is where having a big batch of this pasta salad in the fridge comes in handy!

This is just an easy vegetarian dish that’s kind of like a salad, kind of like pasta, kind of like pasta salad, and kind of like pasta with salad.  With whole wheat pasta for fibre, lots of veggies for nutrients, chickpeas for protein, and some goat cheese for richness, it’s a well-balanced dish that makes for great lunches (or post water workout meals) throughout the week! 

Arugula Pasta Salad with Goat Cheese, Olives, Chickpeas, and Roasted Veggies

Arugula Pasta Salad with Chickpeas, Veggies, Olives, and Goat Cheese

Loosely based on a recipe from Cooking Light

Serves 4-6

Ingredients:

375g box of whole wheat penne
8 oz green beans, ends trimmed
1 pound halved cherry tomatoes, divided
4 tablespoon extra-virgin olive oil, divided
Salt & pepper
2 tablespoons minced shallots
2 tablespoons fresh lemon juice
1 tablespoon Dijon mustard
1 teaspoon dried basil
1 tablespoon honey
1/2 cup pitted sliced kalamata olives
1/2 cup (2 ounces) crumbled goat cheese
1 (540mL) can chickpeas, drained and rinsed
3 cups packed arugula

Directions:

Preheat oven to 400°F. 

Cook pasta according to package directions.  Drain and set aside.

Meanwhile, toss green beans and half the cherry tomatoes with 1 tablespoon oil and season with salt and pepper.  Spread in an even layer on a foil-lined baking sheet and roast in preheated oven for 15-20 minutes.

Prepare the dressing by whisking the remaining 3 tablespoons oil with the shallots, lemon juice, Dijon mustard, basil, and honey in a small bowl.  Add salt and pepper to taste.

Combine cooked pasta, roasted vegetables, remaining fresh cherry tomatoes, olives, goat cheese, and chickpeas in a large bowl.  Mix in the arugula.  Add dressing and toss to coat.  Serve warm or chill for a cold pasta salad (though I preferred it warm).  Season with additional salt and pepper and top with additional goat cheese if desired.

*Note – the pictures are missing the additional fresh cherry tomatoes; I forgot to add them until after

Ingredient Index

Related Posts Plugin for WordPress, Blogger...