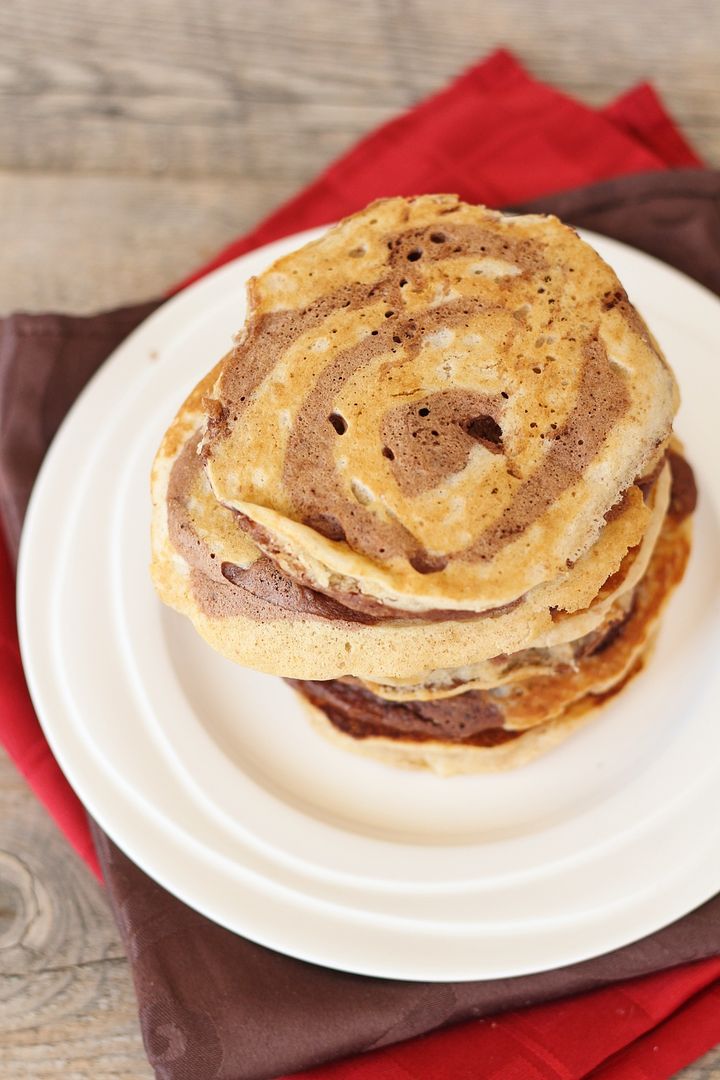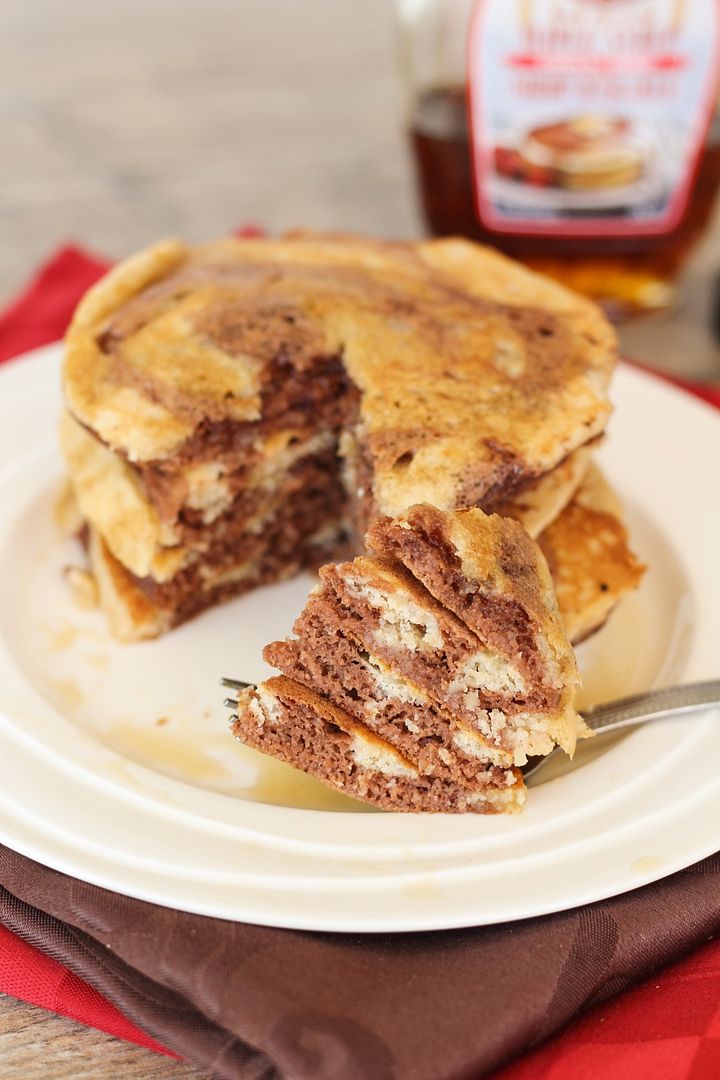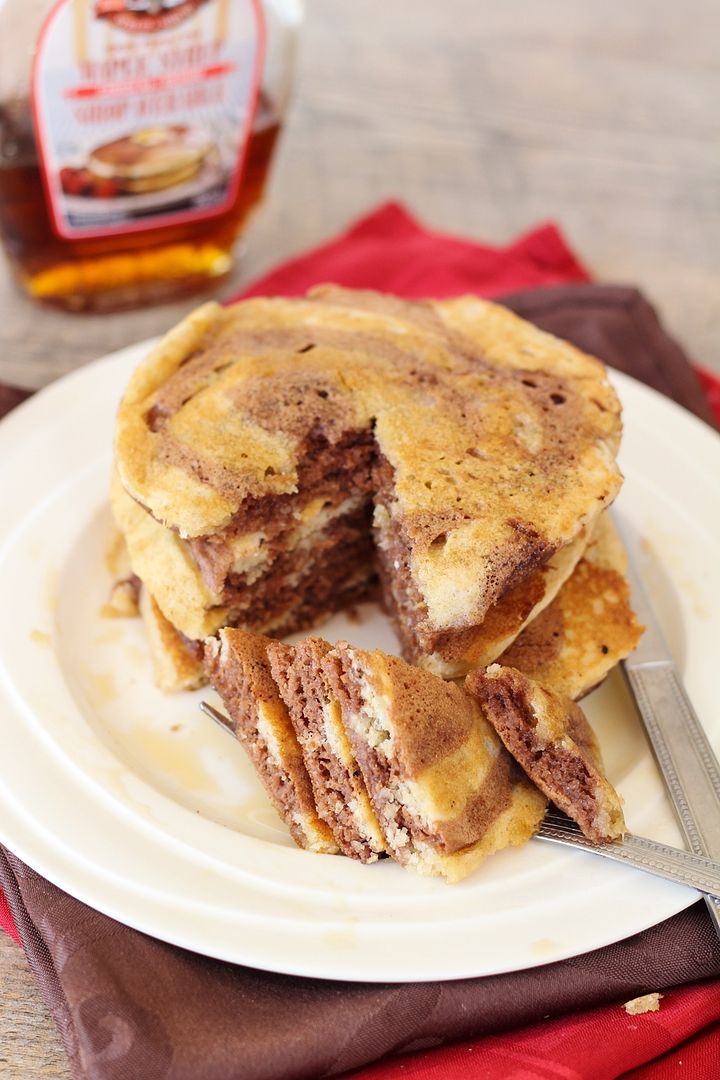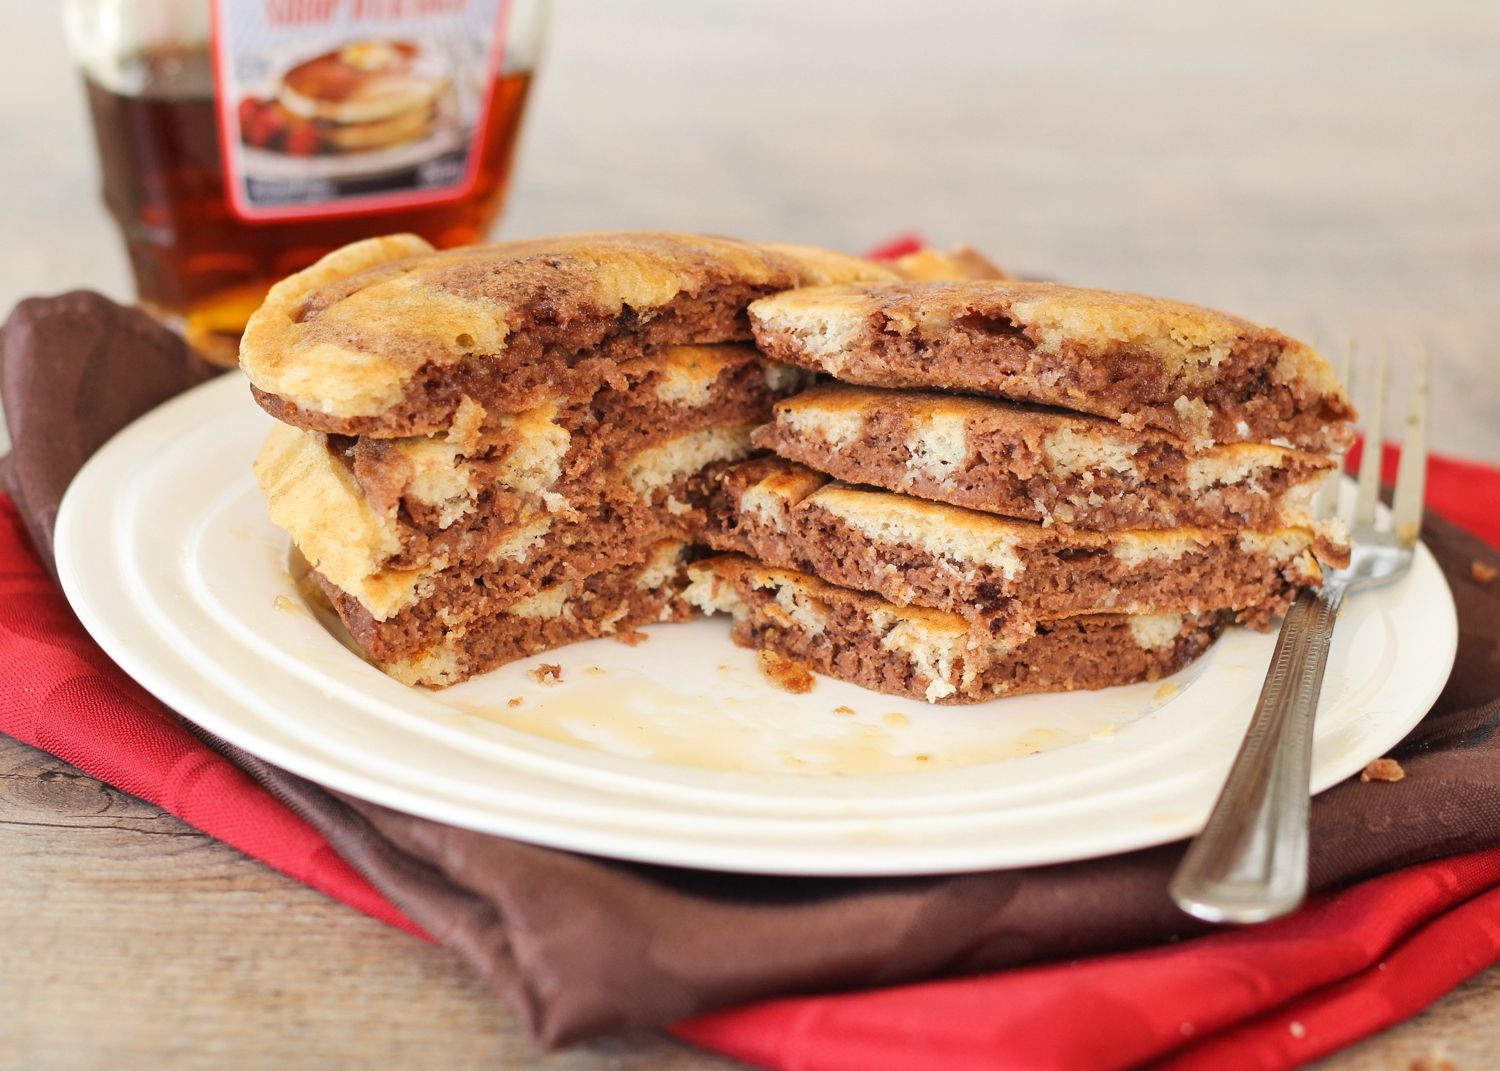
Showing posts with label vanilla extract. Show all posts

September 25, 2014

Vegan Pumpkin Pie

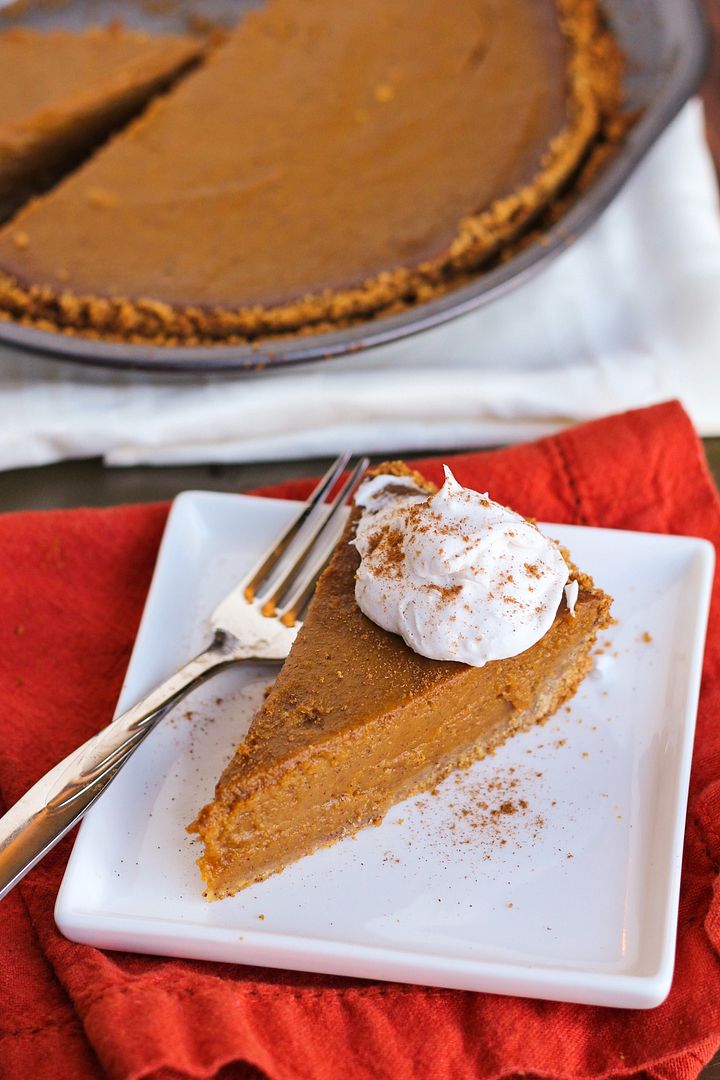
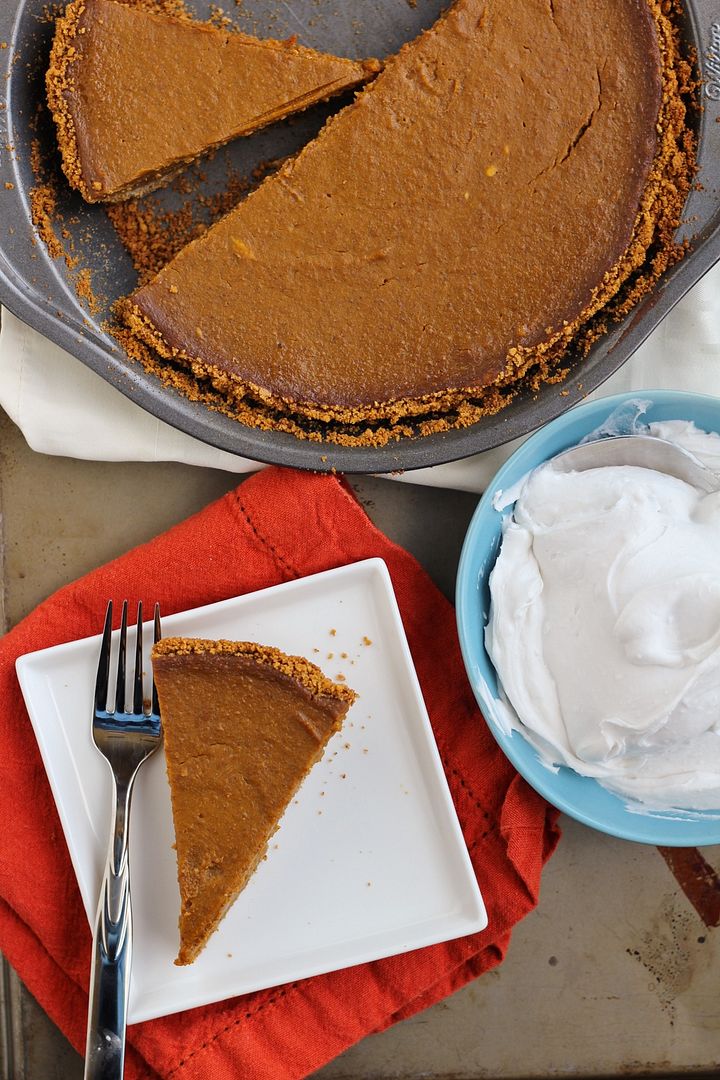
Healthy vegan pumpkin pie

Pumpkin pie is my (and a lot of people's, I'm sure) favourite type of pie, and the type I have the least self-control around because it's so easy to just take a little slice from the fridge, and then one more little slice, and suddenly you've eaten a whole pie just like that.  Ryan has been wanting to buy a pumpkin pie for weeks now but I told him that since it would just be the two of us eating it (and I intend on eating much more pumpkin pie in the coming months!) I wanted to try making a healthy pie that we wouldn't feel guilty about eating!
Healthy vegan pumpkin pie

This pumpkin pie is pretty healthy and also happens to be vegan.  The crust is made from low-fat graham crackers mixed with a bit of coconut oil, so the crust alone has a lot less "bad" fats than a typical butter or shortening-packed pie crust.  (Not that I have anything wrong with eating the occasional piece of traditional pie, but like I said, I wanted to make a healthier version!)  I could have made a healthier crust with nuts and dates but I wanted to keep this as easy and inexpensive as possible since we wanted it to be more of an every day dessert pie.

The filling is made up of pumpkin puree, unsweetened almond milk, no eggs, a reduced amount of brown sugar and some pure maple syrup for sweetening, cornstarch to help everything set, and of course the usual pumpkin spices.
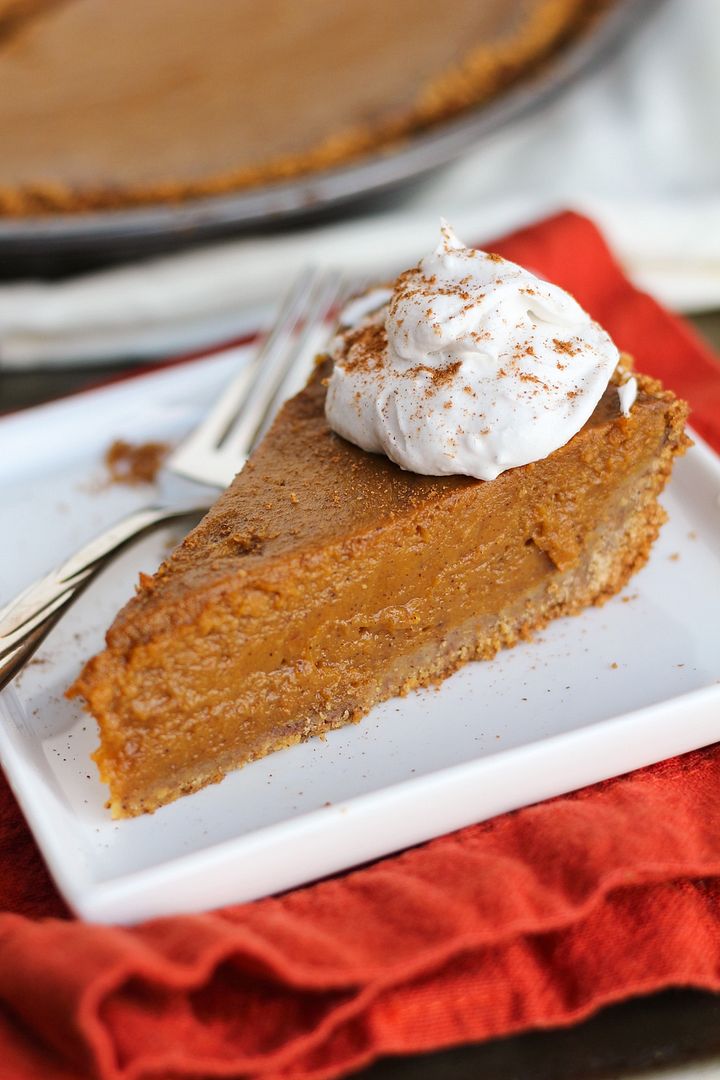
Healthy vegan pumpkin pie

For a topping, I made a batch of coconut whipped cream, which is a great vegan alternative to traditional whipped cream!  To make it, you basically put a can of coconut milk in the fridge for a while so that the cream separates from the liquid, then you scoop out the coconut cream and whip it in a chilled bowl until it's fluffy.  It doesn't need much sweetener but I added a tiny bit of powdered sugar and vanilla extract to mine.  It tastes amazing and the slight coconut flavour really complements pumpkin pie!  Oh She Glows has a great tutorial for making whipped cream if you've never tried it before!
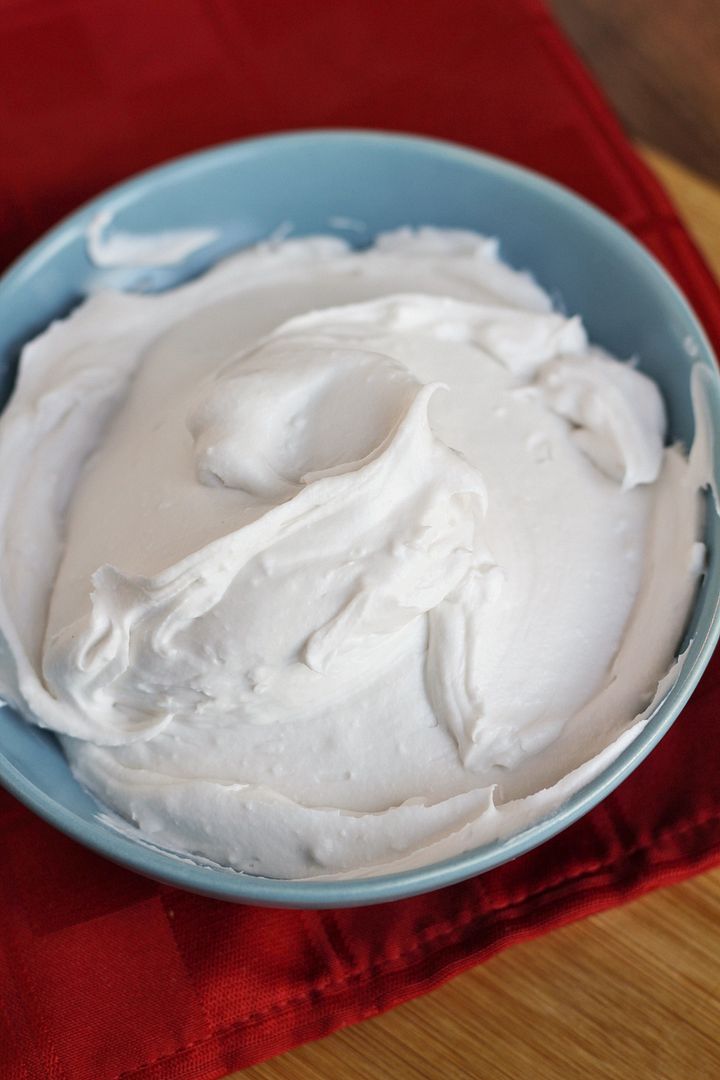
Coconut whipped cream

I was worried that either the taste or texture of this pie wouldn't turn out right but it turned out so much better than I'd even hoped!  It had a really nice bold pumpkin flavour from all the spices and addition of molasses (you can cut back if you don't like a lot of spice though!), the filling set perfectly and was smooth and creamy, and the crust sort of softened but stayed firm.  I won't say that it tastes exactly the same as a traditional pumpkin pie, but we both loved this and will likely be making it again soon!

With (Canadian) Thanksgiving quickly approaching, this would be a great dessert if you'll have any vegans at the table, or just want a lighter option after a big meal!
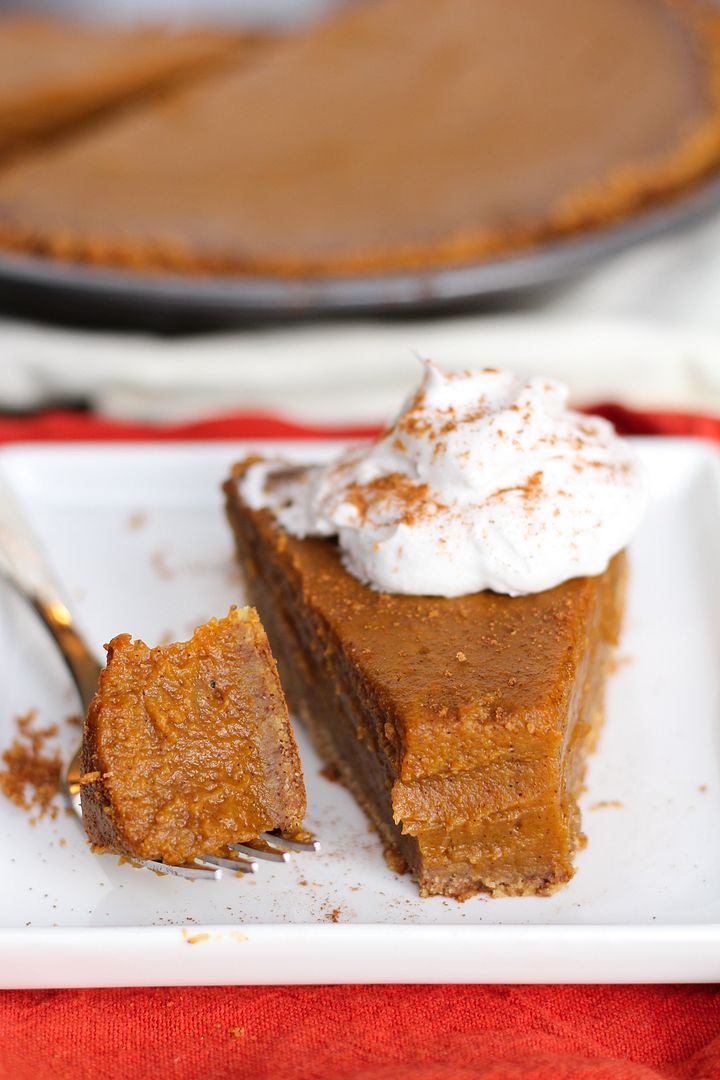
Healthy vegan pumpkin pie

Vegan Pumpkin Pie

Recipe inspired by and adapted from several sources, including Vegetarian Times, Minimalist Baker, and Oh She Glows

Makes one 9-inch pie

Ingredients:

For the Crust:
10 sheets of low-fat graham crackers (about 1.5 cups of crumbs)
1 teaspoon cinnamon
1/4 cup melted organic coconut oil

For the Filling:
2 cups canned pumpkin puree (not pumpkin pie filling)
1 cup unsweetened almond milk
3-1/2 tablespoons cornstarch
1/3 cup brown sugar
1/4 cup pure maple syrup
1 tablespoon molasses
1 teaspoon vanilla extract
1-1/2 teaspoons cinnamon
1/2 teaspoon ground ginger
1/4 teaspoon nutmeg
1/4 teaspoon sea salt

Directions:

Preheat oven to 350°F.  Lightly spray a 9” pie pan with non-stick cooking spray.

Pulse graham crackers in a food processor until they form fine crumbs. Transfer to a bowl and mix in the cinnamon with a whisk or a fork.  Add the melted coconut oil and mix together (I use a fork) until well combined.  Pour crumb mixture into the prepared pie pan and press evenly across the bottom and up the sides to form a pie crust.  Bake in preheated oven for about 7 minutes, then remove.  Leave oven on.

For the filling, mix all ingredients together in a large bowl, whisking together until just combined.  You could do the wet and dry ingredients separately if you like but I saved bowls and just mixed everything together in one.  Pour filling over the baked pie crust, return to oven, and bake for 55-60 minutes, until set. 

Remove from oven and let cool at room temperature for at least an hour, then transfer to refrigerator and let cool for 3-4 hours or overnight before slicing and serving.

Serve with coconut whipped cream, if desired.  Follow the link for instructions on making coconut whipped cream; note that your coconut milk will need to be in the fridge the day before so plan ahead!

July 22, 2014

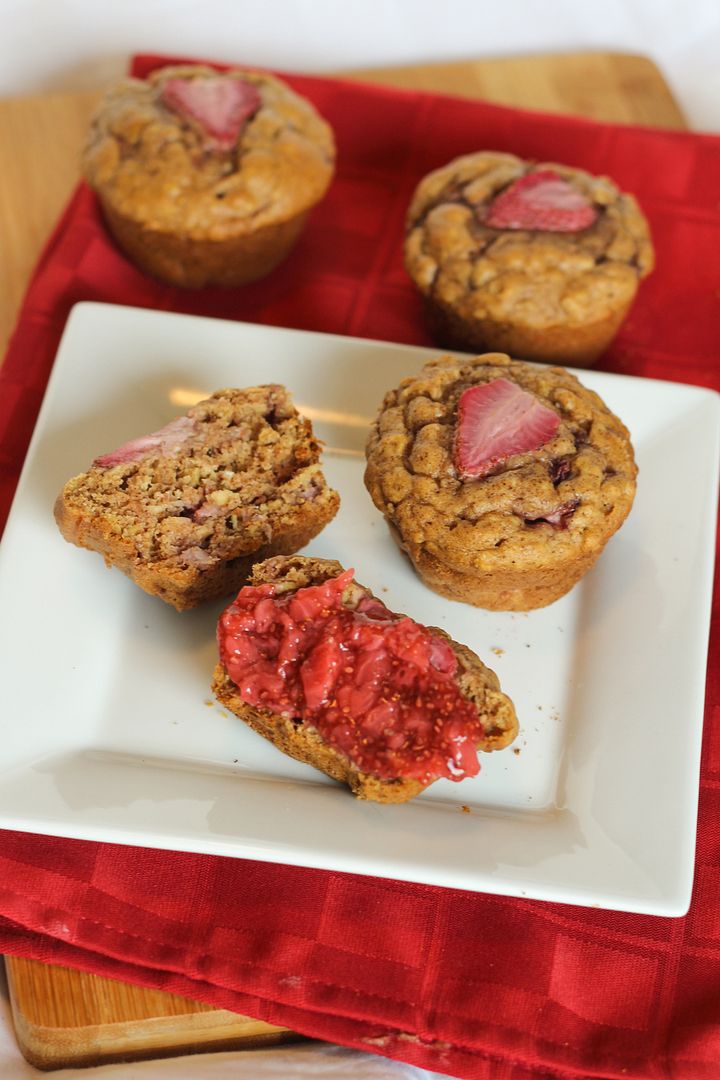
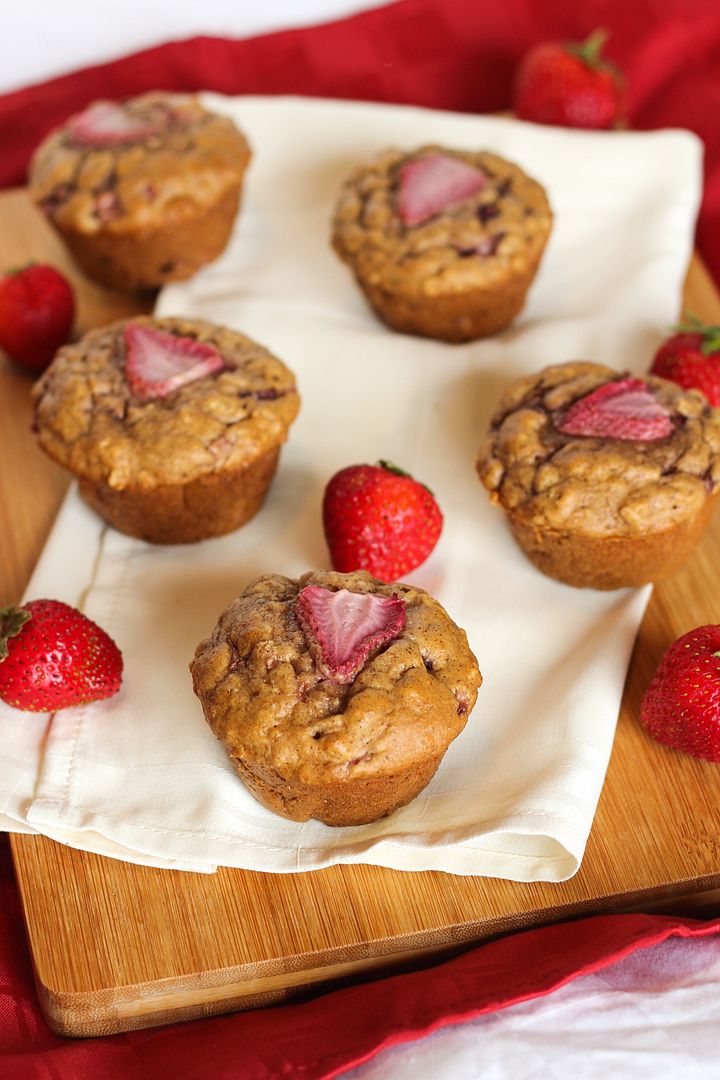
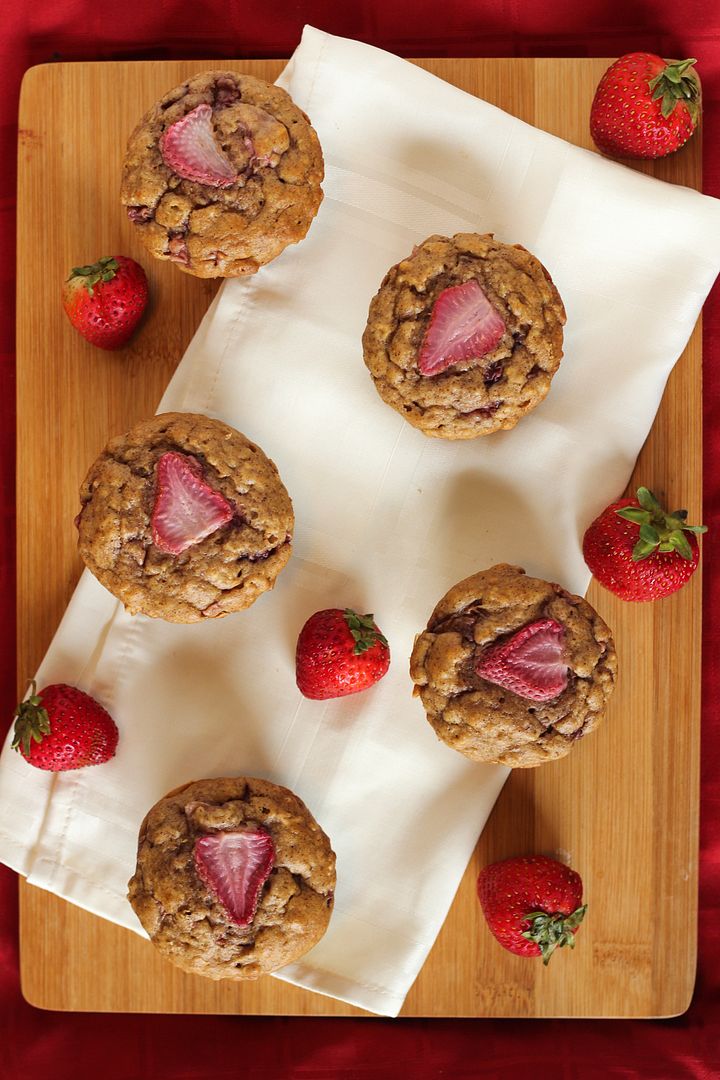
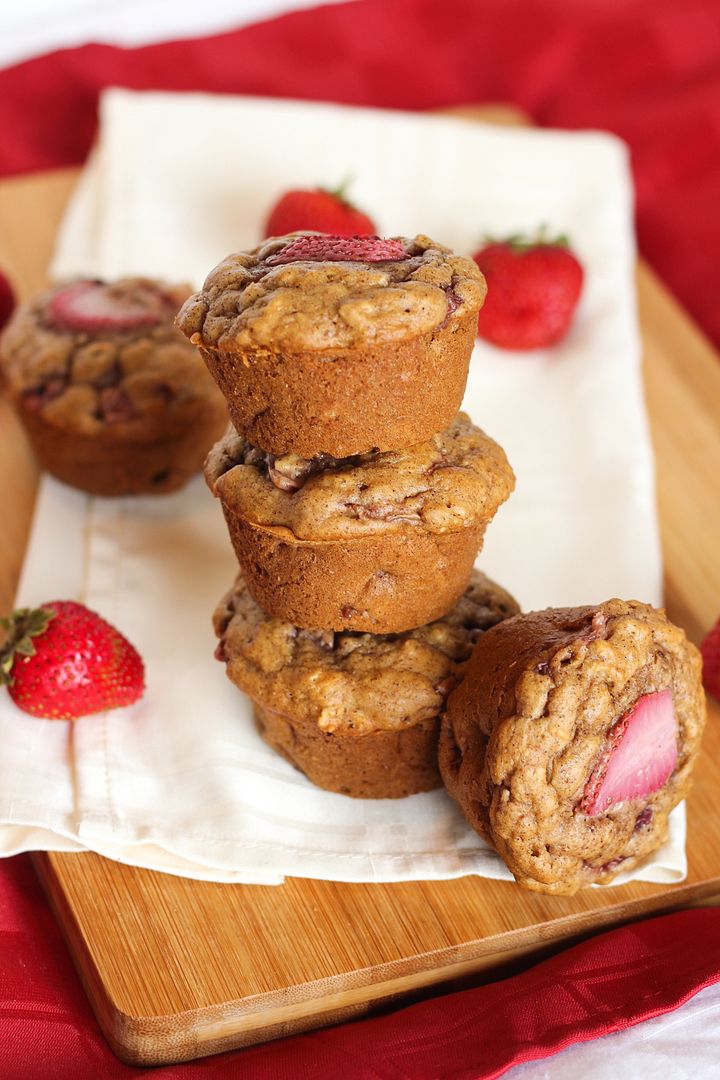
Strawberry & Peanut Butter Whole Wheat Oat Muffins

Strawberry & Peanut Butter Whole Wheat Oat Muffins

Somehow I always end up missing strawberry season because it seems to go by so quickly, so this year I was determined to bake at least one thing with strawberries. 

We don't really want a lot of desserts around right now though, so I decided to bake something on the healthier side.  And because we are only two people, I wanted something that can freeze well.  Enter muffins!

I had it in my head to make peanut butter and strawberry muffins, which surprisingly I could find almost no recipes for, so I decided to make up my own.  Peanut butter and jam goes together, so why not pb and fresh strawberries!

Strawberry & Peanut Butter Whole Wheat Oat Muffins

Because I wanted these to be on the healthier side, I used all whole wheat flour combined with oats, only a bit of pure maple syrup for sweetener instead of sugar, natural peanut butter, unsweetened almond milk, only a tablespoon of oil, and fresh strawberries instead of jam.

While they're not exactly low-fat because of the peanut butter, and not vegan because I included an egg (I haven't really had success with eggless baked goods in the past and don't have any problems personally with an egg being included), I still consider them a wholesome snack that is perfect for afternoon cravings as they satisfy hunger pretty well!

Strawberry & Peanut Butter Whole Wheat Oat Muffins

These were photographed over a day after making them, so the strawberries I had placed on top aren't looking so hot, but I assure you that these still turned out great!

I also love slathering these in chia jam for more strawberry goodness.  If you've never made chia jam before, I encourage you to give it a try!  It's super easy and quick to make and so much better for you than regular jam.  I used the jam recipe from these strawberry oat squares by Oh She Glows, another strawberry recipe I'll have to try soon before the season is over!

Strawberry & Peanut Butter Whole Wheat Oat Muffins


Strawberry & Peanut Butter Whole Wheat Oat Muffins

Makes 12 muffins

Ingredients:

1-1/4 cups whole wheat flour
3/4 cups rolled oats
1 teaspoon baking soda
1 teaspoon baking powder
1 teaspoon cinnamon
1/4 teaspoon salt
1 large egg, lightly beaten
1 cup unsweetened vanilla almond milk
1/2 cup natural peanut butter, melted slightly to mix in better
1/4 cup pure maple syrup (or I used 2 T maple syrup + 2 T honey)
1 teaspoon vanilla extract
1 tablespoon extra virgin olive oil
1 cup diced fresh strawberries
12 slices strawberries for the tops, if desired

Directions:

Preheat oven to 350°F.  Spray a regular 12-cup muffin tin with non-stick cooking spray.

Whisk the dry ingredients (flour through salt) together in a medium bowl.  In a separate bowl, mix the wet ingredients until just blended (egg through oil).  Add the wet ingredients along with the diced strawberries to the dry ingredients and fold together until just combined.

Divide batter evenly among the 12 muffin cups.  If desired, add a strawberry slice to the top of each muffin.  Bake muffins in preheated oven for 18-20 minutes or until toothpick inserted in middle of a muffin comes out clean.  Let cool for a couple minutes in the pan then remove to a wire rack to cool completely.

June 19, 2014

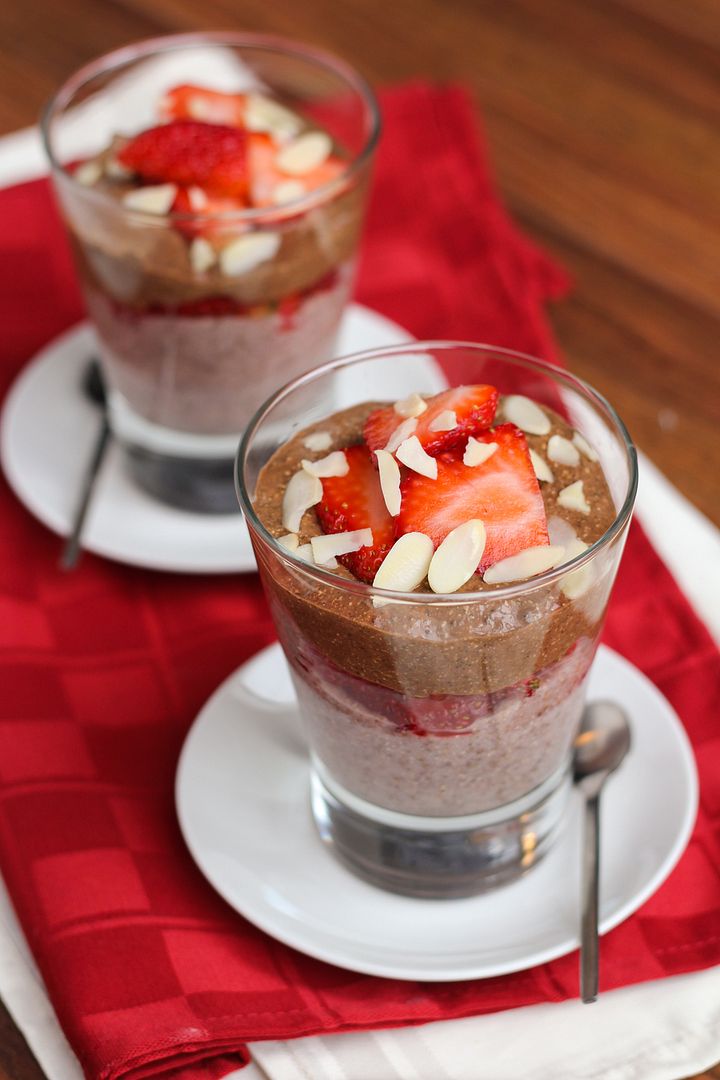
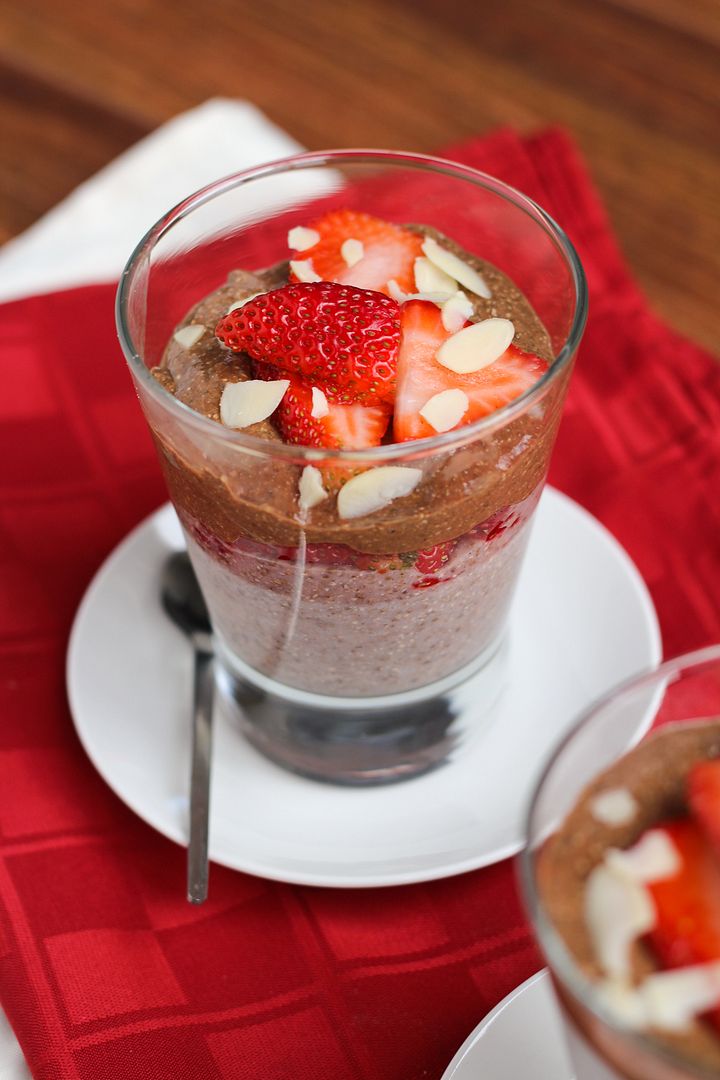
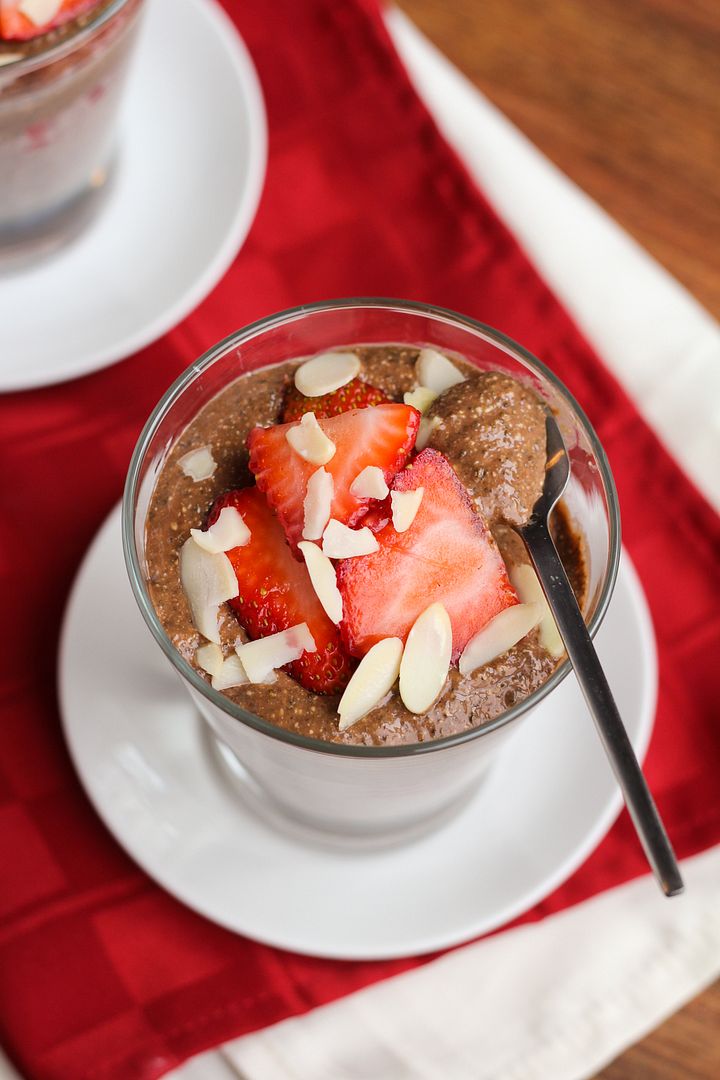
(Healthy) Strawberry & Chocolate Chia Pudding

Healthy Strawberry and Chocolate Chia Pudding

I've been wanting to try chia pudding for so long now - I think I've had this mango coconut chia pudding bookmarked for two years - but for some reason I've never gotten around to it.  Lately I've been craving dessert much more, likely because the days feel longer, I've been staying up later, and thus need more food to sustain me, so I've been trying to find healthy desserts that still satisfy a craving.  So when I saw Dietitian Debbie's beautiful layered chocolate and strawberry chia pudding recently I decided to give it a try!

Healthy Strawberry and Chocolate Chia Pudding

I feel like chia seeds are everywhere lately, but if you haven't heard of this little superfood before, it's basically a tiny seed that's packed with nutrition, including lots of fiber, omega-3 fatty acids, calcium, other vitamins, minerals, and antioxidantst, and even protein!

And because they can absorb somewhere around 10-12 times their weight (I've seen various numbers floating around) and take on a sort of gel-like consistency when they do so, they're great for making healthy pudding (though of course, you can use them in many other ways, too)!

Healthy Strawberry and Chocolate Chia Pudding

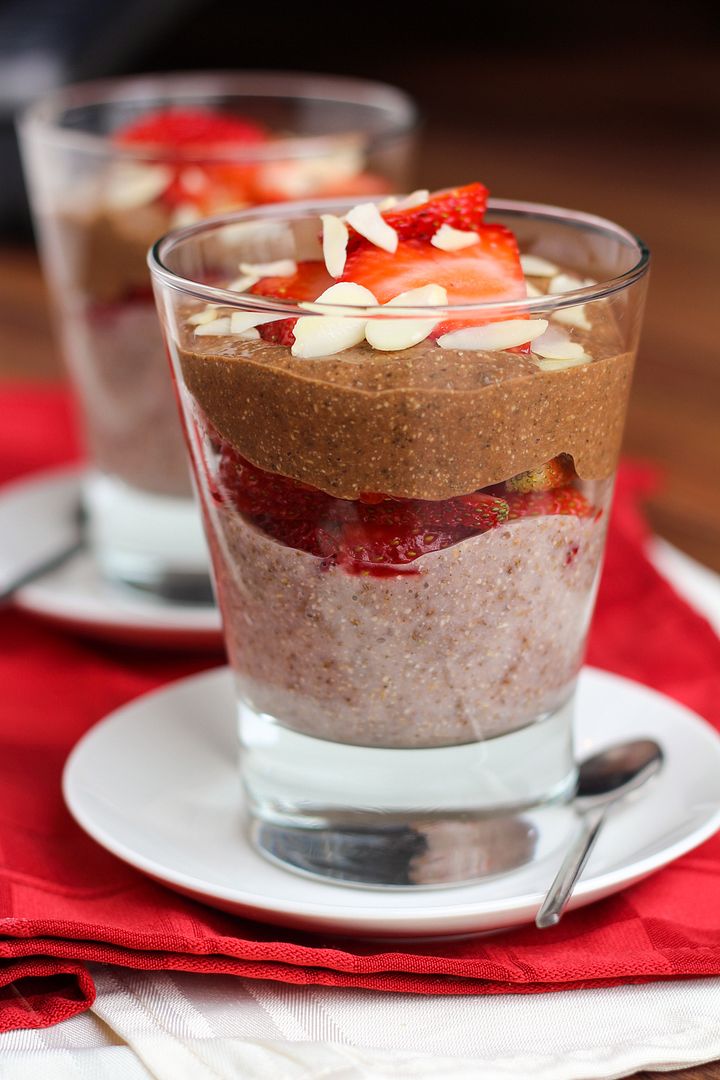
The version I came up with is different than the original idea, but this pudding is still really easy to make.  Both the chocolate and strawberry portions contain unsweetened vanilla almond milk, chia seeds, and pure maple syrup for sweetener, then the chocolate version has added cocoa powder while the strawberry version contains fresh strawberries and a little vanilla extract.

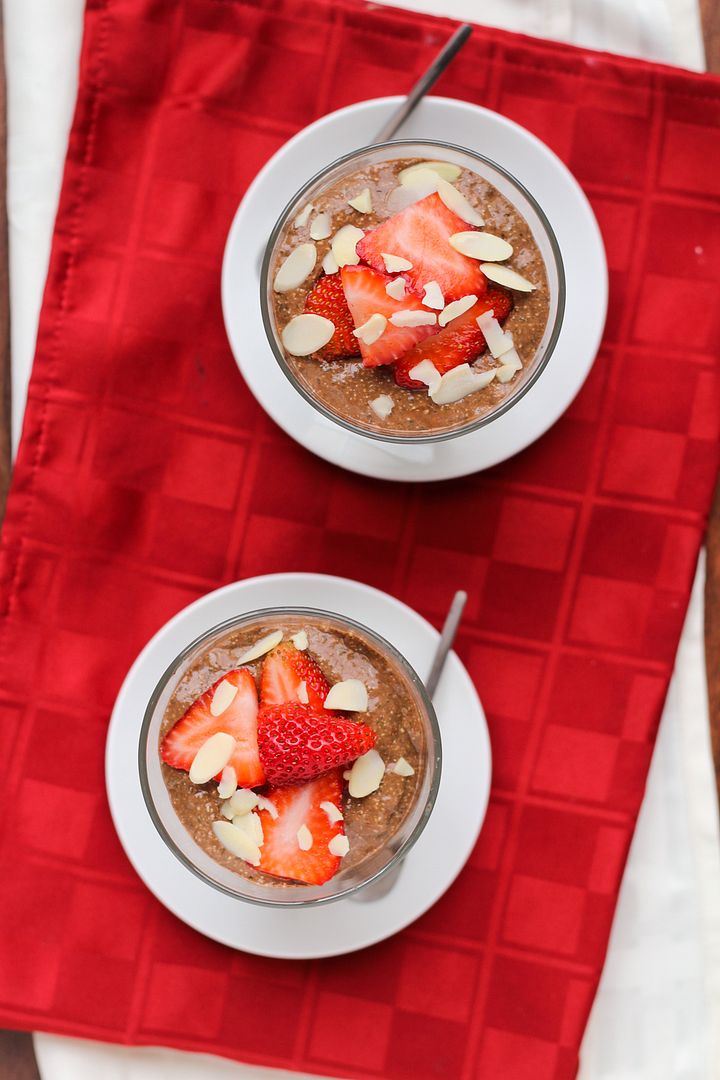
I also used Oh My Veggies' idea to blend the chia pudding after to give it a smoother texture, but you can leave out this step if you like.  I topped mine with more strawberries and sliced almonds for crunch, but you could use chocolate chips, coconut flakes, or anything else you like!

Healthy Strawberry and Chocolate Chia Pudding

The only difficult part about this recipe is waiting for the pudding to set.  It's best to leave it overnight, but otherwise plan for at least 4-6 hours to let the chia seeds work their magic and turn this into pudding!

This makes a perfect light summer treat that satisfies a dessert craving but leaves you feeling good, and it would also totally be appropriate for breakfast!  Ryan was skeptical about the whole idea but after trying it, he said he could eat it every day, so I'd say it was a big success!

Healthy Strawberry and Chocolate Chia Pudding

Strawberry & Chocolate Chia Pudding

Note: The idea for this recipe was inspired by Dietitian Debbie; ingredient amounts were adapted from All Recipes

Serves 4 (servings are on the smaller side)

Ingredients:

For the Strawberry Layer:
1 cup unsweetened vanilla almond milk (or your choice of milk)
8oz (half a package) fresh strawberries, chopped
1/4 cup chia seeds
2 tablespoons pure maple syrup
1/2 teaspoon vanilla extract

For the Chocolate Layer:
1-1/4 cups unsweetened vanilla almond milk (or your choice of milk)
1/4 cup chia seeds
2 tablespoons pure maple syrup
2 tablespoons cocoa powder

For Topping:
8oz sliced strawberries
Optional: Slivered almonds, chocolate chips, coconut flakes (I used almonds)

Directions:

To prepare strawberry pudding, blend almond milk and strawberries in a blender until smooth.  Transfer to a bowl or container and stir in chia seeds, maple syrup, and vanilla until well combined.  Cover and keep in refrigerator overnight or until set, at least 4 hours.

To prepare chocolate pudding, stir together the almond milk, chia seeds, maple syrup, and cocoa powder, and also store in the fridge along with the strawberry pudding.

When ready, the mixtures should have a more gel-like consistency.  If you like you can serve the pudding as is, but if you want a smoother consistency where you won’t notice the chia seeds as much, transfer each mixture to the blender separately (cleaning in between) and puree until smooth.

To prepare pudding, layer chocolate and strawberry puddings in glasses or bowls with sliced strawberries and almonds in between each layer and on top.  If you like you could also top with chocolate chips and/or coconut flakes and an extra drizzle of maple syrup or honey of it’s not sweet enough for your tastes.

April 29, 2014

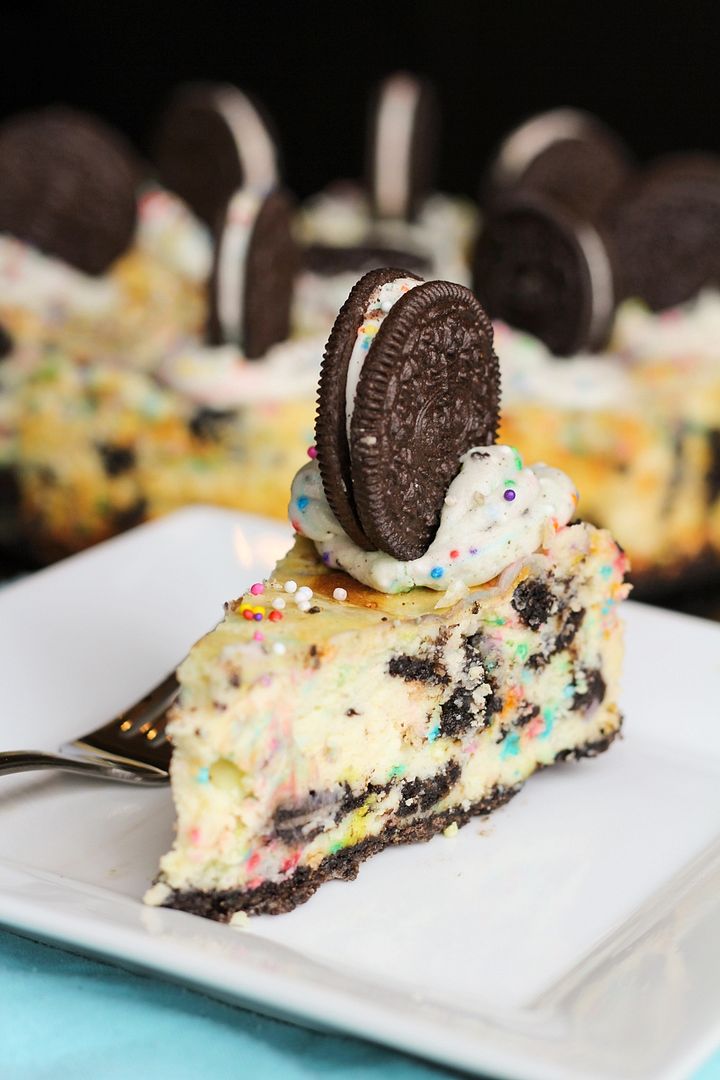
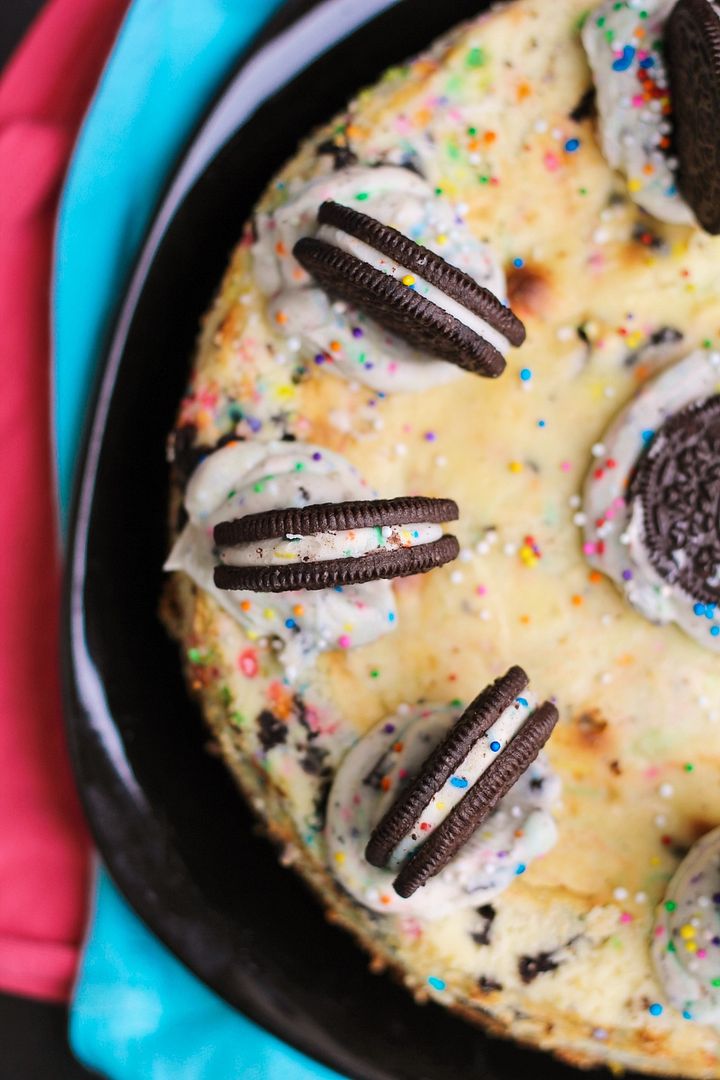
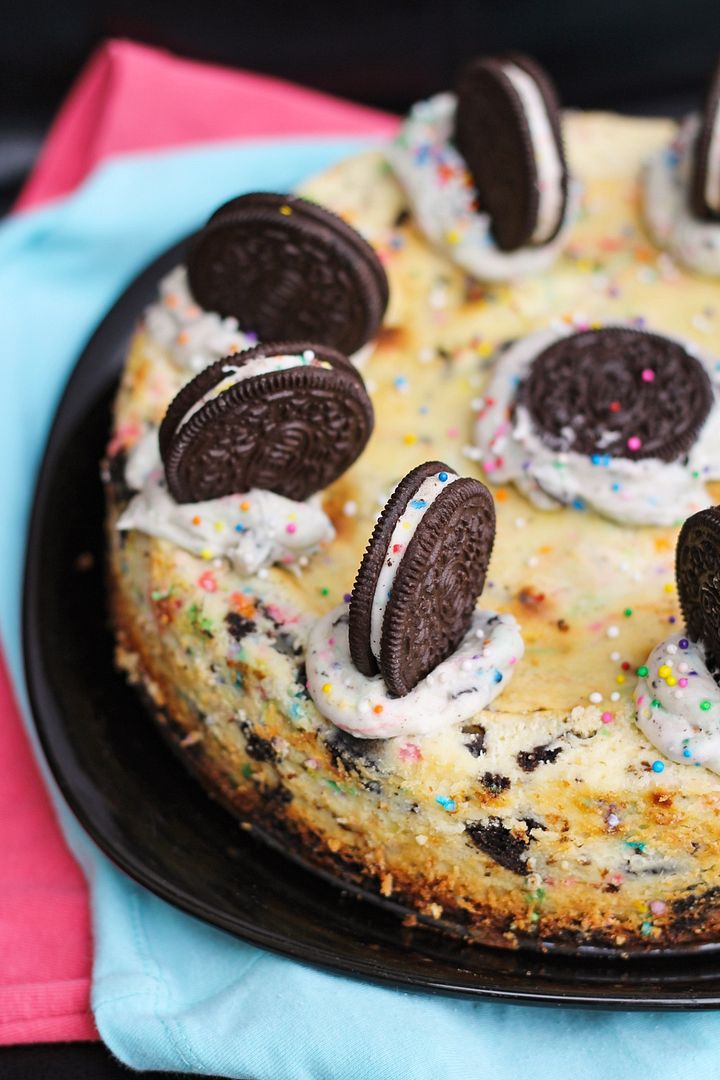
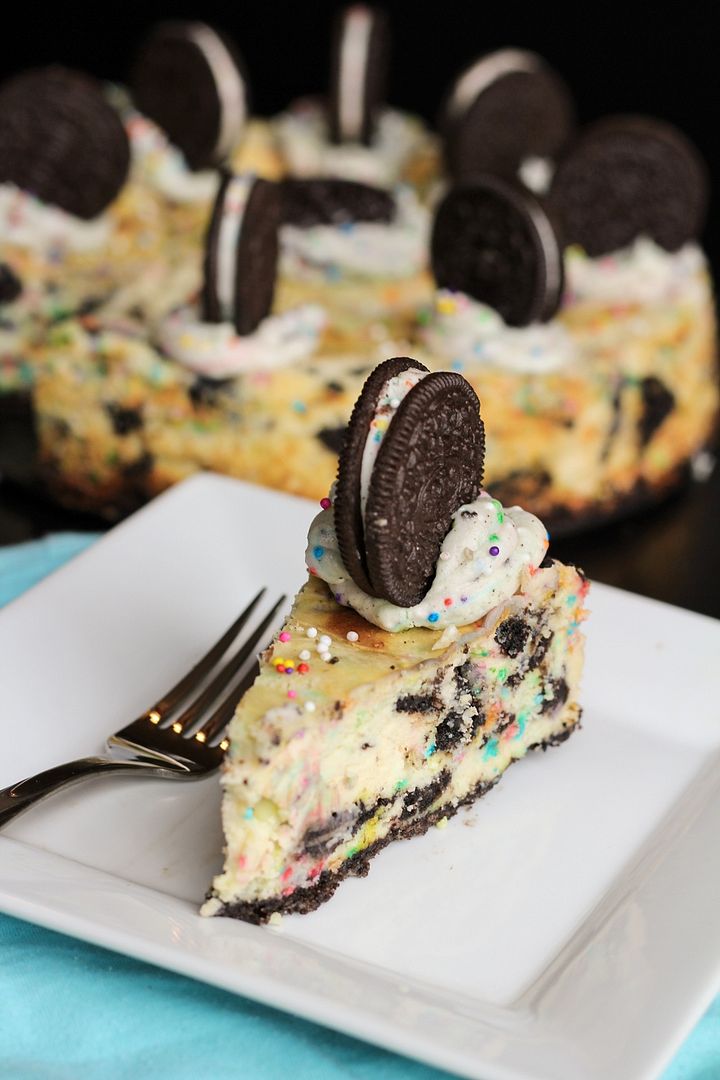
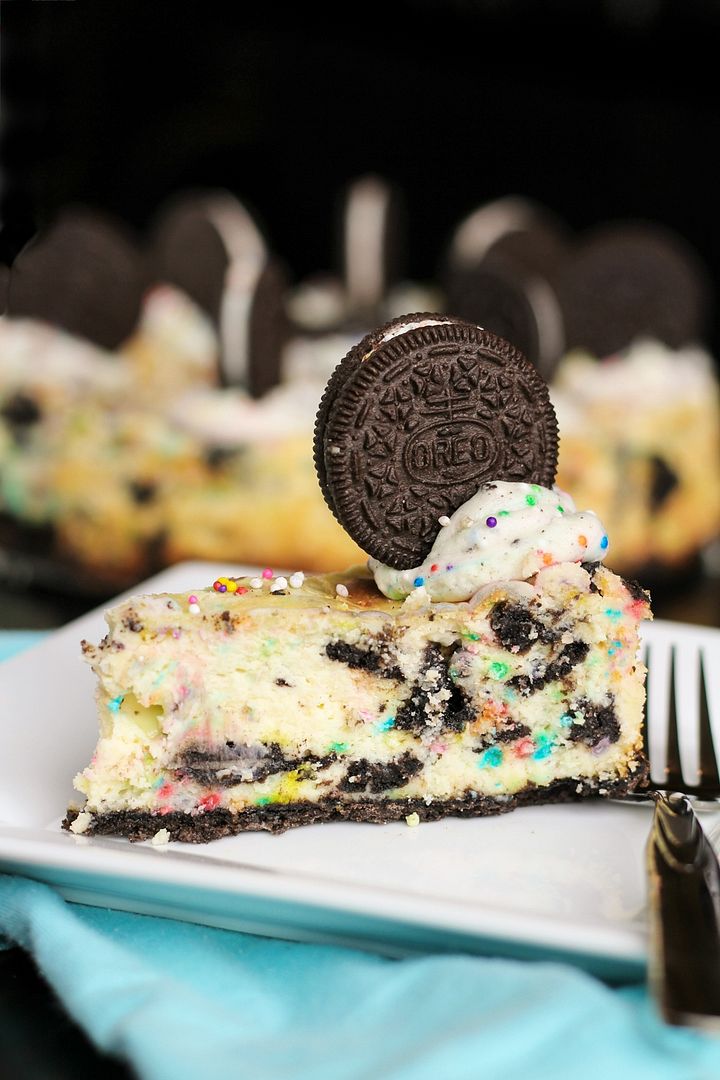
Birthday Cake Oreo White Chocolate Cheesecake

Birthday Cake Oreo White Chocolate Cheesecake

Last Thursday was my (and my twin sister Genevieve's!) birthday and I had a fantastic day being spoiled by my fiance, who took me to my first NHL playoff game that evening, which was really exciting even though the end result of the game didn't turn out quite how we'd hoped!
On the weekend I celebrated with my family, which meant that I got to choose a birthday dinner, but I made my own cake as usual because I look forward to it every year!  For dinner, my parents made a somewhat Mexican-themed meal with sangria, chips and guacamole, and caramelized pineapple and chicken quesadillas with a strawberry salsa - it was all amazing!
Birthday Cake Oreo White Chocolate Cheesecake

And for dessert, I made this festive birthday cake Oreo white chocolate cheesecake! 

As I mentioned in my last post, I'm not a huge fan of the typical white birthday cake with super sweet frosting, but cheesecake is a different story - I love any and every kind of cheesecake!

Birthday Cake Oreo White Chocolate Cheesecake

My older sister had just brought back birthday cake flavoured Oreos for us from her trip to the US, so I decided to incorporate them into a birthday cheesecake!  I don't think I've seen these Oreos anywhere in Canada but I could be wrong - if someone knows if they're available, let me know!  If you can't find them, you can still make this with regular Oreos, it just won't smell as much like birthday cake :)   I didn't have quite enough birthday Oreos to use throughout the cake by the time I got around to grabbing the package, so I just used half regular Oreos which worked fine!

Birthday Cake Oreo White Chocolate Cheesecake

This cheesecake has an Oreo crust, with the birthday cake Oreos chopped up and mixed throughout the cheesecake batter, along with some sprinkles (necessary for anything birthday themed, of course) and melted white chocolate chips to enhance the sweet birthday cake flavour. 

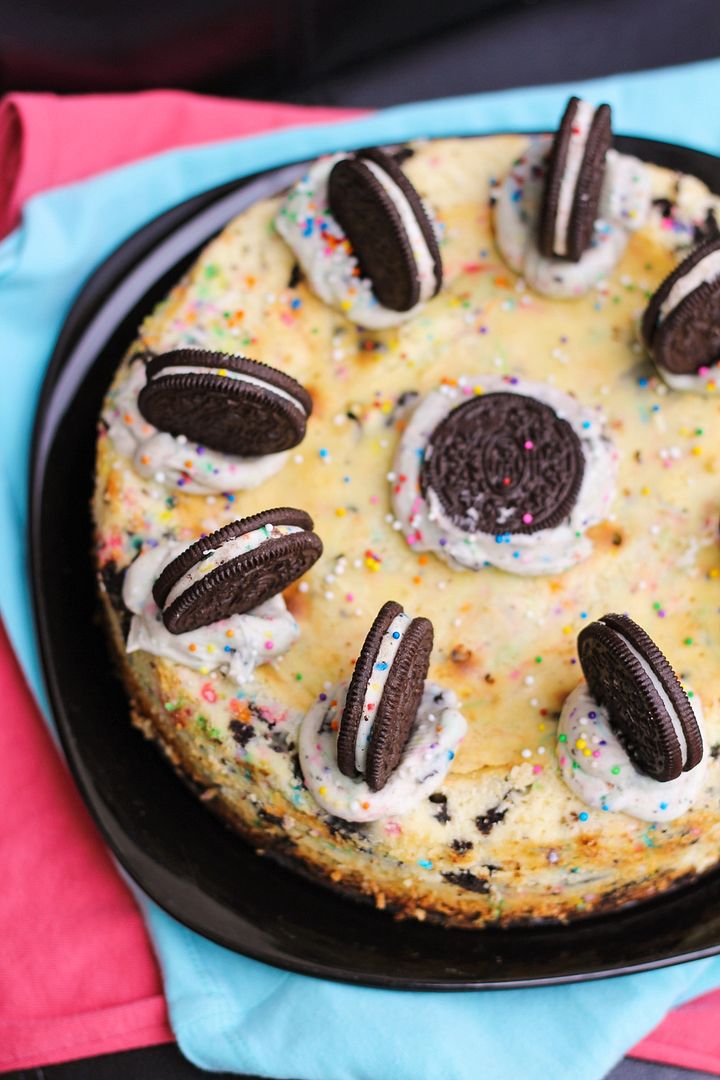
I also made a quick buttercream frosting, which I don't particularly like but in this case I needed it to stick some Oreos on top for decoration.  I mixed in some sprinkles and Oreo crumbs to the frosting which ended up turning the frosting into a somewhat unappealing grey colour, so if you want to avoid my mistake just leave the Oreos out of the frosting, there's plenty of Oreos elsewhere in the cake anyway!

Birthday Cake Oreo White Chocolate Cheesecake

I have a tendency to overbake my cheesecakes because I'm always paranoid about them not being cooked all the way through and haven't quite mastered the art of knowing when a cheesecake is done yet, so as you can see mine was a tad overdone, but everyone still loved it! 

I loved how festive it looked, and it smelled and tasted just like a birthday cake but with the creamy texture of cheesecake - like a grown-up version of a kid's birthday cake to help make this getting older business a lot easier :) 

Birthday Cake Oreo White Chocolate Cheesecake

Birthday Cake Oreo White Chocolate Cheesecake


Makes one 9” cheesecake; serves around 12

Ingredients:

For the Crust:
16 Oreos – I used regular Oreos for the crust
3 tablespoons unsalted butter, melted

For the Filling:
2 cups white chocolate chips
1/2 cup half-and-half cream
3 (250g or 8oz) bricks of cream cheese, softened
1/2 cup sugar
3 large eggs
1 teaspoon vanilla extract
14 ‘Birthday Cake’ Oreos, chopped (I chopped each one into about 6 pieces)
2 tablespoons sprinkles

For the Topping (Optional):
1/4 cup unsalted butter, softened
3/4 cup icing sugar
1/4 teaspoon vanilla extract
2 teaspoons milk
6-8 Oreos
Sprinkles

Directions:

Preheat oven to 350°F.

Crush the 16 Oreos for the crust in a food processor or blender until they form crumbs.  Stir in melted butter with a fork and mix until combined, then transfer Oreo mixture to a 9” springform pan, and press evenly to cover the bottom in a thin layer.

In a metal bowl placed over a small saucepan of simmering water on the stovetop, melt white chocolate chips and half-and-half, stirring occasionally until melted and smooth.  Remove from heat.

In a large bowl or bowl of a stand mixer, beat cream cheese and sugar until smooth, 2-3 minutes.  Add eggs 1 at a time, beating just until blended after each addition.  Add vanilla extracte and melted white chocolate mixture and beat just until smooth.  Gently fold in the chopped Oreos and sprinkles with a flexible spatula.  Pour batter over prepared crust and gently tap the pan against the counter a few times to remove any air bubbles. 

Bake in preheated oven for 50-55 minutes, until center is almost set.  My cheesecake had some butter drip out the bottom of the pan, which is an issue with my pan, but in case you have the same issue, be sure to place a baking sheet on the rack below the cheesecake to catch any drippings.  You could also use a water bath if you prefer to bake your cheesecakes that way.  Once done, I turn off the oven and let my cheesecake cool in there for about 10-20 minutes or more, then remove transfer it to a wire rack.  Run a knife around the edge of the pan to loosen the cake so it doesn’t crack as it cools.  Let cool at room temperature for at least an hour, then refrigerate for at least 4 hours or overnight.

If you wish to decorate the cheesecake as I did, you can prepare a simple buttercream frosting to stick Oreos on to the top of the cake.  To make buttercream, beat 1/4 cup butter for 2-3 minutes until smooth and creamy.  Add 3/4 cup icing sugar slowly and mix on low speed until incorporated.  Mix in 1/4 teaspoon vanilla and 1 to 2 teaspoons milk until smooth.  If the frosting's too thin you can add more icing sugar; if it’s too thick you can add more milk.  I also stirred in 2 teaspoons of sprinkles and 1 crushed Oreo but this can alter the colour of the frosting (mine came out kind of grey) so I might recommend leaving those out and just adding sprinkles on top, or at least just leaving out the Oreos.  Pipe buttercream onto spots of the cake where you want to attach Oreos and stick Oreos into the frosting (see pictures). Keep cake refrigerated until ready to serve.

April 15, 2014

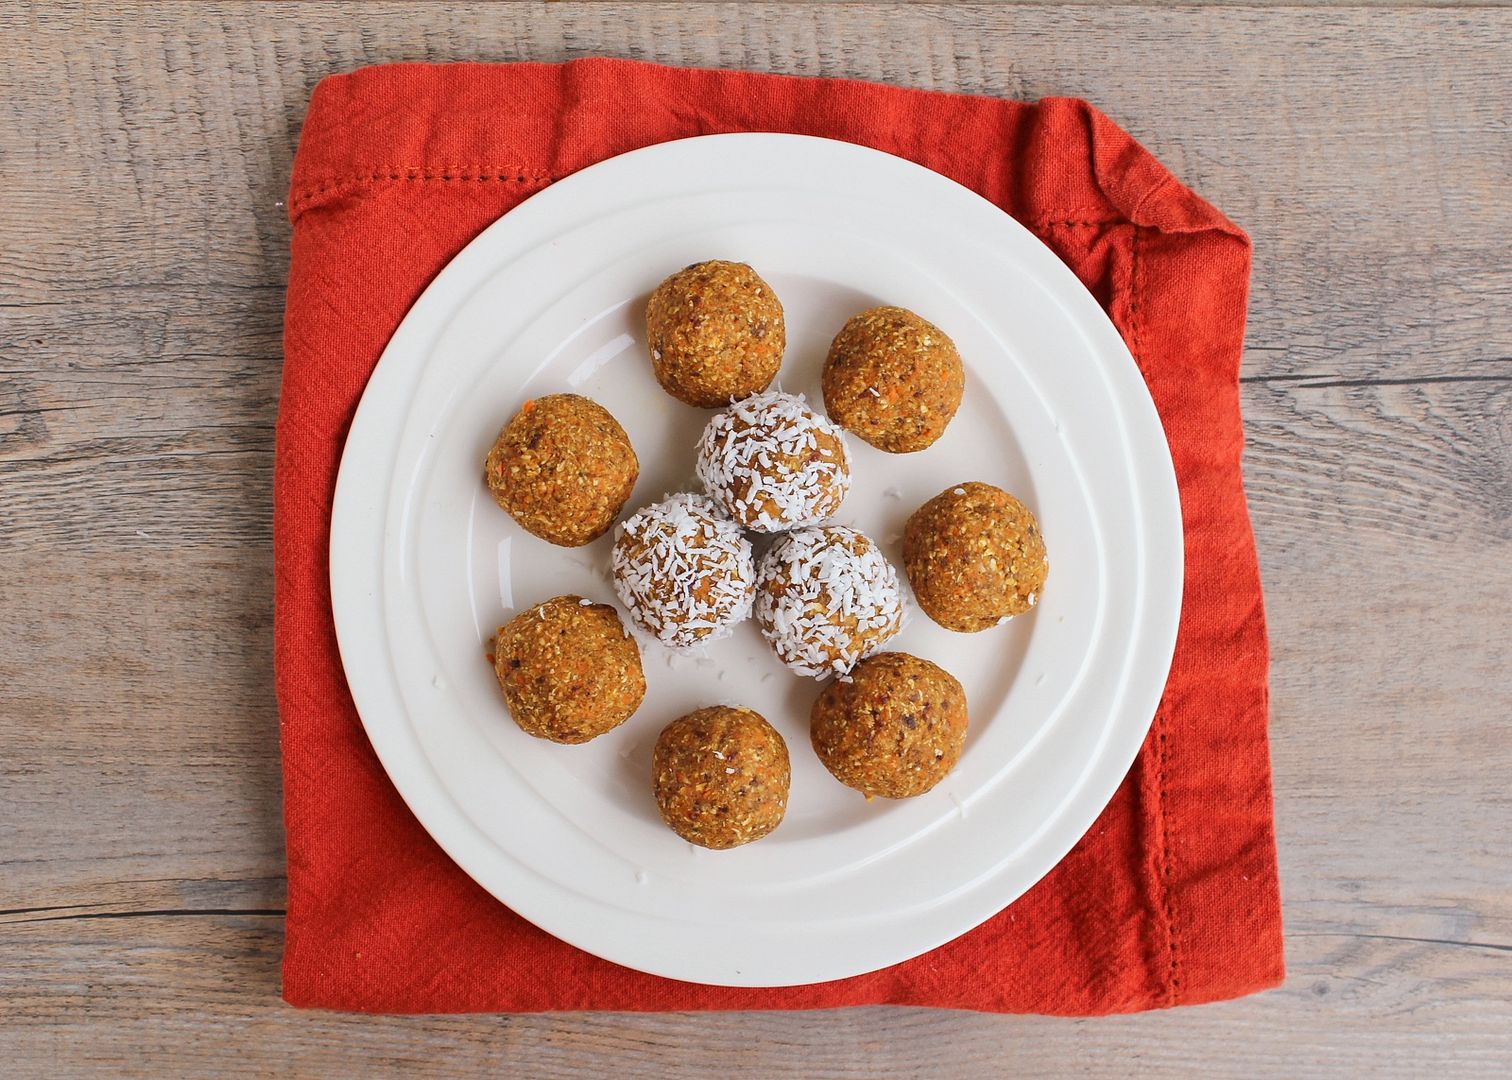
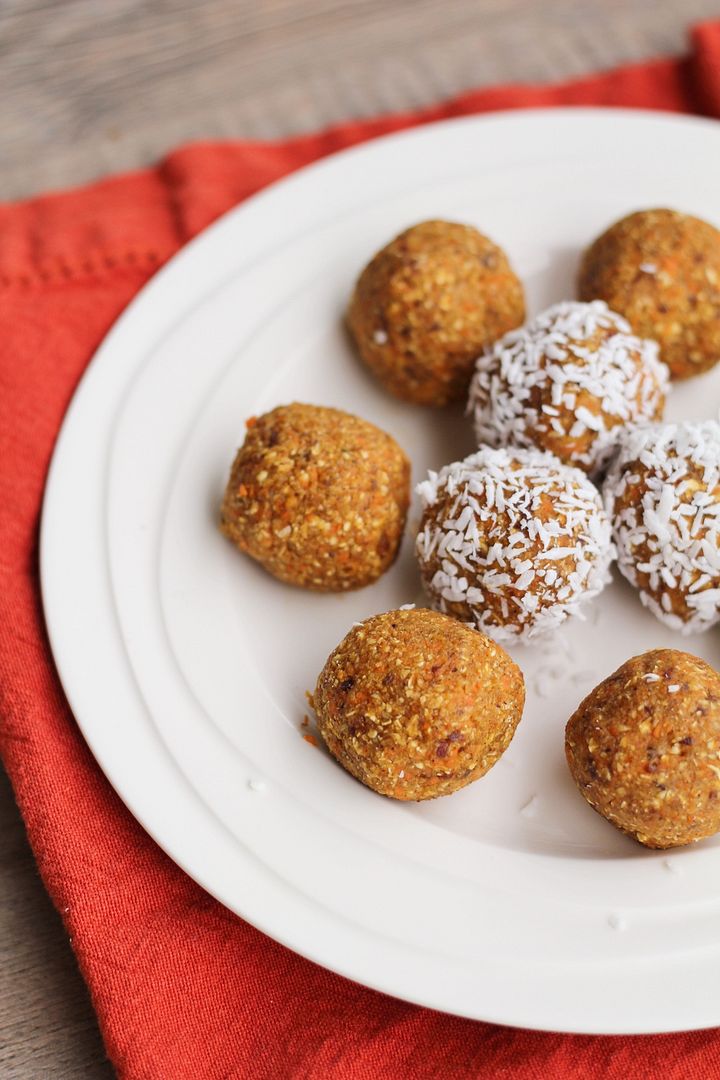
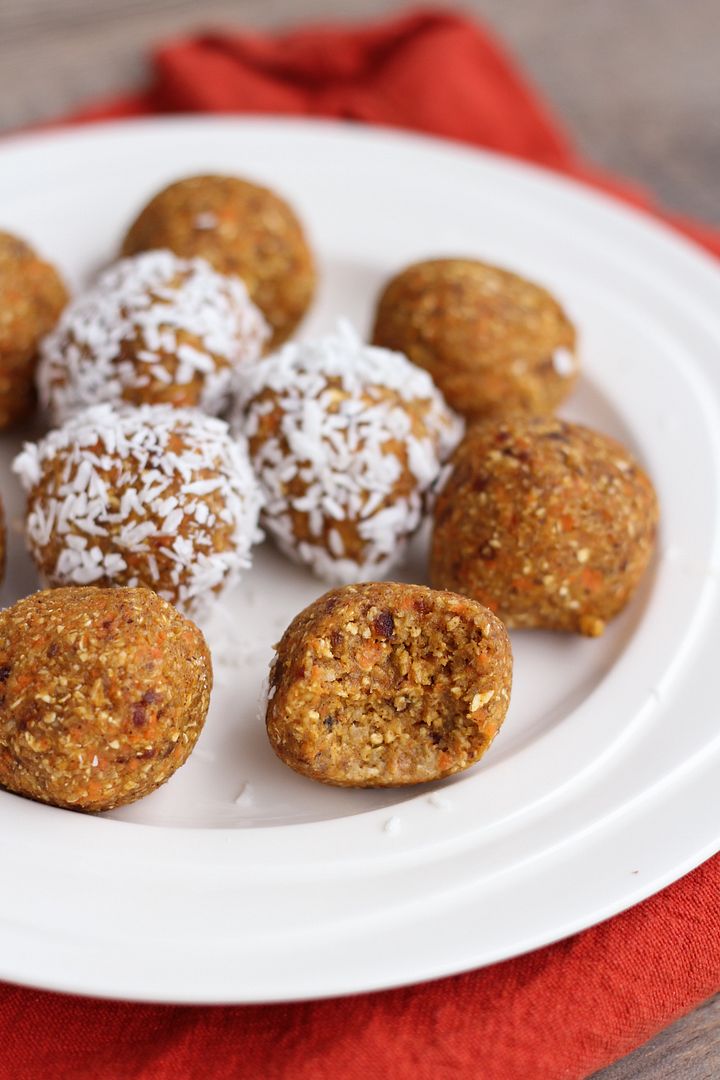
Healthy No-Sugar Carrot Cake Date Balls

Healthy No-Sugar Carrot Cake Date Balls

With Easter rapidly approaching (how is it this weekend already?!), I spent some time this past weekend trying to come up with a new Easter recipe to share.  Last year I stuck with an Easter egg theme with egg-shaped breakfast naan pizzas and Easter egg cheesecake bars, but this year I wanted to do something with carrot cake, which I consider a pretty standard Easter dessert and which is one of my favourite types of cake!

It seems like a carrot cake version of everything already exists though, like carrot cake oatmeal, carrot cake banana bread, carrot cake pancakes, carrot cake cheesecake, carrot cake whoopie pies, carrot cake rice krispie treats, etc., all of which look absolutely amazing, of course.  I haven't seen too many carrot cake versions of healthy no-bake balls, though, and after recently trying these oatmeal cinnamon truffles which I loved, I decided to make a carrot cake version!

Healthy No-Sugar Carrot Cake Date Balls

These are super quick and easy to make, with oats, dates, and walnuts as the main ingredients, along with shredded carrots (obviously needed for carrot cake, and with a bonus of added nutrients!), and vanilla, cinnamon, nutmeg, ginger, and salt to bring out the carrot cake flavour.

The end result is a sweet treat with a taste that really reminded me of carrot cake, even though dates are the predominant flavour.  I couldn't really taste the carrots, but I realized carrot cake doesn't taste like carrots either; you could always add more and adjust the ratio of other ingredients if you like though.  These would be a great sugar-free snack to have around this coming weekend to help balance out all the chocolate!

Healthy No-Sugar Carrot Cake Date Balls

No-Bake Healthy Carrot Cake Date Balls

Makes about 18 balls

Ingredients:

1-1/2 cups large-flake rolled oats
1/2 cup chopped walnuts
1/4 teaspoon sea salt
1/2 teaspoon cinnamon
1/4 teaspoon nutmeg
1/4 teaspoon ground ginger
12 medjool dates, pits removed, chopped into pieces
1 cup grated carrot (about 2 large carrots)
1/2 teaspoon pure vanilla extract

Optional: raisins, unsweetened shredded coconut

Directions:

Add oats, walnuts, salt, cinnamon, nutmeg, and ginger to the large bowl of a food processor.  Process until the mixture resembles fine crumbs.  Remove from food processor and set aside in a bowl.

Add dates to the food processor and mix until smooth.  I added 1 tablespoon of water to help them blend.  Add the carrots, vanilla, and oat mixture back to the food processor and pulse everything until combined and sticking together.  Taste mixture and add more spices or carrots if desired.

Remove mixture from food processor and roll into balls about 1” in diameter.  Keep covered in refrigerator and let refrigerate for at least a couple hours before eating for better texture.

Options:  If desired, you can add raisins to the balls to resemble carrot cake more; the date taste is already strong and sweet though so I didn’t feel it necessary.  Another option is to roll the balls in shredded coconut if you like; I’m not a huge fan of shredded coconut so I didn’t do this with all of mine but it sticks easily to the balls if you wish to roll them in it.

April 04, 2014

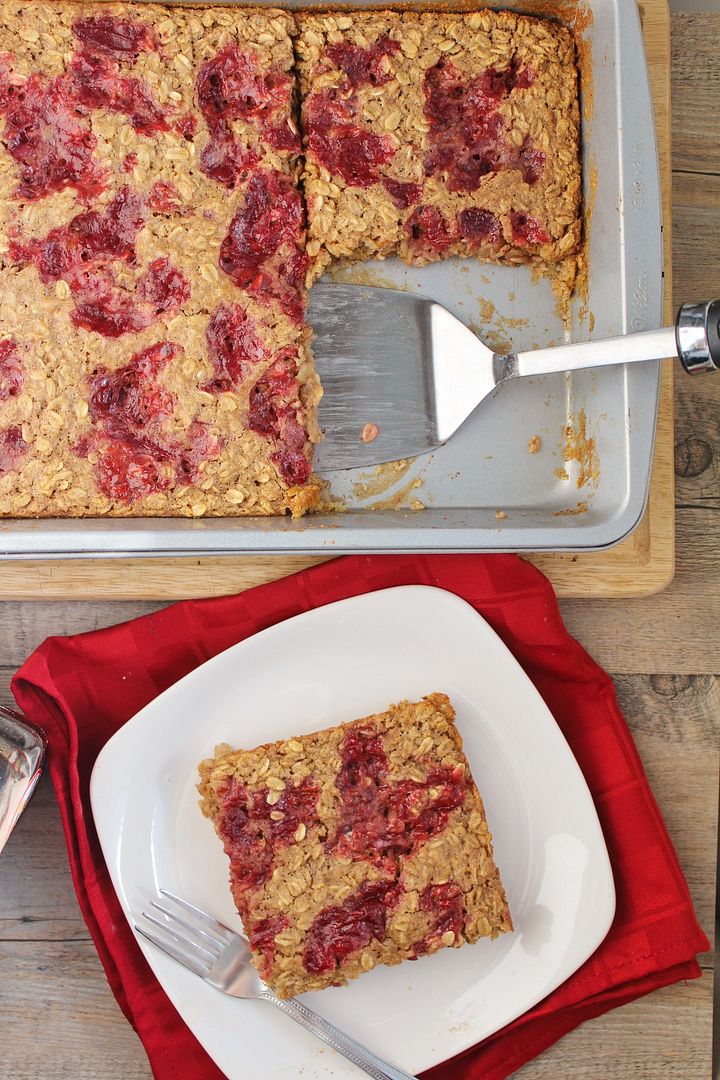
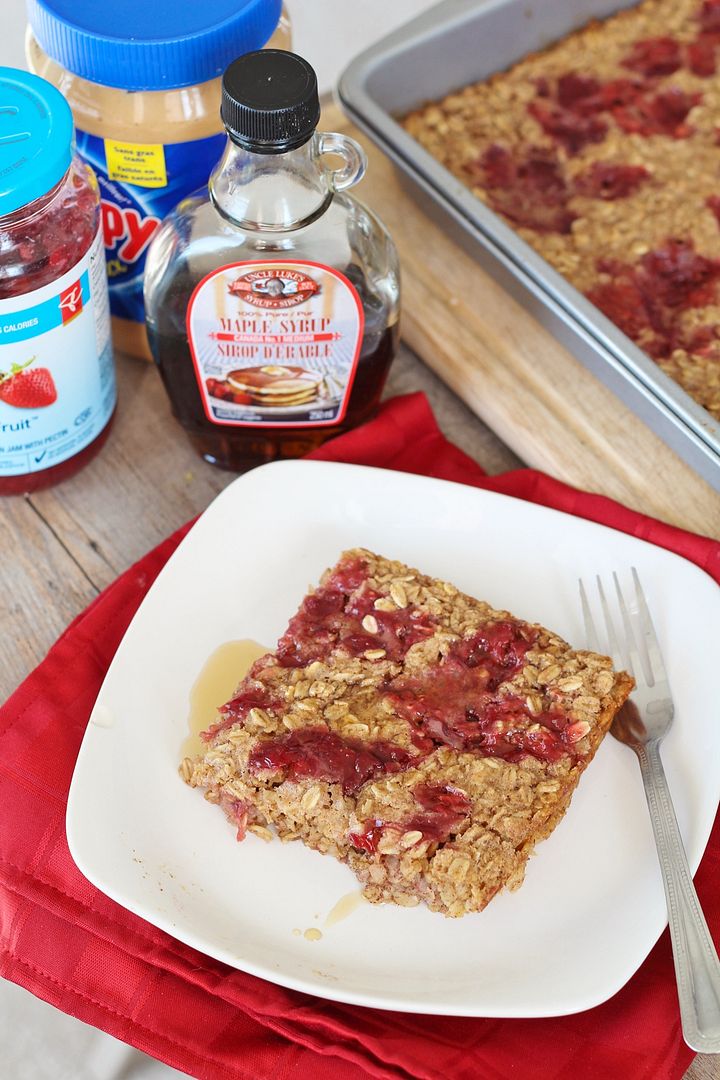
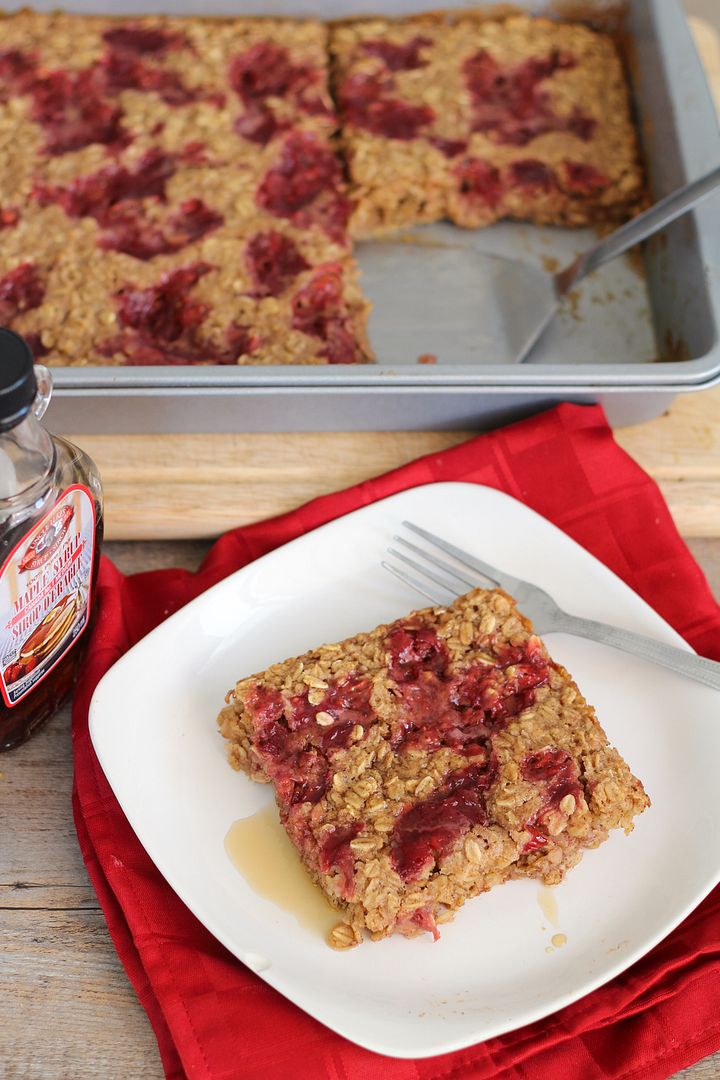
Peanut Butter & Jelly Baked Oatmeal

Peanut Butter & Jelly Baked Oatmeal

As a kid I used to love all the flavours of those little instant oatmeal packets that I'm sure are full of sugar and everything kids love.  Now the only instant oatmeal I'll occasionally buy comes from the organic aisle, but I need to eat at least two packages to sustain me for breakfast and even then I'll still be hungry a couple hours later.  I love making my own oatmeal on the stovetop, especially versions that are full of ooey gooey delicious things like bananas, peanut butter, or pumpkin.  Unfortunately, I don't do this often as I'm usually in too much of a hurry or too lazy in the mornings to make anything that requires effort.

Which is why I've become obsessed with baked oatmeal lately.  Sure it requires some effort to make, but you end up with a lot of leftovers that can be stored as individual servings in the fridge so all you have to do later on is reheat.  Perfect for busy mornings, and also for people who don't like the mushy texture of a bowl of stovetop oatmeal, as the baked version is a lot firmer.

Peanut Butter & Jelly Baked Oatmeal

This peanut butter and jelly version of baked oatmeal is Ryan and my current favourite.  It has a strong peanut butter flavour with the perfect amount of jam to sweeten it up, and it's nice and filling.  It's pretty easy to throw together too - just add your wet ingredients (egg, milk, vanilla, peanut butter) to your dry ingredients (oats, a tiny bit of brown sugar, baking powder, cinnamon, and salt), drop some jam on top, and throw it in the oven.  The hardest part is waiting for it to be ready! 

I've made this with both grape and strawberry jam before and we love it both ways; I always try to choose a low sugar jam as I usually find regular jam way too sweet.  I consider this a reasonably healthy breakfast so I don't mind eating it for several breakfasts in a row or that Ryan now asks for it all the time!

Peanut Butter & Jelly Baked Oatmeal


Peanut Butter and Jelly Baked Oatmeal

Makes 6 servings

Ingredients:

2-1/2 cups large flake rolled oats
2 tablespoons light brown sugar
1-1/2 teaspoon baking powder
1/2 teaspoon salt
1-1/2 teaspoons cinnamon
1 large egg, lightly beaten
2 cups skim milk or almond milk
1 teaspoon vanilla extract
1/2 cup peanut butter - I usually use regular smooth peanut butter but natural would work too if you want slightly less sugar and salt
1/2 to 3/4 cup low-sugar jam – strawberry, grape, or mixed berry all work

Directions:

Preheat oven to 350°F.  Spray a 9x13 baking pan with non-stick cooking spray.

In a large bowl, whisk together the oats, brown sugar, baking powder, salt, and cinnamon.  In a separate bowl, whisk together the egg, milk, vanilla, and peanut butter. You can warm up the peanut butter for about 20-30 seconds in the microwave first to make it more liquid so it will mix in better.  Add the wet ingredients to the dry ingredients and stir just until combined. 

Spread mixture into pan and spread evenly with a spatula.  It will look like oats floating in a lot of liquid – that’s normal; the liquid will all be absorbed during baking.  Drop spoonfuls of jam evenly on top of the oatmeal.  If you like, you can leave the jam in little pockets, or take a butter knife and try to swirl the jam around to cover more surface area (that’s what I like to do).  Bake in preheated oven for 35-40 minutes, until edges are golden brown and middle is cooked through.  Divide into at least 6 servings and serve warm, with maple syrup if desired.

Leftovers can be stored covered in the fridge for a few days and reheated.

March 04, 2014

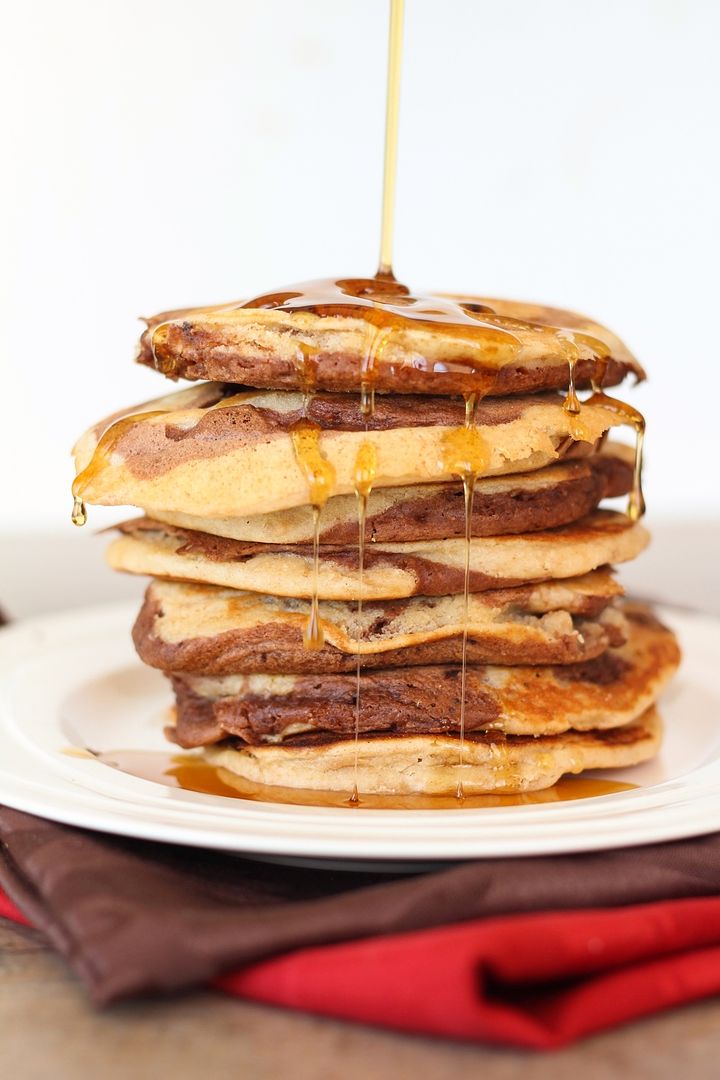
Chocolate Peanut Butter Swirl Pancakes

Chocolate Peanut Butter Swirl Pancakes

Today  is one of my favourite days of the year, Pancake Tuesday!  Better known as Fat Tuesday, it's a day traditionally meant for eating richer, fatty foods before Lent, which somehow led to eating pancakes (though I don't really agree that they're a rich or fatty food!)  To my family and I, it just means it's a day to eat pancakes for dinner!

Chocolate Peanut Butter Swirl Pancakes

As a kid I always loved the traditional blueberry and chocolate chip pancakes for pancake dinner, but now I love using the day to try new flavours of pancakes I've never had before.  Last year I made these delicious earl grey vanilla tea pancakes with honey tea syrup, and the year before that was these caramel latte pancakes, which I also loved.

Chocolate Peanut Butter Swirl Pancakes

But it's getting harder and harder to think of pancake flavours that haven't been done before, so this year I decided to combine two flavours into one!  And what better combination than the best of friends, chocolate and peanut butter.

Chocolate Peanut Butter Swirl Pancakes

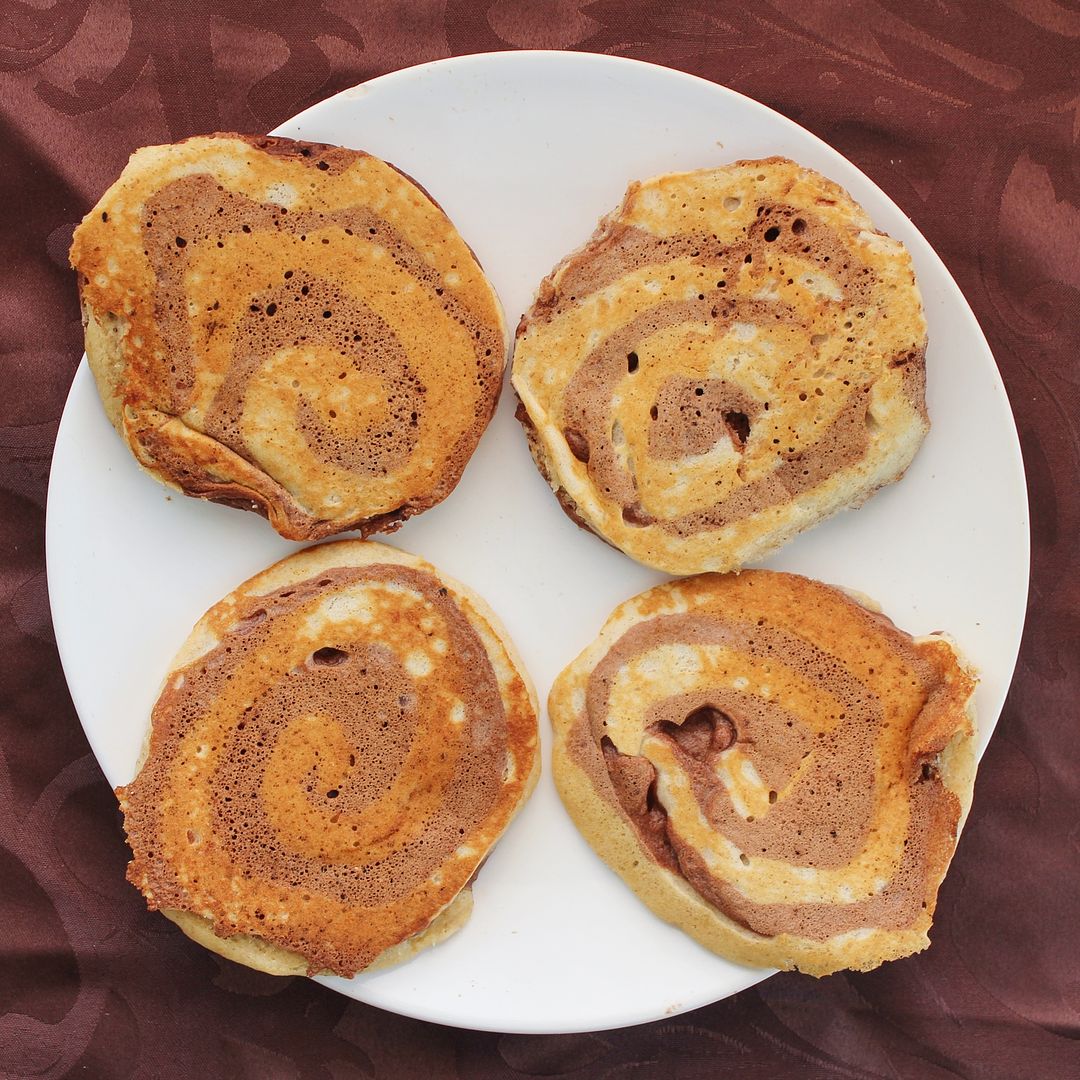
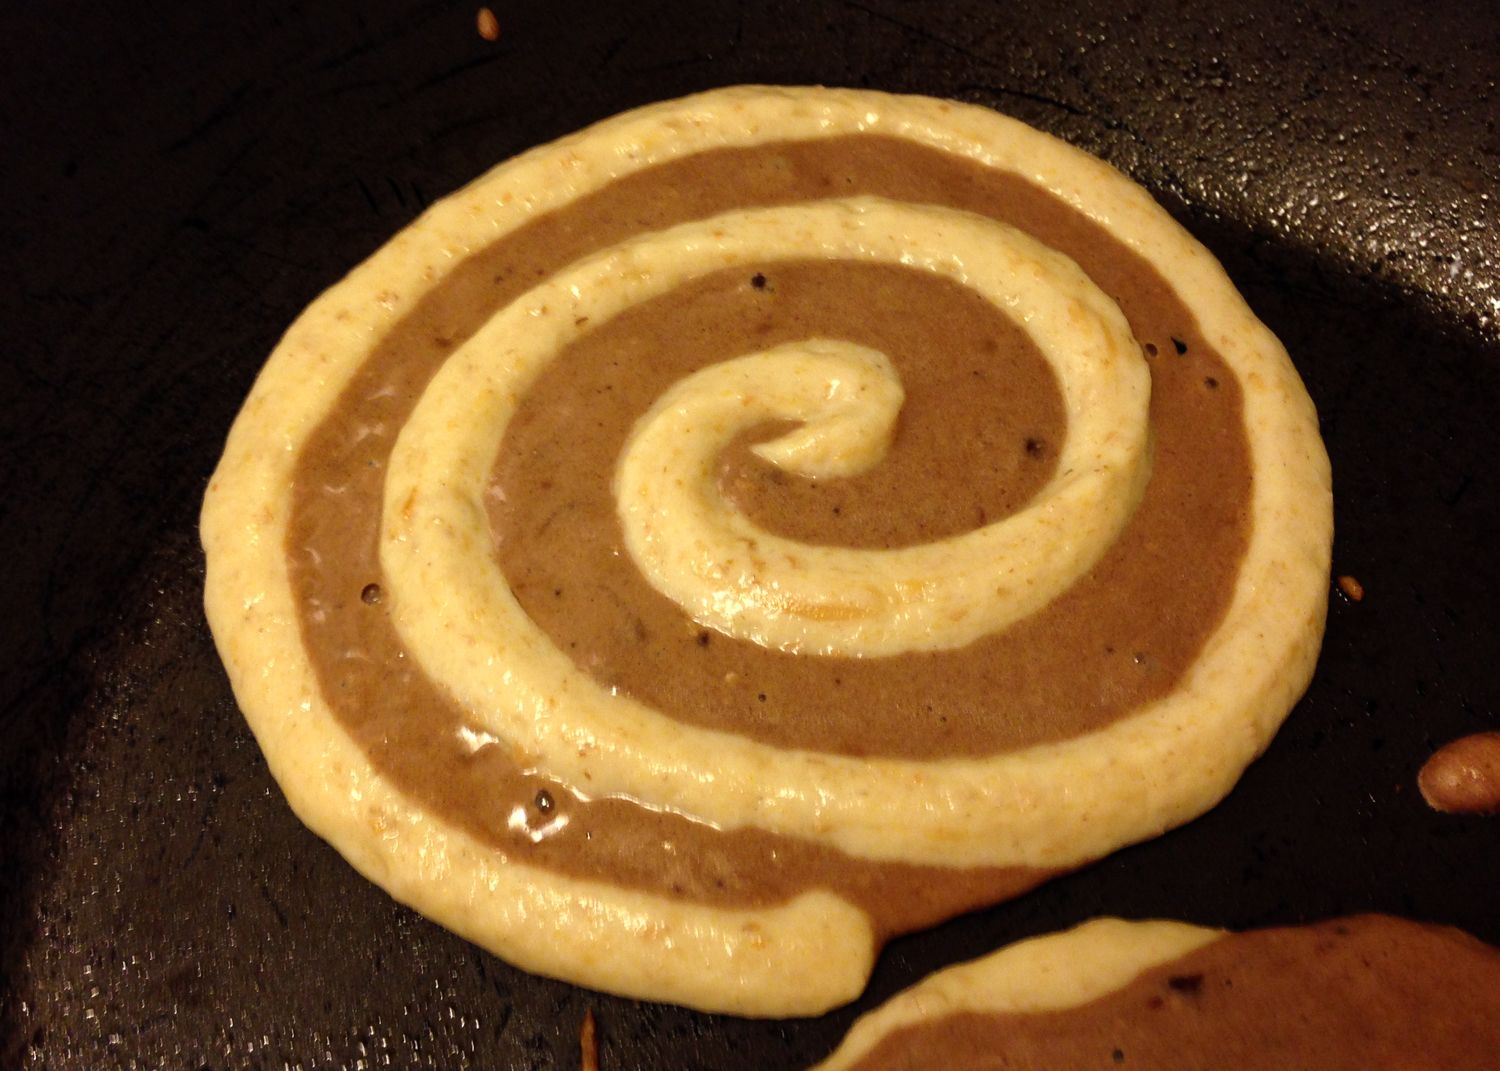
These really are no harder than regular pancakes because the chocolate and peanut butter batters are basically the same, the only difference being the addition of cocoa for the chocolate batter versus peanut butter for the peanut butter batter (duh, I know).  Because the peanut butter batter is thicker, you'll pour the chocolate into your pan first in a pancake shape, then swirl the peanut butter batter on top just using a simple ziplock bag.

The browning of the pancakes hides the swirl a little, but I still love the contrast in colours you see, and the balance of peanut butter and chocolate in the taste is absolutely perfect - I love that you can taste both equally!

Chocolate Peanut Butter Swirl Pancakes

These may just be my new favourite pancakes, and with a certain peanut butter loving fiance's birthday coming up this weekend, I think I have the perfect excuse to make them again soon!

Chocolate Peanut Butter Swirl Pancakes

Chocolate Peanut Butter Swirl Pancakes

Recipe by Once Upon a Cutting Board but peanut butter pancake batter adapted from Food.com

Makes around 10 pancakes

Ingredients:
For the Chocolate Batter:
1/4 cup all-purpose flour
1/4 cup whole wheat flour*
1 teaspoon baking powder
1/4 teaspoon salt
1 tablespoon sugar
1 tablespoon cocoa powder
1/2 large egg, lightly beaten
1/2 cup milk (I used almond milk)
1 tablespoon vegetable oil
1/2 teaspoon vanilla extract

For the Peanut Butter Batter:
1/4 cup all-purpose flour
1/4 cup whole wheat flour*
1 teaspoon baking powder
1/4 teaspoon salt
1 tablespoon sugar
1/2 large egg, lightly beaten
1/2 cup milk (I used almond milk)
1 tablespoon vegetable oil
1/2 teaspoon vanilla extract
1/4 cup smooth peanut butter

*note: feel free to replace the whole wheat flour with all-purpose flour if you don’t have whole wheat

Directions:

Prepare the chocolate and peanut butter batters separately, but notice that the batters contain almost identical ingredients (the chocolate batter has cocoa and the peanut butter batter has peanut butter), so you can prepare them side by side, making it easy. Add all your dry ingredients to two separate bowls for the separate batters and whisk the mixture together, then add the wet ingredients to each bowl and gently whisk or fold just until the wet and dry ingredients are combined. Note that for the egg, you can lightly beat one egg then divide it in two for the two batters. Transfer the peanut butter batter to a squeeze bottle or a Ziplock bag with a small corner cut off.

Heat two large non-stick skillets over low-medium heat and spray with non-stick cooking spray if needed. To make the pancakes, you’ll pour the chocolate batter into a pancake then swirl the peanut butter on top because it’s a thicker batter. Pour chocolate batter by about 1/4 cup full onto the pan, then immediately swirl peanut butter batter on top. It will look something like this:

chocolate peanut butter swirl pancakes

Cook for a couple minutes until bubbles form on top, then cook for one to two minutes on the other side, until cooked through. If you let the pancakes brown too much, it will hide the swirl, so you want to try to cook these over low heat, which may require a bit more time than usual. Repeat with remaining pancake batter; you will end up with more peanut butter batter leftover so just use that to make a few plain peanut butter pancakes. You can serve those in the middle of your stacks to help balance out the chocolate flavour.

Serve pancakes warm, with pure maple syrup if desired. 

February 11, 2014

Valentine's Mug Hugger Espresso Shortbread Cookies

Valentine's Mug Hugger Espresso & Chocolate Shortbread Cookies

I just returned from a trip to Seattle (which I hope to share some details of soon, as there was so much amazing food and beer there!), which means I didn't have much time to think about Valentine's Day until I returned yesterday and got straight to work making a heart-shaped recipe!

I know a lot of people aren't fans of the holiday and are sick of seeing heart-shaped things, but I think they're adorable, and whether you share heart cookies with your significant other, your family, friends, coworkers, or even just treat yourself, I think that making time for love, sharing, and cookies is a good thing!

Valentine's Mug Hugger Espresso & Chocolate Shortbread Cookies

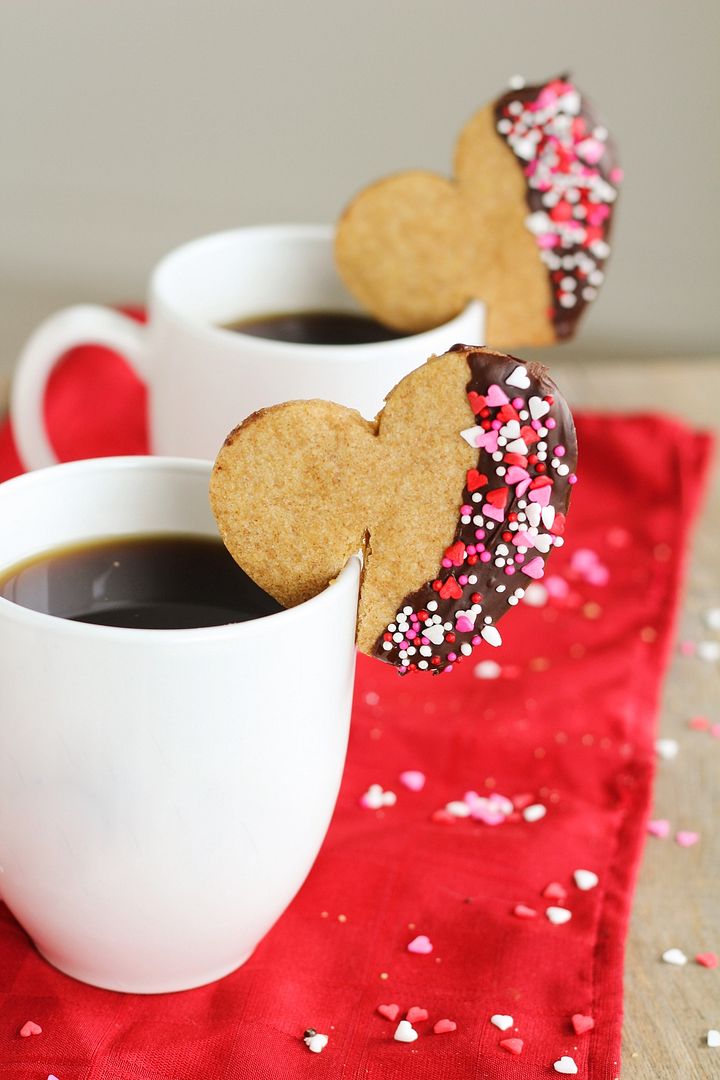
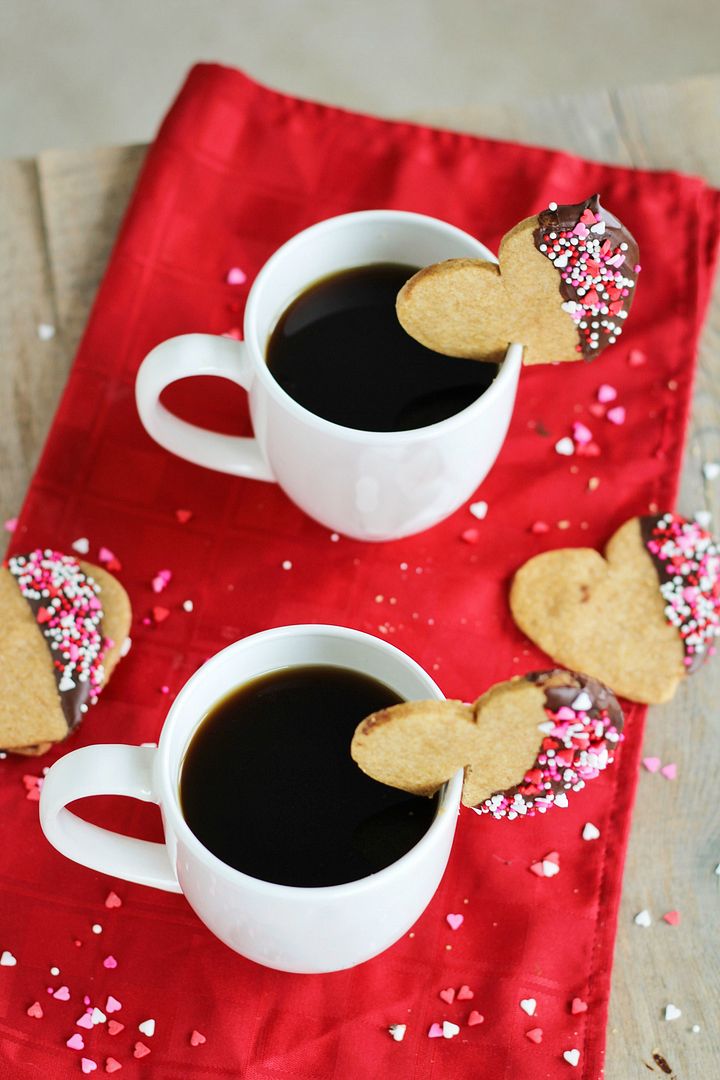
I originally got the idea for "mug hugger" cookies from Red Path Sugar, and loved that you can hang a cookie on your mug!  And because my mug is usually full of (strong, black) coffee, I decided to make espresso shortbread cookies instead of sugar cookies (also because I love shortbread).  And because it's almost Valentine's Day, I had to dip them in chocolate and cover them in red and pink sprinkles, of course!  The chocolate actually helps add some sweetness to an otherwise not-so-sweet cookie, so don't skip that step!  You can skip the sprinkles if you really want, but why would you want to?!

Valentine's Mug Hugger Espresso & Chocolate Shortbread Cookies

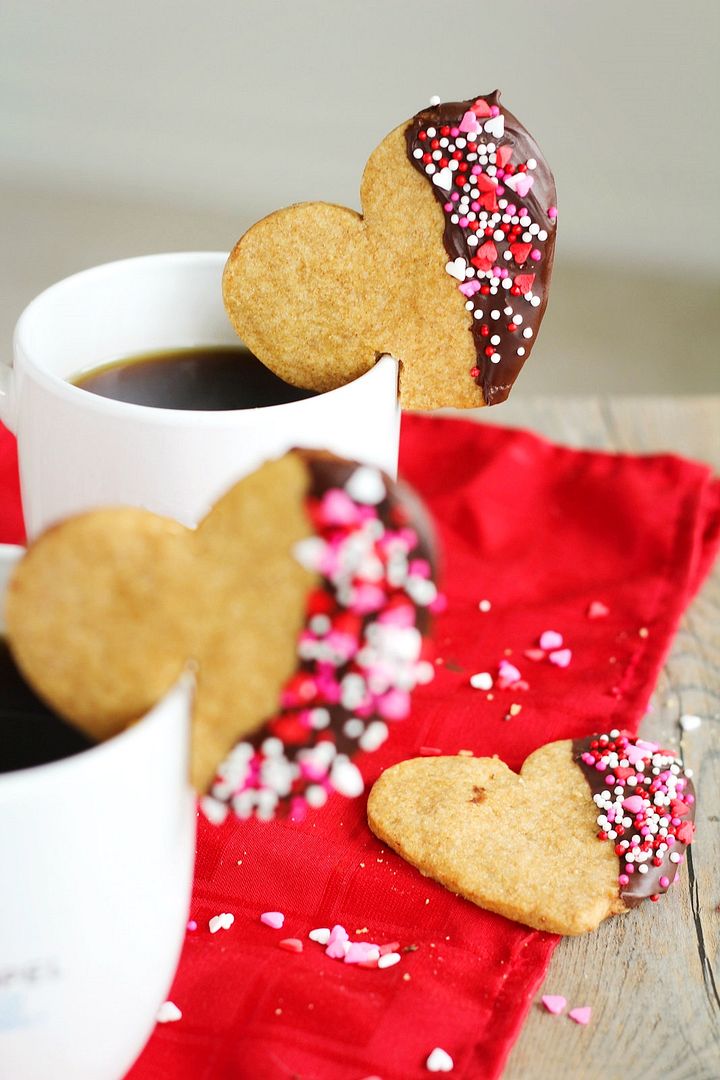
In order to make these "mug huggers", you just have to cut a little slot in the cookie, preferably as soon as it comes out of the oven while it's still soft, then hook it onto your mug!  To be perfectly honest, these cookies might not stay on your mug too long; mine tended to fall off every few minutes as I was taking photos, which often resulted in broken cookies.  You can easily forget the mug hugger part and just make these as regular cookies if you want, which will be just as good, but if you serve someone their morning (or afternoon) coffee with one of these guys attached, you're sure to brighten their day!

Valentine's Mug Hugger Espresso & Chocolate Shortbread Cookies


Heart-Shaped Espresso Shortbread Cookies

Shortbread recipe adapted from Fine Cooking

I got around 1 dozen cookies with a 3” heart-shaped cookie cutter; I’d recommend using a 2” cutter instead, which would result in around 2 dozen cookies

Ingredients:

1/2 cup unsalted butter, at room temperature
1/4 cup sugar
1 cup all-purpose flour
1 tablespoon instant espresso powder
1/4 teaspoon salt
1/2 teaspoon vanilla extract

~1/3 cup semisweet chocolate chips
Red/pink sprinkles, if desired

Directions:

Cream butter and sugar in the bowl of a stand mixer (using paddle attachment) on medium speed until combined, about 1-2 minutes.  In a separate bowl, whisk together the flour, espresso powder, and salt.  With the mixer on low, add the dry ingredients on low speed, scraping the bowl frequently, until just incorporated.  Add the vanilla and mix until just incorporated again, and the dough has just started to come together.  Don’t overmix.

On a lightly floured surface, roll the dough to about 1/4 inch thick.  Use a heart shaped cookie cutter to cut out shapes, rerolling the dough until it is all used up.  I used about a 3” cookie cutter which is a bit big for a mug; I’d recommend using a smaller cookie cutter if possible.  Arrange the cookies carefully on a parchment paper lined baking sheet and refrigerate the baking sheet until dough is chilled, at least 30 minutes.  Meanwhile, preheat the oven to 325°F.

Bake the cookies in preheated oven for about 18-20 minutes, until golden on bottom.  Remove from oven, and if you want to make these "mug hugger" cookies, now is the point where you would cut little slits into the cookies so they can hang on a mug.  If you do this before the cookies bake, they will puff up over the cut-out, and if you wait until they have cooled, the cookies will break when you try to cut them.  While they are still soft from the oven, use a sharp knife to cut a slit in the edge of a cookie just long and wide enough for it to fit over a mug (see pictures for an idea).  Let cool on baking sheet for about 5 minutes, then transfer to a wire rack to cool completely.

Melt chocolate chips in a double boiler or a small heatproof bowl set over a pan of simmering water.  Transfer to a small container and dip the edges of each cookie in the chocolate.  Try to only dip the top half of the cookies and keep the chocolate layer thin so it won't end up overpowering the cookie.  Immediately sprinkle the chocolate covered portion with sprinkles, if using.  Set cookies back on parchment paper until chocolate is set, about 2 hours.  Then keep covered in a container.

*Note: I did try to cut some cookies into mug huggers after they had cooled; many broke, but if I cut only a tiny bit at a time and was very gentle, I could cut out a slot just big enough so the cookie could fit on a mug.  In the pictures, the cookie in front was cut out right from the oven and the cookie in behind was cut after it had cooled.

December 30, 2013

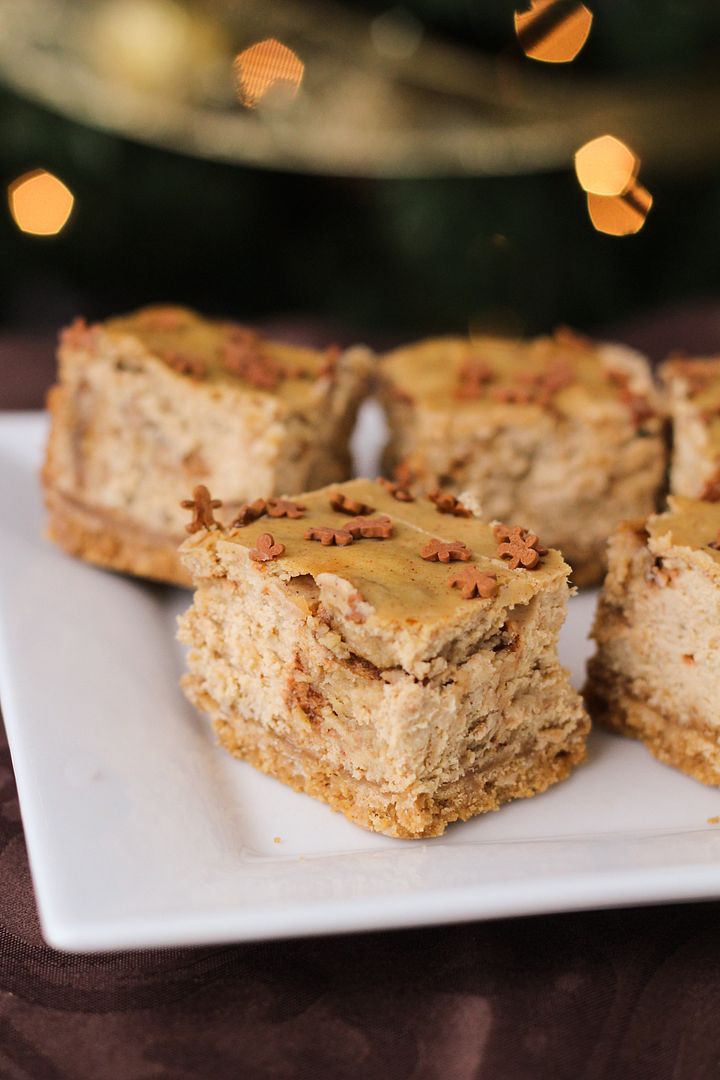
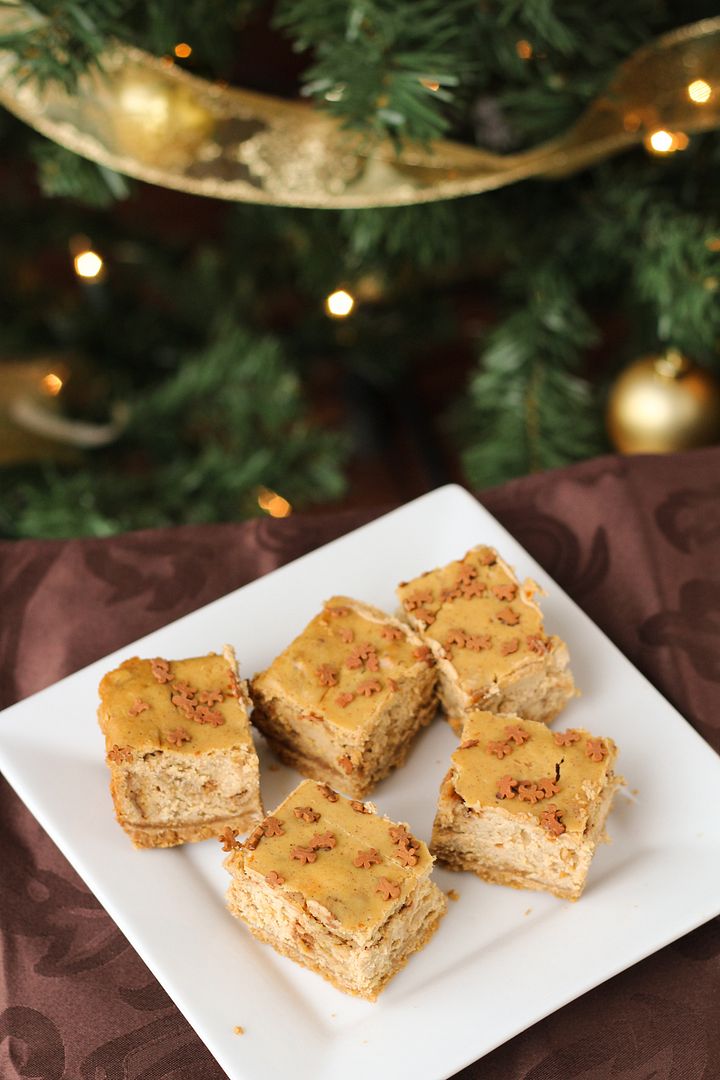
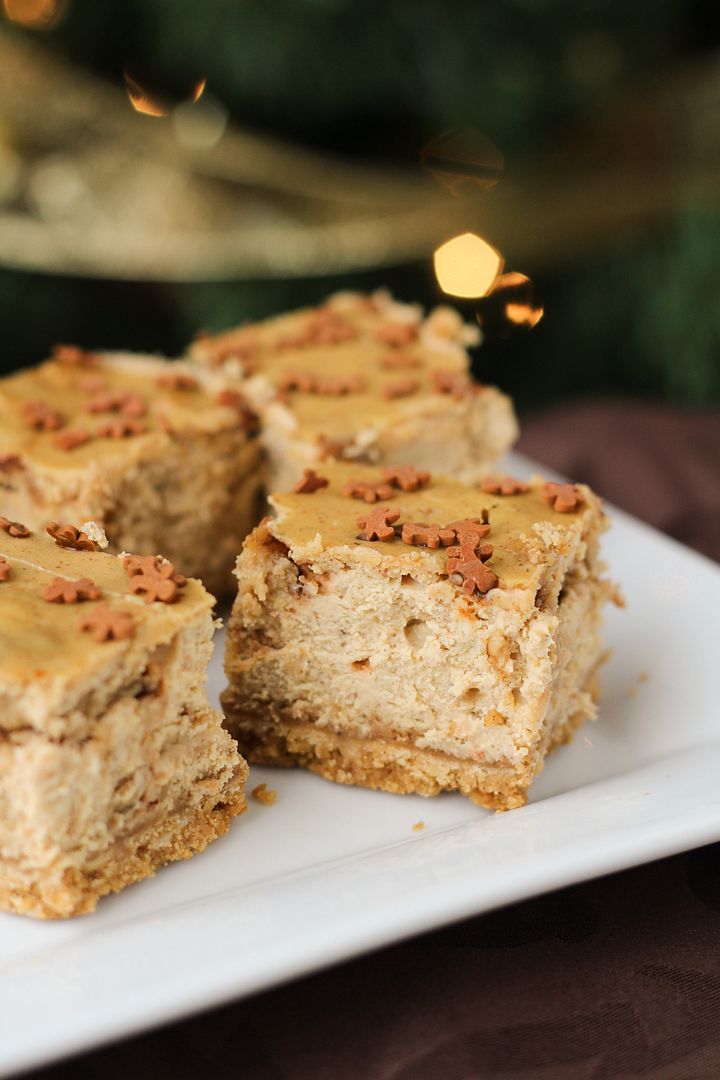
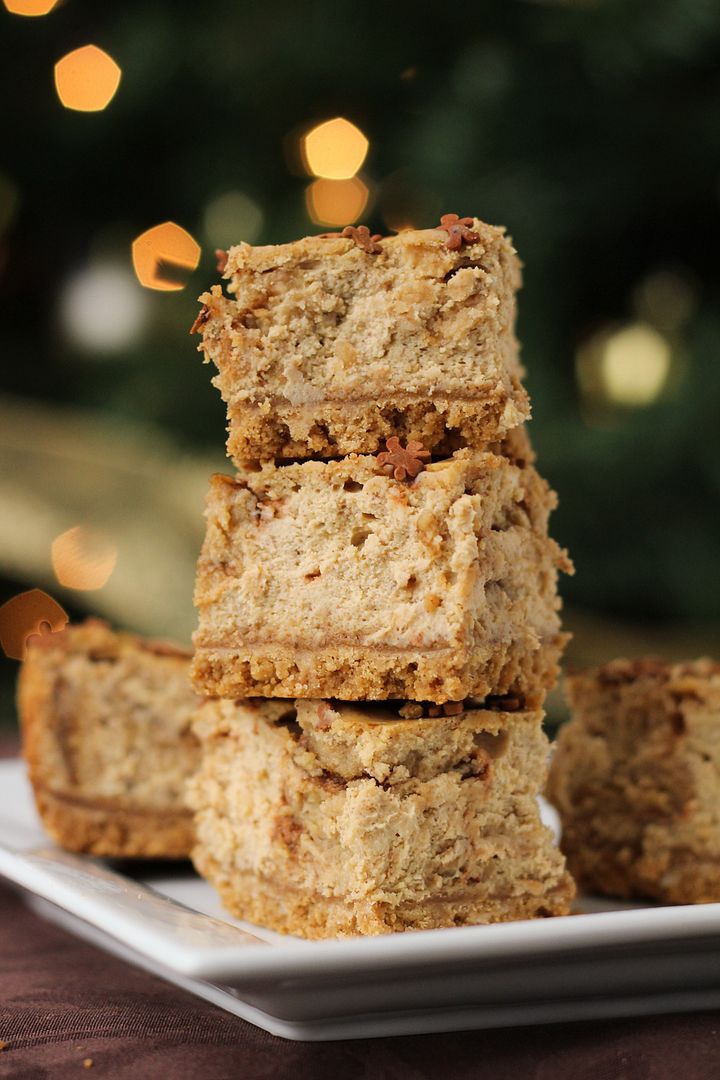
Gingerbread Oreo Cheesecake Bars

Gingerbread Oreo Cheesecake Bars

I hope you all had a wonderful Christmas and happy holidays!

I've been having a very restful and quiet holiday break so far, except for the fact that I came down with the flu a couple of days before Christmas, and though the fever and aches are now gone, I've been left with a nagging cough that won't seem to go away.  The good news is that it has forced me to take it easy so I've been doing a lot of relaxing!  Being sick put a little bit of a damper on Christmas but I still had a fantastic day with my family, who spoiled me as usual, and I got out of any cooking duties so I just got to enjoy all the fabulous food made by everyone else!

Gingerbread Oreo Cheesecake Bars

Another good thing about being sick is that I haven't overindulged on food and drink like I usually do this time of year, mostly sticking to a ton of water and tea in the evenings.  The one thing I probably enjoyed more than my fair share of though was these delicious cheesecake bars that I luckily made a few days before I got sick.

These were inspired by the limited edition gingerbread flavoured Oreos that I couldn't resist picking up this year.  I immediately decided to use them in cheesecake bars similar to the candy cane ones I made last year, but with molasses and gingerbread spices instead of candy canes and peppermint extract for flavouring.

Gingerbread Oreo Cheesecake Bars

I wasn't originally going to share these because I ran out of time before Christmas to post them, but I got so many compliments and enjoyed them so much that I thought I should share them now anyways.  I'm sure most of you are already past the gingerbread stage and perhaps not wanting to go anywhere near dessert right now, so if that's the case just be sure to save this recipe for next year!  Or maybe you can find some gingerbread Oreos on clearance right now, in which case you should make a double batch of these!

Gingerbread Oreo Cheesecake Bars

Gingerbread Oreo Cheesecake Bars


Makes one 8x8 pan, about 16-20 bars

Ingredients:

For the Crust:
23 Gingerbread Oreos
1/2 teaspoon cinnamon
2 tablespoons unsalted butter, melted

For the Filling:
16 oz (2 bricks) cream cheese, softened
1/3 cup sugar
1 large egg + 1 egg yolk, lightly beaten
1/4 cup + 2 tablespoons sour cream, at room temperature
1 teaspoon vanilla extract
2 tablespoons molasses
1 teaspoon cinnamon
1/2 teaspoon ground ginger
1/4 teaspoon nutmeg
1/4 teaspoon cloves
12 Gingerbread Oreos, roughly chopped

*Note: You will need to buy two boxes of gingerbread Oreos to make this recipe, though you won't use the entire two boxes

Directions

Preheat oven to 325°F.  Line an 8x8-inch baking dish with aluminum foil, leaving an overhang around the edges to easily lift the bars out of the pan later.   Lightly spray the foil with non-stick cooking spray.

To make the crust, finely crush the Oreos in a food processor.  Add the cinnamon and melted butter and pulse until cookie crumbs are moistened.  Pour mixture into the prepared pan and press crumbs into an even layer over the bottom of the pan.  Bake in preheated oven for 10 minutes, then set aside.  Leave the oven on.

To make the filling, beat the cream cheese in the bowl of an electric mixer on medium-high until smooth, about 2 minutes.  Mix in the sugar until well combined. Add egg and egg yolk one at a time, mixing just until each is combined. Mix in the sour cream, vanilla extract, and molasses until just combined.  Mix in the spices until just combined.  Stir in the chopped Oreos.

Pour the cheesecake batter over the baked crust, smoothing the top with a spatula.  Bake for 40-45 minutes, until the cheesecake is set around the edges but slightly jiggles in the middle.  Sprinkle gingerbread quins on top for decoration, if desired.  Transfer to a wire rack to cool at room temperature for about one to two hours, then refrigerate until well chilled, at least 3 hours (I chilled mine overnight).

To cut the bars, pull the entire cheesecake out of the pan by lifting the foil edges, then peel away foil and slice into bars.  Keep refrigerated until ready to serve.

December 24, 2013

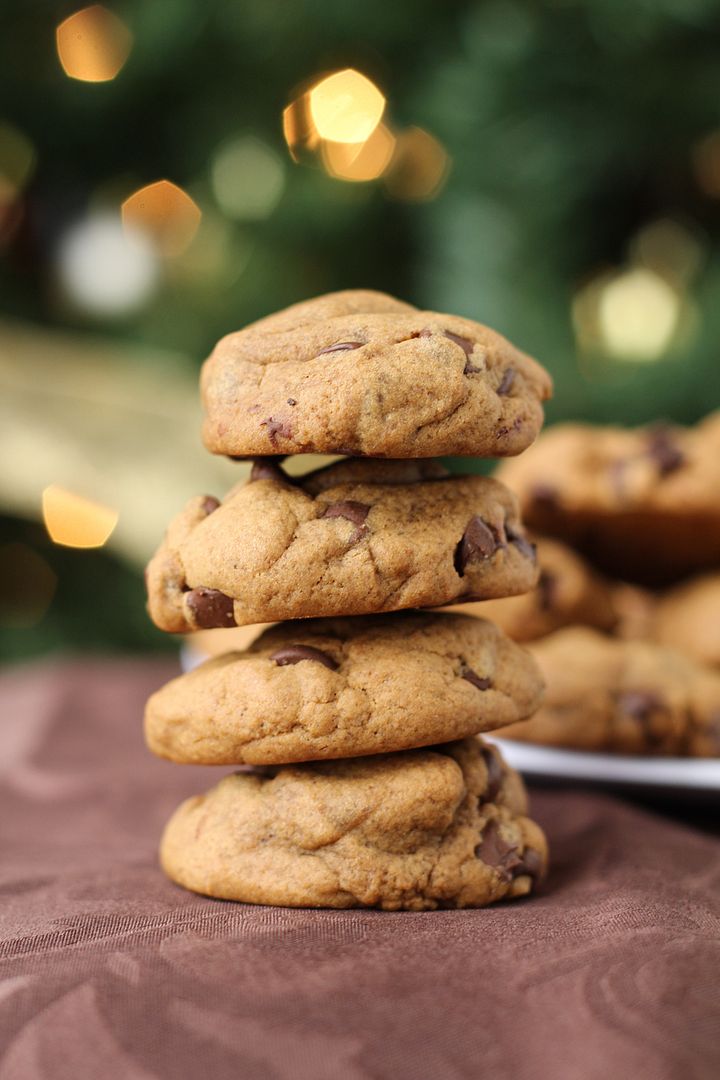
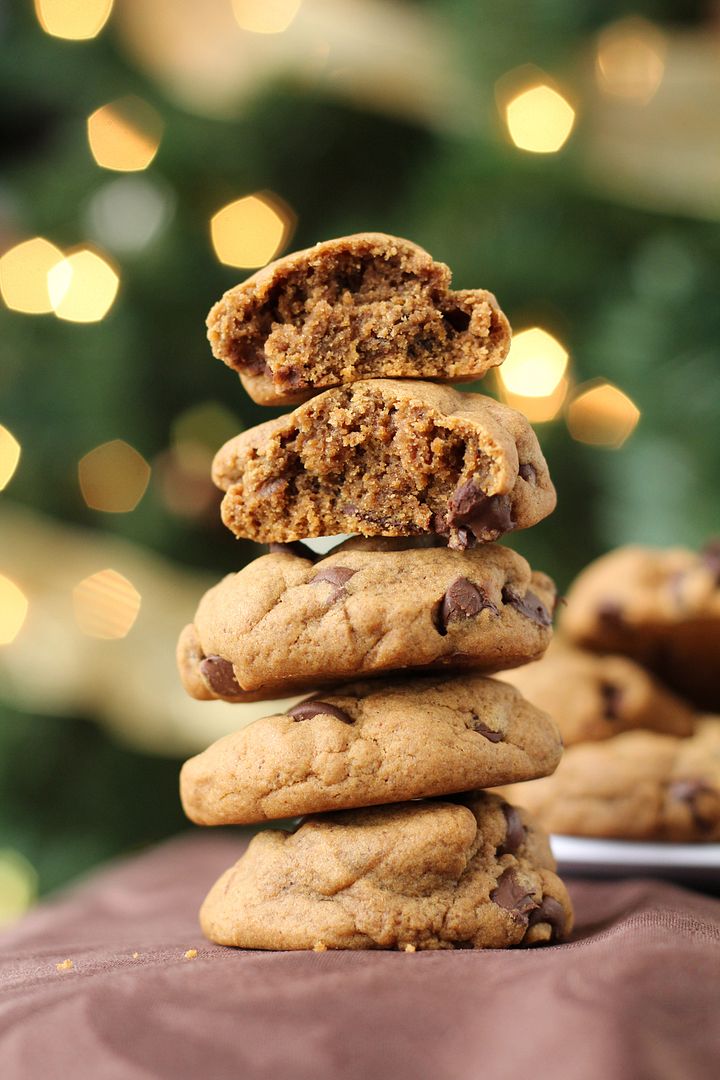
Gingerbread Chocolate Chip Cookies

Gingerbread Chocolate Chip Cookies

I'll have to make this post short as I'm not feeling well but still have to do all my Christmas wrapping and last minute preparations before the big day tomorrow (which hopefully I'll be feeling better for)!  I just wanted to squeeze in one last Christmas recipe though as these cookies were probably my favourite thing I've made this season!

Gingerbread Chocolate Chip Cookies

These cookies are inspired by a recipe I saw on Baked By Rachel, which I then went and changed almost everything about so I'm sure they're nothing like the original, but I absolutely loved my own version!  They're puffy but chewy, with a nice strong gingerbread flavour and just the right amount of sweetness from the chocolate chips.  I think these will be a new holiday favourite of mine!

Gingerbread Chocolate Chip Cookies

I'd also like to take this time to wish everyone the very best of the holiday season, with lots of rest and relaxation, cheer and good times spent with family and friends, and of course, delicious food!

Gingerbread Chocolate Chip Cookies

Gingerbread Chocolate Chip Cookies

Inspired by Baked By Rachel

Makes about 2 dozen cookies

Ingredients:

1/2 cup + 2 tablespoons unsalted butter, softened
1/4 cup sugar
1/4 cup dark brown sugar
1 large egg
1/4 cup molasses
1 teaspoon vanilla extract
2 cups all-purpose flour
1/2 teaspoon salt
1 teaspoon cinnamon
1/2 teaspoon nutmeg
1-1/2 teaspoons ground ginger
1/2 teaspoon cloves
1 tablespoon cocoa powder
3/4 teaspoon baking powder
1/2 teaspoon baking soda
3/4 cup semi-sweet chocolate chips

Directions:

In a large bowl, use a hand mixer or electric mixer to cream the butter and sugars until light and fluffy, about 2-3 minutes.  Add the egg and mix until combined.  Add molasses and vanilla and mix until combined.

In a separate bowl, whisk together the flour, salt, cinnamon, nutmeg, ginger, cloves, cocoa powder, baking powder, and baking soda.  Add the dry ingredients to the wet ingredients in 3-4 additions, mixing on low speed until each addition is just combined.  Stir in chocolate chips.  Cover dough and refrigerate for several hours until chilled through – this is important if you want the cookies to stay thick and puffy.  I chilled mine for about 3 hours.

Preheat oven to 350°F.  Scoop dough by about 1.5 tablespoons full and drop onto a parchment-lined baking sheet about 1 inch apart.  Because the dough will still be quite firm, I pressed the cookies slightly at the top to flatten them slightly.  Bake for 11-12 minutes.  Allow to rest on cookie sheet for 1-3 minutes, then transfer to a wire cooling rack to cool completely.  Store covered in a container.

December 17, 2013

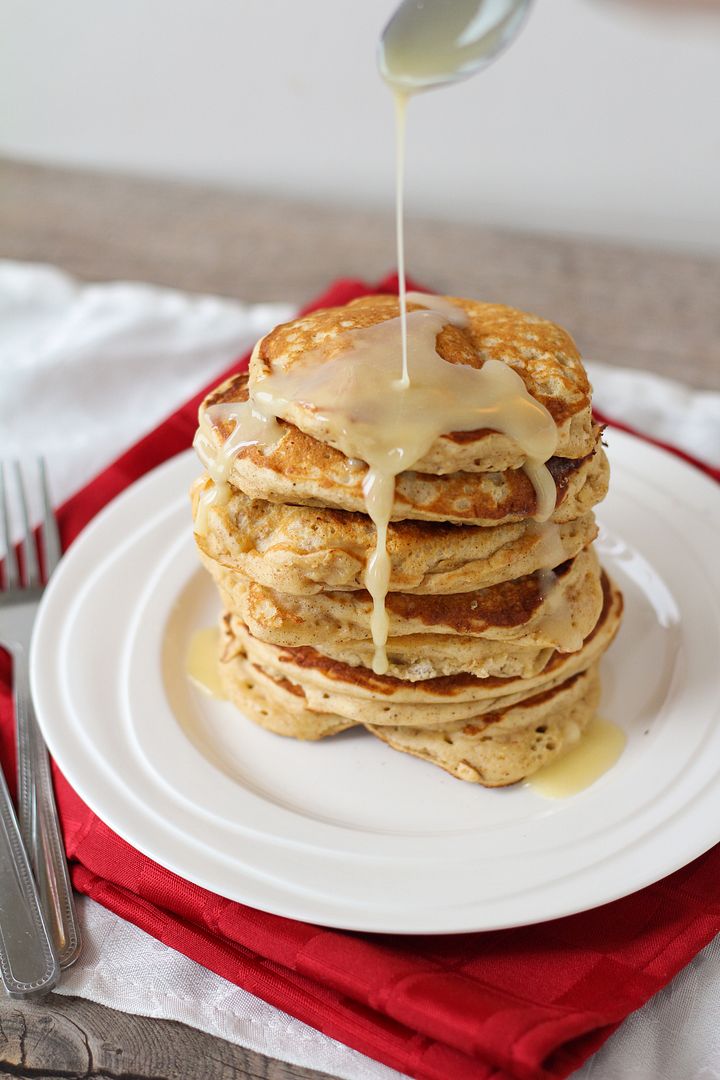
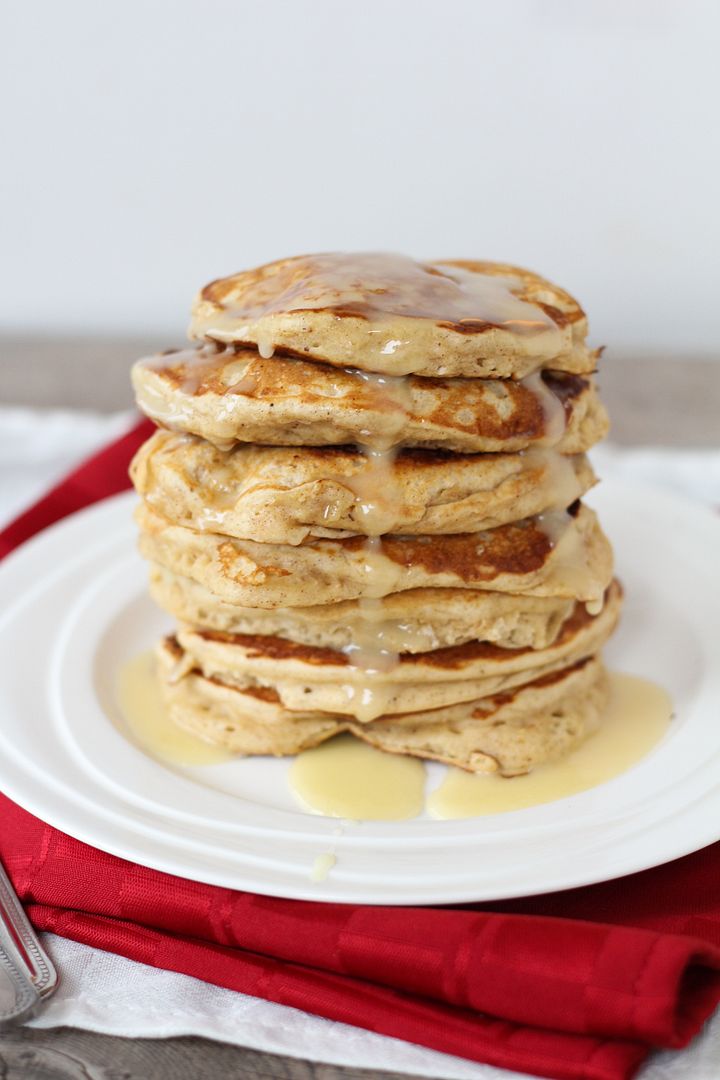
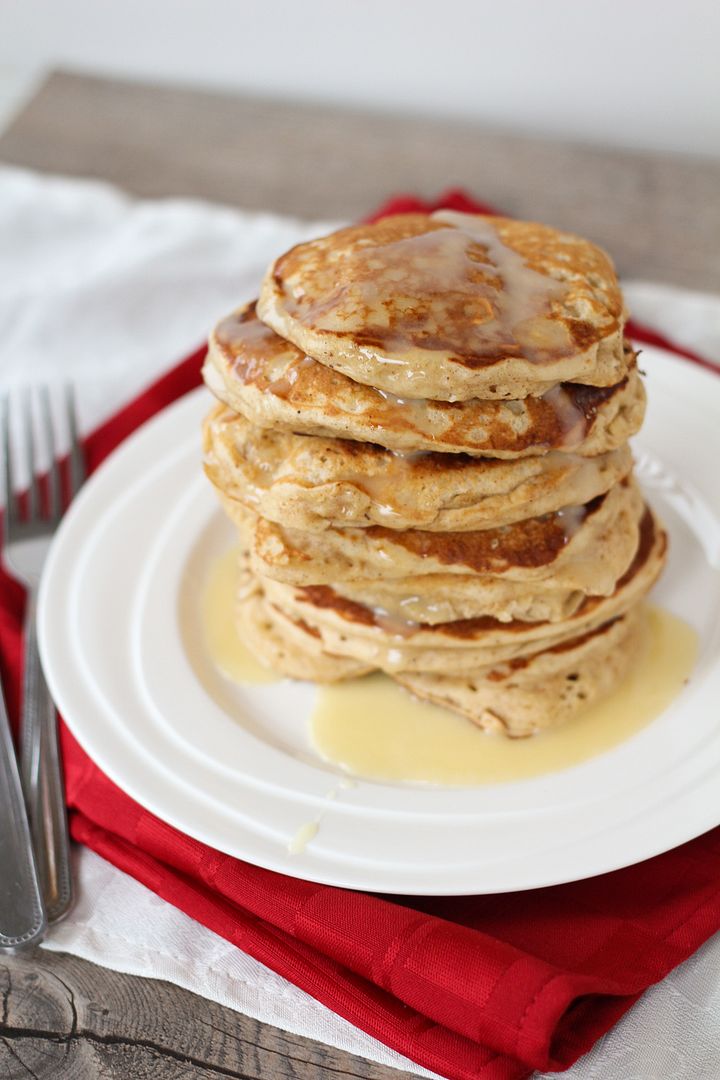
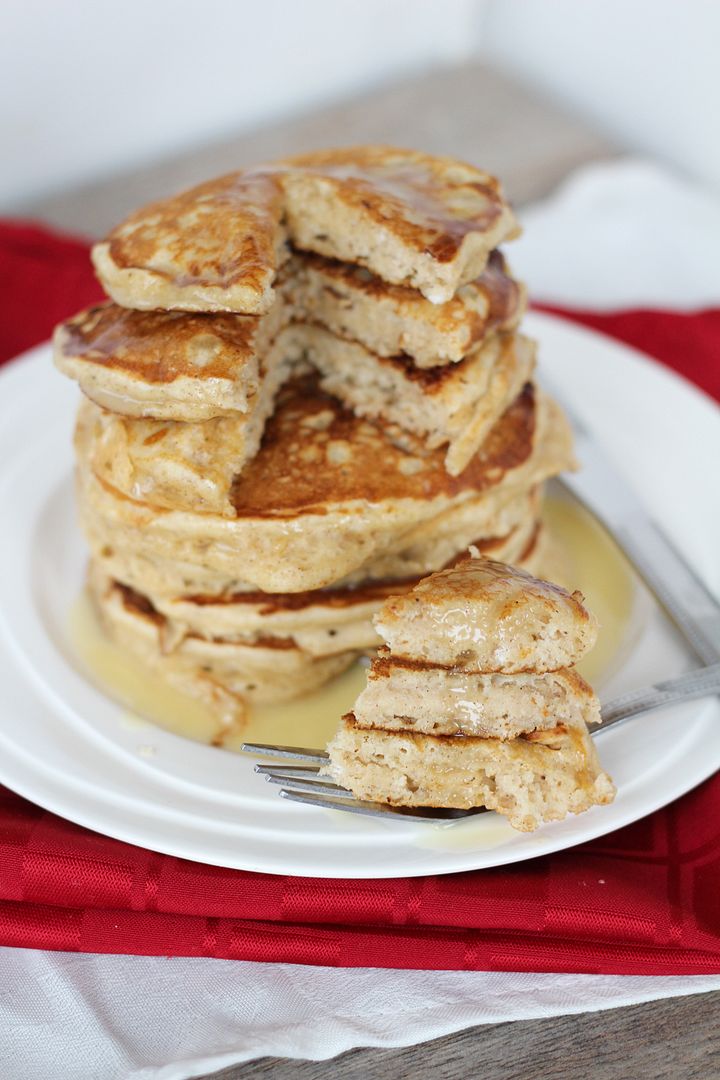
Eggnog Pancakes with Eggnog Glaze

Eggnog Pancakes with Eggnog Glaze

I can't believe Christmas is basically a week away and I haven't posted a single festive recipe on here yet.  I've been more focused on trying to get all my Christmas shopping done lately as I've had an extra hard time coming up with gift ideas this year and as it's looking now, I likely won't finish shopping until Christmas Eve.  Every year I tell myself I'm going to be more organized with everything Christmas-related but every year I end up with a TON of stuff to do last minute.  It's kind of part of the holiday rush and excitement though, and at least I usually get good deals by leaving my shopping so late!

Eggnog Pancakes with Eggnog Glaze

I do regret not being more organized with holiday recipes though.  I had a lot of ideas floating around my head in November but so far I've mainly just been consuming treats that involve eggnog and Kahlua or Baileys, which you don't really need a recipe for!  Other than those soft molasses cookies I told you about earlier, these pancakes are the only other festive thing I've made this year.  And while I'm disappointed I haven't been doing more cooking/baking, I'm pretty happy that the one thing I made turned out so well!

Eggnog Pancakes with Eggnog Glaze

These pancakes are light and fluffy with eggnog in the batter and a pinch of spices to give them a subtle eggnog flavour, but the glaze is what really kicks up the eggnog flavour so you're certain you're eating a festive (and slightly decadent, but not over-the-top) breakfast and not just regular pancakes.  So don't skip it!  

I already can't wait to make these again for breakfast this weekend, and to hopefully squeeze in some holiday baking before then!

Eggnog Pancakes with Eggnog Glaze

Eggnog Pancakes with Eggnog Glaze

Recipe drew inspiration from several similar recipes, including Forkful of Comfort, Savory Simple, and SkinnyTaste

Serves about 4-6 (makes 16-18 pancakes)

Ingredients:

For the Pancakes:
2 cups all-purpose flour
4 teaspoons baking powder
1/2 teaspoon salt
1/2 teaspoon nutmeg
1 teaspoon cinnamon
2 large eggs, lightly beaten
2 cups eggnog (I used low-fat eggnog)
2 tablespoons vegetable or canola oil
2 teaspoons vanilla extract (or substitute half rum extract if desired)

For the Glaze:*
1/2 cup icing sugar
2 tablespoons eggnog
1 tablespoon maple syrup
1/2 teaspoon rum extract

Directions:

First, prepare the pancake batter.  Whisk all the dry ingredients (flour, baking powder, salt, nutmeg, and cinnamon) in a large bowl.  In a separate medium bowl, whisk together the wet ingredients (eggs, eggnog, oil, and vanilla extract).  Add the wet ingredients to the dry ingredients and fold together with a spatula until just combined (batter will be lumpy).

Heat a large non-stick skillet or griddle to medium heat and spray with non-stick cooking spray if necessary.  Pour pancake batter by 1/4 cup-fulls onto the pan.  Let cook until bubbles begin to form and pancake is browned on one side, a couple of minutes, then flip and cook until both sides are evenly browned.

While cooking pancakes, prepare the glaze by whisking all ingredients together in a small bowl.

Serve pancakes warm with a small amount of eggnog glaze on top.
*Note: The amount of glaze should be just enough for a small amount for each serving.  The glaze is quite sweet so you shouldn’t want too much, but feel free to double the amounts for the glaze if you like.

Ingredient Index

Related Posts Plugin for WordPress, Blogger...