June 29, 2012

Mini Strawberry Vanilla Cupcakes for Canada Day

Mini Strawberry Vanilla Cupcakes for Canada Day

As I promised in my last post, I have another Canada Day recipe to share with you guys before the big day this long weekend (and to my American friends, don't stop reading - this recipe is still really good even without the Canada-themed frosting)!

I love making mini versions of baked goods, especially for parties where other desserts will be present, because they're a lot easier to eat and let people save room in their stomachs to try other treats!  These mini strawberry vanilla cupcakes are a nice little bite-sized treat that won't leave you feeling stuffed and can serve a lot of people, so they're perfect for bringing to a Canada Day party!

Mini Strawberry Vanilla Cupcakes for Canada Day

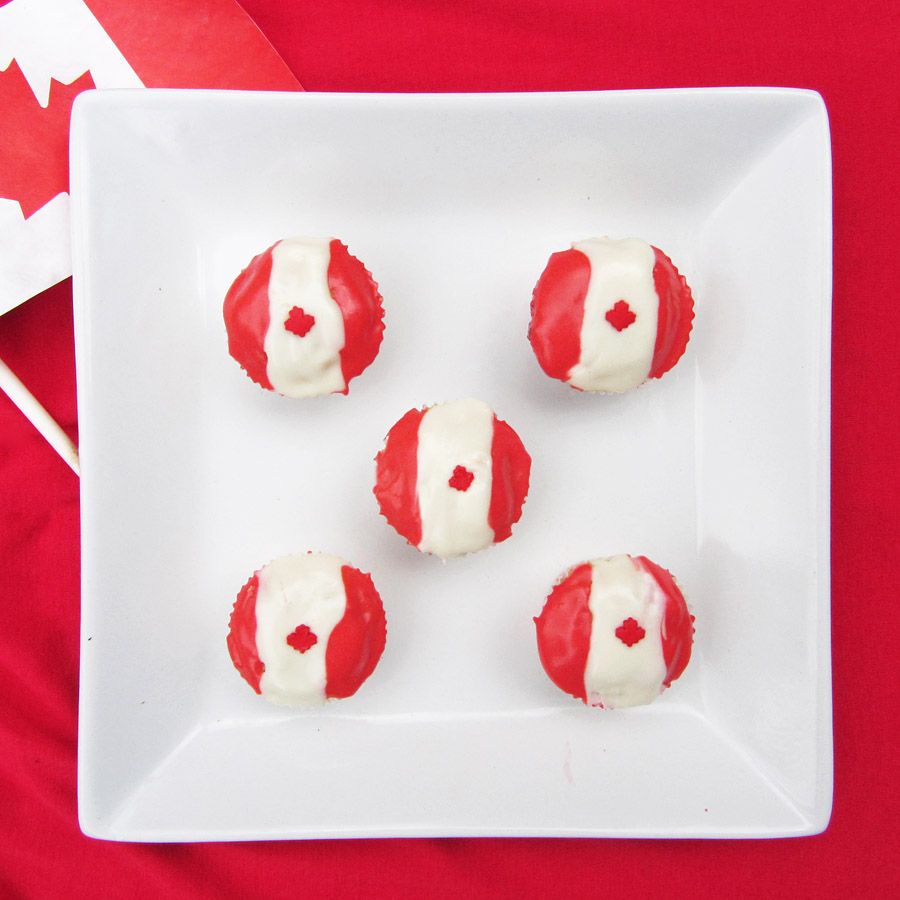
These are delicate little cupcakes with a light crumb and a nice vanilla flavour with a surprise burst of sweet strawberry jam in the middle.  They're topped with a smooth and spreadable cream cheese frosting that  pairs really well with the strawberry and vanilla flavours and works perfectly for transforming the cupcakes into festive mini Canada flags!

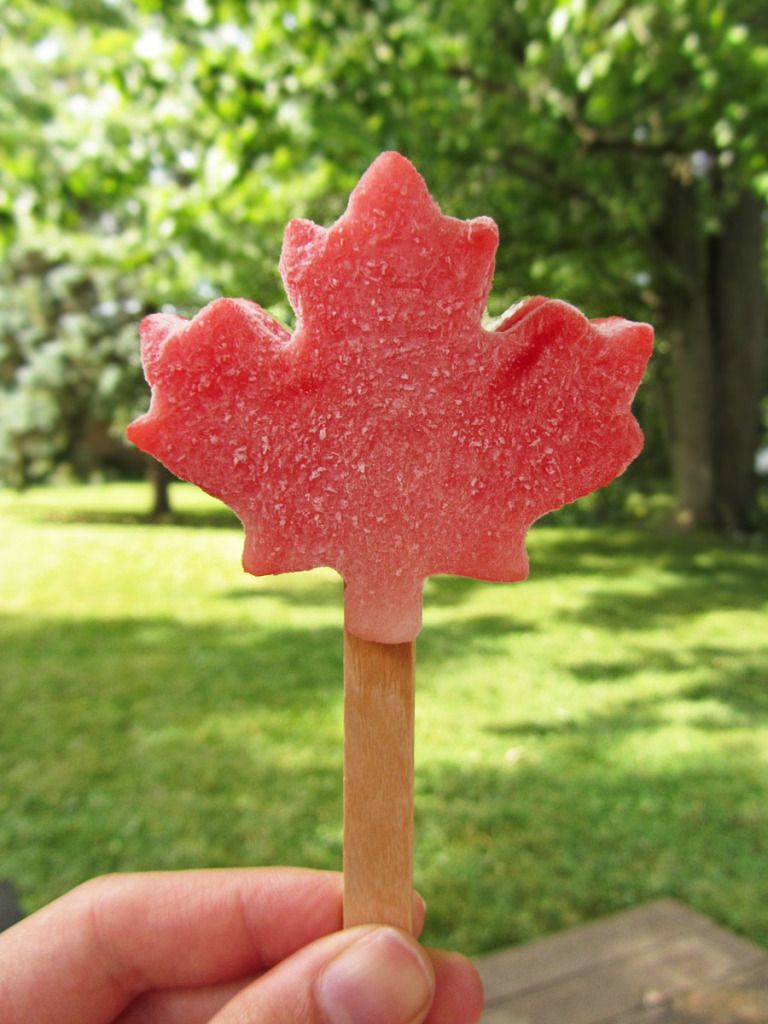
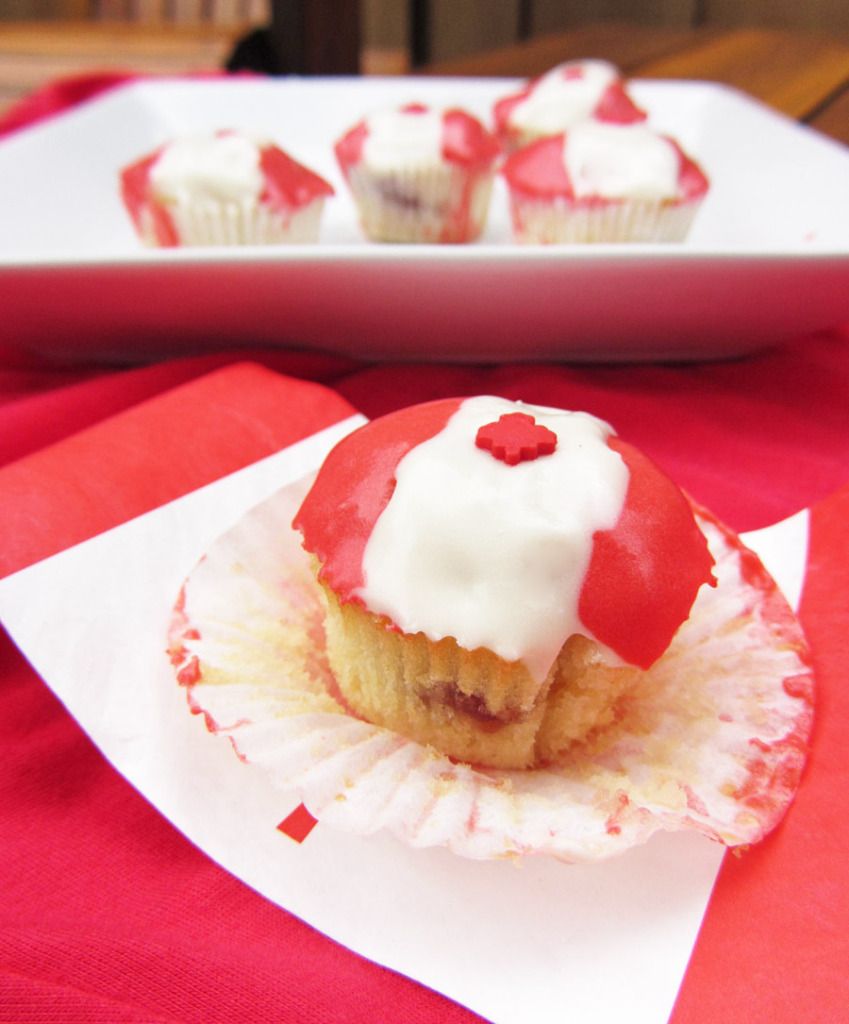
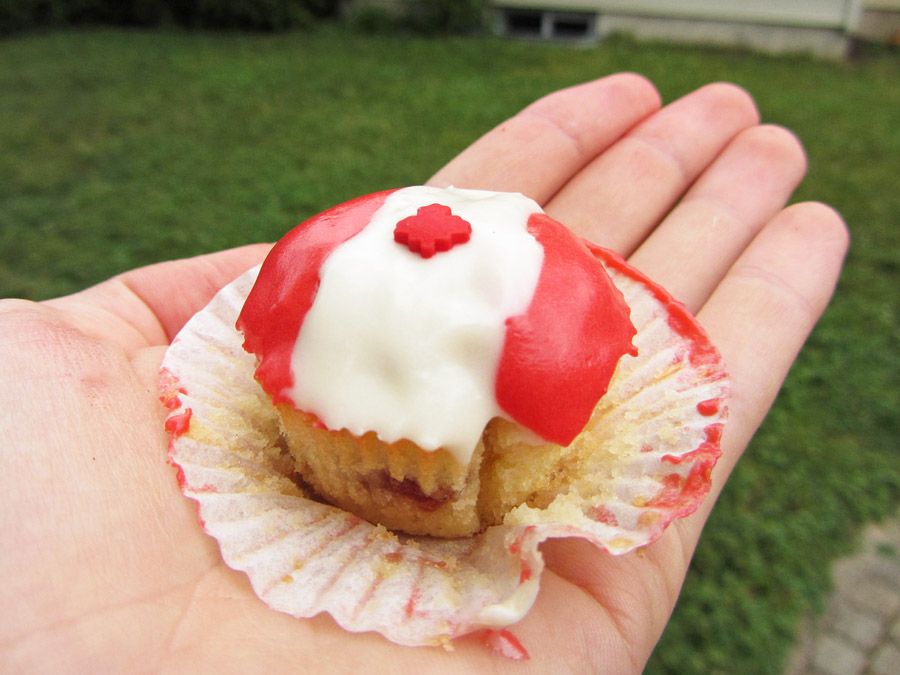
The lighting isn't great in these pictures, but here's a picture of a cupcake in my hand so you can see how little it is - isn't it cute??  I found those little maple leaf quins at Bulk Barn, but if you can't find something similar, you could probably use a toothpick dipped in some red icing to draw your own little maple leaf - it might not look perfect but I'm sure people will get the idea!

Mini Strawberry Vanilla Cupcakes for Canada Day

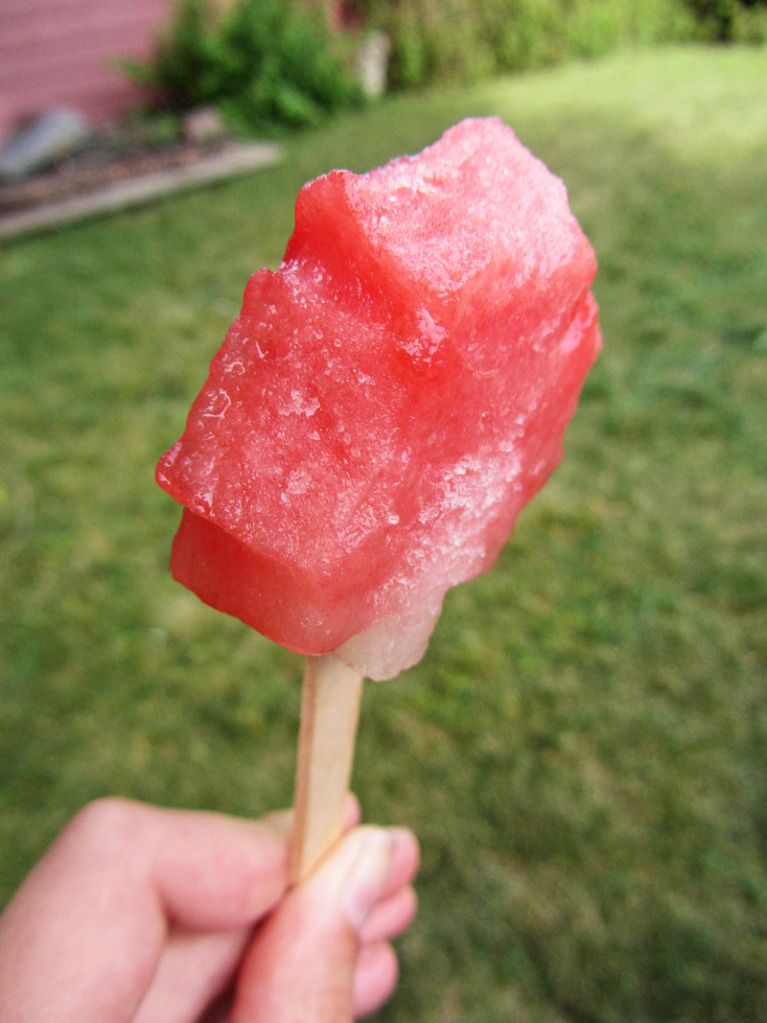
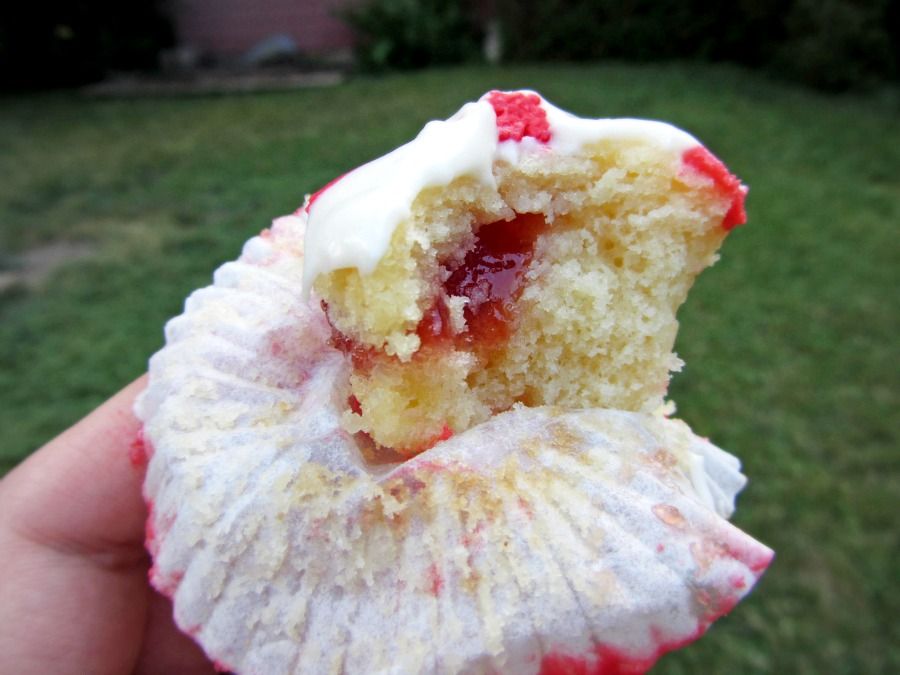
And here's a picture of the inside of a cupcake so you can see the lovely little swirl of strawberry jam inside.  My cupcakes didn't look quite the same as the original recipe because I used a little less jam in the middle, but they still tasted great!

I hope all my fellow Canadians have a safe and happy long weekend!

Mini Strawberry Vanilla Cupcakes for Canada Day

Mini Strawberry Vanilla Cupcakes with Cream Cheese Frosting

Cupcake recipe adapted from Kitchen Trial & Error; Frosting my own

Makes 24-28 mini cupcakes

Ingredients:

For the Cupcakes:
1-1/2 cups all purpose flour
1/2 teaspoon baking powder
1/4 teaspoon salt
1/2 cup unsalted butter, at room temperature
3/4 cup sugar
2 eggs
1 teaspoon vanilla extract
1/4 cup milk
~1/2 cup seedless strawberry jam

For the Frosting:
4 oz (half a brick) cream cheese
2 tablespoons unsalted butter, at room temperature
1/2 teaspoon vanilla extract
1 cup icing sugar
Red icing colour (I used this)
Canada Day (red maple leaf) quins (can be found at Bulk Barn)

Directions:

Preheat oven to 350°F.  Line a 24-cup mini muffin pan with paper liners and lightly spray with non-stick baking spray.

Whisk together the flour, baking powder, and salt in a large bowl.

In the bowl of an electric mixer, beat the butter and sugar until light and fluffy.  Add the eggs, one at a time, followed by the vanilla, beating until incorporated each time.  Alternate adding the milk and dry ingredients to the butter mixture until fully incorporated.

Spoon a scant tablespoon of batter into each muffin liner.  Drop about 1/2 teaspoon of jam into the middle of each muffin, then top with another scant tablespoon of batter, spreading it with your fingers if necessary to cover the jam. 

Bake for 10-12 minutes, or until a toothpick inserted in the middle comes out clean (except for some jam!)  Cool in the pan until cool enough to handle, then remove and place on a wire rack to finish cooling.

Meanwhile, prepare the cream cheese frosting.  Beat cream cheese and butter in the bowl of an electric mixture until smooth and no lumps remain.  Add vanilla and mix until incorporated.  Add icing sugar and mix on low until smooth.  Taste and add more icing sugar if you prefer a sweeter frosting.

Place 1/3 cup of frosting in a small bowl, and the remaining 2/3 cup in another small bowl.  To the larger portion of frosting, add red icing colour using a toothpick to add a small amount at a time, and stir to completely incorporate the colouring after each addition.  Repeat until you reach desired red colour.  Cool frostings in the refrigerator for about 30 minutes so it’s easier to work with.

To frost cooled cupcakes, place white and red frostings in two separate ziplock bags and snip the corner off each.  Pipe a stripe of white frosting down the middle of each cupcake, then two stripes of red on each side, to resemble the Canadian flag.  Use a small knife or spoon to spread the frostings around to cover the cupcake in three even stripes.  Place a maple leaf quin in the center of the white stripe to complete the design.

June 28, 2012

Watermelon Daiquiri Pops for Canada Day

Frozen Watermelon Daiquiri Pops for Canada Day

As I mentioned in my last post about our "food on a stick" themed meal, there was one more theme-related snack we enjoyed before dinner that I was saving for a separate post - these adorable and refreshing frozen watermelon daiquiri pops!

I didn't even know you could freeze watermelon until I saw a post recently (and can't remember where) showing how to insert popsicle sticks into watermelon slices and freeze them for a super easy popsicle.  I then wondered about the possibility of adding alcohol, as watermelon often seems to be paired with booze, and then found a post on The Shiksa in the Kitchen that did just that!

I knew I wanted to try them, especially with the hot weather we've been having lately, but then I wondered if I could turn them into a Canada Day treat by shaping each pop into a maple leaf, and this is what I ended up with!

Frozen Watermelon Daiquiri Pops

Tori from The Shiksa in the Kitchen gives some great tips about freezing watermelon; she says you can't just freeze it as is or it will lose a lot of flavour.  Instead, it's best to soak it in some sort of sweet liquid first, and using alcohol to make cocktail-flavoured pops works perfectly!  For those who want an alcohol-free treat, she also gives suggestions for that, so be sure to check out her post!

Tori made watermelon mojito pops, but I decided to make watermelon daiquiri pops using rum, triple sec, lime juice, and simple syrup.  All you do is cut the watermelon into maple leafs using a cookie cutter (which worked so well!), soak the pieces in your booze mixture, insert popsicle sticks, freeze, and then you have a sweet and refreshing treat that's perfect for Canada Day and the hot weather!

Frozen Watermelon Daiquiri Pops

There are two things to note about this recipe, the first is that you don't want to eat them the second they come out of the freezer, as they'll be a little too hard.  Just let them thaw for about 5 to 10 minutes before serving, but make sure you don't let them thaw too much!

You can see the difference between a frozen and slightly thawed popsicle in the pictures above and below - the popsicles above are straight out of the freezer and still a little icy, and the popsicle below is one I had taken a few bites out of it already!

Frozen Watermelon Daiquiri Pops

The second thing to mention is that these don't taste too strongly of alcohol, so if you're looking for a super boozy pop, these probably won't satisfy you!  The original recipe said to soak the watermelon in the alcohol mixture for 20 minutes, and most other similar recipes I've seen call for about 15-20 minutes.  I soaked mine a bit longer (for a total of 30 minutes), but of the seven people who tried one, I was one of the only ones who could taste the alcohol in them.

Now don't get me wrong, everyone still loved them, but I just wanted to warn you that they're not a super boozy treat!  I'm guessing that if you wanted to taste the alcohol more, you could try soaking them even longer than I did, or maybe try injecting the alcohol into the watermelon with a syringe.  Just note that I haven't actually tried those methods myself so I can't verify that they'll work, but leave a comment if you do give it a shot and let me know how it turns out!

Anyways, I didn't mind that the watermelon pops weren't too strong because they still tasted great, and I just used my leftover soaking liquid to make daiquiris afterwards by mixing it with some blended watermelon (I got about three drinks out of it, in case you're wondering).  So tasty!

Watermelon Daiquiri

I hope you give this idea a try, and stay tuned because I have another Canada Day recipe coming your way soon!

Frozen Watermelon Daiquiri Pops for Canada Day

Adapted from The Shiksa in the Kitchen

Makes around 7-8 pops, depending on the size of your cookie cutter

Ingredients:

One quarter of a seedless watermelon (about a 4 pound piece)
1/4 cup + 2 tablespoons sugar
1/4 cup + 2 tablespoons water
1/4 cup rum
1/4 cup triple sec
Juice of one lime (2-3 tablespoons)

Special Equipment: Maple leaf shaped cookie cutter, popsicle sticks

Directions:

Slice watermelon into 1-inch wedges (About 8-10 wedges).  Use maple leaf cookie cutter to cut a leaf out of each wedge (make sure you don’t use any of the rind).  You’ll have some scraps leftover, which can be used for another purpose, such as blending up for a drink later!  Transfer pieces to an 8x8 dish, or a dish just big enough to just fit the slices in an even layer.

Note: If you just want a Canada Day-themed simple snack, you could stop here and just serve the leaf-shaped watermelon slices as is, or with a popsicle stick inserted as a fun snack!

Prepare simple syrup: Add sugar and water to a small saucepan, and bring to a boil, whisking constantly, until sugar is dissolved.  Remove from heat and let cool.

Mix simple syrup, rum, triple sec, and lime juice in a small bowl.  Pour mixture over the watermelon slices, and let soak for about 15 minutes per side (30 minutes total). 

Carefully insert a popsicle stick into the bottom of each maple leaf, pushing through the center until it almost reaches the top.  I found this easier if I made a small insertion with a knife first.  Place the popsicles on a foil-lined baking sheet and place in the freezer to freeze for at least 1-2 hours.  Reserve the soaking liquid to make cocktails later!

Remove from freezer about 10 minutes before serving so they're not too hard, but don't let them thaw too much!

Here's a quick step-by-step visual to help you out!

How to make frozen watermelon daiquiri pops for Canada Day

June 25, 2012

A "Food on a Stick" Themed Meal

Our family celebrated a belated Father's Day this past weekend, and I thought it would be fun to share what we ate with you guys, as the meal turned out to have an interesting theme!

When the time came for menu planning between my sisters and my mom, we first decided on barbecued kabobs as the main course, partly because I was giving my dad some new fancy skewers that we wanted to try out!  Then my sister Genevieve suggested our favourite appetizer from last summer, watermelon and feta bites, and once we realized that both dishes are served on a stick, for some reason we decided to make a whole meal with that theme!

We had so much fun coming up with ideas for each course, and the end result was fantastic.  It helps that everyone in my family is an amazing cook!   Here's what we ate, in case you're interested in planning something similar yourself!

Appetizer: Watermelon, Feta, and Mint Bites

Watermelon, Feta, and Mint Appetizer

These were probably the biggest hit of the whole meal!  If you're a food blogger or follow food blogs often, you've probably seen the watermelon, feta, and mint combination a thousand times already.  Well there's a reason for that, because the ingredients work so well together and are perfect for summer!

Gen was in charge of making these, and all she had to do was cut out cubes of watermelon, top each cube with a piece of fresh mint and a piece of feta (you want the feta to be smaller than the watermelon).  Then drizzle with reduced balsamic vinegar, stick a toothpick through each bite, and serve!  So easy and definitely a crowd-pleaser - if you haven't tried a version of this appetizer before, I highly recommend giving it a try!

Main Course: Veggie/Cheese, Beef, and Chicken Kabobs

Kabobs on the Grill

For the main course, my mom grilled up three types of skewers so there would be something to please everyone!  They all had the same vegetables (bell peppers, onions, tomato, and pineapple) and a teriyaki glaze, but some had beef, others had chicken (both organic), and for the vegetarians, we chose to use a grilling cheese (that was it's actual name, I dont know what specific type of cheese it was!) instead of tofu.  Notice the new skewers I mentioned on the right - they worked so well and even include a slider to push everything off the skewer when  you're ready to eat!  You can buy them from quirky.com if you're interested in getting some for yourself.

Here they are ready to eat .. the cheese got a bit burnt but was still good!

Three types of kabobs

Side: Grilled Mini Red, White, and Blue Potatoes

Grilled mini potatoes

For our side dish, we bought a couple bags of mini potatoes, which contained red, white, and blue potatoes (perhaps more appropriate for a fourth of July party!), and grilled them along with the kabobs.  Seasoned with salt, pepper, and a little olive oil, they were not only adorable but tasty too!

Salad: Caprese Skewers

Caprese Skewers

For our "salad", Gen made these caprese skewers with tomato, mozzarella, and basil.  We bought some really creamy buffalo mozzarella balls and marinated them in olive oil, balsamic vinegar, and Italian seasoning for about 15 minutes.  Then, you just skewer them with grape tomatoes and fresh basil, and season them with salt and pepper.  Fresh, summery, and another crowd-pleaser!

Here's a picture of my plate before I devoured it (and went back for seconds)!


Dessert: Chocolate Fondue with Fruit

Chocolate fondue with fruit

We had a few ideas for dessert on a stick, including my older sister's great idea of strawberry shortcake on a skewer, but once my mom thought of making fondue, we all agreed it would be the perfect finish to the meal!  It's fun and interactive, and you can eat as much or as little as you want, so you don't end up feeling stuffed at the end of the meal.  And of course, you eat it on a stick!

Dipping in chocolate fondue

We all had a great night and loved every part of the meal, especially our dad, who got to sit back and relax without worrying about cooking or cleaning for a change!  And did I mention that we bought almost every element of the meal at the market that same day?  Knowing that the ingredients were all fresh and many of them were local made the meal that much better!

The only part of the meal that I can take full credit for is a pre-dinner frozen treat that I'm saving for my next post, so be sure to come back in a couple of days to find out what it was!

June 22, 2012

Strawberry Pineapple Lime Popsicles

Strawberry Pineapple Lime Popsicles

It has been scorching hot outside all week here, and though I love warm weather, I don't love the kind of heat that feels like it's suffocating you!  I would give anything to have a backyard with a cool, refreshing pool these days, but since I don't think my apartment building plans to turn the parking lot into an outdoor pool any time soon, I've been settling for the next best thing for cooling off - popsicles!  (okay, maybe the second next best thing, after a cold beer)

This was my second attempt at making homemade popsicles this year, and I took a much different approach with these than my last attempt.  My banana date popsicles were yogurt-based, which gave them a creamy texture, but these strawberry pineapple lime popsicles are fruit-based, so they have more of an icy texture that's similar to the standard storebought kind, if that makes sense?

I can't decide which ones I liked better - they're both so good!

Strawberry Pineapple Lime Popsicles

With strawberries at their peak right now, I've been buying them faster than I can eat them, so I decided to use some of my extras in a popsicle.  I also had some pineapple to use up before it went bad, so I combined the two, along with some lime juice and a bit of honey for added sweetness.

The sweet strawberries and honey are perfectly balanced by the tart pineapple and lime in these juicy popsicles, and I love that they're sweet enough to eat for dessert but are still natural and healthy (and full of lots of vitamin C!)

Strawberry Pineapple Lime Popsicles

As you can see from the pictures, I spent a little too long photographing my popsicles and they were starting to melt quite a bit towards the end!  I couldn't help it though, I just loved the bright colours that photographed so well!

I should also mention that I attempted a swirling pattern in these by pouring the pineapple and strawberry mixtures into the molds separately, then swirling them together a little with a knife.  Unfortunately, it wasn't until the last popsicle that I realized it works a lot better if you alternate pouring the two mixtures in layers so they're more evenly distributed.  I just poured them in two equal parts, so you can see how the pineapple part was mainly at the bottom and got a little overwhelmed by the strawberry colour.  I still think they look pretty though, and now you can learn from my mistake!

Strawberry Pineapple Lime Popsicles

Below is a picture of an almost eaten popsicle so you can get an idea of the fruity texture.  It's quite different from the last picture in my banana date popsicle post, but like I said, I still love them both!

Hope you all stay cool and have a great weekend!

Strawberry Pineapple Lime Popsicles

Pineapple Strawberry Lime Popsicles

Adapted from Jennifer Murray on About.com

Makes 4-6 popsicles, depending on the size of your popsicle mold

Ingredients:

1 cup diced strawberries
1 cup diced ripe pineapple
4 teaspoons fresh lime juice
2 teaspoons honey (optional)

Directions:

Add strawberries, 2 teaspoons lime juice, and 1 teaspoon honey to a blender and blend until smooth.  Transfer to a glass or measuring cup and rinse out the blender.

Blend the pineapple, remaining 2 teaspoons lime juice, and 1 teaspoon honey until smooth.  Transfer to a second measuring cup.

Alternate pouring pineapple juice and strawberry juice into each popsicle mold (I found alternating two portions of each worked best), then use a knife to gently swirl together (but not enough so that they complete blend into one colour!)  Freeze.

Strawberry Pineapple Lime Popsicles

I had to add one more picture of my plate after I'd removed the melting popsicles - I thought it looked so pretty!

June 19, 2012

Warm Dijon Roasted Asparagus & Potato Salad

Warm Dijon Roasted Asparagus & Potato Salad

I’ve always thought that I didn’t like potato salad, and I usually avoid it at potlucks and picnics.  Then I realized that there are so many different types of potato salad out there, and the versions that I don’t like are the cold, mushy type.   

Warm potato salads are actually amazing, especially when you roast or grill the potatoes so they’re crispy and golden brown, as opposed to those soft and mushy boiled potatoes.  And when you combine the roasted potatoes with roasted asparagus and a light and tangy Dijon yogurt dressing, you’ve got a potato salad that’s pretty hard not to love!

I’ve already made this recipe twice in the last week, once with green beans and once with asparagus (both were good, but I prefer asparagus), and I absolutely love it.  It’s also healthy and light – a far cry from the mayo-drenched, gloopy (is that a word?) potato salads you find in a grocery store.   It doesn’t make for great leftovers, but it’s so good that you probably won’t have any leftovers to save anyway!

Warm Dijon Roasted Asparagus & Potato Salad

Warm Dijon Roasted Asparagus & Potato Salad

Adapted from Food Network

Serves 4-6 as a side dish

Ingredients:

1.5 pounds small white or red potatoes
1/2 pound asparagus, woody ends removed, cut into one or two-inch pieces
Olive oil, salt, and pepper

Dressing:
1/4 cup + 1 tablespoon plain yogurt
1 tablespoon Dijon mustard
1 tablespoon red wine vinegar
1/2 shallot, minced
1/4 teaspoon each salt + pepper

Directions:

Preheat oven to 400°F. 

Scrub potatoes and cut into bite-sized chunks, roughly one inch wide.  Toss with a drizzle of olive oil and season with salt and pepper, then spread in an even layer on a baking sheet (I lined mine with aluminum foil).  Roast for around 30 minutes, until golden brown and tender.

Meanwhile, toss asparagus with another drizzle of olive oil and season lightly with salt and pepper.  Add to the oven with the potatoes during the last 8-10 minutes of cooking.

Prepare Dijon yogurt dressing by adding the yogurt, Dijon, red wine vinegar, shallot, salt, and pepper to a small bowl and whisking until smooth.  Taste and adjust amounts to your liking if necessary.

Remove asparagus and potatoes from oven and let cool slightly.  Transfer to a large bowl and mix with the Dijon yogurt dressing.  Serve warm.

June 15, 2012

Pasta with Chicken & Broccoli in a Mushroom White Wine Sauce

Pasta with Chicken & Broccoli in a Mushroom White Wine Sauce

When I was looking through my hundreds of bookmarked recipes for a comforting, easy meal to make for dinner one night, I came across this pasta with roasted garlic, white cheddar, and wine sauce on Annie's Eats and it fit the bill perfectly. Most normal people would have made the recipe as written, because it looked pretty amazing. But because I can't seem to follow a recipe for the life of me, my brain immediately started whirring with ideas to change things up a little, and this is what I came up with!

Instead of making a butter-flour based sauce with chicken broth and a bit of white wine, I decided to use equal parts wine and broth, and I switched to a mushroom broth (and threw in some onions and mushrooms) so the sauce would have lots of flavour. I eliminated the butter because the cheese made the sauce thick and rich enough. I kept in the roasted garlic but added a bit of Dijon mustard for an extra kick. Finally, I threw in some sundried tomatoes for added flavour and texture.

Everything was so flavourful and combined into an amazing meal that tasted rich but was still reasonably healthy by my standards. The best part was the sauce, which you can't really see in the pictures because it absorbed into the ingredients pretty well, but it had such a deep flavour that really made the dish. It may seem like a lot of work to make this, but if you prepare a few things ahead of time, like the roasted garlic and chicken, then it's pretty easy to throw together. And of course, you can easily make it vegetarian by leaving out the chicken as there's plenty else going on in this pasta!

Hope you all have a fabulous weekend! Mine will be filled mostly with school work and housework, but I'm hoping to get out to enjoy the sun a bit - it's been gorgeous here lately!

Pasta with Chicken & Broccoli in a Mushroom White Wine Sauce

Pasta with Chicken & Broccoli in a Mushroom White Wine Sauce

Adapted from a recipe originally from Good Things Catered (no longer active) and seen on Annie’s Eats

Makes 4-6 servings

Ingredients:

2 heads of garlic
1 tablespoon olive oil, divided
1 teaspoon Dijon mustard
1 large chicken breast
1 lb penne pasta (whole wheat or regular)
1 head of broccoli, chopped into florets
1 small onion, diced
8 oz pre-sliced white or crimini mushrooms, roughly chopped
1 cup dry white wine (I used Sauvignon Blanc)
1 cup mushroom stock (I made this from a bouillon cube, but if you can’t find it, you could substitute chicken stock)
1-1/2 cups grated sharp white cheddar cheese
1 tablespoon flour
Ground black pepper
1/2 cup diced sundried tomatoes (rehydrated if necessary)

Directions:

Preheat oven to 350°F.  Cut the ends off the two heads of garlic so that the cloves are exposed.  Drizzle the exposed cloves with a teaspoon of olive oil, then wrap the heads with aluminum foil and place on a baking sheet.  Roast in the preheated oven for about 1 hour.  Unwrap and let cool, then squeeze the garlic out of the skin and mash into a paste.  Mix the Dijon mustard into the garlic paste.  Set aside.

Heat a teaspoon of olive oil in a non-stick skillet over medium-high heat.  Cook chicken breast in the skillet for about 5-6 minutes per side, until cooked through.  Remove from heat and let rest a few minutes before slicing into small pieces. Set aside.

Bring a large pot of salted water to a boil.  Add pasta and cook for length of time specified on package.  Set chopped broccoli in a steamer basket over the boiling water and cover.  Steam for about 3 minutes until crisp-tender, then remove from heat.  When pasta is finished cooking, drain and set aside.

At the same time, heat a teaspoon of olive oil in a large saucepan over medium-high heat.  Add chopped onion and mushrooms and cook until soft, stirring often, about 5-7 minutes.  Add the roasted garlic paste and stir for about a minute.  Add the white wine and mushroom broth and bring to a boil.  Let simmer until reduced by about half, about 5-6 minutes, stirring occasionally.  Stir in the cheddar cheese until melted.  Add the flour and whisk the mixture over low heat, until thickened slightly.  Season generously with pepper.

Combine the pasta, chicken, broccoli, sundried tomatoes, and sauce in a large pot.  Heat briefly over low heat if not warm enough.  Serve warm.

June 12, 2012

5 Tasty Ways to eat Avocado for Breakfast

I absolutely love avocados.  A ripe, buttery avocado spread over a piece of toast and sprinkled with a bit of salt and pepper is one of my absolute favourite things to eat.  Add a juicy tomato and another piece of bread and you've got my favourite sandwich (and what I brought for lunch today!).  Not only are avocados delicious, but they have many nutritional benefits as well, including healthy monounsatured fats, more potassium than bananas, and plenty of vitamins and essential nutrients.

Because avocados fill me up pretty well, I love having them for breakfast to keep me full and happy until lunchtime.  There are so many ways to eat avocados for breakfast, so I thought I'd do a fun post today sharing some of the recipes I've been enjoying lately, along with lots of other avocado breakfast ideas from other blogs.

Here we go!

1) Poached Egg on Avocado Toast

Poached Egg on Avocado Toast & other Breakfast Ideas with Avocado

This is one of the easiest and most satisfying breakfasts using an avocado.  Simply spread a ripe avocado over a piece of toast, season it with lots of salt and pepper (I actually forgot to do this before I took the photo, but rest assured it was added after!), then top it with a poached egg.  When you cut into the poached egg, the runny yolk spills out and you can dip each piece of avocado toast into the yolk to make it taste even better!

For another variation of the egg on avocado toast, I also really enjoy putting some scrambled eggs on top instead of a poached egg - you don't get the same runny yolk effect, but it's a lot easier to make when you're in a hurry and it still tastes delicious!

2) Fried Egg & Avocado Breakfast Pizza

Fried Egg and Avocado Breakfast Pizza & other Breakfast Ideas with Avocado

This idea (from Justina Blakeney) is very similar to the one above, but a little fancier and more fun!  All you have to do is toast a pita (I used whole wheat), top it with some mashed avocado (don't forget that salt and pepper!) and a fried egg.  You get the same egg + avocado + runny yolk goodness, but you get to eat it like a slice of pizza!  Next time, I'd probably use a poached egg because I prefer the texture over fried eggs, but either works.  I also think some sliced tomatoes would make a great additional topping!

Get the recipe here.

Now while we're on the topic of eggs and avocado, I had to mention that I finally tried the famous 'egg baked in an avocado' that was all the rage on the web recently:

Egg Baked in an Avocado
The basic idea is that you scoop out a bit of an avocado half, crack an egg into it, then bake the avocado in the oven until the egg is set.   I wasn't quite sure what to expect from this because the reviews on the internet are very divided - people either seem to love it and think it's the most amazing idea ever, or they absolutely hate it.  Unfortunately, I fell into the second group.  First of all, this took FOREVER to bake so that the egg was set, way longer than any time I saw in a recipe.  And once it was finally ready to eat, I found that I did not enjoy the taste or the texture.  Maybe I don't like baked eggs in general, but the whole thing was just a mushy, runny texture that started to really gross me out, and I wasn't a fan of the taste of warm avocado either.  I actually had to throw it out halfway through.

Has anyone else tried this?  I'm curious to hear your thoughts!

Moving on to much better ideas, avocados work really well in smoothies, like this one:

3) Avocado Banana Smoothie

Avocado Banana Smoothie & other Breakfast Ideas with Avocado

Adding a ripe avocado to a smoothie gives it a rich, creamy texture that makes your breakfast smoothie a little more substantial, without overpowering the drink with avocado flavour.  It's also a great way to use up half an avocado if you need to!

The smoothie pictured above is a refreshing combination of banana and avocado.  I would normally add spinach for a bit more nutrients, but I didn't have any on hand at the time I made this.  Here are the ingredients I used (no directions needed - just mix in a blender until smooth!) :

1 cup milk
1/2 ripe avocado
1 frozen ripe banana, chopped
2 tablespoons rolled oats
1 tablespoon honey
handful of spinach (optional - not in the smoothie pictured above)

Another way to use avocados at breakfast (this time a bit more sneakily!) is in baked goods, like this healthy chocolate avocado banana bread!

4) Chocolate Avocado Banana Bread

Chocolate Avocado Banana Bread & other Breakfast Ideas with Avocado

This is a moist, chocolatey banana bread that tastes like you're eating chocolate cake for breakfast, but it's actually fairly healthy!  The original recipe was vegan and gluten-free, but since I didn't have a lot of the ingredients on hand, I made it non-vegan and glutenized with the following changes:
 
-          Changed the three flours to 1 cup all-purpose flour, and left out the xanthan gum (note that I should have used 2 cups as a replacement but accidentally used 1 - it still worked fine though!)
-          Changed the "flax egg" (flaxseed plus water) to one large egg
-          Baked for one hour

But the vegan version sounds great too!  Get the recipe at Manifest Vegan.

I also reduced the olive oil to only three tablespoons, and next time I might try using whole wheat flour in place of half the all-purpose flour so it's even healthier.  I really, really liked this banana bread and would definitely make it again.  It's especially good warmed up with a bit of margarine!

Chocolate Avocado Banana Bread & other Breakfast Ideas with Avocado

The final recipe I'll include here is possibly my favourite - a hearty breakfast wrap filled with eggs, black beans, salsa, cheese, and avocado!

5) Black Bean, Egg, & Avocado Wrap

Black Bean, Egg, and Avocado Wrap & other Breakfast Ideas with Avocado

This was a really easy wrap to throw together, but tasted just as good as something I would order in a restaurant.  You could make it fancier by throwing in some sauteed peppers, onion, and garlic, but I prefer to just keep it simple.  You'll notice that the wrap on the right-hand side of the picture had barbeque sauce and the wrap on the left had salsa - both are good, but I preferred the salsa version.

Here's the recipe!

Black Bean, Egg, & Avocado Wrap

Serves 1

1 whole wheat tortilla (or 2 small)
1/2 cup canned black beans, drained and rinsed
1 egg
1 ripe avocado, sliced
Handful of shredded cheddar cheese
Salsa or bbq sauce for topping

Heat tortilla(s) by covering with a damp paper towel and microwaving on high for 30 seconds.  Heat black beans in a small saucepan until warm.  Transfer to center of tortilla(s).  Whisk egg then cook in a small pan over medium-low heat, stirring often, until scrambled.  Transfer to tortilla, on top of black beans.  Top with shredded cheese, sliced avocado, and salsa or barbeque sauce.  Wrap and eat warm.

Note that all amounts are approximate and can be adjusted to your liking.  You could easily make this serve two people by doubling or tripling the amount of eggs.

Black Bean, Egg, and Avocado Wrap & other Breakfast Ideas with Avocado

And in case you aren't feeling inspired yet, here are even more creative ideas from other blogs:

More Breakfast Ideas using Avocado:

Savoury Breakfasts:

California omelette with avocado, tomato, mozzarella, pesto from Once Upon a Cutting Board
Avocado egg salad with tomatoes and goat cheese from Green Cilantro
Avocado breakfast paninis from BrokeAss Gourmet
Guacamole omelette from Poor Girl Eats Well
Southwestern eggs benedict with black bean spread, avocado & salsa from Cookin' Canuck

Avocado Smoothies:

Avocado kale smoothie from Kiran Tarun
Strawberry avocado smoothie from Cara's Cravings
Blueberry avocado smoothie from Live Love Laugh
Avocado and melon breakfast smoothie from avocado.org

Avocado Baked Goods:

Chocolate avocado pancakes from Mother Thyme
Avocado pop tarts from Scarletta Bakes
Vegan avocado scones from Family Fresh Cooking
Double chocolate avocado muffins from Eat Me, Delicious

Other:

Avocado oatmeal from The Chic Life
Avocado breakfast pudding from The Kitchn

June 08, 2012

Mediterranean Quinoa Veggie Burgers

Mediterranean Quinoa Burgers

I always associate summertime with the five B's: beaches, backyards, barbeques, beer, and burgers.  There's nothing better than being able to eat dinner in the backyard and biting into a freshly cooked burger that's just oozing with flavourful toppings.  I actually just returned from a delicious lunch at The Works, a burger chain in Canada with a pretty crazy list of burger toppings.  I had a turkey burger with avocados, roasted red peppers, havarti, and a vegetable mayo sauce, and it was messy but one of the tastiest burgers I've had in a while!

While I'm not much of a beef burger eater, I absolutely love chicken burgers, turkey burgers, and pretty much every type of veggie burger.  I know some people are super picky about their veggie burgers and I'm not sure why; maybe it's because they're looking for a veggie burger that tastes just like a meat burger?  What I like about veggie burgers is that they don't remind me of meat burgers, and there are so many different kinds to try - black bean, chickpea, sweet potato, lentil, portobello mushroom, and even quinoa burgers!

I've tried many of the veggie burger varieties I just listed, except for a quinoa burger, which is surprising because I love quinoa!  So I decided to remedy that last week and kick off the start to burger season with these Mediterranean quinoa feta burgers.

Mediterranean Quinoa Burgers

These are a great healthy and tasty alternative to traditional meat burgers.  They're full of Mediterranean flavours both in the quinoa patties, which include red pepper, garlic, parsley, and feta, and in the burger toppings, for which I used lettuce, tomato, cucumber, and a storebought Greek feta yogurt dressing.  If you can't find a similar dressing, you could easily just use crumbled feta or make your own feta yogurt dressing with a recipe like this one.  You can also change up the toppings however you like - I think roasted red peppers would work really well with these!

I loved the way the quinoa added an extra texture to the burger so it wasn't completely mushy like some bean burgers can be, and that it added lots of protein to the dish so I still felt full afterwards.  I served mine with a side of cucumbers drizzled in the feta yogurt dressing to keep my meal light and healthy, but the fact that the burgers are healthy could easily justify eating them with a big side of fries!

These probably won't satisfy someone looking for a veggie burger that tastes like a meat burger, but they're a great option for anyone looking for a healthy alternative to a traditional burger.

Mediterranean Quinoa Burgers

Mediterranean Quinoa Burgers

Adapted from Whole Living

Makes 6-7 quinoa patties

Ingredients:

For the patties:
1 cup dry quinoa
1 (540mL) can kidney beans or chickpeas, drained and rinsed
1 shallot, minced
1 clove garlic, minced
1/2 a red pepper, finely chopped
1/4 cup chopped parsley
1/3 cup crumbled light feta
2 egg whites, lightly whisked
1 teaspoon kosher salt
1/2 teaspoon ground pepper
1/2 cup to 1 cup panko bread crumbs
Non-stick cooking spray

For the Burgers:
6-7 multigrain thin hamburger buns
Lettuce, tomato, cucumber for topping
Feta cheese (optional)
Feta yogurt sauce (storebought or homemade)

Directions:

Cook quinoa as per package directions and let cool slightly.

Mash the kidney beans in a large bowl.  Add the cooked quinoa, shallot, garlic, red pepper, parsley, feta, egg whites, salt, and pepper, and mix well.  Add 1/2 cup bread crumbs and attempt to form a patty.  If the mixture is too wet to hold together well, continue adding more bread crumbs (up to an additional 1/2 cup) to reach a texture where the patty will hold its shape when you pick it up gently with your hand.  Shape mixture into 6 or 7 round patties.

Heat a large non-stick skillet over medium heat and spray with non-stick cooking spray.  Cook patties in batches, about 5 minutes per side, until golden brown and cooked through.

Serve quinoa patties on hamburger buns, topped with lettuce, tomato, cucumber, and feta yogurt salad dressing or feta cheese.

June 05, 2012

Banana Date Popsicles

Banana Date Popsicles with Cinnamon & Vanilla

It has never really occurred to me before to make my own popsicles, probably because I'm not really much of a popsicle-eater in the first place.  I much prefer smooth, creamy ice cream or frozen yogurt over hard, messy popsicles.

This year though, there seems to be more and more recipes for homemade popsicles popping up on blogs, and I was surprised to see that you can create beautiful, tasty, and healthy popsicles at home with often only a few ingredients.  So when I saw a popsicle mold for only two dollars at the grocery store, I went for it!

Banana Date Popsicles with Cinnamon & Vanilla

Surprisingly, for my first adventure in popsicle making I didn't choose a bright and beautiful strawberry or mango popsicle recipe, but a recipe that used dates as the main ingredient.  I happen to like dates and was intrigued by the idea of using them in a healthy, creamy popsicle that was different from a lot of the fruit-based recipes out there.

I still ended up adding some fruit in the form of banana because I thought it would pair well with the dates, and I used vanilla Greek yogurt along with some added vanilla extract and cinnamon for flavour.  I used coconut milk beverage as the liquid because that's what I had in the fridge at the time, but I bet these would be even better with vanilla almond milk. 

Banana Date Popsicles with Cinnamon & Vanilla

I'm happy to report that my first-ever popsicle experiment was a huge success!

The main taste in them was definitely banana, but they were nicely spiced from the cinnamon, and the vanilla and dates added the perfect touch of sweetness.  I only made five popsicles and went through them pretty quickly!  I loved being able to grab a homemade popsicle from the freezer for a healthy but satisfying dessert, knowing exactly what ingredients were in it.

Banana Date Popsicles with Cinnamon & Vanilla

Now that I've christened my popsicle mold, I can't wait to break it in some more with lots of other flavours!  My goal this summer is going to be to try to always have some healthy popsicles ready to eat in the freezer, and to try to resist the temptation to buy every other type of mold out there!  I saw some rocket pop molds at the store the other day and had to try reeeally hard not to add them to my cart! 

You can probably expect to see many more popsicle recipes here this summer, but if you can't wait, I've started a Pinterest board of frozen treats with some of the recipes I've been eyeing!

Banana Date Popsicles with Cinnamon & Vanilla

Banana Date Popsicles with Cinnamon & Vanilla

Based on these date shake popsicles from Whole Living

Makes 5 popsicles

Ingredients:
 
10 pitted dates
1/2 cup low-fat vanilla Greek yogurt
1 large ripe banana, peeled and chopped
1/2 cup milk – I used coconut milk but almond milk or dairy milk would also work
1/2 teaspoon cinnamon
1/4 teaspoon pure vanilla extract

Directions:

Soak dates in hot water for about 5 minutes to soften them, then remove from water and chop them into very small pieces.  Add all ingredients to a blender and blend until smooth.  Pour into 5 popsicle molds and freeze.

Note: I had just barely enough mix to fill 5 standard popsicle molds so you may want to add a touch more yogurt and milk to the mixture to make sure there is enough, depending on the size of your popsicle molds.

June 01, 2012

Easy Salmon Pilaf with Asparagus & Peas

Salmon Pilaf with Asparagus & Peas

Happy Friday!

This will be a short (or at least quickly-written) post as I'm about to leave to catch a Greyhound home for the weekend to spend a couple of days with my family and boyfriend.  I'm looking forward to seeing them but am not so excited about the trip home considering it's been raining cats and dogs (does anyone say that anymore?) all day and is FRIGID outside!  

I'll admit I was a little excited when I realized it would be cooler out today because it meant I could wear the pretty new red spring jacket I just bought, but after about three minutes outside I was cursing my flimsy jacket and wishing I had worn a parka instead!

So considering the very spring-like weather we'll be having all weekend, I thought it was appropriate to share a spring-like recipe today!  This pilaf with salmon, asparagus, and peas, is an easy and healthy weeknight dish that I've made quite a few times and will probably make a few more times this season while asparagus is still in its prime!

Salmon Pilaf with Asparagus & Peas

I'm calling this an "easy" pilaf because it's sort of a shortcut version of a traditional pilaf that makes the dish come together fairly quickly and with minimal effort.  I use instant rice that I cook separately for only the 5 or 10 minutes directed on the package, I roast the salmon in the oven so that it's very hands-off, I cook the asparagus and onions quickly on the stove, then basically just mix them all together with some broth in a big pan and voila!

The one caveat with this dish is that its flavour depends on the quality of the ingredients you use.  If you have good-tasting salmon, asparagus, peas, and stock, then you'll end up with a good-tasting meal.  I also rely on lots of salt and pepper to season this dish - it makes a huge difference!  You can certainly feel free to add in any other ingredients or seasonings you like though.

Well, I'm off to go stand in line for a bus in the pouring rain.  Hope you have more exciting Friday night plans than me and that you all have a great weekend!

Salmon Pilaf with Asparagus & Peas

Salmon Pilaf with Asparagus and Peas

Adapted from Cooking Light
 
Serves 2-3

Ingredients:

2 salmon fillets
1.5 cups uncooked instant long grain white rice or brown rice (I prefer brown but for the dish pictured I used enriched white rice)
2 cups chicken or vegetable broth, divided (I prefer chicken broth here)
1 tablespoon olive oil
1 medium yellow onion, chopped
2 cloves garlic, minced
1 cup chopped asparagus
1/2 cup frozen peas, thawed
1 tablespoon lemon juice
1/4 cup packed chopped parsley
Lots of salt and pepper

Directions:

Preheat oven to 425°F.  Season salmon with salt and pepper, place on a foil-lined baking sheet, and roast for 12-15 minutes, until salmon flakes easily with a fork.  (Alternately, you could cook the salmon according to your own preferred cooking method).

Meanwhile, cook rice according to package directions, replacing the water with 1.5 cups chicken or vegetable stock.

Heat olive oil in a large saucepan or deep skillet over medium-high heat.  Add onion, garlic, and asparagus, and sauté for 4-6 minutes, stirring often, until onion starts to brown.  Add rice, peas, and 1/2 cup chicken/vegetable broth, stir, and cook for 1-2 minutes.  Add lemon juice and parsley, and season generously with salt and pepper.  Cook, stirring often, for another 2 minutes.  Remove from heat and serve warm.

Ingredient Index

Related Posts Plugin for WordPress, Blogger...