October 28, 2011

Mini Party Appetizers - Mac n' Cheese & Pizza Puffs

mini party appetizersWith the weekend upon us and possibly some Halloween parties to go to, I thought I'd share some fun recipes for cute and tasty mini party appetizers! I made these for a sports night get-together recently. I wasn't actually there but Ryan reported back to me that everyone loved them - and of course, I did plenty of taste testing myself to confirm this before everyone arrived :)

I used my mini muffin pan to create two appetizers - mac n cheese bites and pepperoni pizza puffs. The mac n cheese bites were the exact same cheesy classic everyone loves, just in a small portable form. It's a little weird eating macaroni and cheese with your hands, but once you have one it's impossible not to have another! The pepperoni pizza puffs had all the components and taste of pizza - cheese, herbs, pepperoni, and marinara sauce - but in a puffy, bite-sized form.

Both of these recipes were super easy to make and the perfect size to feed lots of people as a fun appetizer. They're also both highly adaptable to whatever cheese or other ingredients you have in your fridge, so have fun with them!

mini party appetizers
Mini Pepperoni Pizza Puffs

Recipe at Kirbie's Cravings

These are highly adaptable - try using different types of cheese (I used a blend of Mozzarella and Mexican cheeses), different seasonings, different meat, or make them vegetarian by adding in some veggies like onions or peppers. For a slightly healthier version, try these Whole Wheat Pizza Puffs from Cooking With My Kid.

But whatever you do, don't forget the marinara sauce!

Mini Mac n' Cheese Bites


Adapted from Dinners for a Year and Beyond

Makes about 36 bites


Ingredients:

1-1/2 tablespoons unsalted butter
2 tablespoons all-purpose flour
3/4 cup milk
1-1/2 cups packed shredded cheese – I used half Mexican blend cheese and half Pepper Jack, but you could also use sharp cheddar or white cheddar, or your other favourite blend
1/4 cup Parmesan cheese, grated, plus more for sprinkling on top
2 large egg yolks
1/2 teaspoon salt
1/4 teaspoon pepper
1/8 teaspoon nutmeg
1/2 pound elbow macaroni, cooked and drained

Directions:

Preheat oven to 425°F. Spray a nonstick mini muffin pan with cooking spray (you may need multiple pans). Set aside.

In a large saucepan, melt the butter over medium heat. Whisk in the flour and cook for about 1 minute. Whisk in the milk and bring to a boil. Cook, whisking occasionally, for about 2 -3 minutes until thickened. Add all the cheeses and stir together to melt. Remove from heat and stir in the egg yolks, salt, pepper, and nutmeg. Stir in the cooked macaroni.

Spoon the macaroni and cheese into the prepared mini muffin pan(s), filling each cup to the top. Pack each one down gently. Sprinkle with remaining Parmesan cheese.

Bake for about 10 minutes, until golden and sizzling. Let cool for about 10 minutes, then use a butter knife to carefully loosen and pop out the bites from the pan. They should pop out very easily. Transfer the mac and cheese bites to a platter and serve warm.

To make ahead, bake and cool mac and cheese bites then store in the fridge. When ready to serve, place the bites on a baking sheet and heat in a 400
°F oven for 5 minutes until warmed through.

mini party appetizers

October 25, 2011

Roasted Butternut Squash and Shallot Soup

roasted butternut squash and shallot soupSorry I haven't been posting as often lately, I've been super busy with school and my dinners this week have consisted of things like noodles with tomato sauce and apples with cheese. Not exactly blog worthy. Fortunately, I made an incredibly tasty soup the other week that I can share with you guys!

I saw this recipe for butternut squash and shallot soup on Cooking Light and was skeptical that something with so few ingredients and no special seasonings or herbs would still be flavourful. I was so wrong - this was one of the most flavourful soups I've ever made! The roasted squash and shallots added the perfect hint of sweetness that was balanced nicely by the spicy kick of the ginger. I should note that some of the comments on the original recipe said that there wasn't enough ginger, and others said there was way too much, so I assume this is a matter of personal taste. I used a 1-inch piece of ginger and thought that was the perfect amount, but if you're worried about it being too strong, I'd suggest to roast the full amount of ginger, then gradually add it to the blender as you're blending the soup until you reach the amount you like.

This soup was so easy to make, and I loved that it had a thick and creamy texture without any cream. I think it would be elegant and impressive enough to serve as a first course at a dinner party, or homey and comforting enough to serve your family as a side to grilled cheese. I enjoyed it with a big slice of hearty bread slathered in roasted garlic (which I roasted alongside the squash) and it was delicious!


Roasted Butternut Squash and Shallot Soup

Adapted from Cooking Light

Makes about 3-4 side servings

Ingredients:

4 cups of cubed (1-inch) peeled butternut squash (about 1 1/2 pounds)
4 large shallots, peeled and halved
4 cloves of garlic, peeled
1 (1/2-inch to 1-inch) piece of peeled fresh ginger, thinly sliced
1 tablespoon olive oil
1/4 teaspoon salt
2 1/2 cups fat-free, reduced sodium chicken broth
Freshly ground black pepper (optional)

Directions:

Preheat oven to 400°F.

Spread squash, shallots, garlic, and ginger onto a jelly-roll pan. Drizzle with olive oil and sprinkle with salt. Toss to coat, then spread out in an even layer on the pan. Bake for 35-40 minutes, or until tender, stirring occasionally. Let cool 5-10 minutes.

Place half of the squash mixture and half of the broth in a blender. Remove the center piece of the blender lid to allow steam to escape, and secure lid on blender. Place a clean towel over the opening in the blender lid to avoid splatters and blend until smooth. Pour into a large saucepan. Repeat with remaining squash and broth. Taste mixture and add more salt and pepper if desired. Cook in the saucepan over medium-high heat for 5 minutes or until thoroughly heated. Serve warm, seasoned with additional pepper if desired.

October 22, 2011

Sweet Potato Hummus

sweet potato hummus
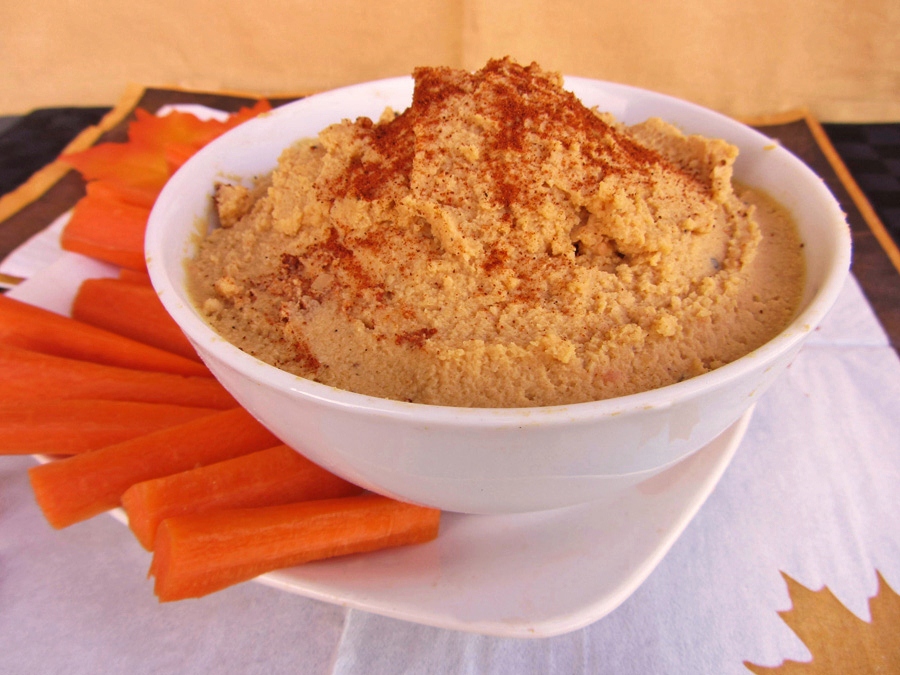
I've mentioned before how much I love making hummus because it's so quick and easy to make yourself, it makes a healthy and filling snack that can last you through the week, and there are so many different flavours out there to try (like beet hummus and spicy pumpkin hummus)!

When I was flipping through my Power Foods cookbook the other week, this sweet potato hummus recipe caught my eye. I'd never tried sweet potato hummus before but it sounded like the perfect combination for fall, and I'll take any excuse I can to bring delicious (and healthy!) sweet potatoes into a recipe.

This hummus did take a little longer to make than other types of hummus because you have to cook the sweet potatoes first, but the steaming method called for in the recipe was one of the quickest and easiest ways I've ever tried to cook a sweet potato. I think roasting them might bring out a little more of the flavour of the sweet potato, but in this case, I preferred the convenience of the steaming method.

The hummus had just the right amount of sweetness and hint of spice, and was delicious served with carrots or pitas as a healthy snack. Since it was a little on the thick side for hummus, it also made a great spread to serve on bread - and it went perfectly with the leftover sweet potato bread I had in the freezer!

I hope you guys aren't sick of hummus yet because I'm not and I plan on trying a lot of new recipes in the near future!

sweet potato hummus with carrot
Sweet Potato Hummus

Adapted from Whole Living

Ingredients:

1 pound sweet potatoes, peeled and cut into 1-inch pieces
1 (15-oz) can chickpeas, drained and rinsed
3 tablespoons fresh lemon juice
1/4 cup tahini
2 teaspoons ground cumin
1 teaspoon nutmeg
2 garlic cloves, minced
1/4 cup olive oil
Salt and pepper

Directions:

Fill a large pot with a couple inches of water. Bring to a boil and set a steamer basket overtop. Add potatoes to the steamer, reduce heat to a simmer, cover and cook until potatoes are tender, about 10-12 minutes. Let cool slightly.

Transfer potatoes to a food processor. Add chickpeas, lemon juice, tahini, cumin, nutmeg, and garlic. Puree until smooth. Pour olive oil into the feed tube of the food processor, allowing it to slowly drizzle into the bowl with the motor running. Once oil has been incorporated, season with salt and pepper to taste. If hummus is too thick, add up to 2 tablespoons of water to thin it out. Taste and adjust any amounts to your liking.

Serve with a sprinkle of paprika if desired. Store in an airtight container in the refrigerator for up to 1 week.

October 19, 2011

Chicken and Apple Sauté

chicken apple sauteThe farmer's markets are brimming with apples lately, and I'm starting to collect more apples in my fridge than I know what to do with. Since I'm still on a bit of a pumpkin kick in the baked goods department, I've been using my apples more for snacks and savory dishes. One dinner that I've really enjoyed lately is this quick and easy chicken and apple sauté.

This is a perfect weeknight meal because it doesn't take long to put together, it doesn't use any strange ingredients, and it's pretty healthy but still filling. All you have to do is sauté some apples, onions, and a bit of garlic until they're soft and fragrant, cook your chicken in some apple juice so it ends up nice and juicy, then combine everything together and serve it over some rice for a complete dinner. You could also throw in a side salad or vegetables to add a bit more nutrition to your meal.

The apples pair really well with the chicken, and the thyme brings an added punch of flavour that keeps the dish from being too sweet. This is definitely a great recipe to have on hand when you need to use up your apples, but it's also worth buying apples just to make this tasty meal!

Chicken and Apple Sauté

Adapted from Diana Ratray at About.com

Serves 2

Ingredients:

2 teaspoons olive oil
2 tart apples, peeled and chopped
1/2 a medium yellow onion, chopped
2 cloves garlic, minced
1/4 teaspoon dried thyme
1/4 teaspoon cinnamon
2 boneless skinless chicken breast halves, pounded thin
1 cup apple juice
1/2 tablespoon apple cider vinegar
1 tablespoon cornstarch
salt & pepper
1/2 cup uncooked instant brown rice

Directions:

Heat one teaspoon of olive oil in a large skillet over medium heat. Add the apples, onion, garlic, thyme, and cinnamon, and cook until apples and onions are soft, about 5-6 minutes, stirring often. Transfer mixture to a bowl and set aside.

Add remaining teaspoon of olive oil to the skillet and cook chicken breasts, turning once, for about 5 minutes total or until golden brown on both sides. Leave chicken in pan and reduce heat to medium low. Set 1 tablespoon of apple juice aside and pour the remaining apple juice in the skillet along with the apple cider vinegar. Cover and simmer for 6 to 8 minutes, until chicken is cooked through and juices run clear. Remove chicken and transfer to a platter or wrap in foil to keep warm (but leave the sauce in the pan).

Meanwhile, as the chicken is cooking, cook the rice according to package directions.
After you’ve removed the chicken from the pan, combine the cornstarch with the reserved tablespoon of apple juice in a small bowl, then stir it into the skillet juices and cook over medium-high heat, scraping up any browned bits, for 2 minutes or until juices are thickened.
Add the apple-onion mixture to the skillet and cook until heated through. Season with salt and pepper to taste.

To serve, place chicken atop cooked rice, and spoon apple mixture on top of the chicken.

October 16, 2011

Sweet Potato Gnocchi

sweet potato gnocchi with cinnamon brown butter sauce
Gnocchi is one of my favourite forms of pasta, and I always used to buy packages of it at the store because I assumed it was one of those things that would be impossible to make on your own. But when I started to get into cooking and reading recipes, I realized that gnocchi didn’t require any special equipment and actually didn’t sound too hard to make. When I finally worked up the courage to try it, I was thrilled – not only was it really easy to make, but it tasted amazing!

I recently had some leftover mashed sweet potato from making sweet potato bread, so I decided to try using it to make sweet potato gnocchi. Since I got to skip the step for making the mash, which is probably the most time consuming part of the gnocchi, it didn’t take long before I had a bunch of adorable little gnocchi ready to be cooked – and the cooking part also takes very little time.

For those who aren’t convinced that making your own gnocchi is worth the effort, I took some pictures to show how easy it is (just excuse the bad lighting)! Once you have your mashed sweet potato, mix it up with some flour, egg, and a pinch of salt and nutmeg, then roll it into long skinny ropes. The dough will be really sticky, so make sure you have a well floured surface and hands (I use my handy pastry mat, which makes clean-up much easier). Just be careful not to add too much extra flour to the dough or it will be tough. Once you have your ropes, just take a sharp knife and cut the ropes into little gnocchi-sized pieces. 

making sweet potato gnocchi ropes

If you want, you can just leave them as is, then throw them in a pot of water to cook (how easy is that?!), but I like to add ridges to the gnocchi first so they catch the sauce better. Most people just roll the gnocchi over the back of a fork to make ridges, but I like using the inside curve of the fork – it doesn’t matter, just do whatever works for you. I rolled the gnocchi over the tines of the fork then pinched the edges together, as shown in the pictures.

forming sweet potato gnocchiThis is what they'll look like when you're done. They don't all have to be perfect!

uncooked sweet potato gnocchi
Once your gnocchi is ready, all you have to do is throw them in a pot of simmering water, and once they float to the surface, they’re done! I heard Rachael Ray describing this stage of gnocchi-making on her show as putting the little guys in the hot tub for a soak and I thought that was pretty funny. I like to pretend I’m rescuing the gnocchi from the hot water whenever they pop to the surface for help and I scoop them out to safety. Making gnocchi should be fun!

When it comes to sauce, pretty much every recipe for sweet potato or pumpkin gnocchi calls for a browned butter sauce, often with sage. This is because any other sauce tends to overpower the taste of the sweet potato or pumpkin in the gnocchi. I went with this idea and made a browned butter cinnamon sauce for my first batch of gnocchi, which was delicious, but didn't exactly make for a healthy dinner.

sweet potato gnocchi with cinnamon brown butter sauceSince I had leftover gnocchi, I didn't want to keep eating melted butter for dinner with my leftovers, so I tried to think of a different way to serve it. I decided to be creative and make a coconut curry sauce for my leftovers, since I thought those flavours would go well with sweet potato. Even though the sauce I made looked a little radioactive, I decided to give it a chance. But as you might have guessed, it didn’t work that well with the gnocchi, so I wouldn’t recommend it.

sweet potato gnocchi with coconut curry sauce

I still had a handful of gnocchi left, so for lunch the next day I tossed them with some jarred marinara sauce and a sprinkle of parmesan. And guess what? That version ended up being my favourite! It did overpower the sweet potato, so it just tasted like you were eating regular gnocchi, but to me there’s nothing wrong that that! I love regular gnocchi, and this was just like a healthier version of it by replacing the potato with sweet potato! I didn’t think to take a picture until I was almost done, but you get the idea:

sweet potato gnocchi with tomato sauce
The lesson learned is that if you want to highlight the flavour of the gnocchi, go with the popular browned butter sauce, and it will be delicious. If you want a classic plain gnocchi flavour, then use a tomato sauce. Or you can always try to be adventurous and try something completely different like I did with the curry sauce, but just be prepared with a backup plan!

Sweet Potato Gnocchi

Gnocchi adapted from Macheesmo

Serves 2-3

Ingredients:

1 medium sweet potato (about 1 cup mashed)
3/4 to 1 cup all-purpose flour
1/2 an egg (whisk one egg, then divide into two – reserve other half for another use or discard)
Pinch of salt
Pinch of nutmeg

Directions:

Peel the sweet potato and cut into chunks. Bring a pot of water to a boil. Add the sweet potato cubes and simmer about 15 minutes, until tender. Rinse with cold water and drain well, then transfer to a bowl and mash the sweet potatoes with a fork. Let cool to room temperature.
Add the egg, salt and nutmeg to the sweet potatoes and mix well. Slowly add the flour 1/4 cup at a time, until dough starts to come together. Stop when you have a soft dough that’s slightly sticky but manageable.

Coat your hands and a flat surface with flour. Divide dough into two and roll each half into a long, even rope, about 1/2 to 1 inch thick.

Cut each rope into 1/2 inch pieces. Take each piece and roll it over the tines of a fork to form ridges, if desired. (See pictures above for instructions)

Bring a large pot of water to a gentle simmer (not a boil). Add gnocchi to the water. Once they float to the top that means they're ready, so remove them with a slotted spoon.

Browned Butter Cinnamon Sauce

While gnocchi are cooking, add desired amount of butter to a small pan and heat over medium heat (I used about a tablespoon of butter for one serving). The butter will start to foam, and once that foam turns brown, it’s ready (about 5 minutes) - don't cook longer than this point or the butter will burn. Add a pinch of cinnamon to the butter and mix, then toss with the gnocchi.

Ingredient Index

Related Posts Plugin for WordPress, Blogger...