Showing posts with label thyme - dried. Show all posts

December 10, 2013

French Onion Stuffed Baked Potatoes

French Onion Stuffed Baked Potatoes | www.onceuponacuttingboard.com

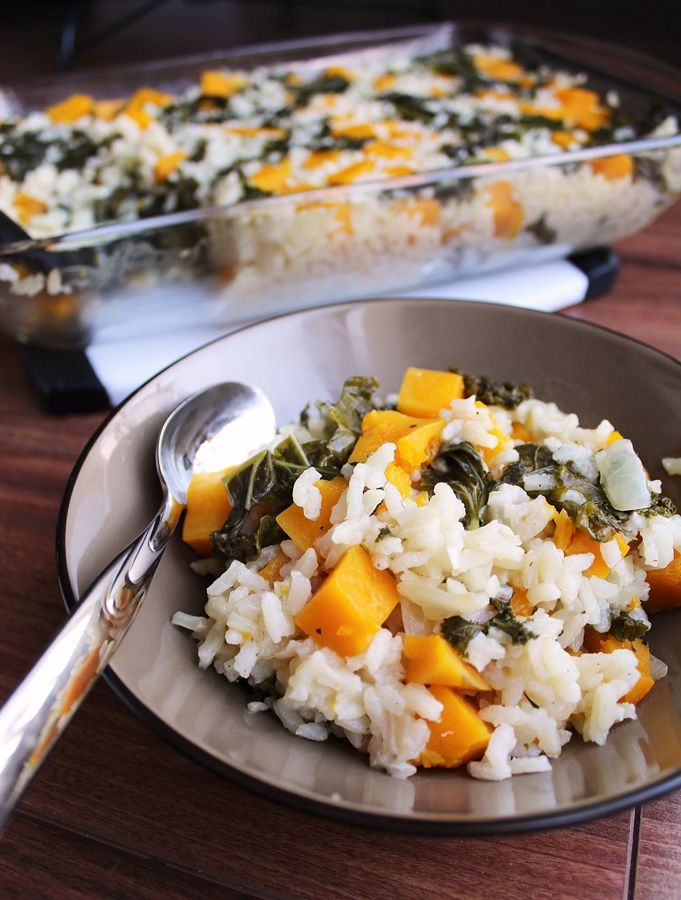
It seems to have become significantly colder around here over the last week as I’m finding myself needing to wear double layers of pants (tights under pants makes such a difference!), double mittens, and double scarves, along with my big winter boots. Sometimes I feel like a walking snowman, but it’s worth it! I’m sure people up farther north in Canada would laugh at me; today’s afternoon temperature here in southern Ontario is -10°C but -19°C (-2°F) with the windchill, but out in places like Thompson, Manitoba, the afternoon temperature with windchill is a freezing -39°C (-47°F)! I’m pretty sure I would never leave my house if I lived there!

Needless to say, I’m sure we’re all craving warm comfort food as the evenings get chillier, and these potatoes fit the bill!

French Onion Stuffed Baked Potatoes | www.onceuponacuttingboard.com

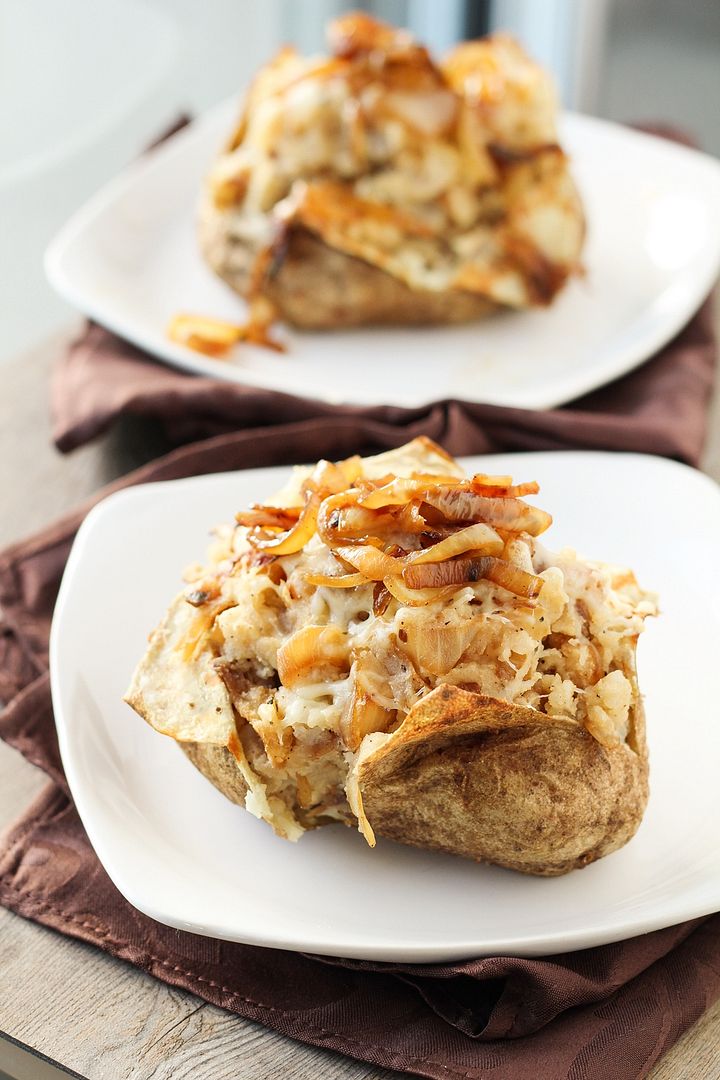
I love potatoes in all forms – French fries, mashed potatoes, roasted baby potatoes, skillet hashbrowns, and baked potatoes are all favourites of mine.  I usually don’t experiment with stuffing potatoes often as I love potatoes on their own so much, but a while back Food Network Magazine included a little booklet with 50 Stuffed Potatoes that I’ve been meaning to take a second look through for a while now.  I finally got around to it the other week and the first version I tried was these French onion soup inspired ones, and I’ve since made them twice already!

French Onion Stuffed Baked Potatoes | www.onceuponacuttingboard.com

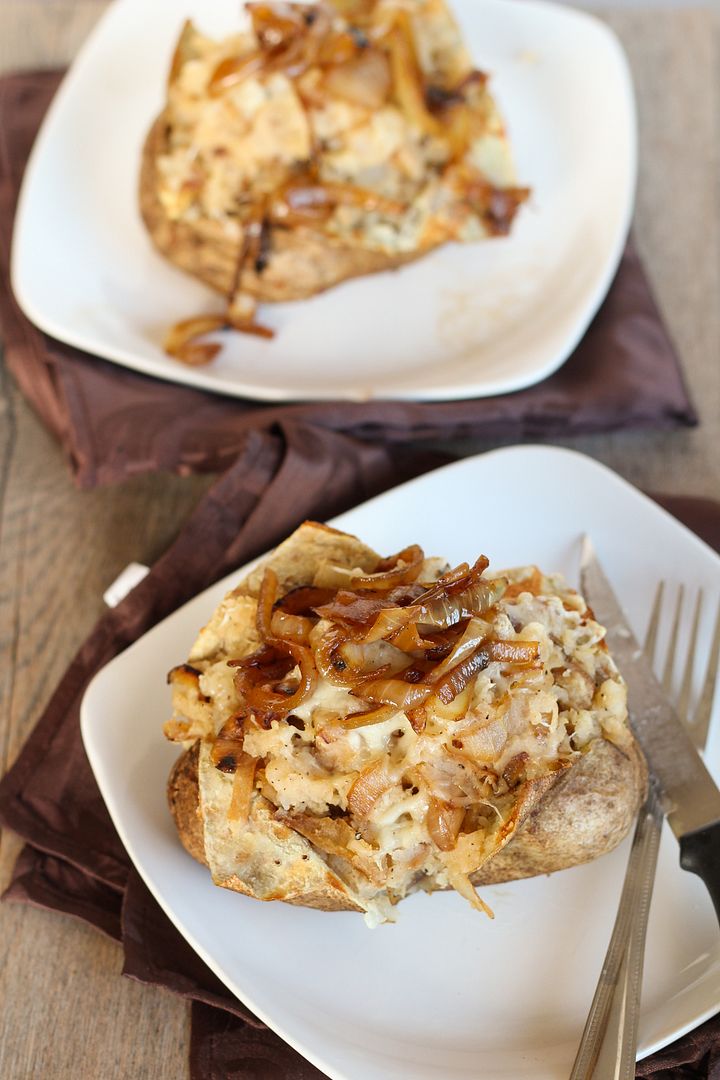
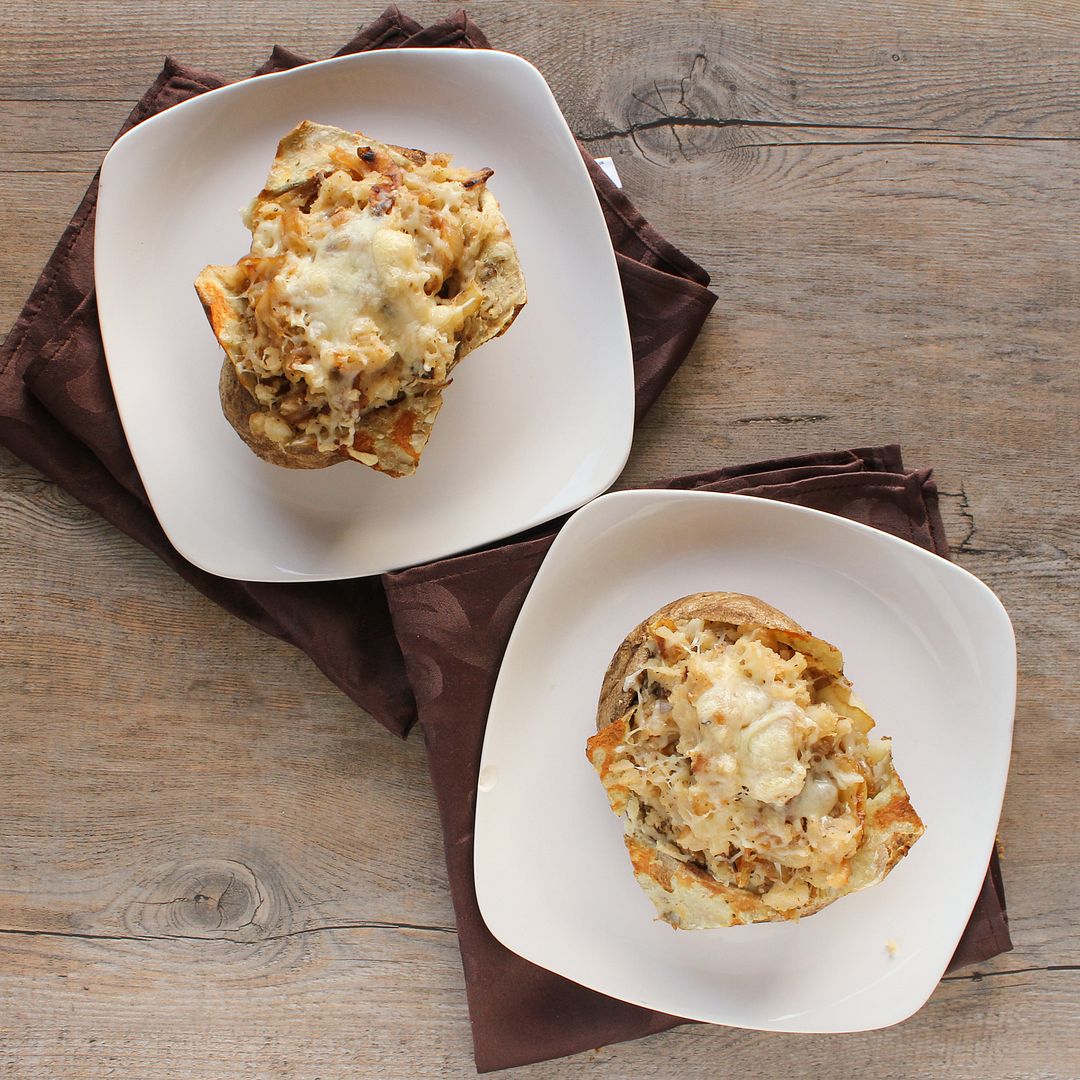
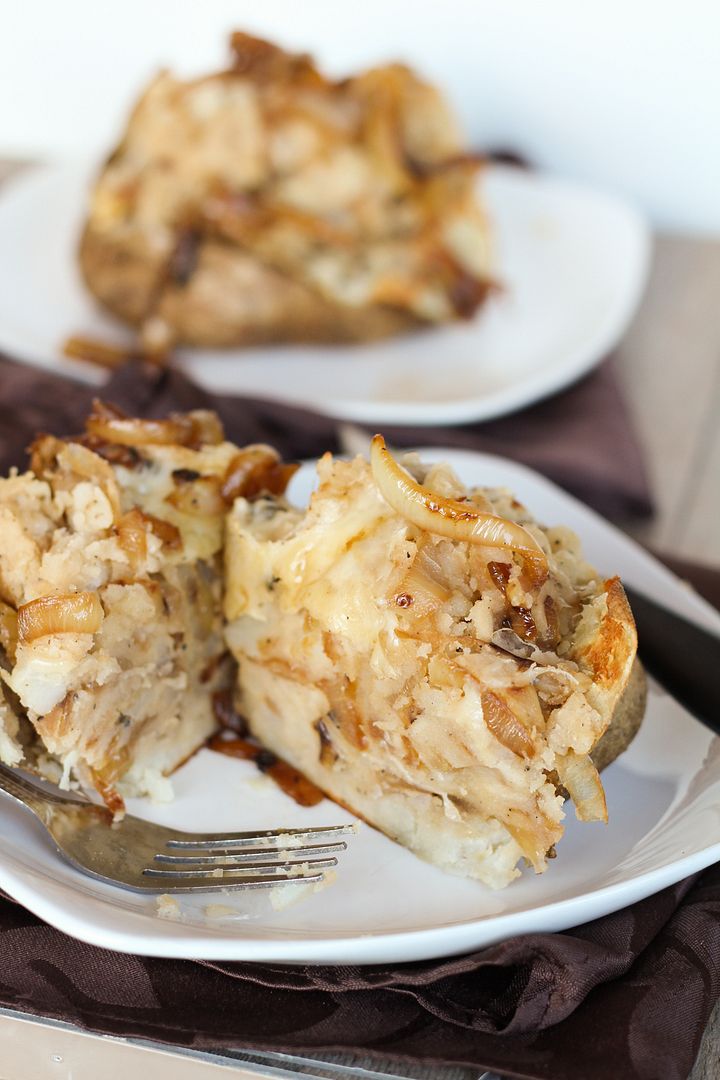
These take a little while to be ready, as all baked potatoes do, but they’re really easy to make. You just bake a potato, and meanwhile caramelize an onion or two on the stovetop. When the potatoes are cooked through, scoop out the flesh and mash it with the onions, some beef broth (though I’m sure you could use vegetable broth for a vegetarian version), cheese, and a little seasoning, then spoon it back in and broil the potatoes until the cheese melts. All the flavours of French onion soup, but in potato form! These end up being huge, so half a potato was fine for us a side dish with some chicken, or you can enjoy a whole one for a light lunch like I also did.

Hope you’re all staying warm and cozy out there!

French Onion Stuffed Baked Potatoes | www.onceuponacuttingboard.com

French Onion Stuffed Baked Potatoes


Makes 2 stuffed potatoes; serves 4 as a side dish (half a potato each)

Ingredients:

2 russet potatoes
1 tablespoon + 1 teaspoon olive oil, divided
1 large sweet onion or two medium yellow onions, thinly sliced
Salt and pepper
1/2 teaspoon dried thyme
1/4 cup beef broth
1/4 cup + 2 tablespoons shredded gruyere or swiss cheese (I used swiss because it was cheaper but either should work)

Directions:

Preheat oven to 400°F.  Scrub potatoes and prick all over with the tines of a fork.  Rub lightly with a teaspoon of olive oil.  Place on a baking sheet and bake in preheated oven for about 1 hour, or until tender.

Meanwhile, heat remaining tablespoon of oil in a large non-stick skillet over medium heat.  Add onions and stir to coat with oil.  After about 5 minutes, season with a bit of salt.  Spread onions out evenly across the pan and let cook, stirring about every 3-4 minutes, until caramelized, about 20-30 minutes total.  Save a small amount of onions to top the potatoes later, if desired.  Transfer the rest to a large bowl.

Once potatoes are ready, remove from oven and let cool slightly. Move oven rack to top third of oven and preheat oven to broil. Slice potatoes crosswise, peel back skin on top of the potato, and scoop out the insides, leaving a thin layer of potato attached to the skin so it remains intact.  Add the scooped out potato to the bowl with the onions, season generously with salt and pepper, and add the thyme, beef broth, and 1/4 cup of shredded cheese.  Mash together, then spoon back into the potatoes to stuff them.  Top each potato with about a tablespoon of remaining cheese.  Return to oven to broil until cheese is melted and potato is heated through, about 3-5 minutes.  Serve hot, seasoned with additional salt and pepper if desired.

January 08, 2013

Butternut Squash & Kale Baked Risotto

Butternut Squash & Kale Baked Risotto

I'm so excited to finally have a new recipe on the blog!  I loved spending the holidays at home and having amazing meals cooked for me most nights, but it also feels good to be back in my own kitchen cooking again, especially using healthy ingredients after a bit of overindulgence over the holidays!

I love risotto, and while it's pretty easy to make, I don't always love standing over a hot stove stirring for half an hour.  I had no idea that baked risotto existed until recently and was very eager to try it out as soon as possible!

This uses all the same ingredients and follows most of the same steps as regular risotto, but when you get to the part of slowly adding broth to the rice and stirring, you just pour it all in at once instead and bake it on the oven (see pic below).

Butternut Squash & Kale Baked Risotto

This version adds butternut squash and kale so it's healthy and tasty!  I found that the texture doesn't turn out to be exactly as creamy as traditional risotto, but it was pretty close.  I know the pictures somehow make it look like regular rice, but it was much creamier than that!  I'd still make the regular version if I wanted to impress guests (or get a good arm workout), but this is a nice shortcut option to have for weeknight meals.

I completely forgot to add the parmesan cheese before taking these photos - it helps the rice stick together and adds flavour, so don't forget it!

Butternut Squash & Kale Baked Risotto

Butternut Squash & Kale Baked Risotto

Adapted from Martha Stewart

Serves about 6

Ingredients:

1 tablespoon olive oil
1 medium yellow onion, diced
2 garlic cloves, minced
1/2 teaspoon dried thyme
1-1/2 cups Arborio rice
Salt and pepper
1/2 cup dry white wine (I used Sauvignon Blanc)
4 cups peeled and diced butternut squash (from a small to medium 2 pound squash)
1 (900 mL) carton low-sodium chicken broth (substitute vegetable broth for vegetarian version)
1 bunch kale, tough stems removed, sliced crosswise into 1/2-inch strips
Grated parmesan cheese for serving

Directions:

Preheat oven to 400°F.

Heat the oil in a large saucepan over medium heat. Add onion and cook, stirring occasionally, for 5-6 minutes until softened. Add garlic and thyme and cook for 1 more minute, until fragrant. Stir in the rice and cook, stirring frequently, for 3 minutes. Season with salt and pepper.

Add wine and cook until almost absorbed, stirring often, about 2 minutes. Add the squash and broth and bring to a boil. Stir in the kale. Transfer to a 9x13 glass baking dish, cover with aluminum foil, and bake in preheated oven for about 25 minutes, until most of liquid is absorbed and rice is tender. Let sit for about 5 minutes before serving. Top each portion with grated parmesan cheese.

Note: The original recipe called for the use of a Dutch oven - that way you don’t have to transfer the rice to a baking dish as you could just transfer the pot to the oven. I didn’t have a Dutch oven where I was cooking this, but it still worked fine without one.

October 19, 2012

Apple Turkey Burgers with Caramelized Onions & Brie

Apple Turkey Burgers with Caramelized Onions and Brie

I love experimenting with different types of veggie burgers – from bean burgers to quinoa to even broccoli burgers! – but I also love a good meat burger once in a while.  While I can sometimes tolerate a beef burger, I MUCH prefer turkey burgers, which is a good thing as they’re also a much healthier choice!  I’ve tried a lot of awesome turkey burger recipes in the past, like Thai peanut turkey burgers (which I really must make again) and BBQ pineapple burgers, but these apple ones might just be my new favourite!

These burgers are extra juicy with the addition of grated apple in the patties, then get tons of flavour from the toppings: crunchy apples, melted brie, and caramelized onions.  Each component works so well together to create a sophisticated but super easy burger – don’t leave any of the toppings out!  The caramelized onions are the only time consuming part of this meal but they can easily be done in advance and reheated when it’s time to eat.  And if you’re vegetarian, I think these would work really well as a chickpea burger too!

What's your favourite type of burger?

Apple Turkey Burgers with Caramelized Onions and Brie

Apple Turkey Burgers with Caramelized Onions and Brie

Recipe adapted from Carolina Girl Cooks and Iowa Girl Eats

Makes 4 burgers

Ingredients:

4 small yellow onions, peeled and sliced into half-moons (or 2 larger yellow onions)
1 tablespoon olive oil
1 lb lean ground turkey
2 granny smith apples, divided
1 teaspoon Dijon mustard
1/2 teaspoon dried thyme
1/2 teaspoon dried sage
Salt and pepper
8 slices Brie cheese
4 hamburger buns

Directions:

Start by caramelizing the onions, as this step can take up to half an hour.  Heat olive oil in a large skillet over medium heat.  Add onions, stir to coat with oil, and season with salt and pepper.  Spread onions out evenly across the pan and let cook, stirring occasionally, until onions are soft and caramelized, about 25-30 minutes.  Don’t stir the onions too often so they can brown, but don’t leave them alone long enough to burn or stick to the pan.  You may need to reduce the heat or add a splash of water to deglaze the pan a few times to prevent onions from burning.  Once they’re done, set aside in a small bowl.  This step can be done ahead of time and onions can be warmed up in the microwave before topping burger.

Grate one apple for using in the turkey burger and keep the second apple aside for topping the burger later.  Prepare turkey burgers by gently mixing ground turkey, grated apple, Dijon mustard, thyme, sage, and a sprinkle of salt and pepper in a bowl.  Form into four patties, being careful not to overwork the mixture. 

Heat a large skillet over medium-high heat and spray with cooking spray or drizzle with oil.  Cook turkey burgers until cooked through (center no longer pink, juices run clear, internal temperature of 165°F), about 5 minutes per side.  Add 2 slices of brie cheese to each burger about 2-3 minutes before it’s done cooking so the brie can melt slightly.

Thinly slice the second apple.  Top each bun with a turkey burger (with brie), sliced apples, and caramelized onions.

March 17, 2012

Red Wine Lentils with Roasted Vegetables and Goat Cheese

red wine lentils Greetings from Singapore! As I mentioned in my last post, I've gone to Singapore for a research conference, which my sister and I will be following up with a very brief trip to Thailand. I've been here for a couple days now and absolutely love it! I've gotten to do a bit of sightseeing and shopping, and I've tried some great food so far - I'll try to do a post about the food when I get back!

As promised, I'm trying not to ignore my blog while I'm away so I'm sharing a recipe I made before I left. This is also my second entry in the Canadian Lentils Recipe Revelations Contest which ends March 19th, so I wanted to make sure I posted it on time!

If you saw my recent recipe for peanut butter lentil granola bars, then I don't have to bother repeating how healthy and versatile lentils are in cooking. They pair really well with meats like fish, but they are a good source of protein themselves and I love eating them as a base for a vegetarian main course, as they're used in this recipe for red wine lentils with roasted vegetables and goat cheese.

This dish was inspired by a recipe I saw on Cooking Light, but I ended up changing around so many of the ingredients and steps that I think it's safe to call it my own now. It's made of green lentils mixed with root vegetables that are roasted in a red wine dressing, then the whole thing is mixed with a really flavourful red wine sauce and topped with a bit of crumbled goat cheese. The result is a truly delicious dish with an earthy flavour from the lentils and vegetables that's deepened by the red wine sauce but brightened up by the bits of tangy goat cheese.

red wine lentilsI know this dish wouldn't win any beauty awards looks-wise (and it doesn't help that it was getting dark at the time I tried to photograph it), but despite its looks, you have to trust me that this really is a wonderful dish! What amazes me most about it is how it actually reminds of me meat - every time I heated up leftovers in the microwave, I could have sworn I could smell steak, probably because of the red wine sauce. That also makes me think that this would be a great dish to introduce skeptical meat eaters to vegetarian proteins like lentils. I gave some of my leftovers to my meat-eating boyfriend who has never had lentils before, and to my vegetarian sister who's quite familiar with them, and they both loved it!

The ingredients list may look a little intimidating, but a lot of the items are actually pantry staples (I only needed to buy carrots, parsnips, beets, tarragon, and goat cheese), and the recipe isn't difficult to prepare if you time all the steps right. I've tried to write the recipe directions in a way that makes it easy to know exactly when to do everything so that the dish will come together quickly and easily.

As with my lentil granola bars, if you want to help me out with this entry to the Canadian Lentils contest, feel free to leave me a comment on this blog post or head over to my post on the Canadian Lentils Facebook page to 'like' it. As the contest is now coming to a close, you'll also be able to find lots of other entries on their page, so be sure to check them all out if you're interested in finding more recipes using lentils! Thanks guys! :)

red wine lentils

Red Wine Lentils with Roasted Vegetables and Goat Cheese

Inspired by Cooking Light

Serves about 4-5

Ingredients:

For the roasted vegetables:
1 cup yellow pearl onions, ends trimmed and peeled
12 oz chopped peeled carrots (about 2 to 3 large carrots)
8 oz chopped peeled parsnips (about 1 to 2 parsnips)
12 oz beets (about 4-5 medium beets), peeled and chopped
10 cloves garlic, peeled
1/4 cup dry red wine
1 tablespoon balsamic vinegar
1 tablespoon olive oil
1/2 teaspoon each salt and pepper
1 teaspoon chopped fresh tarragon

For the lentils:
3 cups water
1-1/2 cups dry green lentils

For the red wine sauce:
1/2 medium onion, peeled and chopped
2 cloves garlic, minced
1 tablespoon olive oil
2 tablespoons tomato paste
½ teaspoon dried thyme
1 teaspoon chopped fresh tarragon
1 cup dry red wine
1/2 cup water
½ a vegetable bouillon cube
Salt and pepper

For topping:
4 oz crumbled goat cheese

Directions:

Preheat oven to 425°F and line a large baking sheet with aluminum foil. Chop all the vegetables (pearl onions, carrots, parnsnips, and beets) into small, even pieces, about ½” thick, and transfer to a large bowl along with the garlic cloves. Mix the red wine, balsamic vinegar, olive oil, salt, pepper, and tarragon in a small bowl, then pour over the vegetables and toss to coat. Transfer the vegetables to the baking sheet, place in the preheated oven, and set the timer for 40 minutes.

When there are 30 minutes left on the timer, combine the lentils and water in a large saucepan and bring to a boil. Once the water reaches a boil, reduce heat, cover, and let simmer for 25 minutes (which should be the remainder of the time left on the vegetables).

Chop the onion and garlic and prepare ingredients for red wine sauce.

When there are 15 minutes left on the timer, heat the olive oil over medium-high heat in a large saucepan. Once hot, add the onions and garlic, and sauté until softened and golden brown, about 5 minutes, stirring often. Add the tomato paste, thyme, and tarragon, and stir for another minute. Add the red wine, water, and bouillon cube, and bring mixture to a boil. Reduce heat, cover, and let simmer about 5 minutes, until slightly reduced and thickened. Remove from heat and season with salt and pepper to taste.

At this time, your lentils and vegetables should be done cooking. Check both, and allow to cook longer if they’re still hard. Otherwise, combine the lentils, vegetables, and red wine sauce and stir together.
Divide into bowls, top each serving with about 1 ounce of crumbled goat cheese (or more, if desired), and season with salt and pepper if desired. Serve warm.

October 19, 2011

Chicken and Apple Sauté

chicken apple saute
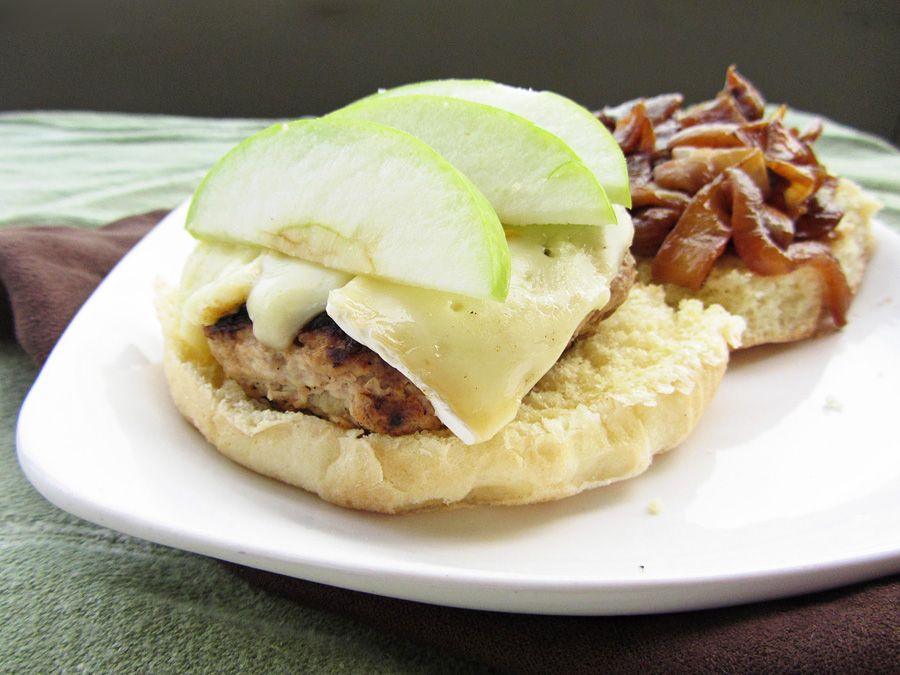
The farmer's markets are brimming with apples lately, and I'm starting to collect more apples in my fridge than I know what to do with. Since I'm still on a bit of a pumpkin kick in the baked goods department, I've been using my apples more for snacks and savory dishes. One dinner that I've really enjoyed lately is this quick and easy chicken and apple sauté.

This is a perfect weeknight meal because it doesn't take long to put together, it doesn't use any strange ingredients, and it's pretty healthy but still filling. All you have to do is sauté some apples, onions, and a bit of garlic until they're soft and fragrant, cook your chicken in some apple juice so it ends up nice and juicy, then combine everything together and serve it over some rice for a complete dinner. You could also throw in a side salad or vegetables to add a bit more nutrition to your meal.

The apples pair really well with the chicken, and the thyme brings an added punch of flavour that keeps the dish from being too sweet. This is definitely a great recipe to have on hand when you need to use up your apples, but it's also worth buying apples just to make this tasty meal!

Chicken and Apple Sauté

Adapted from Diana Ratray at About.com

Serves 2

Ingredients:

2 teaspoons olive oil
2 tart apples, peeled and chopped
1/2 a medium yellow onion, chopped
2 cloves garlic, minced
1/4 teaspoon dried thyme
1/4 teaspoon cinnamon
2 boneless skinless chicken breast halves, pounded thin
1 cup apple juice
1/2 tablespoon apple cider vinegar
1 tablespoon cornstarch
salt & pepper
1/2 cup uncooked instant brown rice

Directions:

Heat one teaspoon of olive oil in a large skillet over medium heat. Add the apples, onion, garlic, thyme, and cinnamon, and cook until apples and onions are soft, about 5-6 minutes, stirring often. Transfer mixture to a bowl and set aside.

Add remaining teaspoon of olive oil to the skillet and cook chicken breasts, turning once, for about 5 minutes total or until golden brown on both sides. Leave chicken in pan and reduce heat to medium low. Set 1 tablespoon of apple juice aside and pour the remaining apple juice in the skillet along with the apple cider vinegar. Cover and simmer for 6 to 8 minutes, until chicken is cooked through and juices run clear. Remove chicken and transfer to a platter or wrap in foil to keep warm (but leave the sauce in the pan).

Meanwhile, as the chicken is cooking, cook the rice according to package directions.
After you’ve removed the chicken from the pan, combine the cornstarch with the reserved tablespoon of apple juice in a small bowl, then stir it into the skillet juices and cook over medium-high heat, scraping up any browned bits, for 2 minutes or until juices are thickened.
Add the apple-onion mixture to the skillet and cook until heated through. Season with salt and pepper to taste.

To serve, place chicken atop cooked rice, and spoon apple mixture on top of the chicken.

October 06, 2011

Thanksgiving Week Day 5 - Butternut Squash Gratin

butternut squash gratinFor Day 5 of Thanksgiving Week I wanted to choose a side dish recipe that was a little more exciting than mashed potatoes (although I do love mashed potatoes) but still easy enough to manage as part of a big meal.

I initially chose a recipe for honey and herb roasted root vegetables from Cooking Light. I shopped, chopped, cooked, and photographed before tasting and deciding that the recipe just wasn't special enough to share for Thanksgiving Week. It was still good, just a little boring.

I then had a lot of pressure to choose a really good recipe to share instead, and decided to go with a Bon Appetit recipe for a butternut squash gratin, which got lots of really good reviews on Epicurious. One bite in, I knew I'd made a good choice this time - whereas I wouldn't care if I ever ate the root vegetables again, this gratin was definitely something I would (and did) go back for seconds of.

I was a bit worried about the type of cheese that the recipe called for, as I'd never paired squash and cheddar together, but the caramelized onions really brought everything together in an unexpected but delicious way. The only bad part about this recipe was that it was hard to photograph, and I hate when really tasty dishes don't come across that way in pictures. But trust me, underneath that pile of messy breadcrumbs is some of the most flavourful squash I've ever tasted! I think the chicken broth helped infuse a unique flavour to the squash that I really liked, but you could easily use vegetable broth to make this dish vegetarian.

There are only 2 days of Thanksgiving Week left and I've saved the best for last - the main dish and the dessert - so be sure to come back for the recipes!

butternut squash gratinButternut Squash Gratin with Rosemary Breadcrumbs

Adapted from Bon Appetit, as seen on Epicurious

Serves 8 - 10

Ingredients:
3 tablespoons unsalted butter
4 cups thinly sliced onions
2 1/2 pounds butternut squash, peeled, seeded, and cut into 1/2-inch cubes
1 teaspoon sugar
1/2 teaspoon salt
1/2 teaspoon ground black pepper
3/4 cup low sodium chicken broth
1.5 to 2 cups fresh breadcrumbs made from soft white bread (I used storebought, panko would also work)
2 cups (packed) grated sharp white cheddar cheese
1 tablespoon chopped fresh rosemary
1/2 teaspoon dried thyme

Directions:

Preheat oven to 350°F. Grease a 13x9x2 glass baking dish with cooking spray.

Melt butter in a large skillet over medium-high heat. Add the onions and sauté until soft and golden, about 8 minutes. Add the chopped squash, stir and sauté another 4 minutes. Sprinkle the sugar, salt, and pepper over the vegetables and sauté until onions and squash begin to caramelize, stirring often, about 5 minutes.

Spread the squash-onion mixture in the prepared baking dish. Pour the chicken broth over the mixture, cover tightly with foil and bake in the preheated oven for 45 minutes.

*The above steps can all be done 1 day ahead. Just cool the mixture after baking, then cover and refrigerate. Reheat the next day in a 350°F oven until heated through, about 10 minutes, then proceed with the rest of the directions.

Increase oven temperature to 400°F. Mix the breadcrumbs, cheese, rosemary and thyme in a large bowl, then sprinkle evenly over gratin. Bake uncovered until top is golden brown and crisp, about 25-30 minutes.

---------------------------------------------------------------------------------------------------------------------------

For other Thanksgiving side dish ideas, check out these links:

Cider glazed roots with cinnamon walnuts from Eating Well
Maple roasted sweet potatoes from Eating Well
Crispy potato roast from The Bitten Word
Potato gratin with rosemary crust from The Bitten Word
Oven roasted garlic brussel sprouts from Sweet Pea's Kitchen
Mashed sweet potatoes from All Recipes

---------------------------------------------------------------------------------------------------------------------------

October 04, 2011

Thanksgiving Week Day 3 - Hearty Sweet Potato Braids

sweet potato bread
For Day 3 of Thanksgiving Week, I decided to share this recipe for hearty sweet potato braids. Bread is an essential part of any meal, but especially the Thanksgiving meal. I think there are two types of bread people – the first likes to eat their bread on the side of their meal, and the other uses it to construct a sandwich out of everything else on their plate. I used to be in the former category, until I discovered how amazing all the components of Thanksgiving dinner (turkey, cranberry sauce, potatoes, stuffing) taste when mixed together on top of a slice of thick bread. But either way you like to eat it, this sweet potato bread is delicious!

This is not a light and fluffy bread – it’s dense and moist, hence the word ‘hearty’ in the title. It’s also not a sweet bread as you might expect from having the sweet potato in there – the addition of the thyme makes it a savory bread, but you could always adjust any of the spices to your own taste! I really enjoyed this bread as is, and I think it would be a great addition to a Thanksgiving meal on its own. But it would also work really well as a base for the spicy pumpkin hummus appetizer I shared yesterday (I tried this and they paired really well together)!

sweet potato bread
The recipe makes two loaves, and while one would be enough to feed a crowd, you might as well make two loaves because it would be tricky to divide a package of yeast in half. This also means you get to keep a whole extra loaf all to yourself – just slice it, wrap it up well and pop it in the freezer after you bake it, then you can pull out a slice or two to thaw anytime you want! One of my favourite dinners last week consisted of a few slices of this bread topped with a ton of roasted garlic with salt and pepper – amazing!

As with any yeast bread, this does take a while to make, but most of it is “hands off” time, freeing you up to work on your other Thanksgiving dishes! This was my first time making a braided bread, and it was actually much easier than I thought! If you’ve ever braided hair, then it’s just like that (although a little heavier and doughier!) After dividing your dough into six equal portions, you roll each one into a 20” rope – if you have a pastry mat with measurements on it, then this part is really easy! Ryan’s mom gave me one and it makes rolling out pie dough and other dough so much easier than my old method of trying to line up a bunch of rulers on the counter. It also makes clean up much simpler too!

sweet potato bread

I tried two methods for braiding the dough. First I tried braiding from the centre of the ropes:

sweet potato bread

For my second loaf, I tried braiding from the end of the ropes:

sweet potato bread
Both worked, but as you can see from the pictures, the first method resulted in a slightly more even braid, so I think I’d recommend you try the braiding from the middle method.

If you don’t have time to make a yeasted bread on Thanksgiving, then check out the Thanksgiving Week recipe for rosemary sweet potato cornbread over at Vanilla & Spice!

sweet potato bread
Hearty Sweet Potato Braids

Adapted from Taste of Home

Makes 2 loaves

Ingredients:

1 package (1/4 ounce) active dry yeast
1/4 cup warm water (110° to 115°)
1/2 teaspoon sugar
~1.5 lbs sweet potato, peeled and cubed (from about 1 large or 2 medium sweet potatoes)
1 cup warm skim milk (110° to 115°)
1/4 cup canola oil
3 tablespoons honey
1 cup all-purpose flour
1/2 cup yellow cornmeal
2 teaspoons kosher salt
1 teaspoon dried thyme
1/2 teaspoon nutmeg
2-3/4 to 3-1/4 cups whole wheat flour

Directions:

Bring a large pot of water to a boil. Add the sweet potato cubes and simmer about 15 minutes, until tender. Drain and rinse with cold water, then transfer to a bowl and mash the sweet potatoes with a fork. Let cool to room temperature.

In a small bowl, dissolve the yeast into the warm water. Add the sugar, stir, and leave for 10 minutes. Mixture should foam and double in size – if it doesn’t, the yeast is no longer active, and you’ll have to start again with a new pack.

Pour the yeast mixture into the bowl of an electric mixer, or a large bowl. Add the mashed sweet potatoes, milk, oil, honey, all-purpose flour, cornmeal, salt, thyme, nutmeg, and 2 cups of the whole-wheat flour. Beat until smooth. Stir in enough of the remaining whole wheat flour to form a firm dough.

Attach the dough hook to the mixer and knead for 6-8 minutes until smooth and elastic. If you don’t have a dough hook, knead the dough by hand on a floured surface. Add more flour as you’re kneading if the dough is too sticky.

Transfer the ball of dough into a large, lightly oiled bowl. Cover and let rise in a warm place until doubled, about 1 hour.

Punch down dough and divide into six equal portions (a scale is helpful here). Shape each portion into a 20-inch rope. Place three ropes side by side on a baking sheet that has been lightly greased or lined with parchment paper. Braid the three ropes and pinch each end to seal, tucking under the braid. Repeat with the remaining ropes to form two braids. Cover and let rise in a warm place until doubled, about 35 minutes. Meanwhile, preheat oven to 350°F.
Bake loaves together at 350°F for 30-35 minutes or until golden brown. Remove to wire racks to cool. Slice diagonally.

-------------------------------------------------------------------------------------------------------------------------------
For other Thanksgiving bread ideas, check out these links:

Perfect dinner rolls from Mel’s Kitchen Café
Buttermilk cluster from The Fresh Loaf
Soft garlic knots from Annie’s Eats
Parmesan pull-apart rolls from Picky Cook
Cranberry walnut bread rolls from La Tartine Gourmande
Pumpkin garlic knots from Handle the Heat
Rosemary pumpkin crescent rolls from Heat Oven to 350
-------------------------------------------------------------------------------------------------------------------------------

Ingredient Index

Related Posts Plugin for WordPress, Blogger...