With the San Francisco 49ers in the Super Bowl this weekend, I wanted to make something San Francisco-inspired to cheer them on. I've never been to California (though it's definitely on my list of places to visit), but I when I think of the Bay area, two things that come to mind are seafood and avocados. After a little research into foods that represent the area, I found out that Green Goddess dressing (named for its green colour that comes from the addition of lots of herbs) was apparently created in San Francisco.
So I decided to combine all of this together into salmon burgers with an avocado green goddess sauce. And since I associate the Super Bowl with snacking on appetizer-sized food, I made them into mini sliders instead of full sized burgers (which also happen to be much cuter!)
I only had frozen salmon to work with, so these didn't turn out as great as they would be with fresh salmon, but they were still delicious - I loved the combination of flavours and all the green goodness going on!
If you have some nice salmon and don't like the idea of pulsing it up into a burger, feel free to just broil it and serve it like these salmon sliders from How Sweet It Is. I wanted to make burgers to infuse some of the green goddess flavours into them, but leaving the salmon as is would be a lot easier!
If you don't like salmon at all, you could just make the sauce and serve it as a dip for veggies (leave out the worcestershire or use vegetarian worcestershire for a vegetarian dip). Or if you want something a little thicker to serve with chips, try this green goddess guacamole from The Fig Tree!
And if you want something 49ers-inspired to wash things down with, try a beer from Anchor Brewing (if it's available where you live), or check out these gorgeous Kaepernick Sparklers from Daydreamer Desserts!
Go Niners! :)
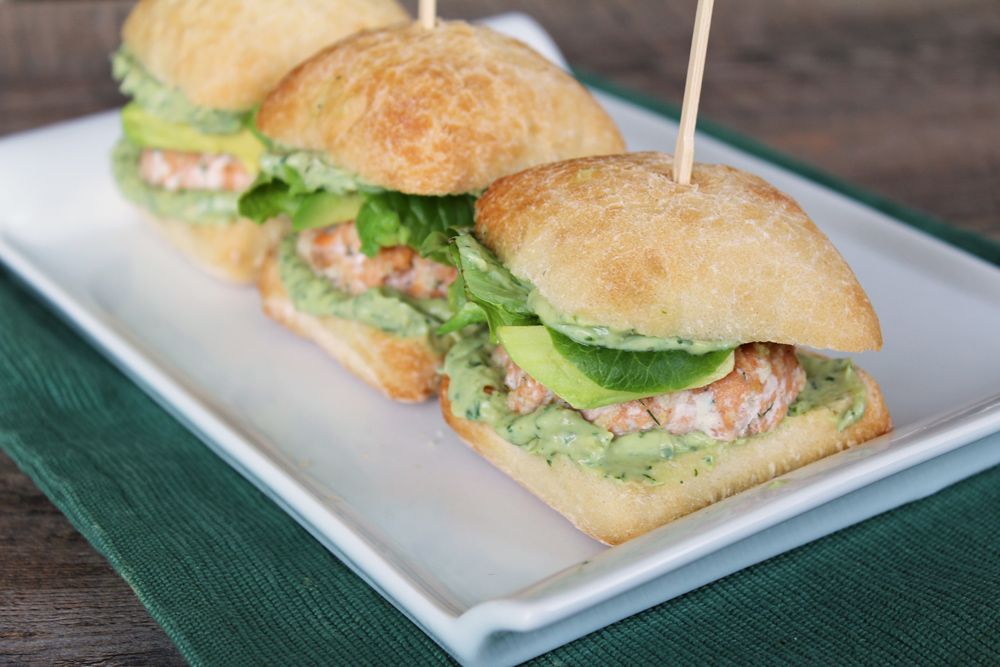
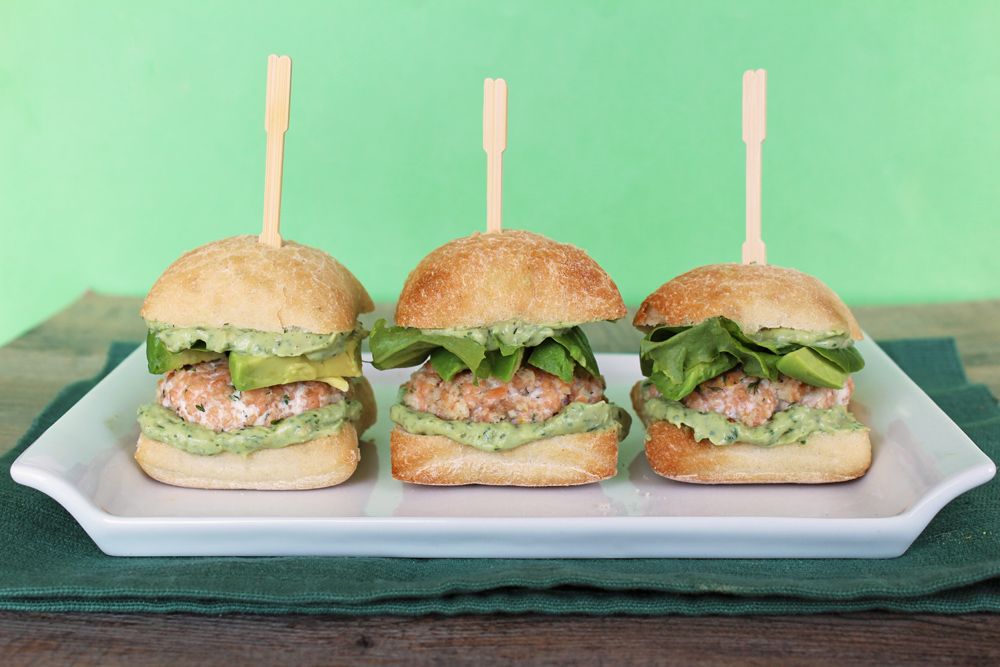
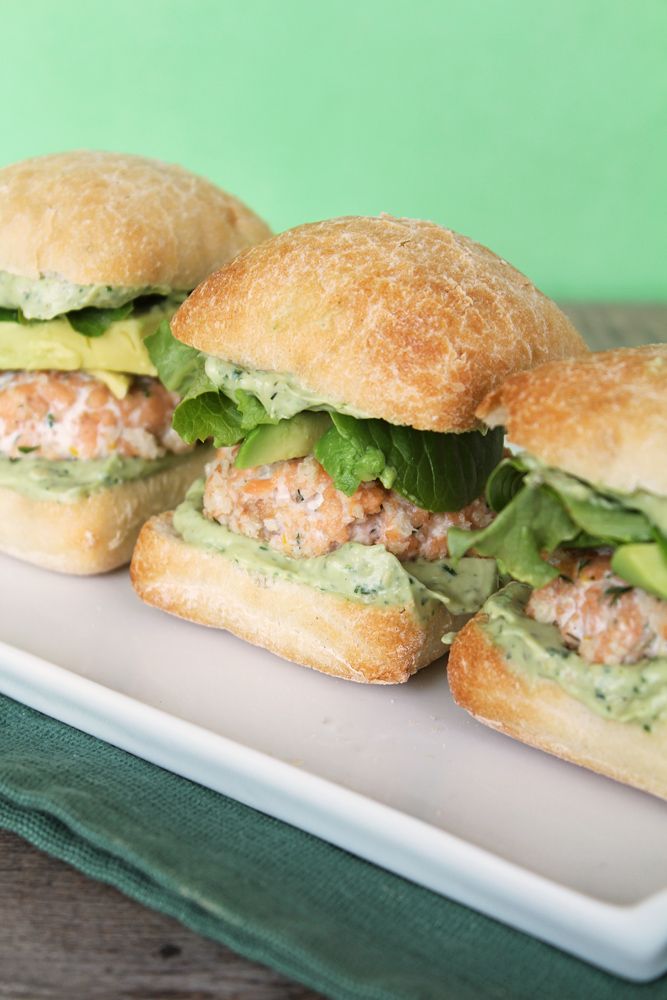
Avocado Green Goddess Salmon Sliders
Makes 10 mini sliders
Ingredients:
For the Green Goddess Sauce:
1 ripe avocado, chopped
1/2 cup light sour cream
2 tablespoons chopped tarragon
2 tablespoons chopped parsley
2 tablespoons chopped dill
1-2 tablespoons fresh lemon juice
2 teaspoons capers, drained
Dash worcestershire sauce
1/4 teaspoons each salt and pepper
For the Burgers:
1 pound fresh salmon fillets, skin and bones removed*
2 tablespoons minced shallots
1 tablespoon chopped parsley
1 tablespoon chopped dill
1 teaspoon lemon zest
1/2 teaspoon salt
1/4 teaspoon ground pepper
1/4 cup panko breadcrumbs
For Assembling:
Mini slider buns (I used mini ciabatta buns)
Lettuce
Sliced avocado
Tomato (optional)
Directions:
First prepare the sauce. Add all ingredients for the green goddess sauce to the bowl of a food processor and blend until smooth. Taste and adjust any amounts to your liking if needed. Refrigerate until ready to use.
Next prepare the salmon patties. Cut salmon into chunks, and add to food processor along with shallots, parsley, dill, lemon zest, salt, and pepper. Pulse just until combined. If you prefer to have some larger chunks of salmon in your burger, then leave half to three quarters of the salmon out of the mixture, chop into ¼” pieces, and add to the mixture after processing. Add panko breadcrumbs so that mixture will form patties. Gently form patties 3/4-inch thick and wide enough to match the size of your slider buns. Place on a parchment-lined baking sheet and refrigerate for at least 30 minutes.
Finally, cook the burgers. You can either heat a large skillet over medium-high heat, lightly grease, and cook the burgers for 3-4 minutes per side, until cooked through, if you want a crispier browned exterior. I baked mine just because it was easier. To bake the patties, bake at 400°F for about 20 minutes, until cooked through. Note that pan-frying them is the ideal method.
Assemble burgers by topping buns and patties with the green goddess sauce, along with lettuce, tomato, and sliced avocado.
*Note: my grocery store only had very expensive and not very fresh looking salmon, so I used frozen wild salmon fillets instead and thawed them. I find that frozen salmon doesn’t taste as good as fresh and has a fishier smell and taste, so fresh salmon is preferable.