Showing posts with label nutmeg. Show all posts

September 25, 2014

Vegan Pumpkin Pie

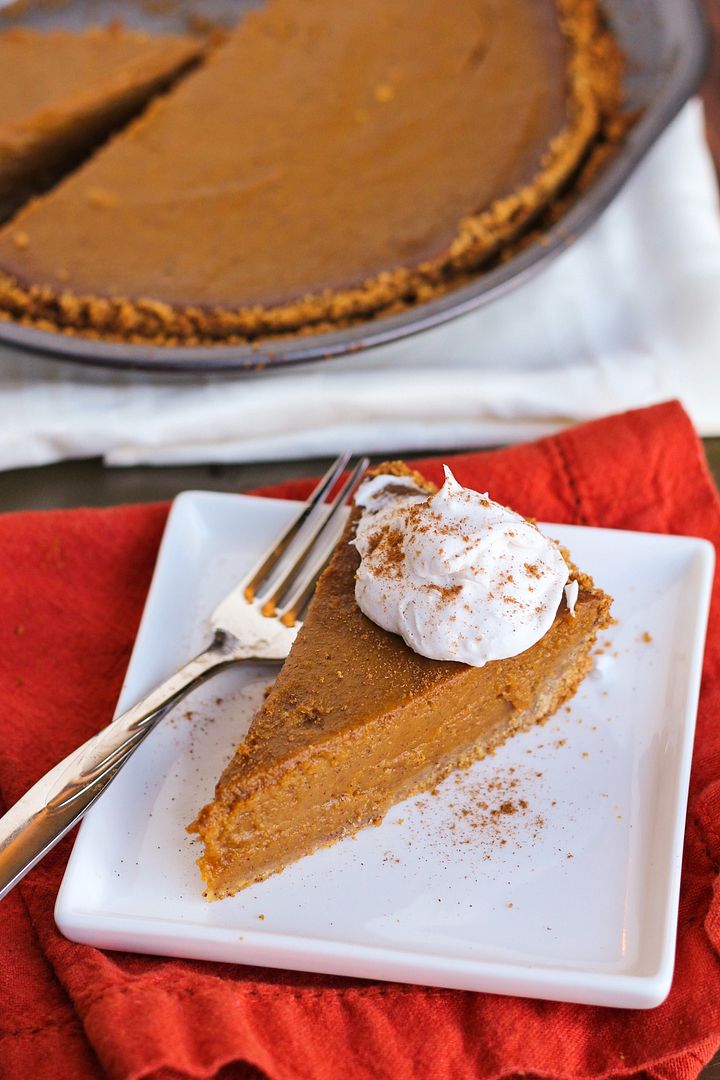
Healthy vegan pumpkin pie

Pumpkin pie is my (and a lot of people's, I'm sure) favourite type of pie, and the type I have the least self-control around because it's so easy to just take a little slice from the fridge, and then one more little slice, and suddenly you've eaten a whole pie just like that.  Ryan has been wanting to buy a pumpkin pie for weeks now but I told him that since it would just be the two of us eating it (and I intend on eating much more pumpkin pie in the coming months!) I wanted to try making a healthy pie that we wouldn't feel guilty about eating!
Healthy vegan pumpkin pie

This pumpkin pie is pretty healthy and also happens to be vegan.  The crust is made from low-fat graham crackers mixed with a bit of coconut oil, so the crust alone has a lot less "bad" fats than a typical butter or shortening-packed pie crust.  (Not that I have anything wrong with eating the occasional piece of traditional pie, but like I said, I wanted to make a healthier version!)  I could have made a healthier crust with nuts and dates but I wanted to keep this as easy and inexpensive as possible since we wanted it to be more of an every day dessert pie.

The filling is made up of pumpkin puree, unsweetened almond milk, no eggs, a reduced amount of brown sugar and some pure maple syrup for sweetening, cornstarch to help everything set, and of course the usual pumpkin spices.
Healthy vegan pumpkin pie

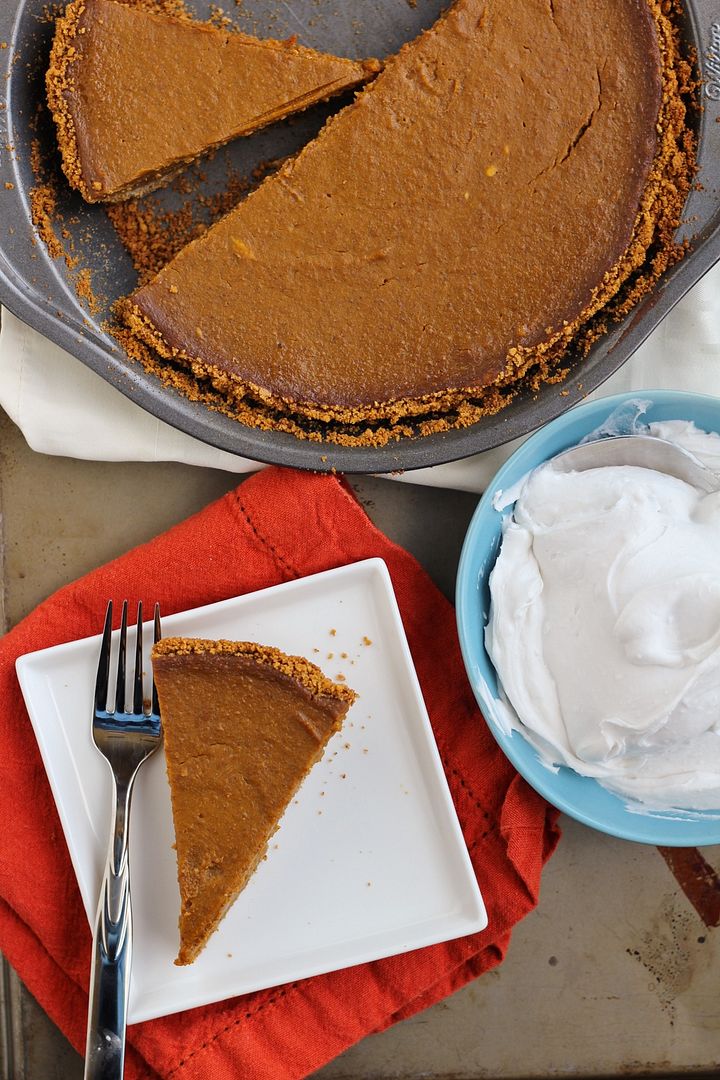
For a topping, I made a batch of coconut whipped cream, which is a great vegan alternative to traditional whipped cream!  To make it, you basically put a can of coconut milk in the fridge for a while so that the cream separates from the liquid, then you scoop out the coconut cream and whip it in a chilled bowl until it's fluffy.  It doesn't need much sweetener but I added a tiny bit of powdered sugar and vanilla extract to mine.  It tastes amazing and the slight coconut flavour really complements pumpkin pie!  Oh She Glows has a great tutorial for making whipped cream if you've never tried it before!
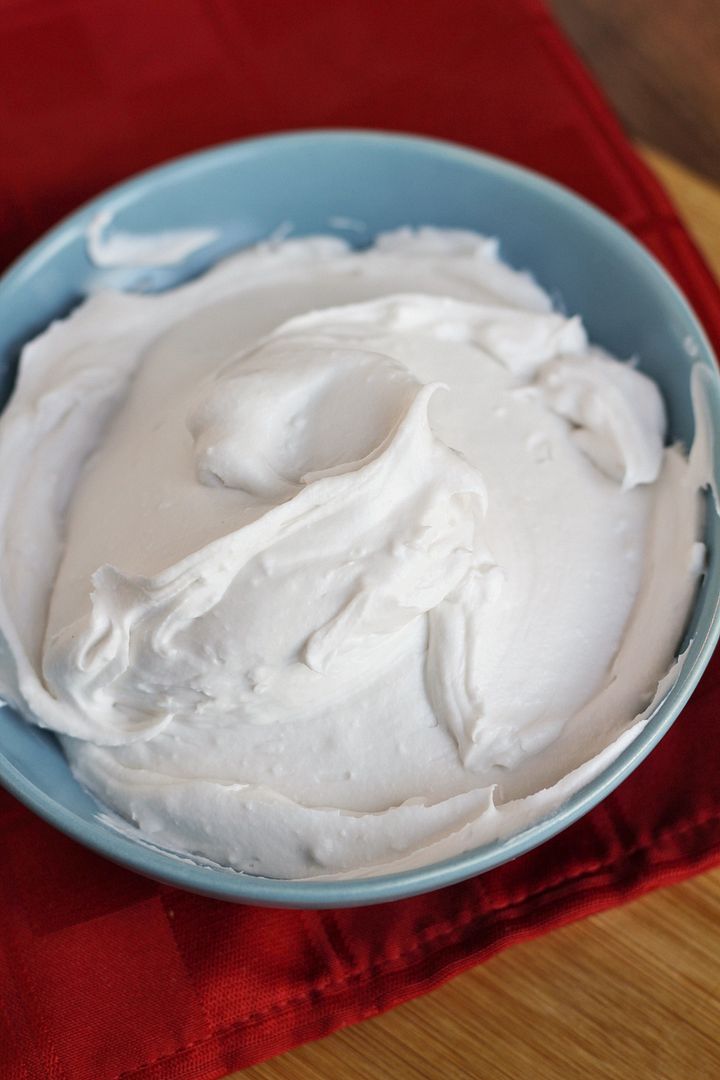
Coconut whipped cream

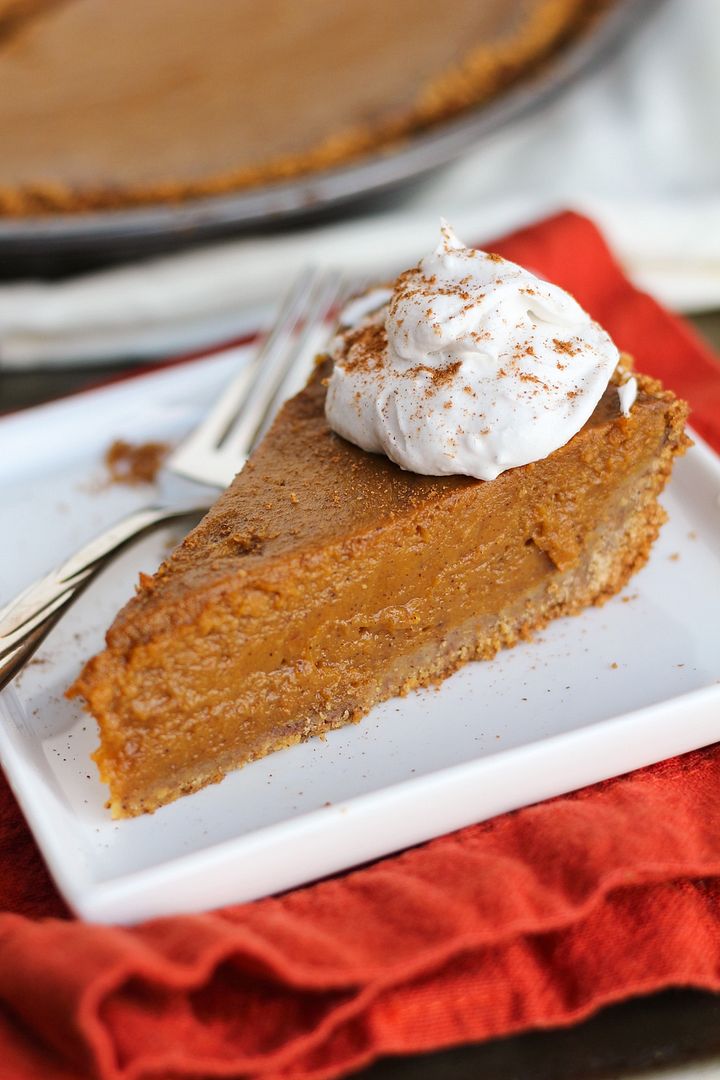
I was worried that either the taste or texture of this pie wouldn't turn out right but it turned out so much better than I'd even hoped!  It had a really nice bold pumpkin flavour from all the spices and addition of molasses (you can cut back if you don't like a lot of spice though!), the filling set perfectly and was smooth and creamy, and the crust sort of softened but stayed firm.  I won't say that it tastes exactly the same as a traditional pumpkin pie, but we both loved this and will likely be making it again soon!

With (Canadian) Thanksgiving quickly approaching, this would be a great dessert if you'll have any vegans at the table, or just want a lighter option after a big meal!
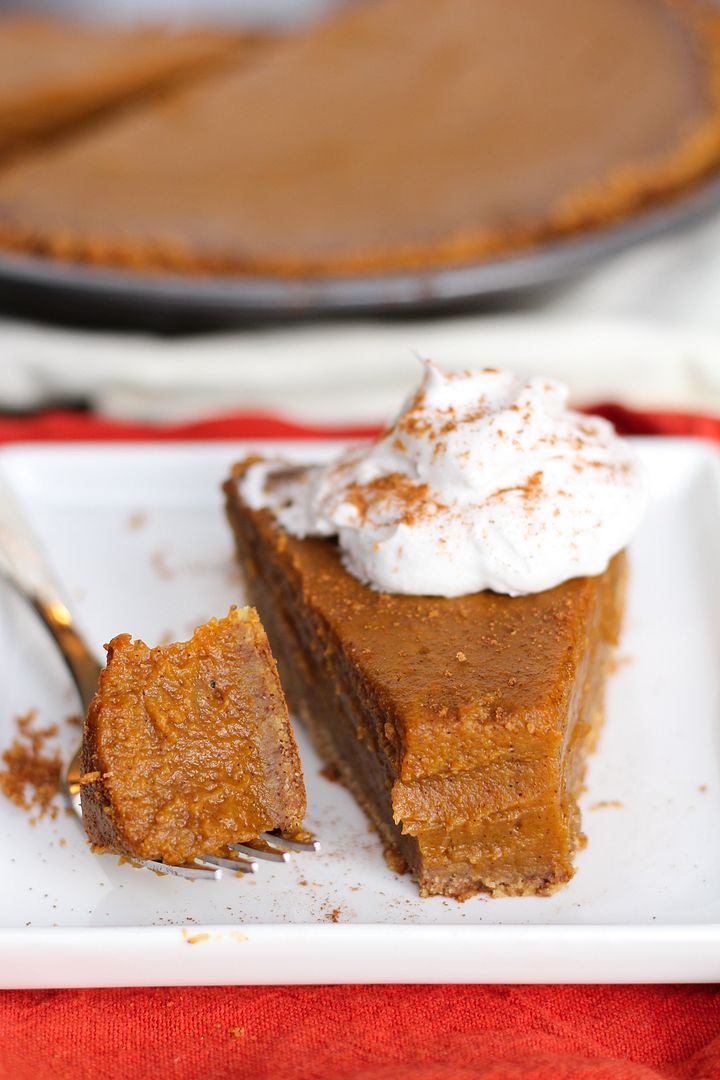
Healthy vegan pumpkin pie

Vegan Pumpkin Pie

Recipe inspired by and adapted from several sources, including Vegetarian Times, Minimalist Baker, and Oh She Glows

Makes one 9-inch pie

Ingredients:

For the Crust:
10 sheets of low-fat graham crackers (about 1.5 cups of crumbs)
1 teaspoon cinnamon
1/4 cup melted organic coconut oil

For the Filling:
2 cups canned pumpkin puree (not pumpkin pie filling)
1 cup unsweetened almond milk
3-1/2 tablespoons cornstarch
1/3 cup brown sugar
1/4 cup pure maple syrup
1 tablespoon molasses
1 teaspoon vanilla extract
1-1/2 teaspoons cinnamon
1/2 teaspoon ground ginger
1/4 teaspoon nutmeg
1/4 teaspoon sea salt

Directions:

Preheat oven to 350°F.  Lightly spray a 9” pie pan with non-stick cooking spray.

Pulse graham crackers in a food processor until they form fine crumbs. Transfer to a bowl and mix in the cinnamon with a whisk or a fork.  Add the melted coconut oil and mix together (I use a fork) until well combined.  Pour crumb mixture into the prepared pie pan and press evenly across the bottom and up the sides to form a pie crust.  Bake in preheated oven for about 7 minutes, then remove.  Leave oven on.

For the filling, mix all ingredients together in a large bowl, whisking together until just combined.  You could do the wet and dry ingredients separately if you like but I saved bowls and just mixed everything together in one.  Pour filling over the baked pie crust, return to oven, and bake for 55-60 minutes, until set. 

Remove from oven and let cool at room temperature for at least an hour, then transfer to refrigerator and let cool for 3-4 hours or overnight before slicing and serving.

Serve with coconut whipped cream, if desired.  Follow the link for instructions on making coconut whipped cream; note that your coconut milk will need to be in the fridge the day before so plan ahead!

April 15, 2014

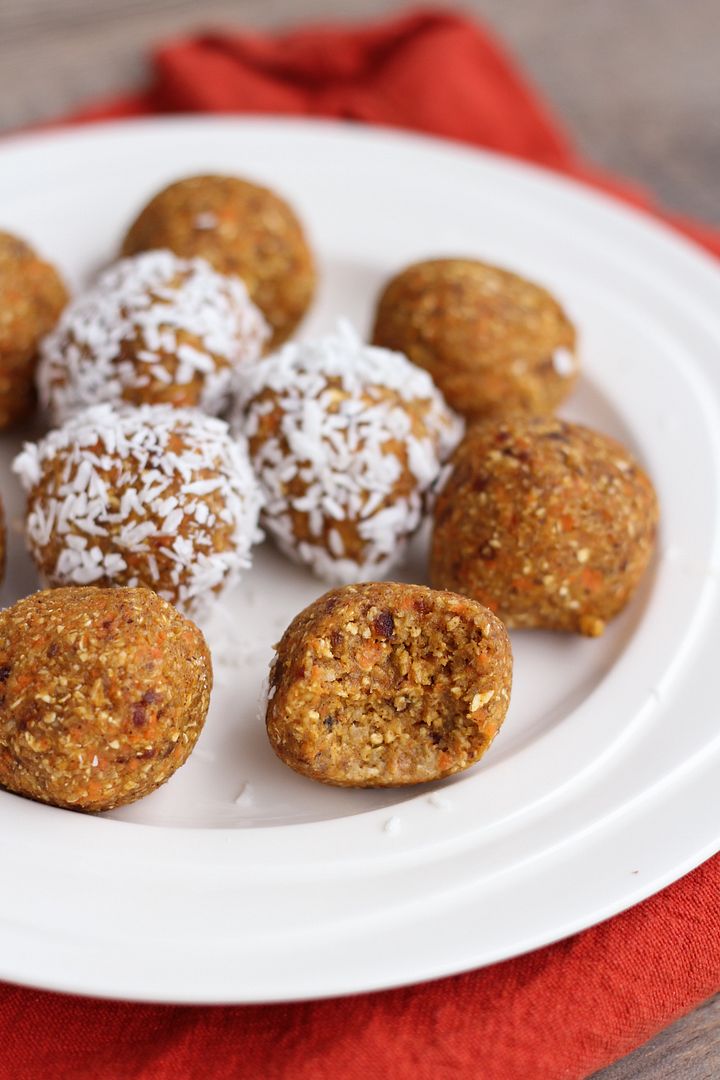
Healthy No-Sugar Carrot Cake Date Balls

Healthy No-Sugar Carrot Cake Date Balls

With Easter rapidly approaching (how is it this weekend already?!), I spent some time this past weekend trying to come up with a new Easter recipe to share.  Last year I stuck with an Easter egg theme with egg-shaped breakfast naan pizzas and Easter egg cheesecake bars, but this year I wanted to do something with carrot cake, which I consider a pretty standard Easter dessert and which is one of my favourite types of cake!

It seems like a carrot cake version of everything already exists though, like carrot cake oatmeal, carrot cake banana bread, carrot cake pancakes, carrot cake cheesecake, carrot cake whoopie pies, carrot cake rice krispie treats, etc., all of which look absolutely amazing, of course.  I haven't seen too many carrot cake versions of healthy no-bake balls, though, and after recently trying these oatmeal cinnamon truffles which I loved, I decided to make a carrot cake version!

Healthy No-Sugar Carrot Cake Date Balls

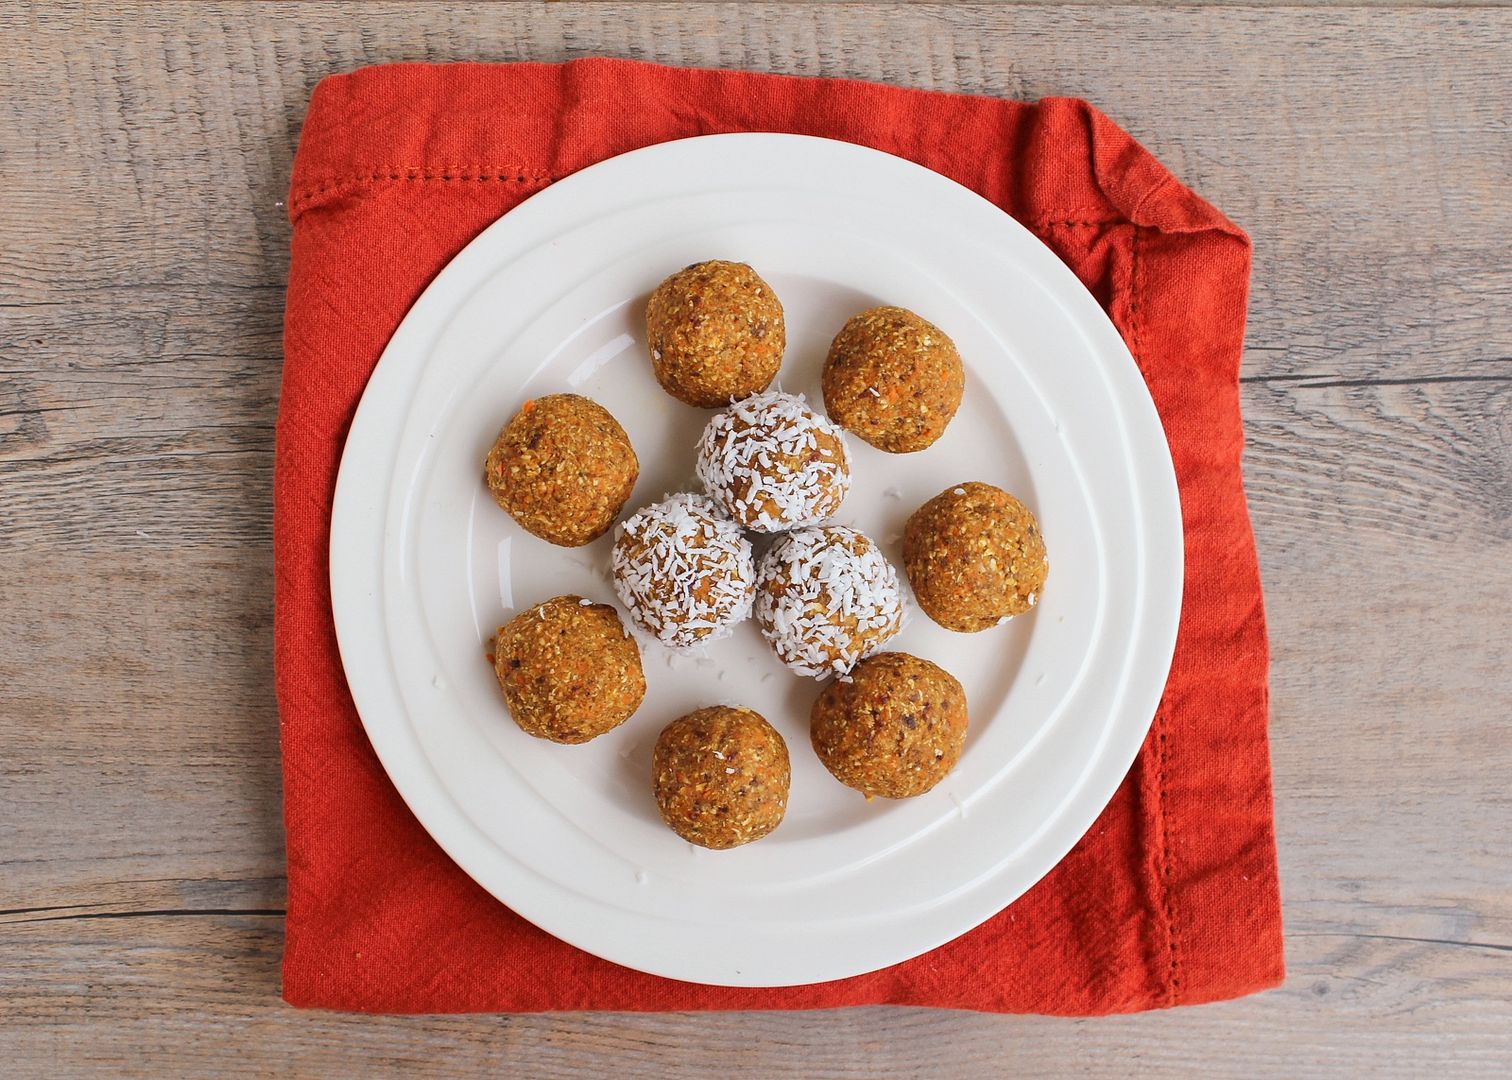
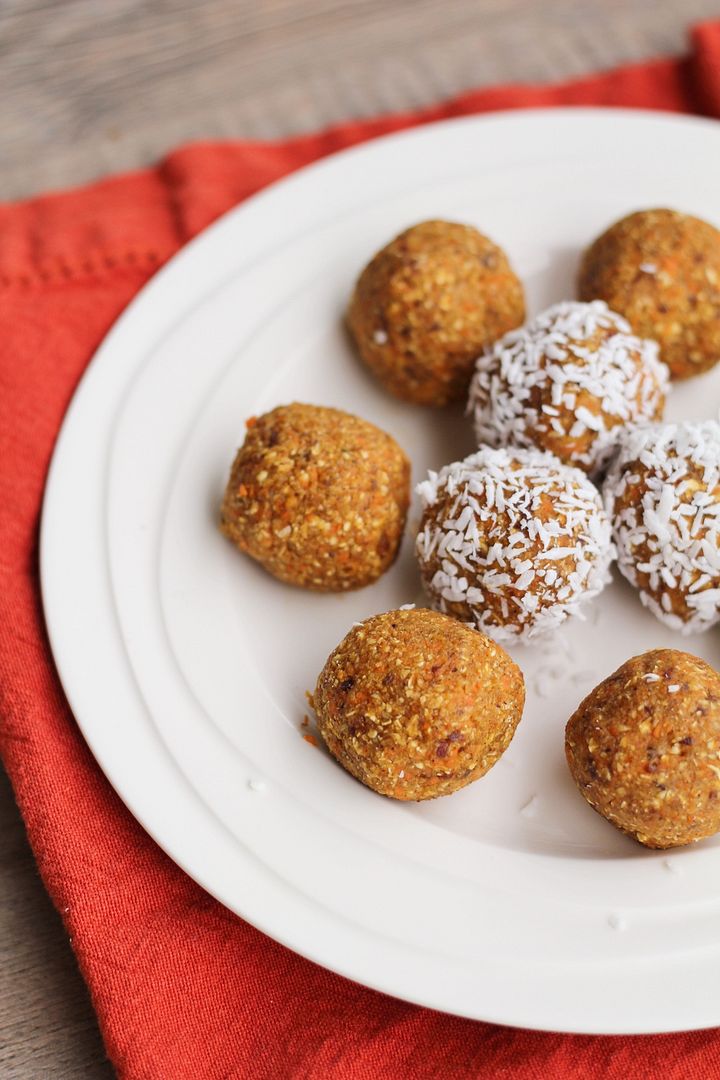
These are super quick and easy to make, with oats, dates, and walnuts as the main ingredients, along with shredded carrots (obviously needed for carrot cake, and with a bonus of added nutrients!), and vanilla, cinnamon, nutmeg, ginger, and salt to bring out the carrot cake flavour.

The end result is a sweet treat with a taste that really reminded me of carrot cake, even though dates are the predominant flavour.  I couldn't really taste the carrots, but I realized carrot cake doesn't taste like carrots either; you could always add more and adjust the ratio of other ingredients if you like though.  These would be a great sugar-free snack to have around this coming weekend to help balance out all the chocolate!

Healthy No-Sugar Carrot Cake Date Balls

No-Bake Healthy Carrot Cake Date Balls

Makes about 18 balls

Ingredients:

1-1/2 cups large-flake rolled oats
1/2 cup chopped walnuts
1/4 teaspoon sea salt
1/2 teaspoon cinnamon
1/4 teaspoon nutmeg
1/4 teaspoon ground ginger
12 medjool dates, pits removed, chopped into pieces
1 cup grated carrot (about 2 large carrots)
1/2 teaspoon pure vanilla extract

Optional: raisins, unsweetened shredded coconut

Directions:

Add oats, walnuts, salt, cinnamon, nutmeg, and ginger to the large bowl of a food processor.  Process until the mixture resembles fine crumbs.  Remove from food processor and set aside in a bowl.

Add dates to the food processor and mix until smooth.  I added 1 tablespoon of water to help them blend.  Add the carrots, vanilla, and oat mixture back to the food processor and pulse everything until combined and sticking together.  Taste mixture and add more spices or carrots if desired.

Remove mixture from food processor and roll into balls about 1” in diameter.  Keep covered in refrigerator and let refrigerate for at least a couple hours before eating for better texture.

Options:  If desired, you can add raisins to the balls to resemble carrot cake more; the date taste is already strong and sweet though so I didn’t feel it necessary.  Another option is to roll the balls in shredded coconut if you like; I’m not a huge fan of shredded coconut so I didn’t do this with all of mine but it sticks easily to the balls if you wish to roll them in it.

December 30, 2013

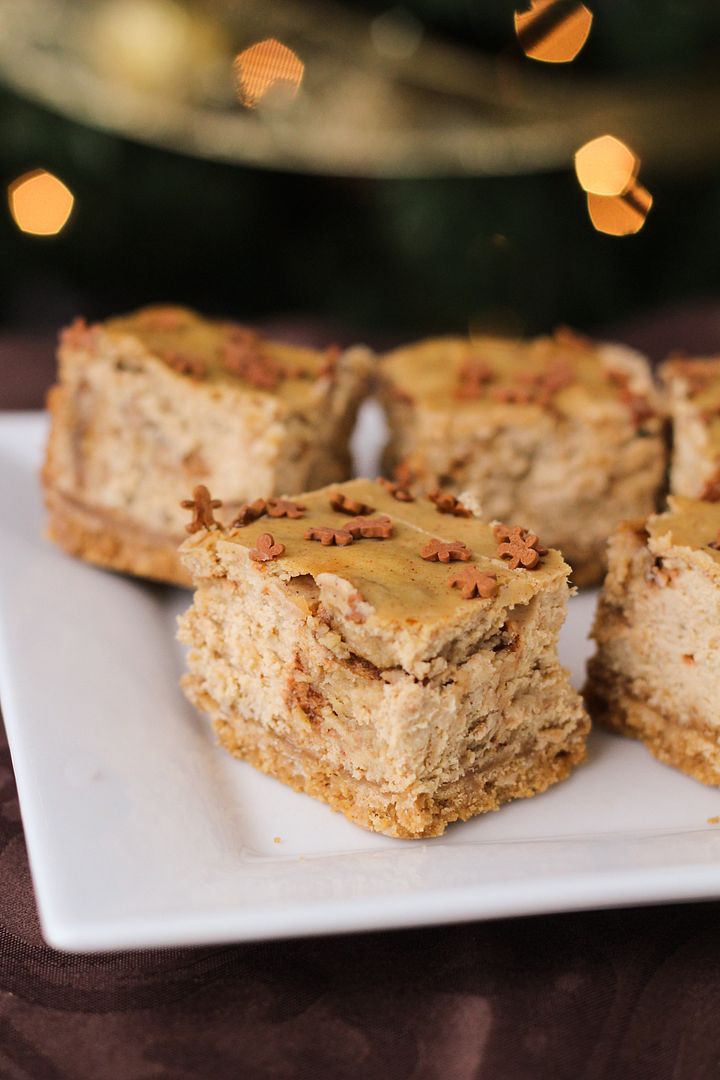
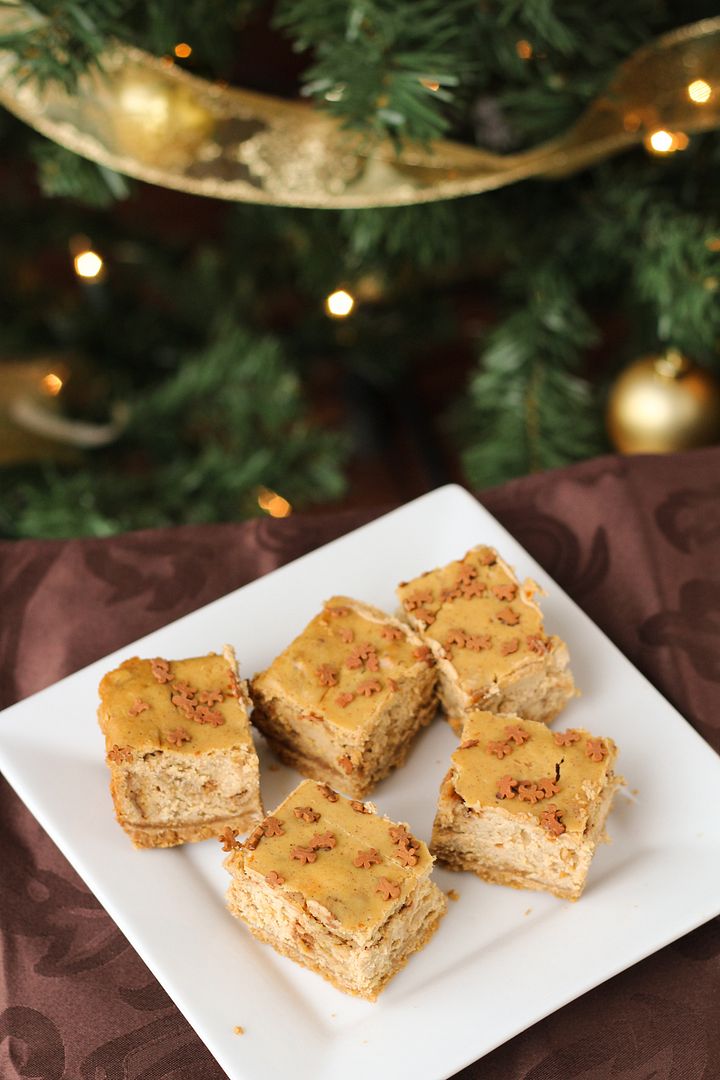
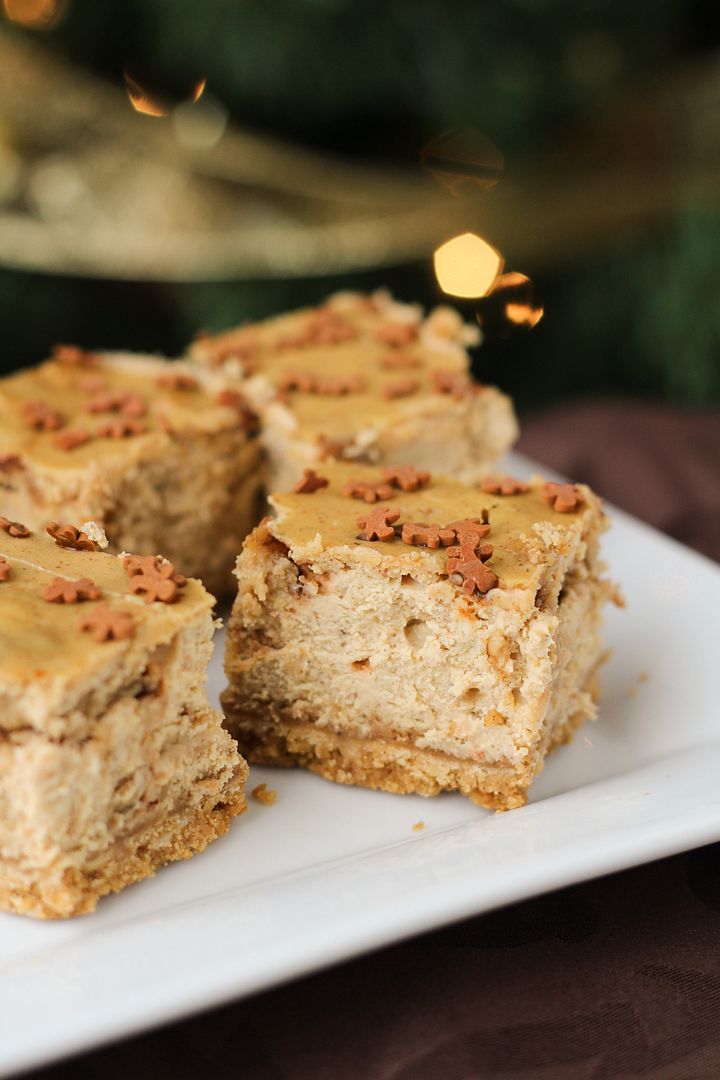
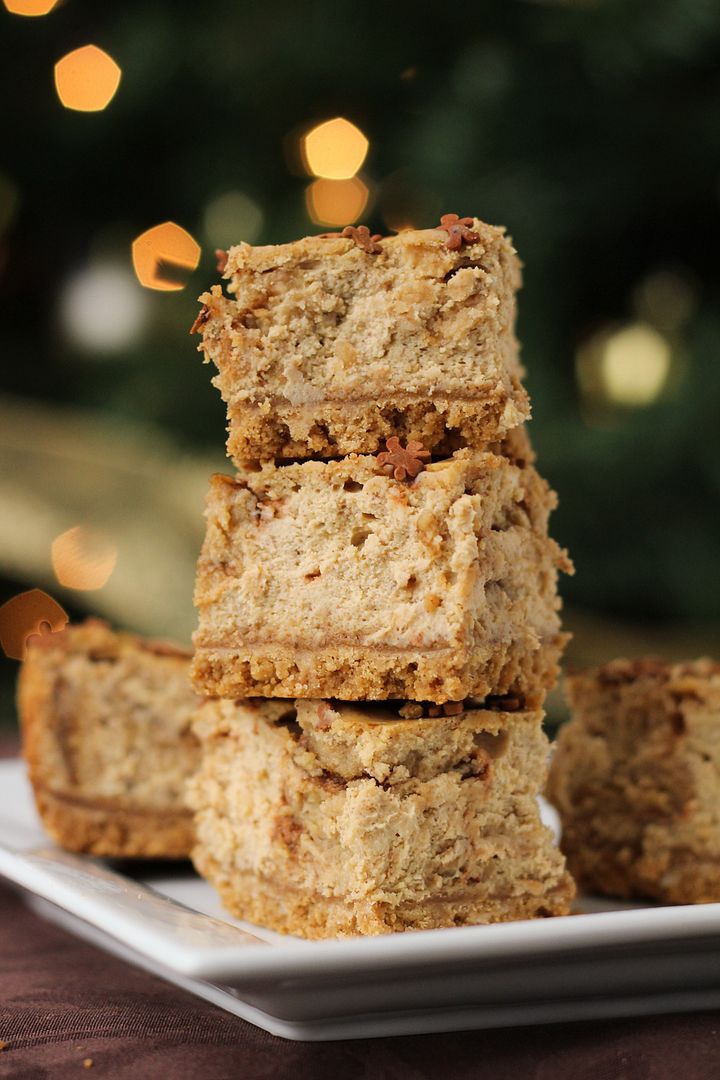
Gingerbread Oreo Cheesecake Bars

Gingerbread Oreo Cheesecake Bars

I hope you all had a wonderful Christmas and happy holidays!

I've been having a very restful and quiet holiday break so far, except for the fact that I came down with the flu a couple of days before Christmas, and though the fever and aches are now gone, I've been left with a nagging cough that won't seem to go away.  The good news is that it has forced me to take it easy so I've been doing a lot of relaxing!  Being sick put a little bit of a damper on Christmas but I still had a fantastic day with my family, who spoiled me as usual, and I got out of any cooking duties so I just got to enjoy all the fabulous food made by everyone else!

Gingerbread Oreo Cheesecake Bars

Another good thing about being sick is that I haven't overindulged on food and drink like I usually do this time of year, mostly sticking to a ton of water and tea in the evenings.  The one thing I probably enjoyed more than my fair share of though was these delicious cheesecake bars that I luckily made a few days before I got sick.

These were inspired by the limited edition gingerbread flavoured Oreos that I couldn't resist picking up this year.  I immediately decided to use them in cheesecake bars similar to the candy cane ones I made last year, but with molasses and gingerbread spices instead of candy canes and peppermint extract for flavouring.

Gingerbread Oreo Cheesecake Bars

I wasn't originally going to share these because I ran out of time before Christmas to post them, but I got so many compliments and enjoyed them so much that I thought I should share them now anyways.  I'm sure most of you are already past the gingerbread stage and perhaps not wanting to go anywhere near dessert right now, so if that's the case just be sure to save this recipe for next year!  Or maybe you can find some gingerbread Oreos on clearance right now, in which case you should make a double batch of these!

Gingerbread Oreo Cheesecake Bars

Gingerbread Oreo Cheesecake Bars


Makes one 8x8 pan, about 16-20 bars

Ingredients:

For the Crust:
23 Gingerbread Oreos
1/2 teaspoon cinnamon
2 tablespoons unsalted butter, melted

For the Filling:
16 oz (2 bricks) cream cheese, softened
1/3 cup sugar
1 large egg + 1 egg yolk, lightly beaten
1/4 cup + 2 tablespoons sour cream, at room temperature
1 teaspoon vanilla extract
2 tablespoons molasses
1 teaspoon cinnamon
1/2 teaspoon ground ginger
1/4 teaspoon nutmeg
1/4 teaspoon cloves
12 Gingerbread Oreos, roughly chopped

*Note: You will need to buy two boxes of gingerbread Oreos to make this recipe, though you won't use the entire two boxes

Directions

Preheat oven to 325°F.  Line an 8x8-inch baking dish with aluminum foil, leaving an overhang around the edges to easily lift the bars out of the pan later.   Lightly spray the foil with non-stick cooking spray.

To make the crust, finely crush the Oreos in a food processor.  Add the cinnamon and melted butter and pulse until cookie crumbs are moistened.  Pour mixture into the prepared pan and press crumbs into an even layer over the bottom of the pan.  Bake in preheated oven for 10 minutes, then set aside.  Leave the oven on.

To make the filling, beat the cream cheese in the bowl of an electric mixer on medium-high until smooth, about 2 minutes.  Mix in the sugar until well combined. Add egg and egg yolk one at a time, mixing just until each is combined. Mix in the sour cream, vanilla extract, and molasses until just combined.  Mix in the spices until just combined.  Stir in the chopped Oreos.

Pour the cheesecake batter over the baked crust, smoothing the top with a spatula.  Bake for 40-45 minutes, until the cheesecake is set around the edges but slightly jiggles in the middle.  Sprinkle gingerbread quins on top for decoration, if desired.  Transfer to a wire rack to cool at room temperature for about one to two hours, then refrigerate until well chilled, at least 3 hours (I chilled mine overnight).

To cut the bars, pull the entire cheesecake out of the pan by lifting the foil edges, then peel away foil and slice into bars.  Keep refrigerated until ready to serve.

December 24, 2013

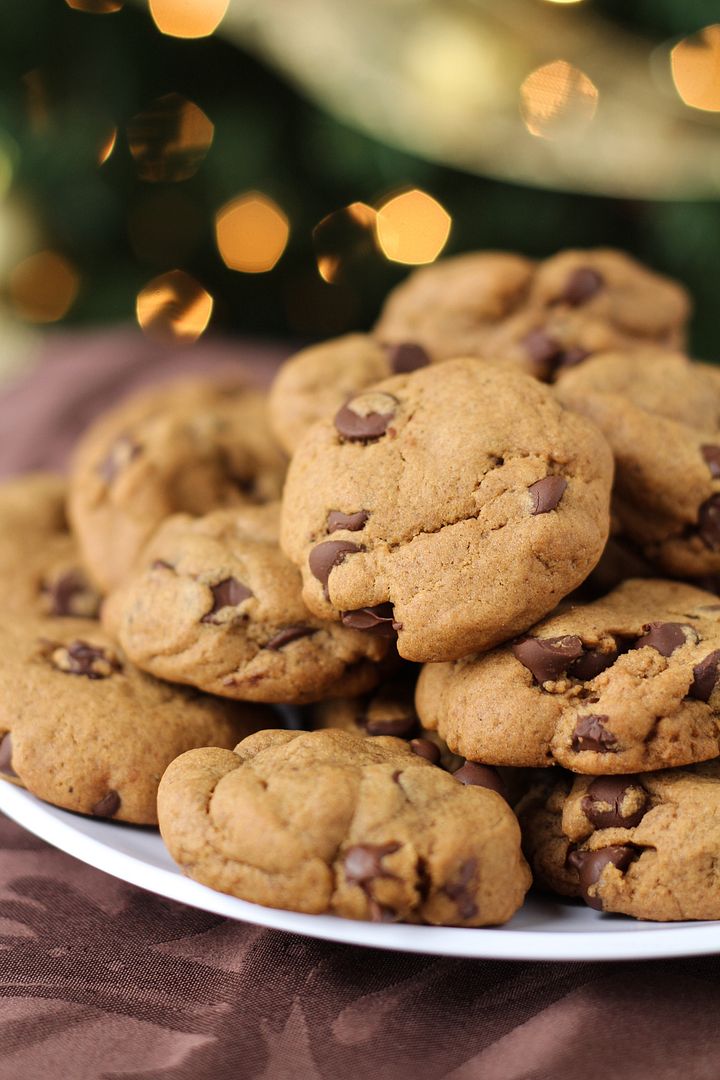
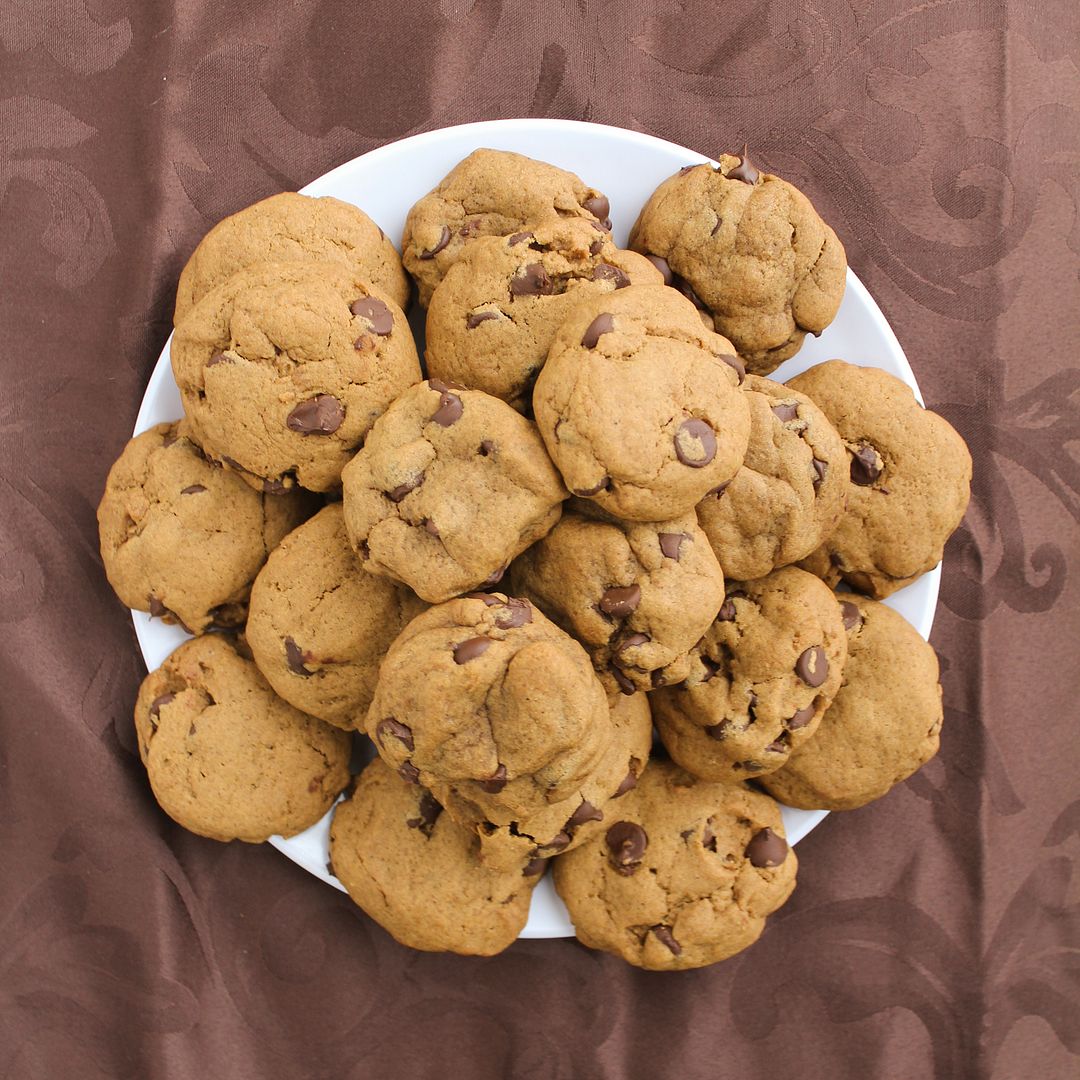
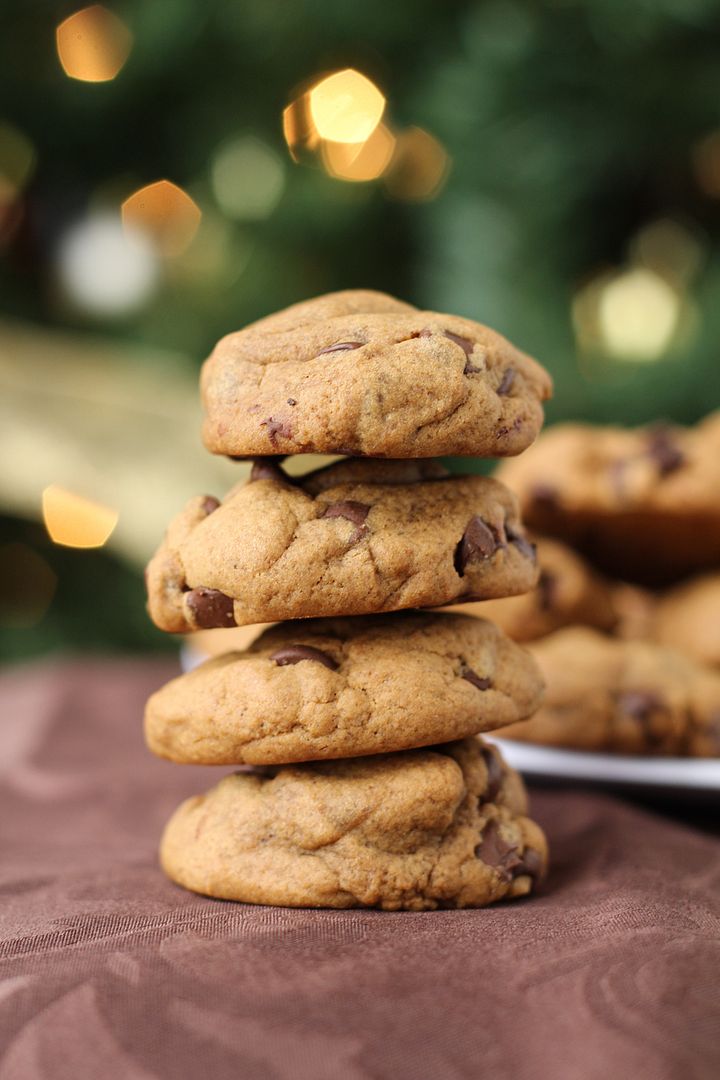
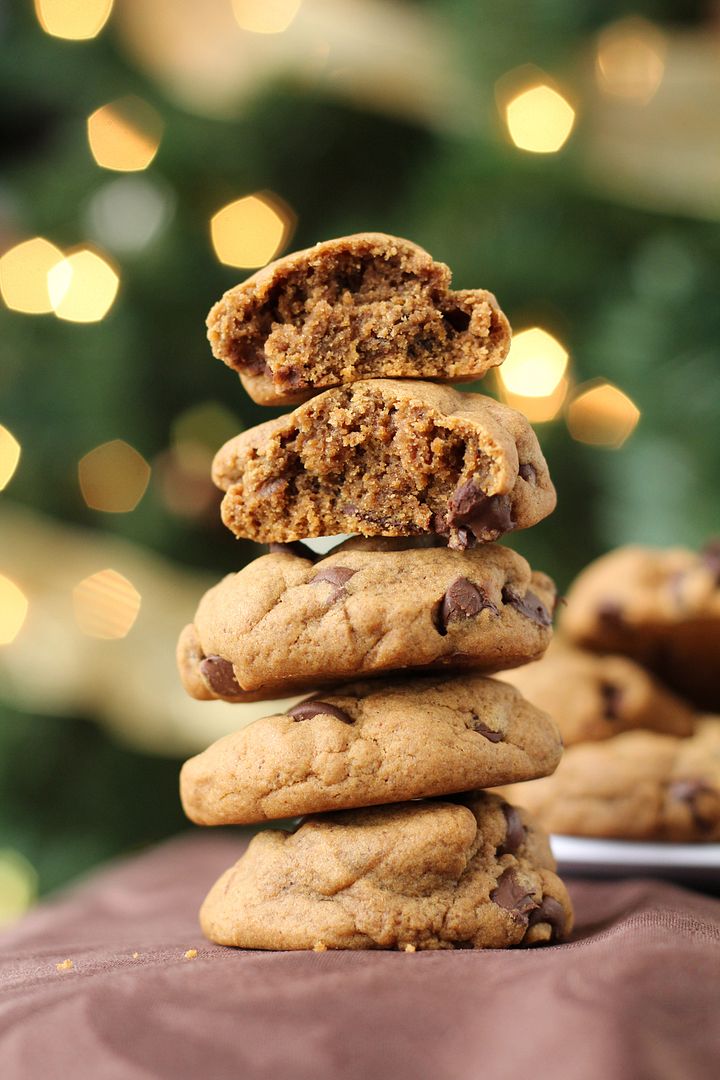
Gingerbread Chocolate Chip Cookies

Gingerbread Chocolate Chip Cookies

I'll have to make this post short as I'm not feeling well but still have to do all my Christmas wrapping and last minute preparations before the big day tomorrow (which hopefully I'll be feeling better for)!  I just wanted to squeeze in one last Christmas recipe though as these cookies were probably my favourite thing I've made this season!

Gingerbread Chocolate Chip Cookies

These cookies are inspired by a recipe I saw on Baked By Rachel, which I then went and changed almost everything about so I'm sure they're nothing like the original, but I absolutely loved my own version!  They're puffy but chewy, with a nice strong gingerbread flavour and just the right amount of sweetness from the chocolate chips.  I think these will be a new holiday favourite of mine!

Gingerbread Chocolate Chip Cookies

I'd also like to take this time to wish everyone the very best of the holiday season, with lots of rest and relaxation, cheer and good times spent with family and friends, and of course, delicious food!

Gingerbread Chocolate Chip Cookies

Gingerbread Chocolate Chip Cookies

Inspired by Baked By Rachel

Makes about 2 dozen cookies

Ingredients:

1/2 cup + 2 tablespoons unsalted butter, softened
1/4 cup sugar
1/4 cup dark brown sugar
1 large egg
1/4 cup molasses
1 teaspoon vanilla extract
2 cups all-purpose flour
1/2 teaspoon salt
1 teaspoon cinnamon
1/2 teaspoon nutmeg
1-1/2 teaspoons ground ginger
1/2 teaspoon cloves
1 tablespoon cocoa powder
3/4 teaspoon baking powder
1/2 teaspoon baking soda
3/4 cup semi-sweet chocolate chips

Directions:

In a large bowl, use a hand mixer or electric mixer to cream the butter and sugars until light and fluffy, about 2-3 minutes.  Add the egg and mix until combined.  Add molasses and vanilla and mix until combined.

In a separate bowl, whisk together the flour, salt, cinnamon, nutmeg, ginger, cloves, cocoa powder, baking powder, and baking soda.  Add the dry ingredients to the wet ingredients in 3-4 additions, mixing on low speed until each addition is just combined.  Stir in chocolate chips.  Cover dough and refrigerate for several hours until chilled through – this is important if you want the cookies to stay thick and puffy.  I chilled mine for about 3 hours.

Preheat oven to 350°F.  Scoop dough by about 1.5 tablespoons full and drop onto a parchment-lined baking sheet about 1 inch apart.  Because the dough will still be quite firm, I pressed the cookies slightly at the top to flatten them slightly.  Bake for 11-12 minutes.  Allow to rest on cookie sheet for 1-3 minutes, then transfer to a wire cooling rack to cool completely.  Store covered in a container.

December 17, 2013

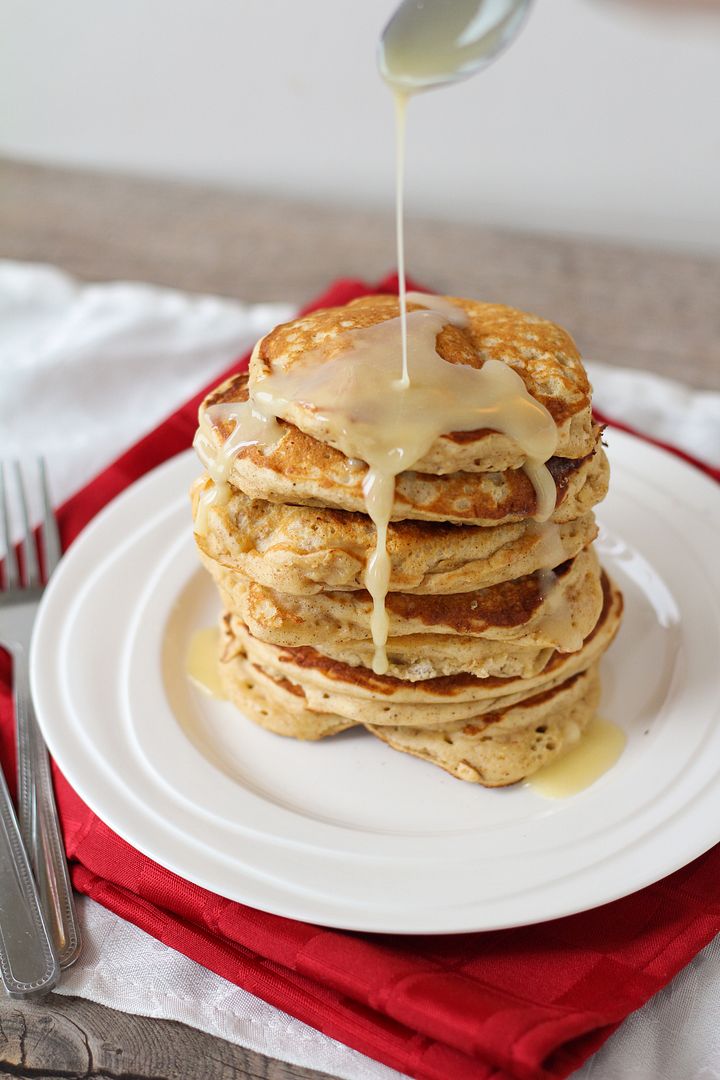
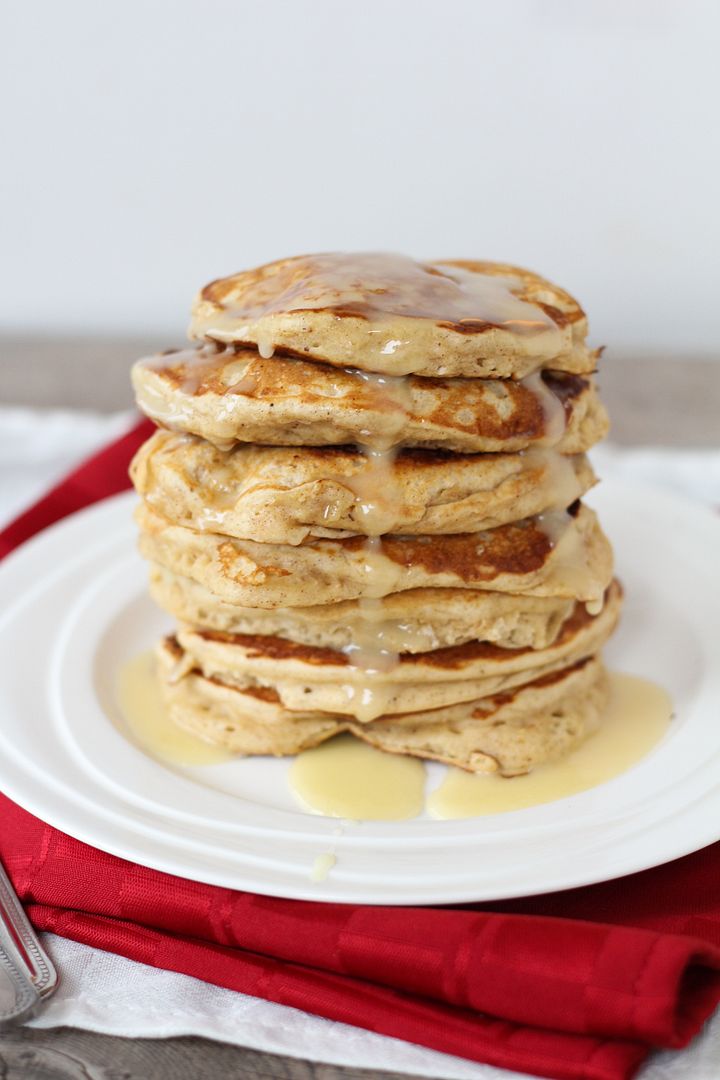
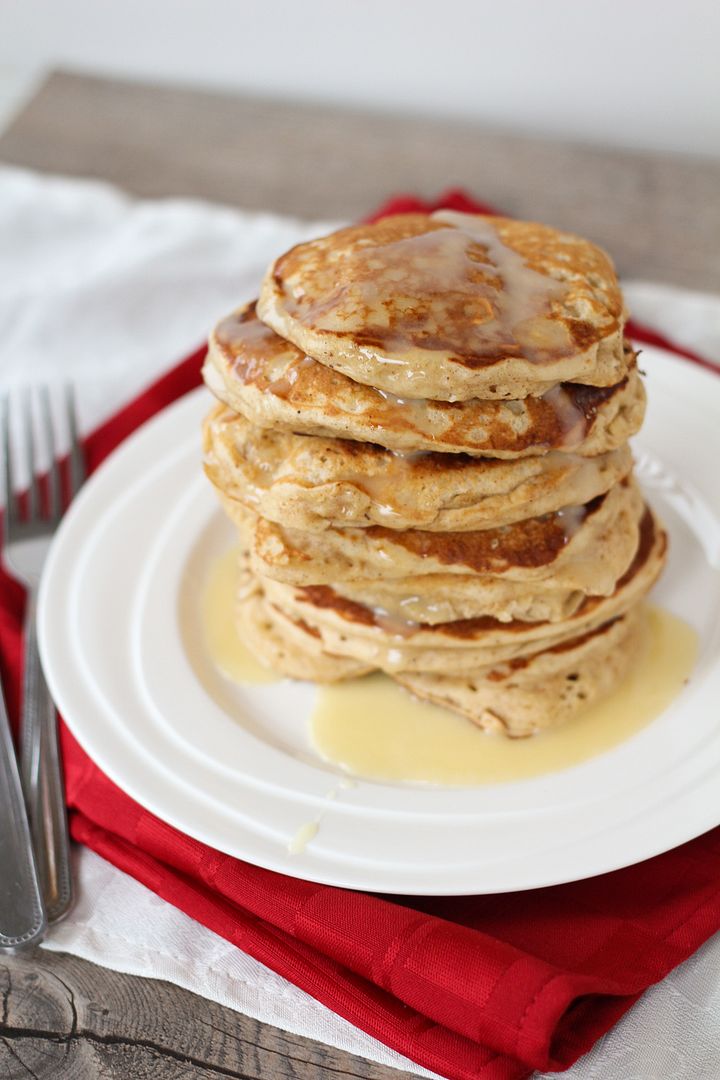
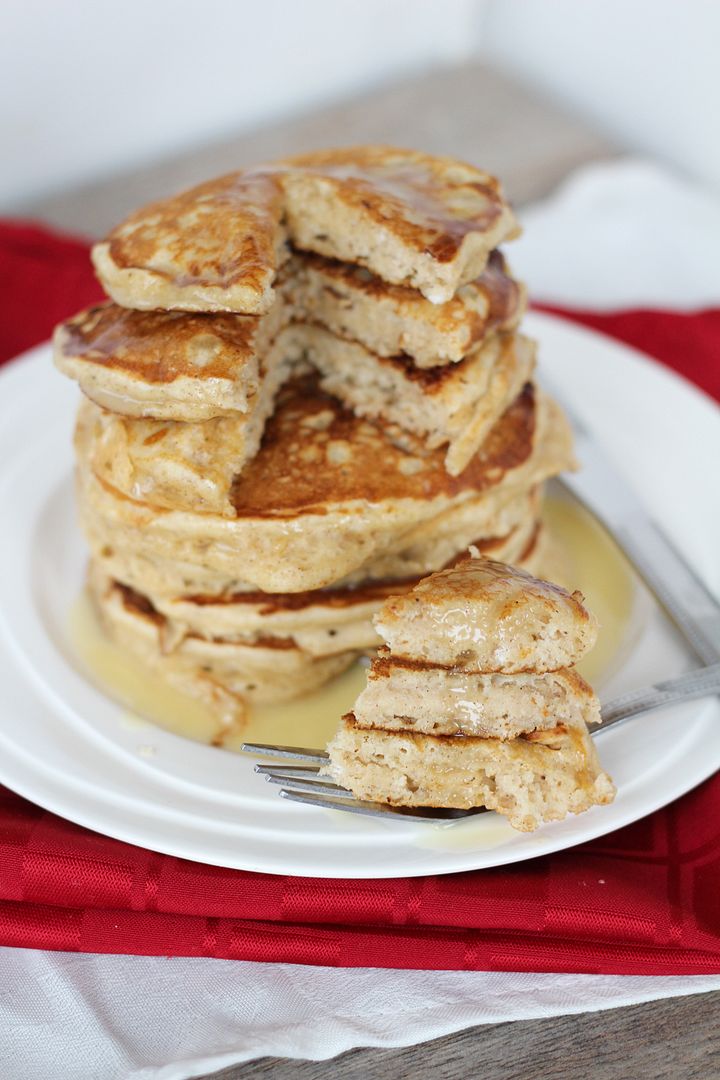
Eggnog Pancakes with Eggnog Glaze

Eggnog Pancakes with Eggnog Glaze

I can't believe Christmas is basically a week away and I haven't posted a single festive recipe on here yet.  I've been more focused on trying to get all my Christmas shopping done lately as I've had an extra hard time coming up with gift ideas this year and as it's looking now, I likely won't finish shopping until Christmas Eve.  Every year I tell myself I'm going to be more organized with everything Christmas-related but every year I end up with a TON of stuff to do last minute.  It's kind of part of the holiday rush and excitement though, and at least I usually get good deals by leaving my shopping so late!

Eggnog Pancakes with Eggnog Glaze

I do regret not being more organized with holiday recipes though.  I had a lot of ideas floating around my head in November but so far I've mainly just been consuming treats that involve eggnog and Kahlua or Baileys, which you don't really need a recipe for!  Other than those soft molasses cookies I told you about earlier, these pancakes are the only other festive thing I've made this year.  And while I'm disappointed I haven't been doing more cooking/baking, I'm pretty happy that the one thing I made turned out so well!

Eggnog Pancakes with Eggnog Glaze

These pancakes are light and fluffy with eggnog in the batter and a pinch of spices to give them a subtle eggnog flavour, but the glaze is what really kicks up the eggnog flavour so you're certain you're eating a festive (and slightly decadent, but not over-the-top) breakfast and not just regular pancakes.  So don't skip it!  

I already can't wait to make these again for breakfast this weekend, and to hopefully squeeze in some holiday baking before then!

Eggnog Pancakes with Eggnog Glaze

Eggnog Pancakes with Eggnog Glaze

Recipe drew inspiration from several similar recipes, including Forkful of Comfort, Savory Simple, and SkinnyTaste

Serves about 4-6 (makes 16-18 pancakes)

Ingredients:

For the Pancakes:
2 cups all-purpose flour
4 teaspoons baking powder
1/2 teaspoon salt
1/2 teaspoon nutmeg
1 teaspoon cinnamon
2 large eggs, lightly beaten
2 cups eggnog (I used low-fat eggnog)
2 tablespoons vegetable or canola oil
2 teaspoons vanilla extract (or substitute half rum extract if desired)

For the Glaze:*
1/2 cup icing sugar
2 tablespoons eggnog
1 tablespoon maple syrup
1/2 teaspoon rum extract

Directions:

First, prepare the pancake batter.  Whisk all the dry ingredients (flour, baking powder, salt, nutmeg, and cinnamon) in a large bowl.  In a separate medium bowl, whisk together the wet ingredients (eggs, eggnog, oil, and vanilla extract).  Add the wet ingredients to the dry ingredients and fold together with a spatula until just combined (batter will be lumpy).

Heat a large non-stick skillet or griddle to medium heat and spray with non-stick cooking spray if necessary.  Pour pancake batter by 1/4 cup-fulls onto the pan.  Let cook until bubbles begin to form and pancake is browned on one side, a couple of minutes, then flip and cook until both sides are evenly browned.

While cooking pancakes, prepare the glaze by whisking all ingredients together in a small bowl.

Serve pancakes warm with a small amount of eggnog glaze on top.
*Note: The amount of glaze should be just enough for a small amount for each serving.  The glaze is quite sweet so you shouldn’t want too much, but feel free to double the amounts for the glaze if you like.

November 08, 2013

Healthy Pumpkin Mousse

Healthy Pumpkin Tofu Mousse

It seems like everyone has already moved on from pumpkin flavoured everything to gingerbread everything, myself included – I love Starbucks gingerbread lattes even more than pumpkin spice lattes and now that they have a molasses drizzle on them I can’t resist getting one whenever I go near a Starbucks! 

And now that there’s starting to be a little snow in the air and on the ground, it’s hard to resist getting in the holiday spirit already. I thought it was a little early still but the Santa Claus parade in my hometown is tomorrow, so I guess not!

Healthy Pumpkin Tofu Mousse

I was just reading on Averie Cooks yesterday (in her post for these amazing looking gingerbread molasses chocolate chip bars) how bloggers so predictably go from pumpkin to gingerbread to peppermint every year, which is so true.  But part of what makes people go crazy for these flavours is how briefly we get to use them each year, so we have to make the most of them while we can!

Hopefully not everyone is ready to completely abandon pumpkin yet though, as I still have one more pumpkin recipe to share!

Healthy Pumpkin Tofu Mousse

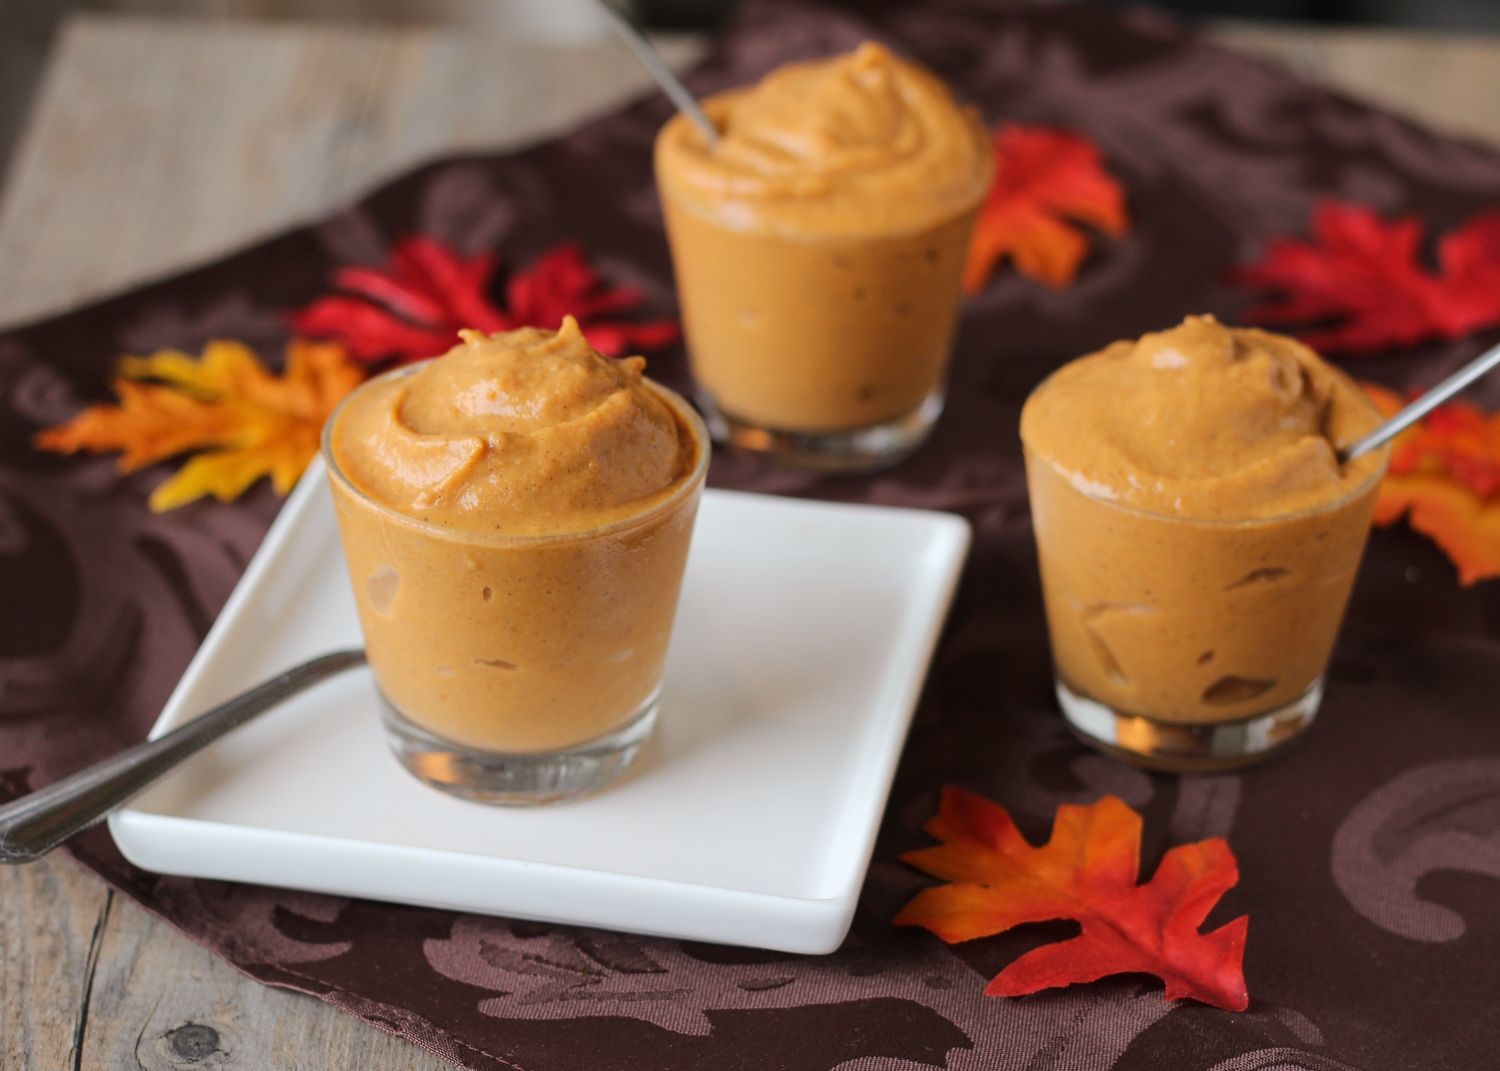
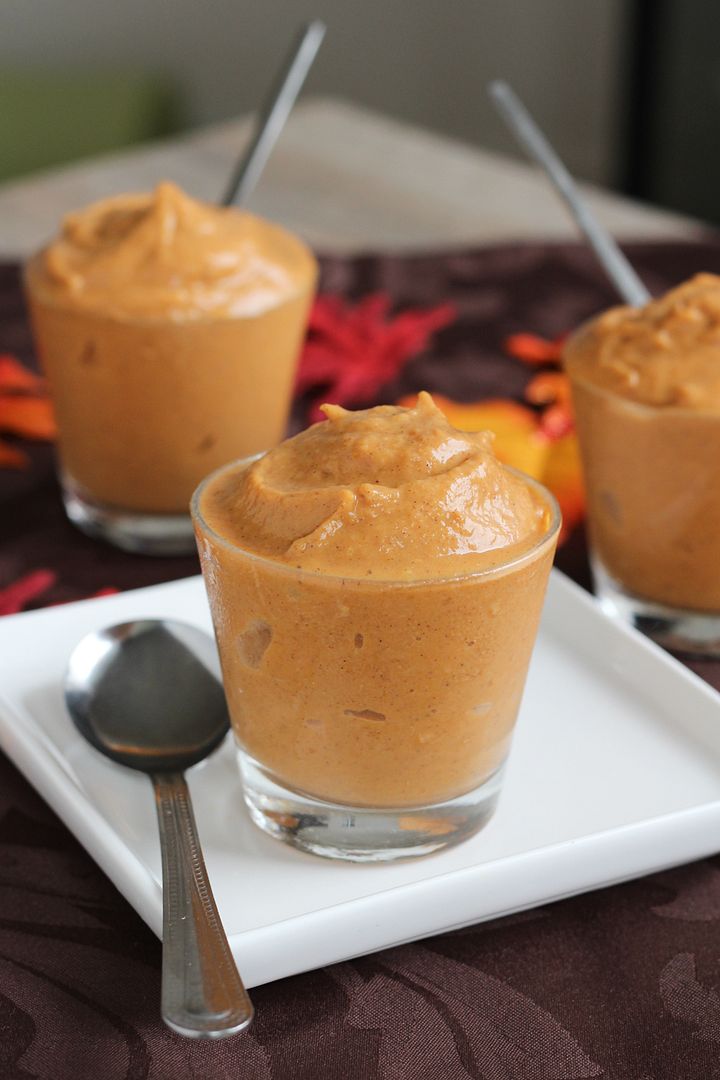
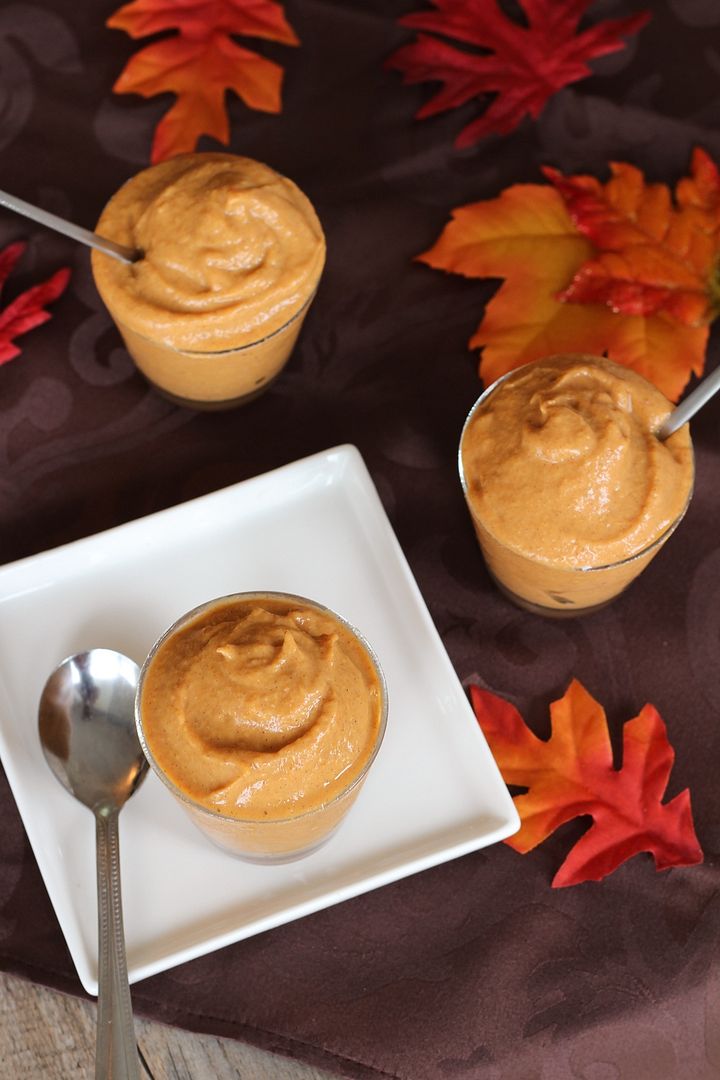
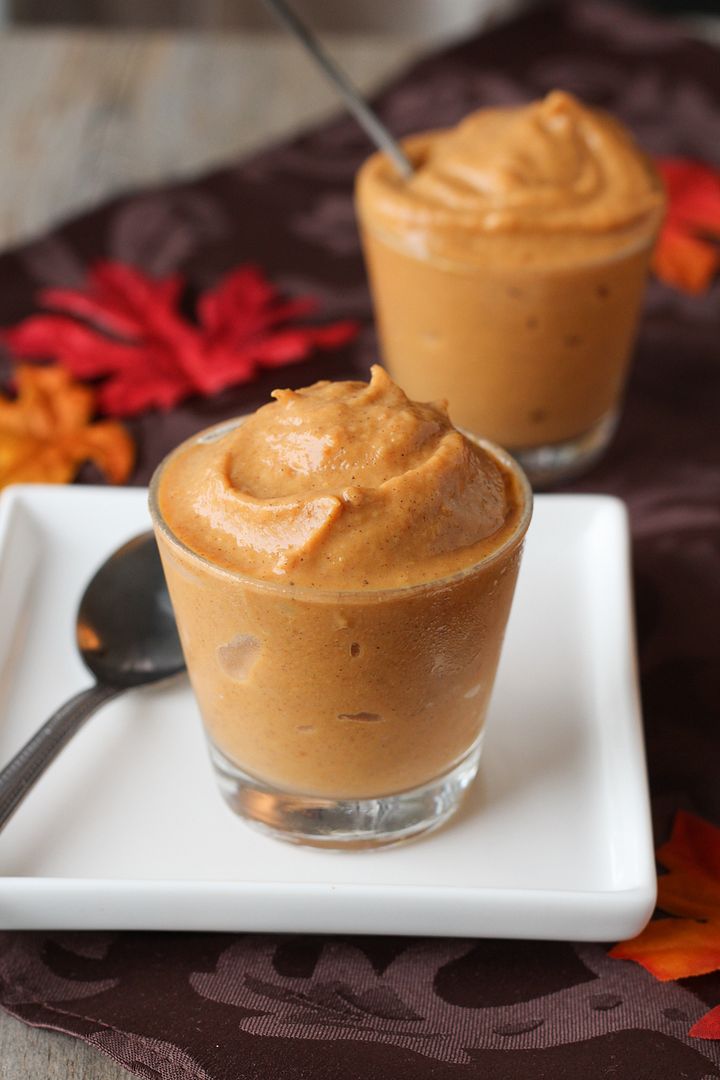
Pumpkin tofu mousse is probably not anything new to a lot of you, but this was the first time I’d tried it and it was so much better than I’d expected that I’ve already made it a few times this year! It’s basically like pumpkin pie in mousse/pudding form with the added benefit of being pretty healthy!  It's actually not as fluffy as regular mousse, but it's lighter than pudding so I wasn't sure what to call it - feel free to call it whatever you like!

This mousse or pudding or whatever you want to call it is super easy to make – just blend together some pumpkin puree, silken tofu (you won’t taste it at all but it adds protein and makes everything light and fluffy!), a bit of pure maple syrup for sweetness, and some vanilla and pumpkin pie spices. I also added a little Greek yogurt to mine for a little extra flavour and thickness, but if you prefer to keep this vegan you could leave it out.

Hope you have room for a little more pumpkin in you, but if not, I will probably be moving on to holiday flavours pretty soon!

Healthy Pumpkin Tofu Mousse


Pumpkin Tofu "Mousse"

Adapted from several sources, including The Smart Kitchen and Baked In

Makes around 4 small servings (but serving size for something like this can vary)

Ingredients:

8oz silken tofu (usually about half a package), drained of all excess water (do your best to get as much water out as you can)
1 3/4 cup pumpkin puree (not pumpkin pie filling) – or one 15oz can
1/4 cup plain or vanilla low fat Greek yogurt
1/2 teaspoon vanilla extract
1/4 cup + 2 tablespoons pure maple syrup
1/2 teaspoon cinnamon
1/4 teaspoon ground ginger
1/4 teaspoon nutmeg
1/8 teaspoon cloves
1/8 teaspoon salt

Directions:

Add tofu and pumpkin to the large bowl of a food processor and process until smooth.  Add all remaining ingredients (leave the 2 tablespoons of maple syrup out for now), and process until well combined.  Taste and add as much of the remaining 2 tablespoons of maple syrup as desired to reach desired level of sweetness.  If desired, you could replace some of the maple syrup with brown sugar.  Adjust any other spices as needed and according to preference.

Refrigerate for at least 1-2 hours before serving.  Keep refrigerated.  Water from the tofu may separate after a couple of days, just drain it or stir it back in before serving.

July 12, 2013

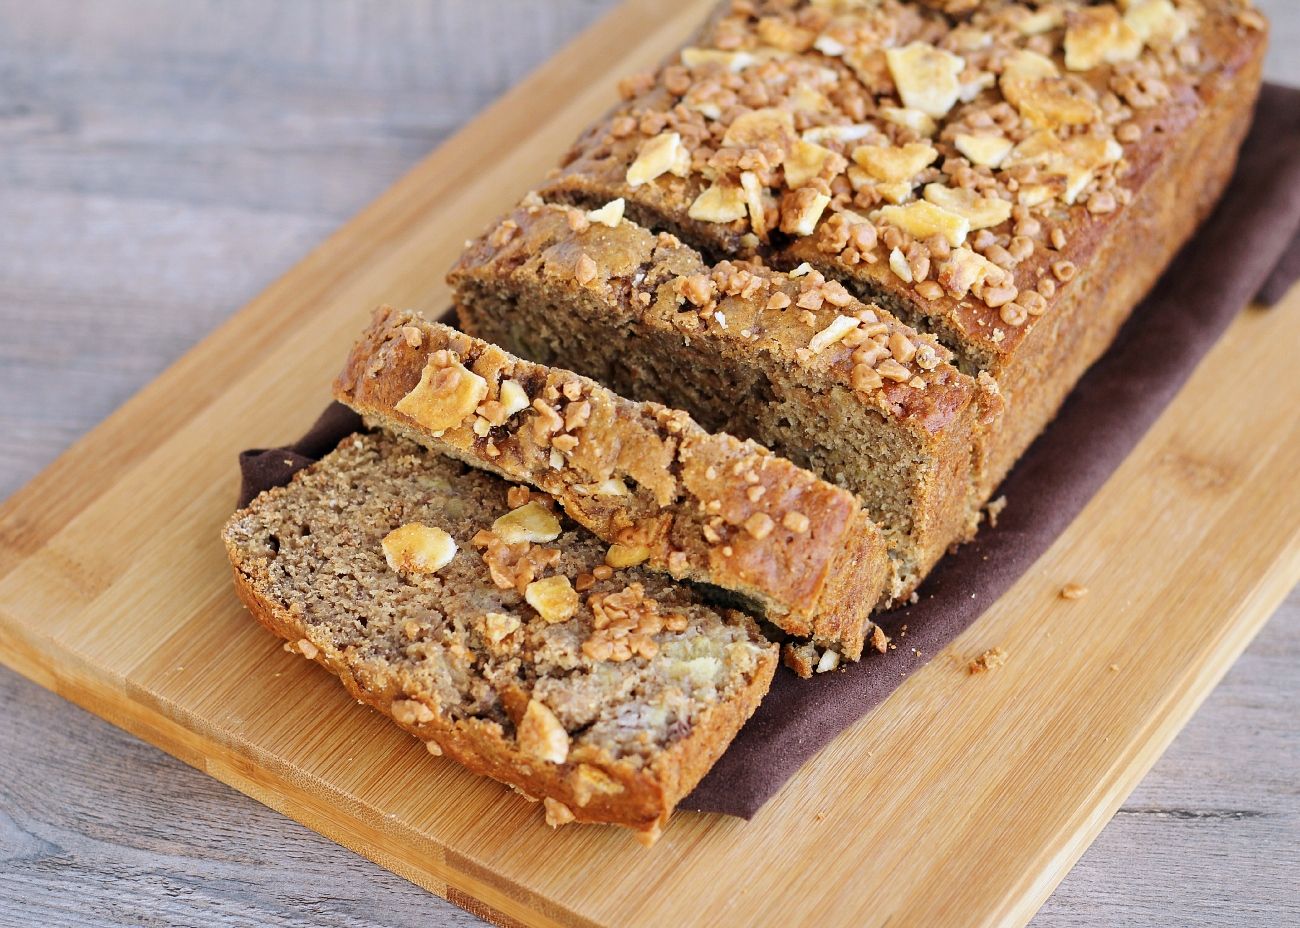
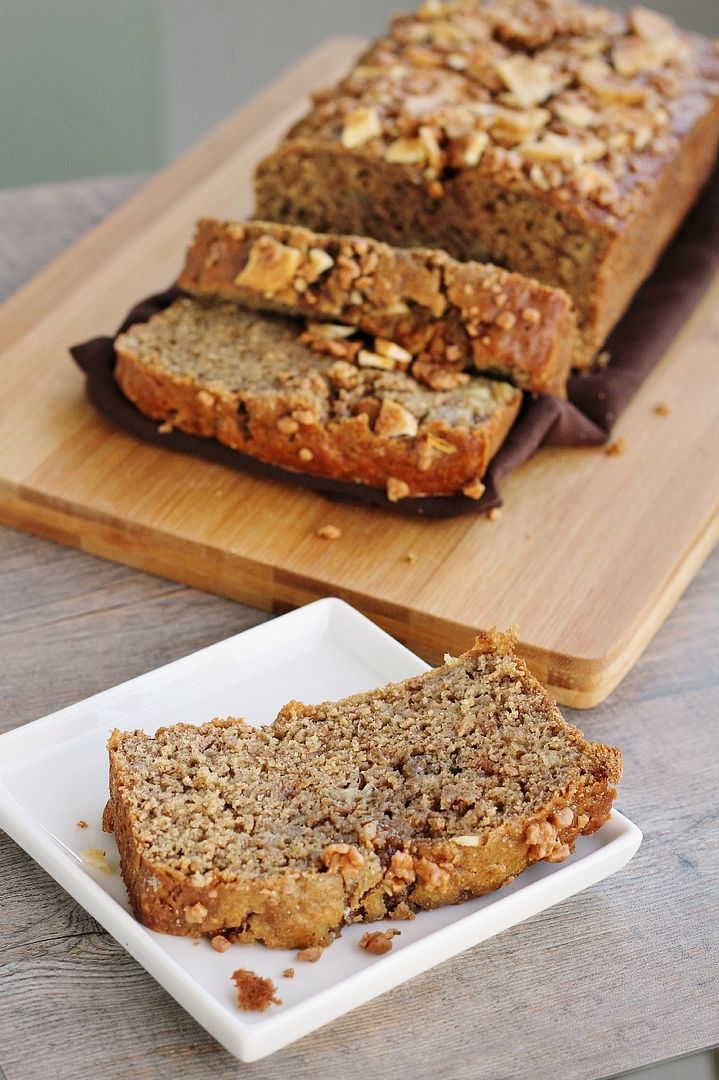
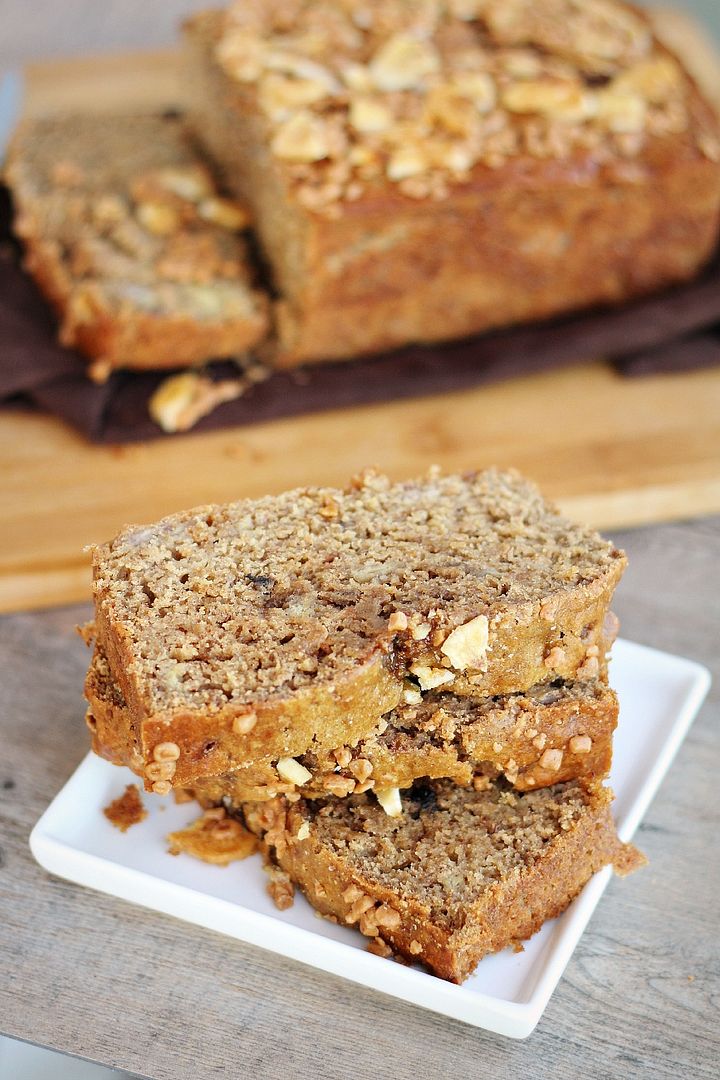
Coffee Toffee Banana Bread

Coffee Toffee Banana Bread

Has anyone else been thinking that it’s already July 12th, which means it’s almost halfway through July, which means summer is halfway over already?! I swear summer JUST started (which is practically true considering the weather we had in June), so I'm freaking out that it’s going by way too fast! I think I’ve only managed to make it to the farmer’s market once so far, I’ve hardly made any summer recipes (especially with berries – and I completely missed strawberry season somehow), I’ve only gone to the beach once, and stores are already starting to clear out their summer clothes before I’ve had the chance to look at them! I think I say this every year, but slow down, summer!

With that being said, I’ll try to make the rest of this post short so I can finish my work then make an effort to get outside for a bit this afternoon to enjoy the sunshine :) Our city has a classic car show today where all the classic cars gather in the park for display, then drive down the streets of downtown and park on the sides of the road, so when you walk downtown it feels like you’ve been transported to the 50’s.  Not the most exciting event for someone who doesn’t appreciate cars (like me), but I’m still looking forward to doing something summery!

Coffee Toffee Banana Bread

This banana bread has a subtle coffee taste along with a subtle toffee taste that not only give it a rhyming name, but make it a little more special than regular banana bread. The original recipe included 1/2 cup of melted butter and all white flour, so to lighten it up a bit I increased the amount of banana and used 1/4 cup of olive oil instead of the butter, and replaced half the flour with whole wheat. I also used dark brown sugar instead of regular sugar, and added cinnamon and instant espresso to boost the flavour. The result is a moist banana bread with a fun flavour twist that goes perfectly with your morning coffee!

Hope you all have a great weekend and do something to enjoy summer!

Coffee Toffee Banana Bread

Coffee Toffee Banana Bread


Makes one 9x5-inch loaf

Ingredients:

3 large ripe bananas, mashed (about 1-1/4 cup)
1/2 cup brewed strong coffee
1 cup all-purpose flour
1 cup whole wheat flour
2 teaspoons baking powder
1/2 teaspoon baking soda
1/2 teaspoon salt
1/2 teaspoon cinnamon
1/4 teaspoon nutmeg
1 tablespoon instant espresso
1/4 cup extra-virgin olive oil
3/4 cup packed dark brown sugar
2 large eggs
1-1/2 teaspoons pure vanilla extract
1/2 cup + 2 tablespoons toffee bits (such as Skor or Heath bits, found in stores with the chocolate chips), divided
1/4 cup chopped banana chips (optional)

Directions:

Preheat oven to 350°F and spray a 9 x 5-inch loaf pan with non-stick spray.

Mix banana and coffee in a small bowl.

In a medium bowl, whisk together the all-purpose flour, whole wheat flour, baking powder, baking soda, salt, cinnamon, nutmeg, and instant espresso.

In a large bowl, whisk together the olive oil and brown sugar.  Add eggs one at a time, mixing well after each addition.  Add the vanilla extract and the banana-coffee mixture and stir until combined.

Slowly add the dry ingredients to the wet ingredients, stirring with a wooden spoon or a spatula until just incorporated.  Fold in 1/2 cup toffee bits. 

Pour mixture into prepared loaf pan and bake for 25 minutes.  Remove from oven, sprinkle the top of the loaf with the remaining toffee bits and banana chips, then return to oven for an additional 25 to 30 minutes, until a toothpick inserted in the middle comes out clean.  *Don't worry about getting all the banana chips on top of the loaf if they don't all fit; you don't want to weigh down the top of the loaf too much to make sure it bakes evenly inside.*  Let stand in pan 10 minutes before transferring to a wire rack to cool completely, then slice.

December 11, 2012

Rudolph Gingerbread Cookies

Rudolph Gingerbread Cookies

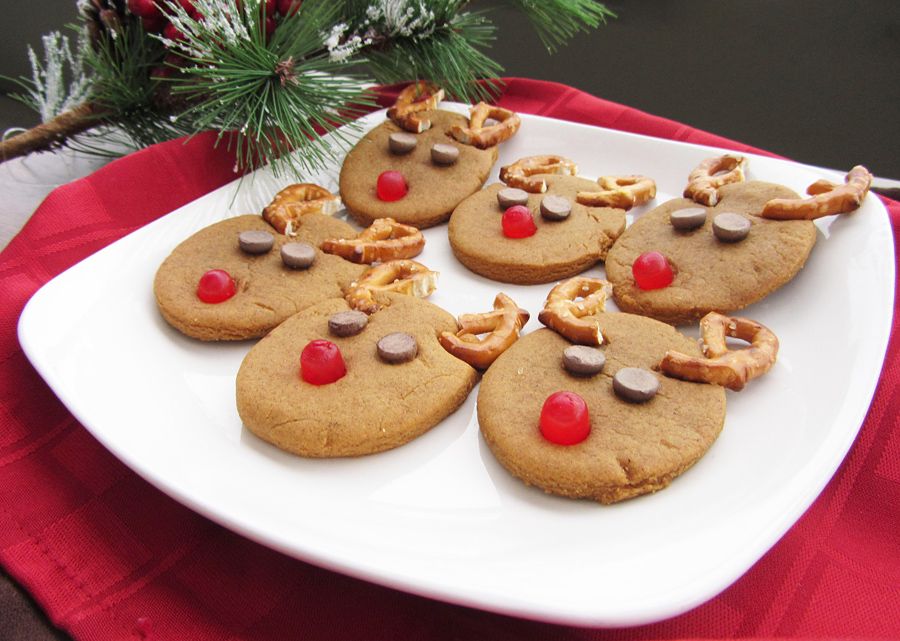
Our department had our holiday cookie swap last Friday, and as usual, I made two types of cookies because I love experimenting with new holiday recipes!  Last year I brought these hidden candy cane kiss cookies and eggnog cake cookies, both of which I loved, but I wanted to try something different this year.  So I decided to make one cookie that was simple but tasted good (recipe to come later), and one that would stand out more for having a ‘cute factor’, like  the popular melting snowmen cookies from last year’s cookie swap (Google it, they’re adorable!).

Rudolph Gingerbread Cookies

When I saw these peanut butter reindeer cookies, I knew I’d found my cute factor!  But since I like to keep things nut-free when I’m bringing them somewhere for lots of people to share, I decided to make them into gingerbread cookies instead – not only are they nut-free but they’re also more festive and reindeer-coloured!

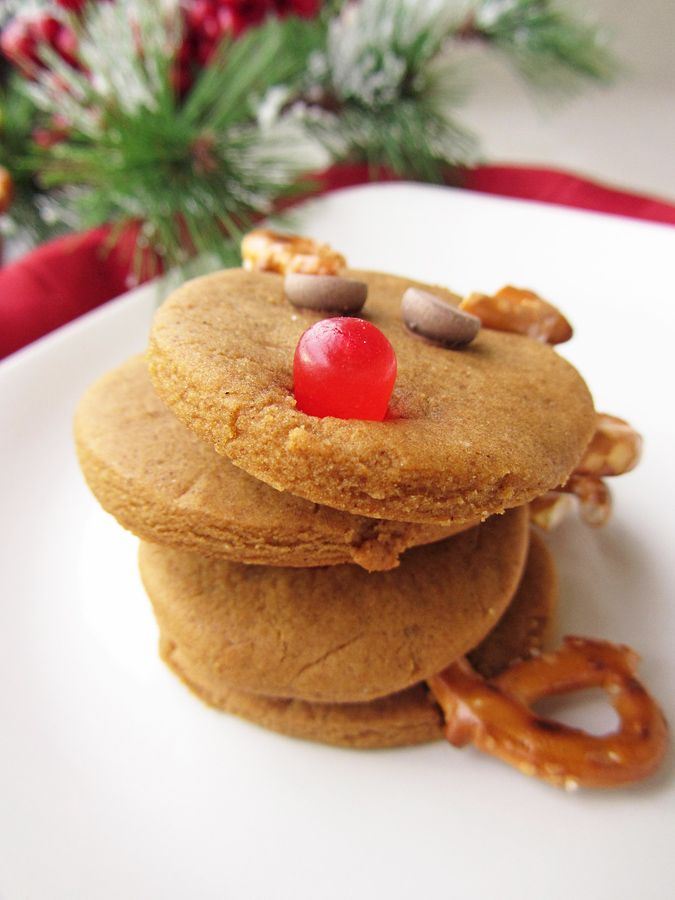
I used Bakergirl’s gingerbread cookie recipe, cut the dough into ovals for the reindeer heads, then stuck some pretzels on for antlers, chocolate chips for eyes, and red Mike & Ike’s for the nose (though I’ve heard that Mike and Ike have recently split up, so I’m not sure who the red colour is supposed to represent, if it even works that way – mine just came from a bulk bin where all the Mike & Ikes still live happily together).

Rudolph Gingerbread Cookies

These turned out to be so adorable and got lots of compliments!  I also really liked the gingerbread recipe – while they were a bit hard coming out of the oven, they softened up and stayed soft for days in a container.  True that the pretzels and candy don’t exactly go with the taste of gingerbread, but you can pick them off and eat them separately if you like, and I don’t think kids would mind the mesh of flavours!  If you’re very concerned though, you could always replace the red nose with an m&m – I just liked the 3D effect of the candy! You could also try using chocolate-covered pretzels, they'll just be a little more expensive.

Rudolph Gingerbread Cookies

Rudolph Gingerbread Cookies

Adapted from Bakergirl (reindeer cookie idea here, gingerbread cookie recipe here)

Makes around 35 cookies

Ingredients:

1/4 cup + 2 tablespoons unsalted butter, at room temperature
1/2 cup packed dark brown sugar
1/2 a large egg (whisk one large egg in a bowl then use only half)
1/4 cup + 2 tablespoons molasses
2 cups all-purpose flour
3/4 teaspoon baking soda
1 teaspoon ground ginger
1/2 teaspoon cinnamon
1/4 teaspoon nutmeg
1/8 teaspoon ground cloves
1/8 teaspoon salt
Around 40 small pretzel twists (this is only a few handfuls from a bag)
Around 70 chocolate chips (again this is only about a handful from a bag)
Around 20 red Mike & Ike candies (I got these from a bulk bin)

Directions:

Cream together the butter and sugar in the bowl of an electric mixer, on medium speed, until light and fluffy.  Add the egg and molasses (tip: coat your measuring cup/spoon with non-stick oil spray before measuring the molasses so it pours out easier) and mix until combined.  In a separate bowl, whisk together the flour, baking soda, ginger, cinnamon, nutmeg, cloves, and salt.  Add the dry ingredients to the mixing bowl in small additions, mixing on low speed until incorporated.  Cover the dough and refrigerate for 2 hours.

Preheat oven to 325°F.

On a lightly floured surface, roll the dough into 1/8-inch thickness.  Don’t worry if the dough’s a little crumbly, you may need to work the dough with your hands for a bit first to get it to roll out smoothly.  Cut out 2-inch ovals with a cookie cutter (I just bent my circle cutter slightly to form an oval).  Place oval cookies two inches apart on a parchment-lined baking sheet.

Break pretzels in half to form antlers, and cut Mike & Ike’s in half so each candy makes two noses.  Press two antler halves onto the top of each cookie oval to form the antlers.  Press two chocolate chips pointy tip facing down into the cookies to form the eyes, and press one Mike & Ike ‘nose’ below the eyes. 

Bake cookies for 7-9 minutes or until edges are firm.  Let cool on baking sheet for a couple minutes then transfer to a wire rack to cool completely.

Reroll remaining scraps of dough and continue cutting out circles and baking cookies until the dough is used up.  I had to bake mine in 3 rounds.

Store cookies in an airtight container.  They may be hard after baking but they will soften up in the container. 
---------------------------------------------------------------------------------------------------------------------

And just so you don't think I only chose the cutest cookies for the pictures (although I did try to do that), here are my phone pics of all the cookies right out of the oven (except for my last batch of 6) - they were all cute and each slightly different!

Rudolph Gingerbread Cookies

November 06, 2012

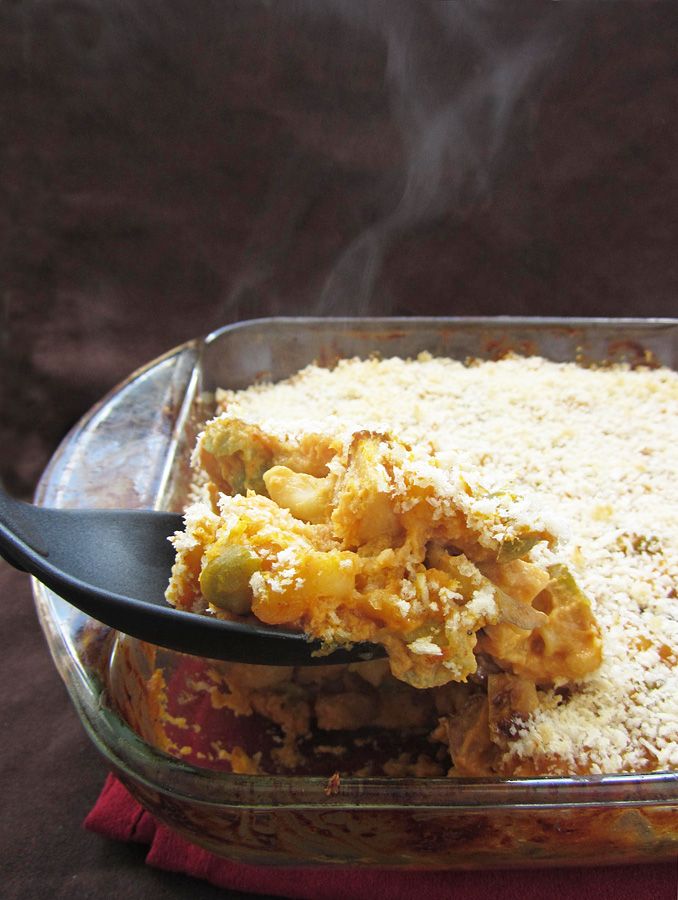
Pumpkin Mac & Cheese with Apples and Caramelized Onions

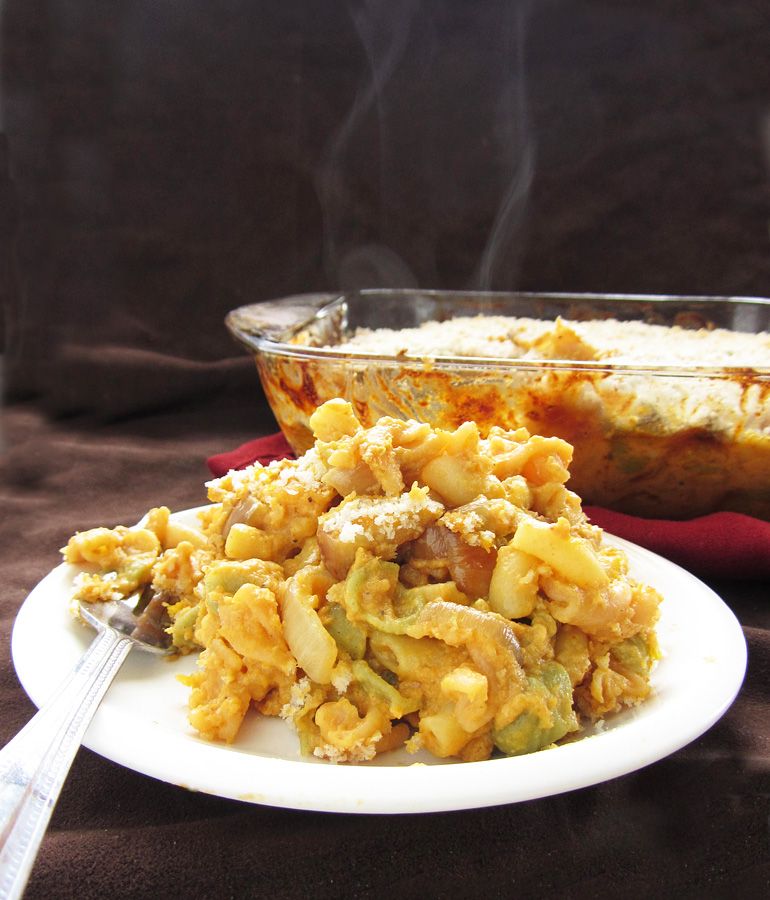
Pumpkin Mac & Cheese with Apples and Caramelized Onions

Now that I’ve seen my first official snowfall of the season and have broken out my winter hat and gloves, all I can think about are warm and cozy meals, and when it comes to comfort food, it doesn’t get much better than mac and cheese!

But as you’ve probably guessed from the title, this is no ordinary mac and cheese! And even though it might sound a little weird, I promise that it works!

Pumpkin Mac & Cheese with Apples and Caramelized Onions

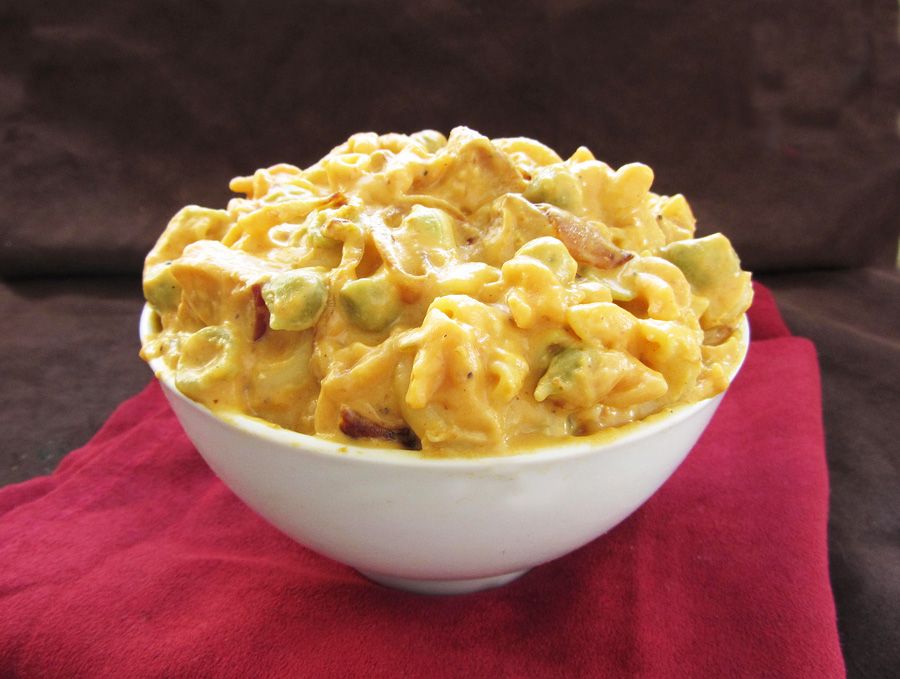
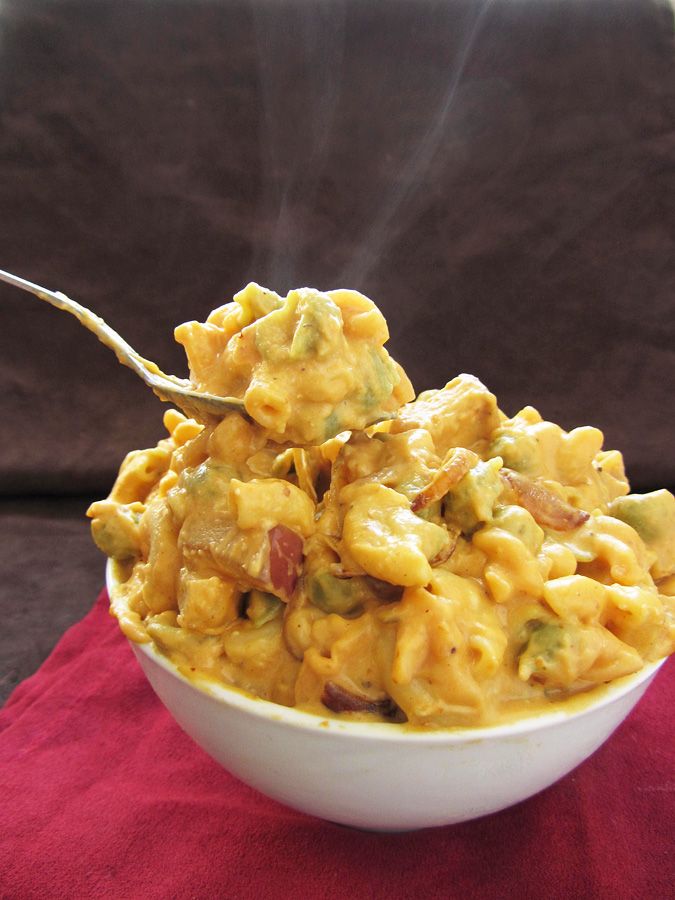
This mac and cheese has a ton of flavour going on – there’s pumpkin puree, pumpkin beer, sautéed apples, caramelized onions, and smoked applewood cheddar cheese – and it all works together so well!

I can never decide if I prefer stovetop or baked mac and cheese, so I tried this both ways. I stopped after cooking it on the stovetop and dug in to test it out. You'll probably want to do the same thing because it’s so hard to resist at this point, and I certainly wouldn't blame you!

Pumpkin Mac & Cheese with Apples and Caramelized Onions

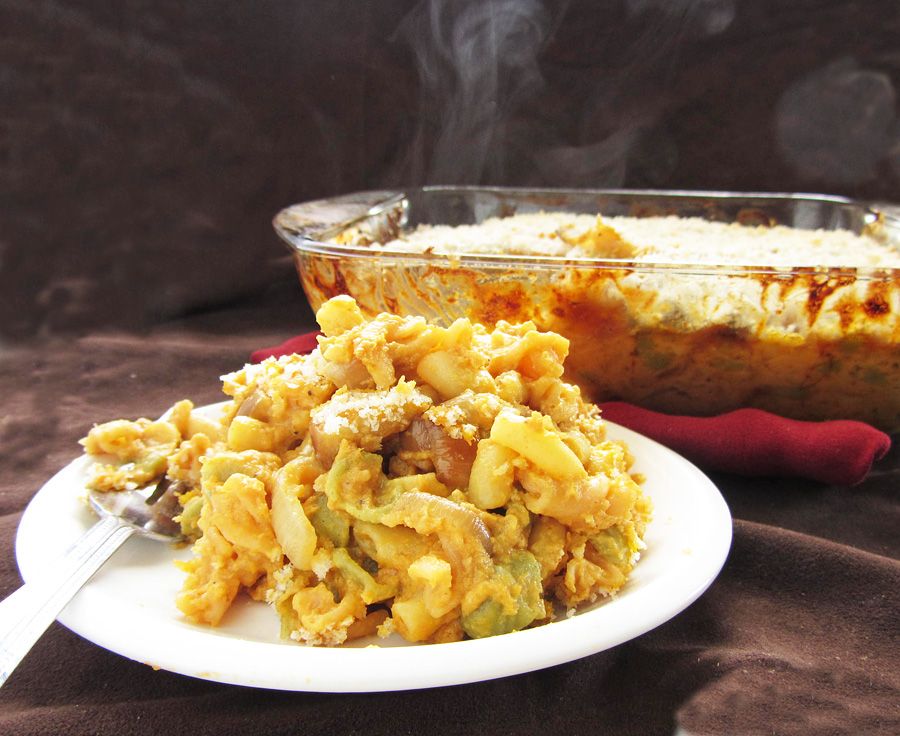
Or you could keep going; sprinkle some breadcrumbs on top and throw it in the oven so you get a crunchy topping with cheesy goodness underneath - it really just depends on how you like your mac and cheese. I loved it both ways!

Pumpkin Mac & Cheese with Apples and Caramelized Onions

I loved that the dash of maple syrup and addition of apples added a touch of sweetness to cut the richness of the cheese, but there wasn’t an apple in every bite so it was like a fun surprise every time you ate one! I also like the smokiness that the applewood smoked cheddar added, but if you don’t like smoky cheeses (my sister complained about the smell every time I heated it up), you could just use a regular sharp cheddar cheese, or I think gruyere would work well too!

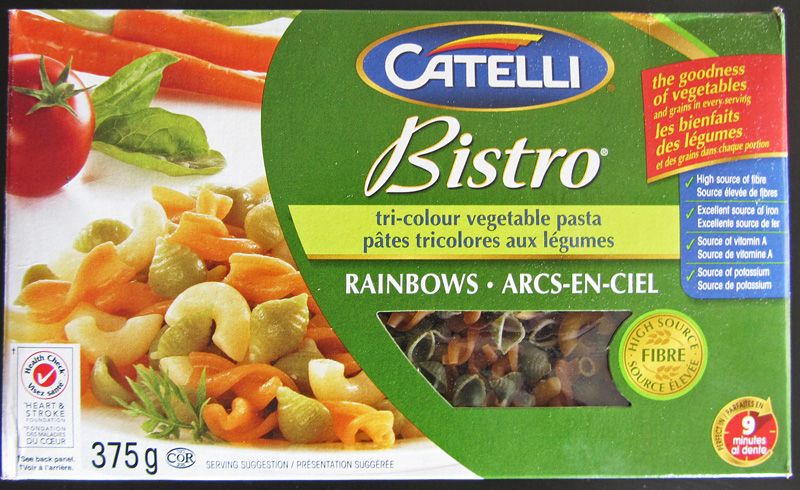
You’re probably wondering why there are strange green things in my pasta, but that’s just because I used this tri-colour vegetable pasta:

vegetable pasta

I realize this isn’t exactly a healthy meal, but with the vegetable pasta instead of regular pasta, the addition of pumpkin, apples, and onions, and using low fat milk, I like to think that it’s at least better for you than a lot of other mac and cheese recipes.

And I certainly had no problem finishing this whole dish by myself (though not all at once, of course!)

Pumpkin Mac & Cheese with Apples and Caramelized Onions

Pumpkin Mac & Cheese with Apples and Caramelized Onions

Adapted from Her Campus, who adapted from Rachel Ray

Serves 4-6

Ingredients:

8oz dry macaroni pasta (I used tri-colour vegetable pasta)
1 tablespoon olive oil
1 large onion, thinly sliced
1 apple, diced (I used Red Delicious)
2 tablespoons unsalted butter
1-1/2 tablespoons all-purpose flour
1/2 cup pumpkin beer
1 tablespoon pure maple syrup
1/2 cup evaporated 2% milk (regular 2% milk would work too)
1/2 teaspoon mustard powder
1/4 teaspoon nutmeg
Salt and pepper
1 cup pumpkin puree
1-1/4 cups grated sharp cheddar cheese (I used applewood smoked cheddar and I used 1-1/2 cups to use it up)
~1/4 cup panko bread crumbs, optional

Directions:

Preheat oven to 350°F.

Cook pasta in a large pot of salted boiling water, according to package directions.  Drain and set aside.
Meanwhile, heat olive oil in a large skillet over medium heat.  Add onions, stir to coat with oil, and let cook, stirring occasionally, about ten minutes.  Season with salt and pepper.  Let cook another 5 minutes or so and then add the chopped apples.  Continue to cook apples and onions, stirring occasionally, for an additional 15 minutes or so, until onions are caramelized and apples are softened and golden brown.  Set aside.

About ten minutes before your onions and apples are done cooking, you can start the roux.  Add butter to a medium saucepan and let melt over medium heat.  Add flour to the melted butter and whisk continuously for about a minute. Raise heat a bit and add the beer.  Reduce until almost evaporated and mixture is quite thick, then whisk in the maple syrup and milk.  Season with mustard powder, nutmeg, and salt and pepper.  Let cook until thick enough to coat the back of a spoon.  Whisk in the pumpkin then whisk in the grated cheese until incorporated.

Stir together the pasta, cheese sauce, onions, and apples.  At this point, you can serve the mac and cheese as is for a stovetop version, or you can bake it.  If you choose to bake it, spread it into an 8x8 glass baking dish and sprinkle breadcrumbs on top.  Bake in preheated oven for about 30 minutes, let cool slightly, then serve.

November 02, 2012

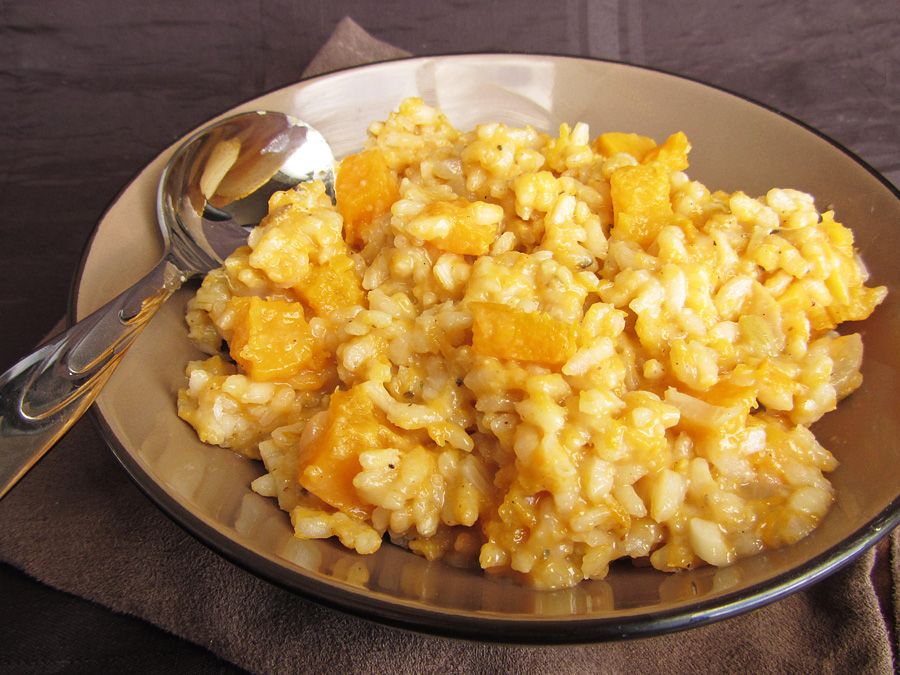
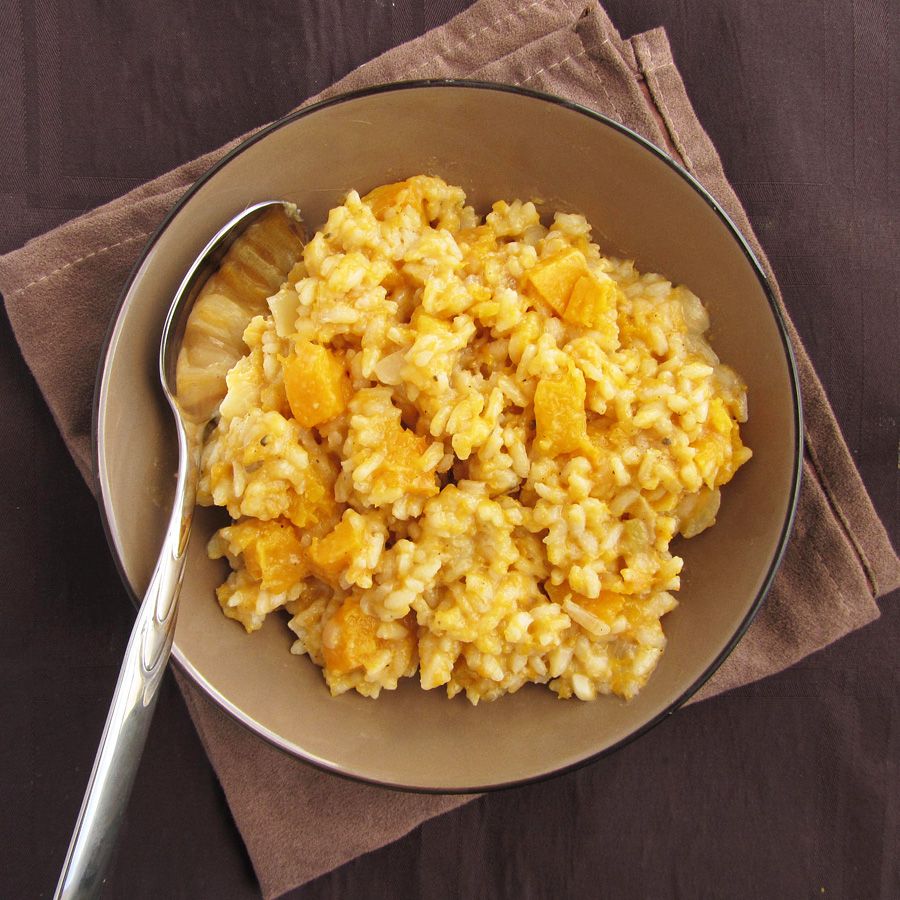
Pumpkin Ale Risotto

Pumpkin Ale Risotto

I cannot believe it’s already November!  Just last week I was walking through fallen leaves in a leather jacket; today I had to wear mittens and it snowed in my hometown this morning!  I’m even kicking off the holiday season tonight with the Holiday Home Tour in London – you get to walk through five (very nice) houses that have been professionally decorated for the holidays, and also enjoy some entertainment and treats along the way.  I admit part of the reason we go is to get a peek into other people’s elaborate homes (which are much nicer than my little apartment!), but it’s also fun to get into the Christmas spirit and start getting decorating ideas!

Even though we’re heading towards winter, I hope it’s not too late for pumpkin recipes because I’ve still got a couple good ones to share, like this pumpkin ale risotto!  I bought pretty much every type of pumpkin beer I saw this fall, and I just couldn’t drink them all fast enough so I tried to experiment with using them in my food.  I had recently seen the idea of using beer instead of wine when you’re making risotto, which got me thinking that pumpkin ale would be perfect to use in a pumpkin risotto!  I used a basic risotto recipe but replaced the white wine with pumpkin ale, added some pureed squash along with some roasted pieces of squash for texture (my grocery store was out of pumpkins but squash worked just as well), then added a bit of nutmeg and sage for seasoning.  The result was a creamy and comforting risotto with a subtle pumpkin flavour that’s perfect for either fall or winter!

Pumpkin Ale Risotto

Pumpkin Ale Risotto

Adapted from several sources, including Chow.com and Two Girls One Food Processor

Serves about 4

Ingredients:

1 (~3lb) cooking pumpkin or squash (I used butternut squash because pumpkins weren’t available at my store)
2 tablespoons olive oil, divided
Salt & pepper
4 cups (1L) low-sodium chicken or vegetable broth
1 small yellow onion, peeled and diced
2 cloves garlic, minced
1-1/2 cups dry Arborio rice
1 cup of your favourite pumpkin ale
1/4 to 1/2 teaspoon nutmeg
1/2 teaspoon dried sage or rosemary
1/4 cup grated parmesan cheese (or more if desired)

Directions:

Preheat oven to 400°F.  Peel and slice squash/pumpkin into small, 1/2-inch cubes.  Toss with 1 tablespoon olive oil and season with salt and pepper.  Transfer to a foil-lined baking sheet and roast in preheated oven for 20-25 minutes, until tender.  Mash enough cubes to make 1 cup of mashed squash/pumpkin, and reserve 1-1/2 cups of cubed squash/pumpkin.  Save any remaining squash for another use.

Add chicken or vegetable stock to a medium pot, and bring to a boil.  Reduce heat to simmer and leave gently simmering as you make the risotto.

Heat remaining tablespoon of olive oil in a large deep skillet over medium-high heat.  Add the onion and sauté until soft, about 4-5 minutes, stirring often.  Add garlic and stir for another 30 seconds, then add rice and stir for 1-2 minutes to toast the rice.  Add pumpkin ale in two additions, stirring until absorbed each time. 

Set a timer for 20 minutes, and for the duration of the timer, continuously add the simmering stock to the rice a ladle at a time, stir until absorbed by the rice, then add another ladle, stir again, etc.  Keep stirring the rice constantly with a flexible heat-proof spatula. When the 20 minutes are up, taste and ensure rice is cooked to al dente. 

Add the mashed pumpkin, nutmeg, and sage and stir until incorporated.  Season with salt and pepper, add the parmesan cheese, stir and taste, and adjust any spices or seasonings to taste (you may wish for more nutmeg or the addition of cinnamon if you really want the pumpkin flavours to come through).  Gently stir in the cubed squash/pumpkin.  Serve warm.

Ingredient Index

Related Posts Plugin for WordPress, Blogger...