Showing posts with label flour - whole wheat. Show all posts

July 22, 2014

Strawberry & Peanut Butter Whole Wheat Oat Muffins

Strawberry & Peanut Butter Whole Wheat Oat Muffins

Somehow I always end up missing strawberry season because it seems to go by so quickly, so this year I was determined to bake at least one thing with strawberries. 

We don't really want a lot of desserts around right now though, so I decided to bake something on the healthier side.  And because we are only two people, I wanted something that can freeze well.  Enter muffins!

I had it in my head to make peanut butter and strawberry muffins, which surprisingly I could find almost no recipes for, so I decided to make up my own.  Peanut butter and jam goes together, so why not pb and fresh strawberries!
Strawberry & Peanut Butter Whole Wheat Oat Muffins

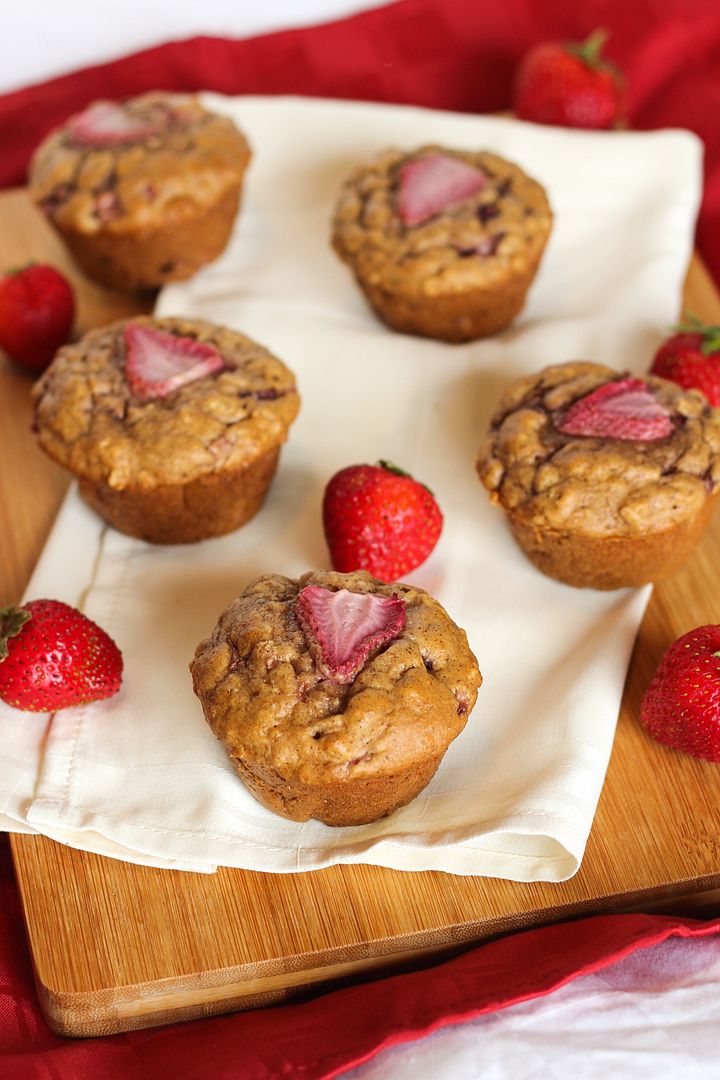
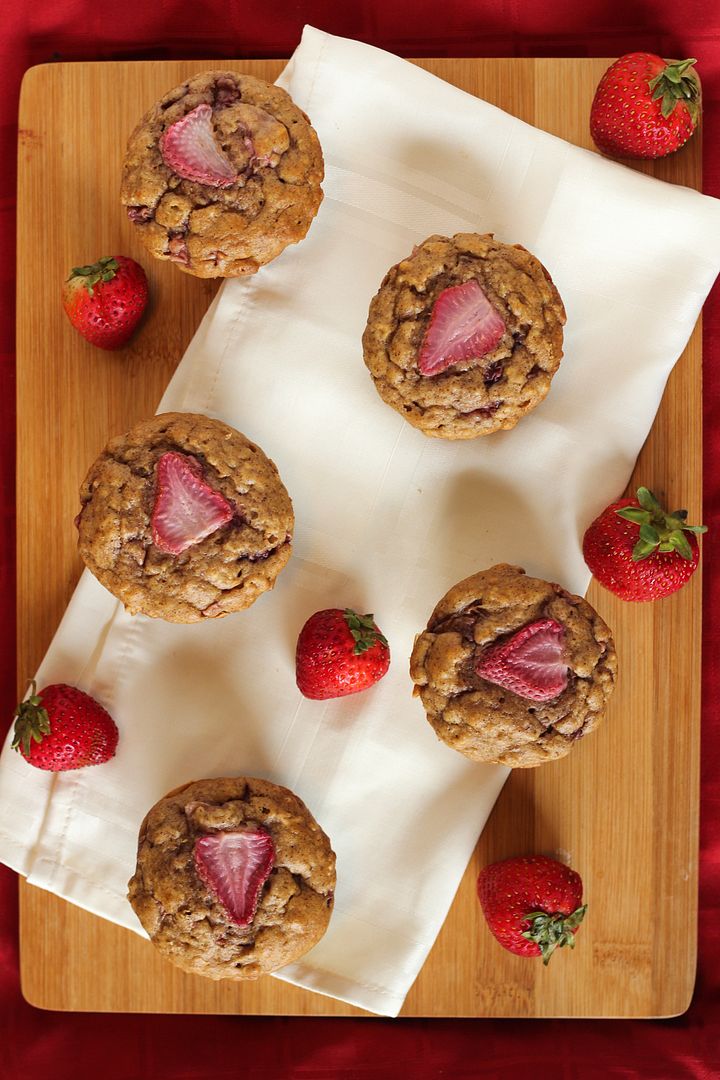
Because I wanted these to be on the healthier side, I used all whole wheat flour combined with oats, only a bit of pure maple syrup for sweetener instead of sugar, natural peanut butter, unsweetened almond milk, only a tablespoon of oil, and fresh strawberries instead of jam.

While they're not exactly low-fat because of the peanut butter, and not vegan because I included an egg (I haven't really had success with eggless baked goods in the past and don't have any problems personally with an egg being included), I still consider them a wholesome snack that is perfect for afternoon cravings as they satisfy hunger pretty well!
Strawberry & Peanut Butter Whole Wheat Oat Muffins

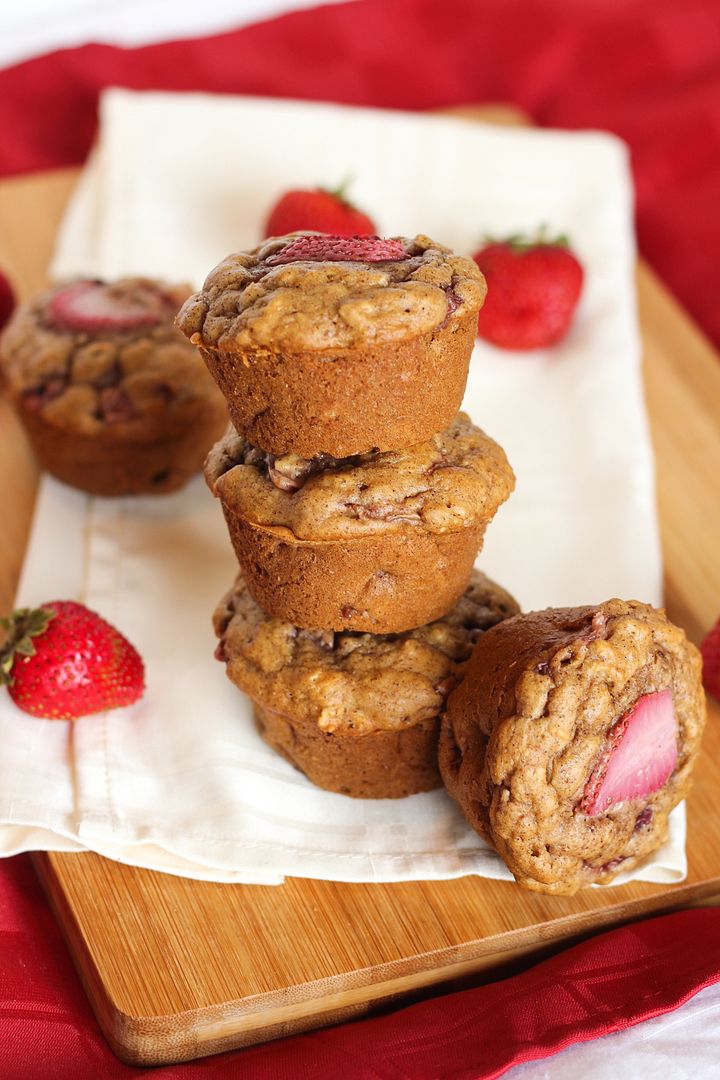
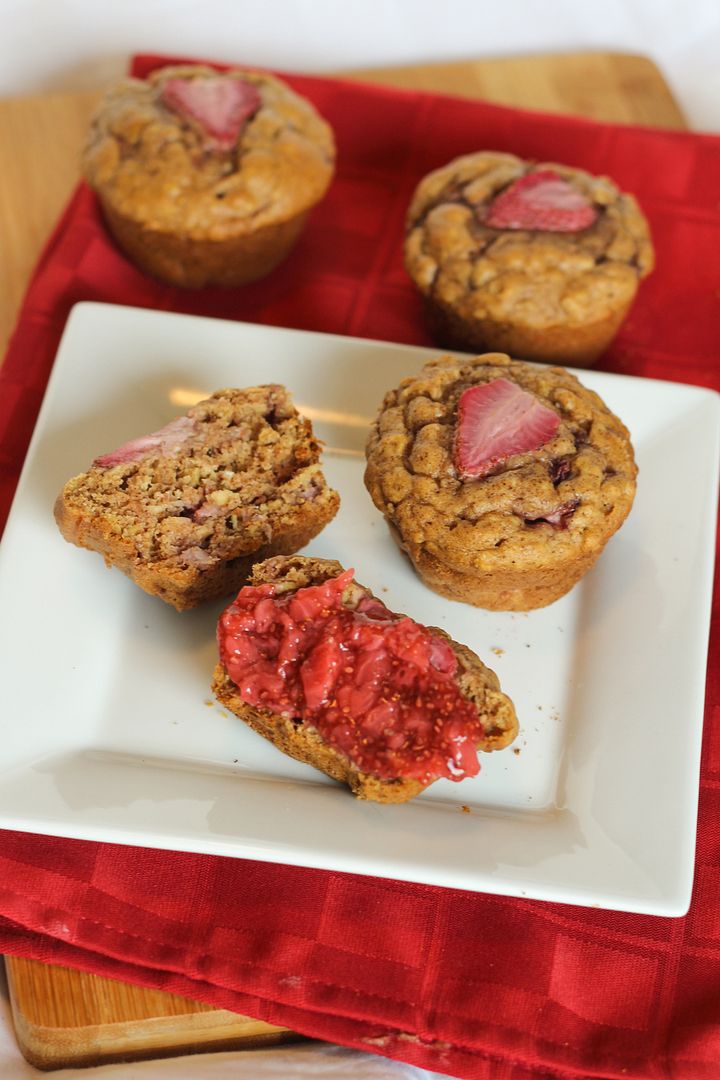
These were photographed over a day after making them, so the strawberries I had placed on top aren't looking so hot, but I assure you that these still turned out great!

I also love slathering these in chia jam for more strawberry goodness.  If you've never made chia jam before, I encourage you to give it a try!  It's super easy and quick to make and so much better for you than regular jam.  I used the jam recipe from these strawberry oat squares by Oh She Glows, another strawberry recipe I'll have to try soon before the season is over!
Strawberry & Peanut Butter Whole Wheat Oat Muffins


Strawberry & Peanut Butter Whole Wheat Oat Muffins

Makes 12 muffins

Ingredients:

1-1/4 cups whole wheat flour
3/4 cups rolled oats
1 teaspoon baking soda
1 teaspoon baking powder
1 teaspoon cinnamon
1/4 teaspoon salt
1 large egg, lightly beaten
1 cup unsweetened vanilla almond milk
1/2 cup natural peanut butter, melted slightly to mix in better
1/4 cup pure maple syrup (or I used 2 T maple syrup + 2 T honey)
1 teaspoon vanilla extract
1 tablespoon extra virgin olive oil
1 cup diced fresh strawberries
12 slices strawberries for the tops, if desired

Directions:

Preheat oven to 350°F.  Spray a regular 12-cup muffin tin with non-stick cooking spray.

Whisk the dry ingredients (flour through salt) together in a medium bowl.  In a separate bowl, mix the wet ingredients until just blended (egg through oil).  Add the wet ingredients along with the diced strawberries to the dry ingredients and fold together until just combined.

Divide batter evenly among the 12 muffin cups.  If desired, add a strawberry slice to the top of each muffin.  Bake muffins in preheated oven for 18-20 minutes or until toothpick inserted in middle of a muffin comes out clean.  Let cool for a couple minutes in the pan then remove to a wire rack to cool completely.

March 04, 2014

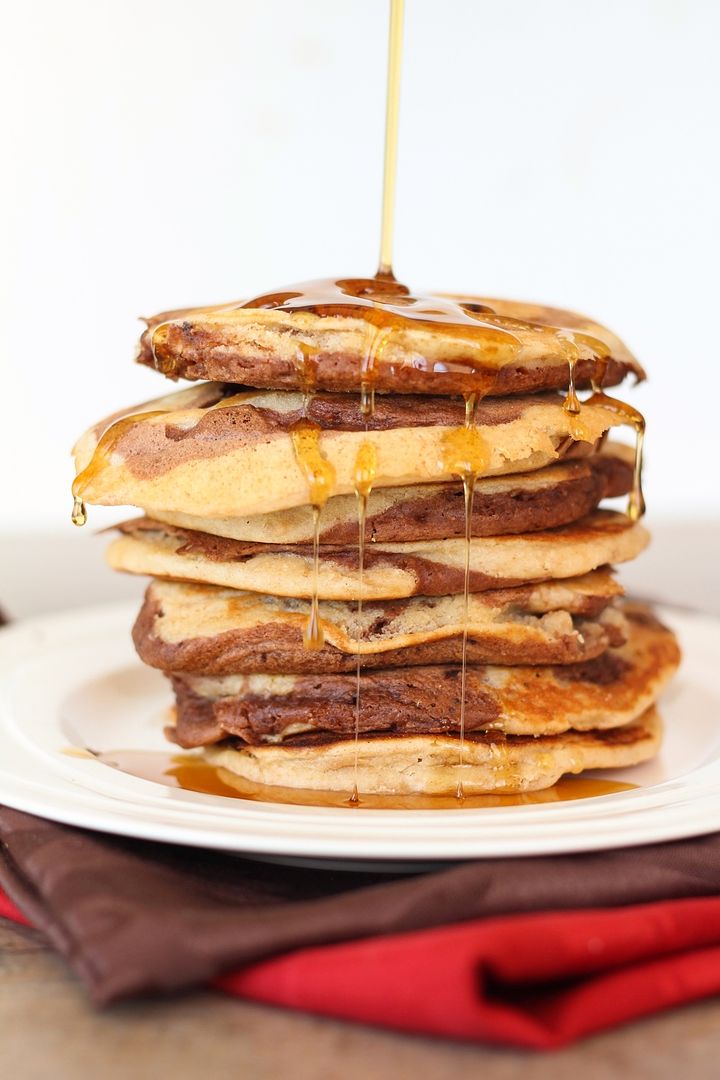
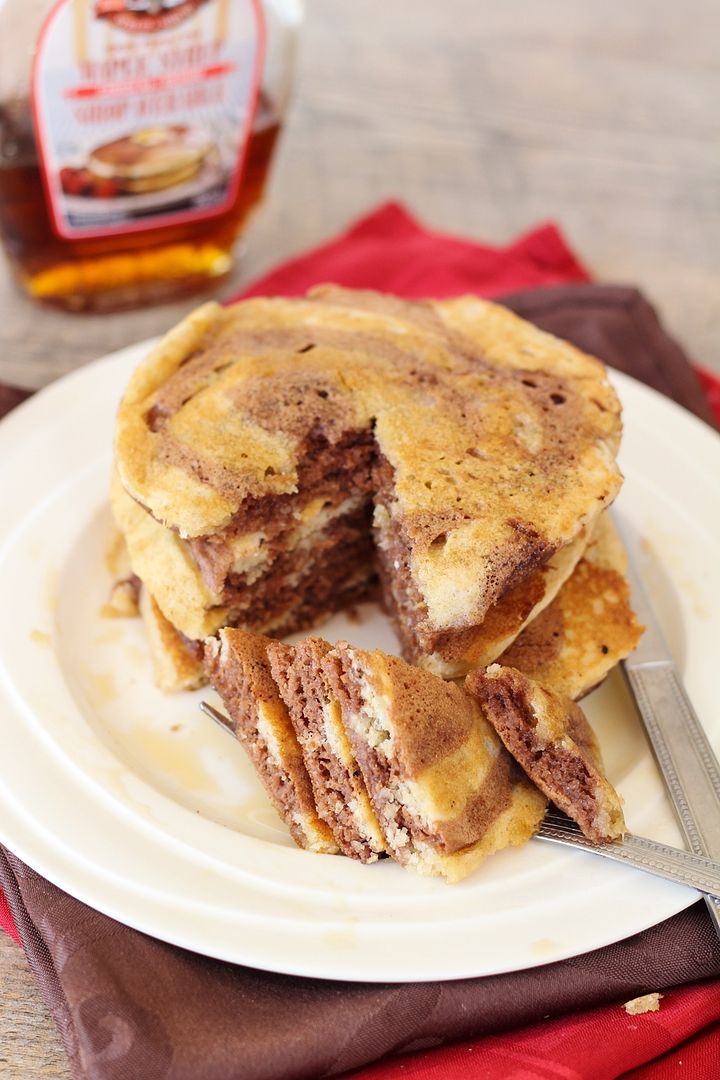
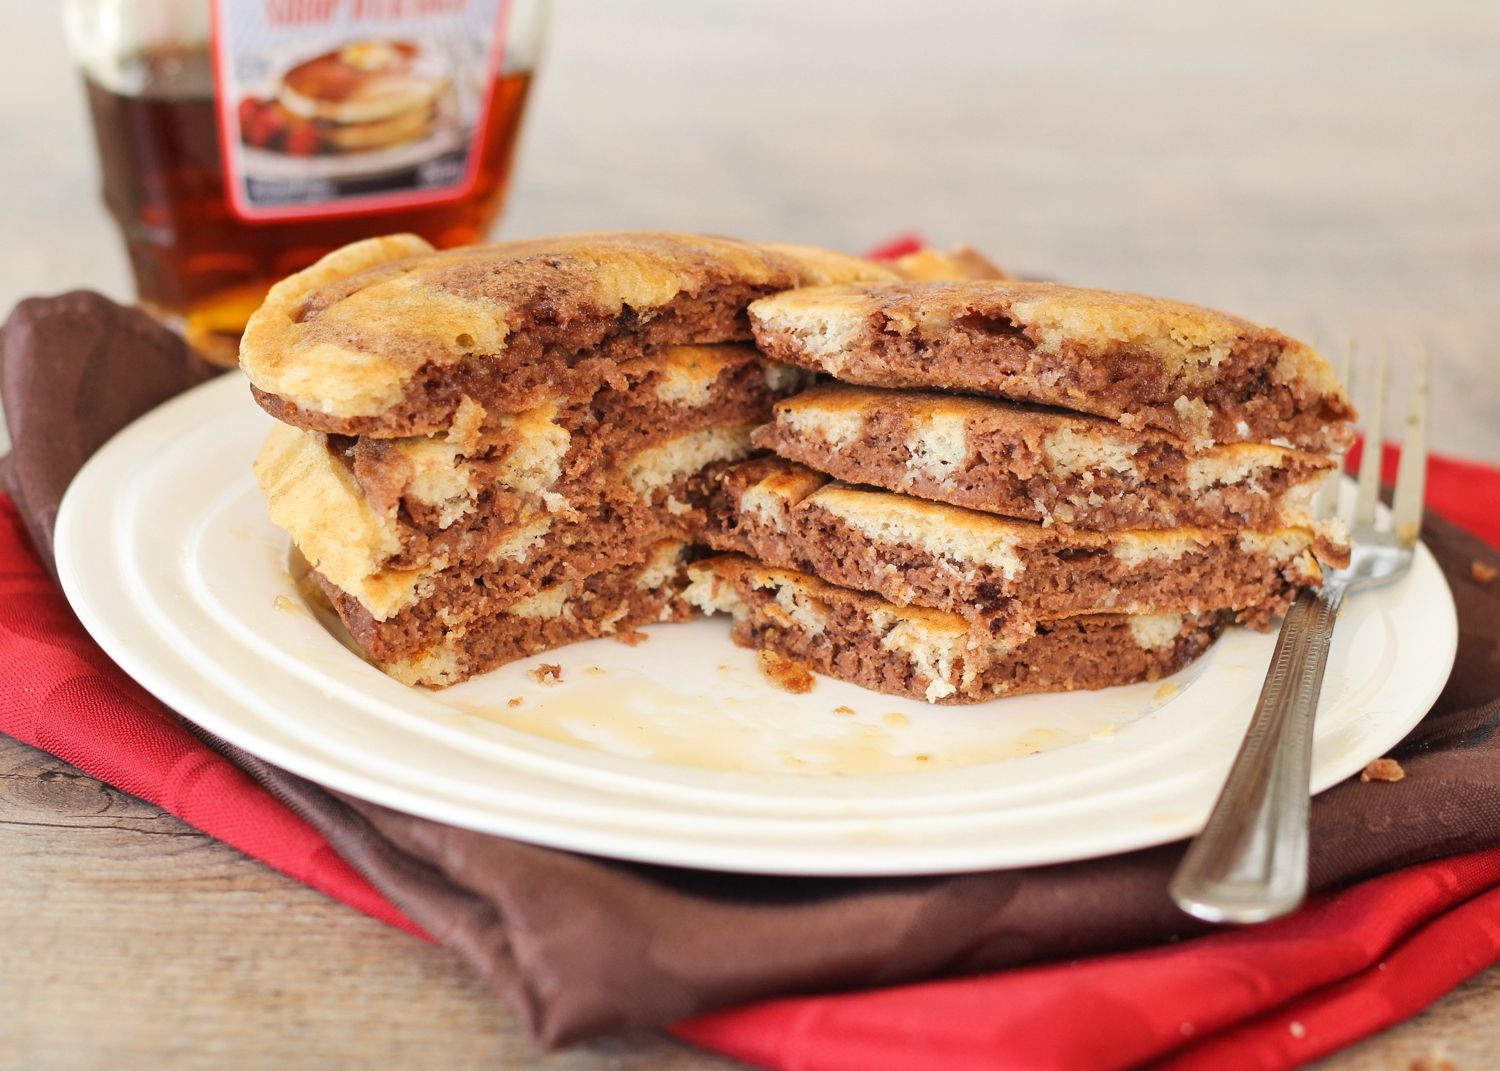
Chocolate Peanut Butter Swirl Pancakes

Chocolate Peanut Butter Swirl Pancakes

Today  is one of my favourite days of the year, Pancake Tuesday!  Better known as Fat Tuesday, it's a day traditionally meant for eating richer, fatty foods before Lent, which somehow led to eating pancakes (though I don't really agree that they're a rich or fatty food!)  To my family and I, it just means it's a day to eat pancakes for dinner!

Chocolate Peanut Butter Swirl Pancakes

As a kid I always loved the traditional blueberry and chocolate chip pancakes for pancake dinner, but now I love using the day to try new flavours of pancakes I've never had before.  Last year I made these delicious earl grey vanilla tea pancakes with honey tea syrup, and the year before that was these caramel latte pancakes, which I also loved.

Chocolate Peanut Butter Swirl Pancakes

But it's getting harder and harder to think of pancake flavours that haven't been done before, so this year I decided to combine two flavours into one!  And what better combination than the best of friends, chocolate and peanut butter.

Chocolate Peanut Butter Swirl Pancakes

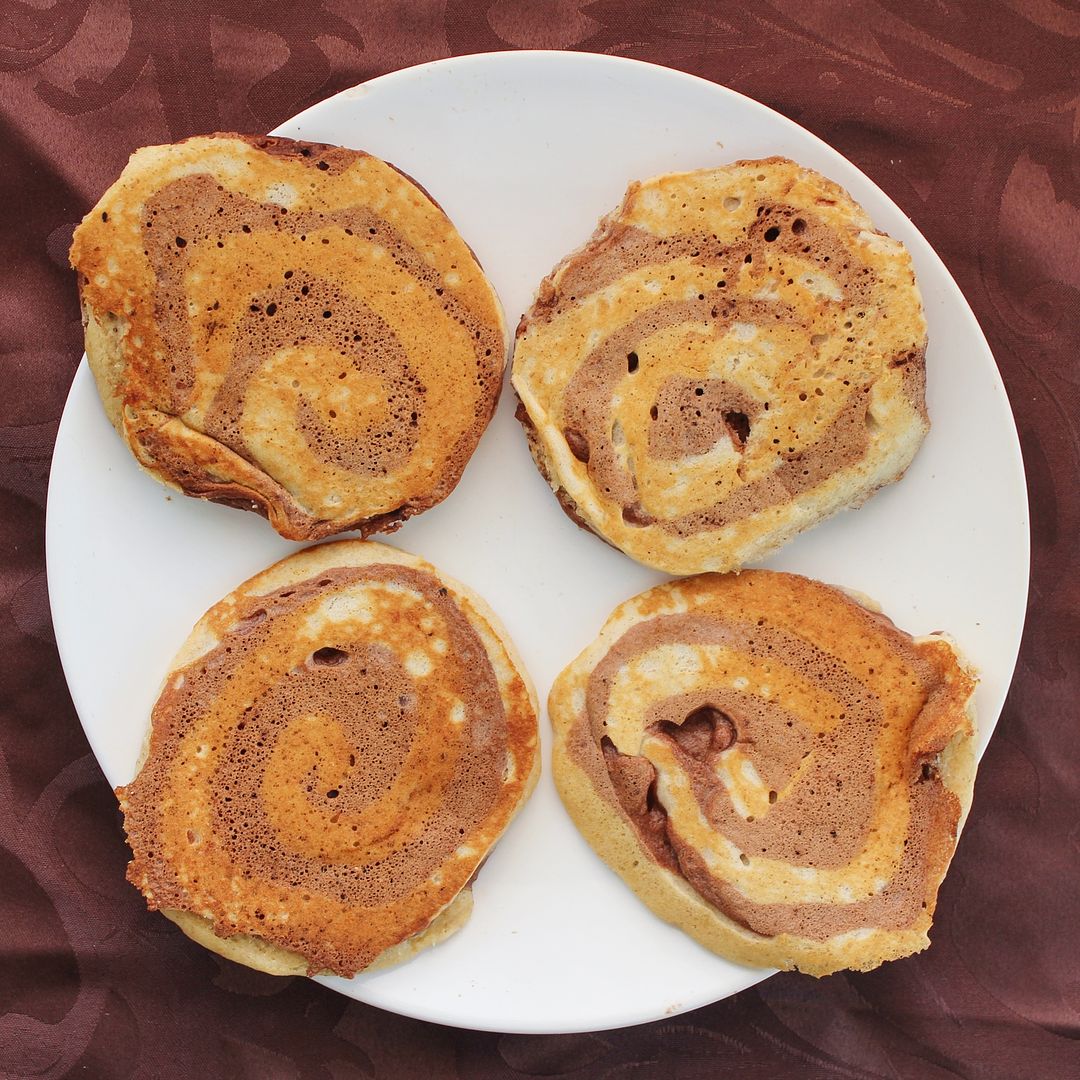
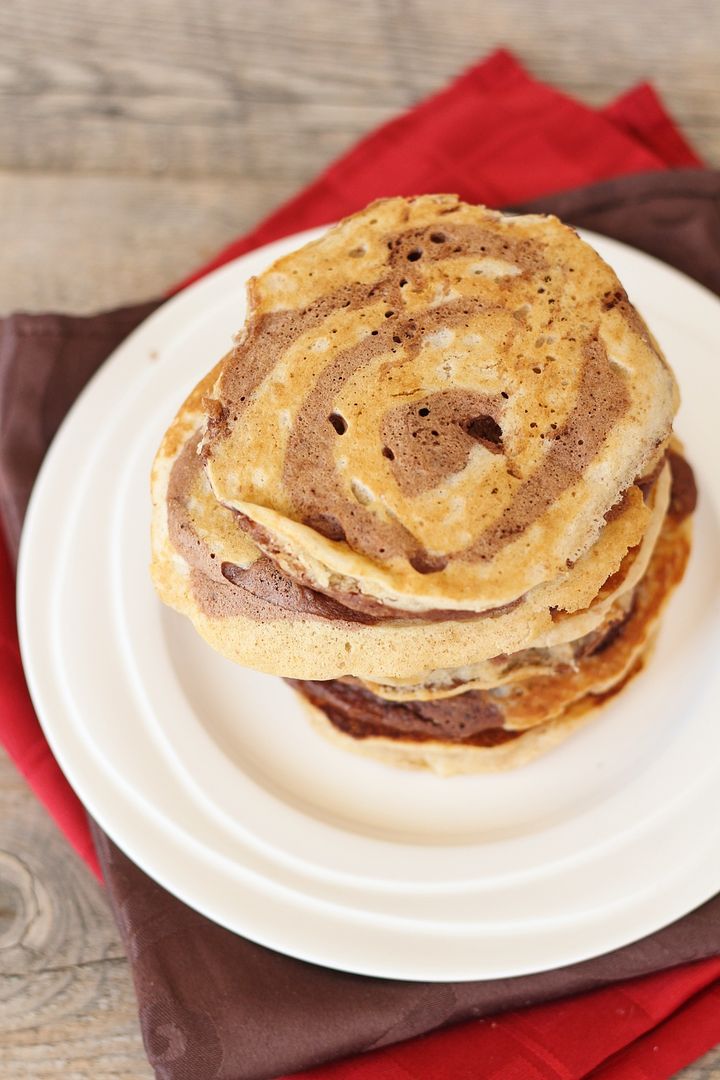
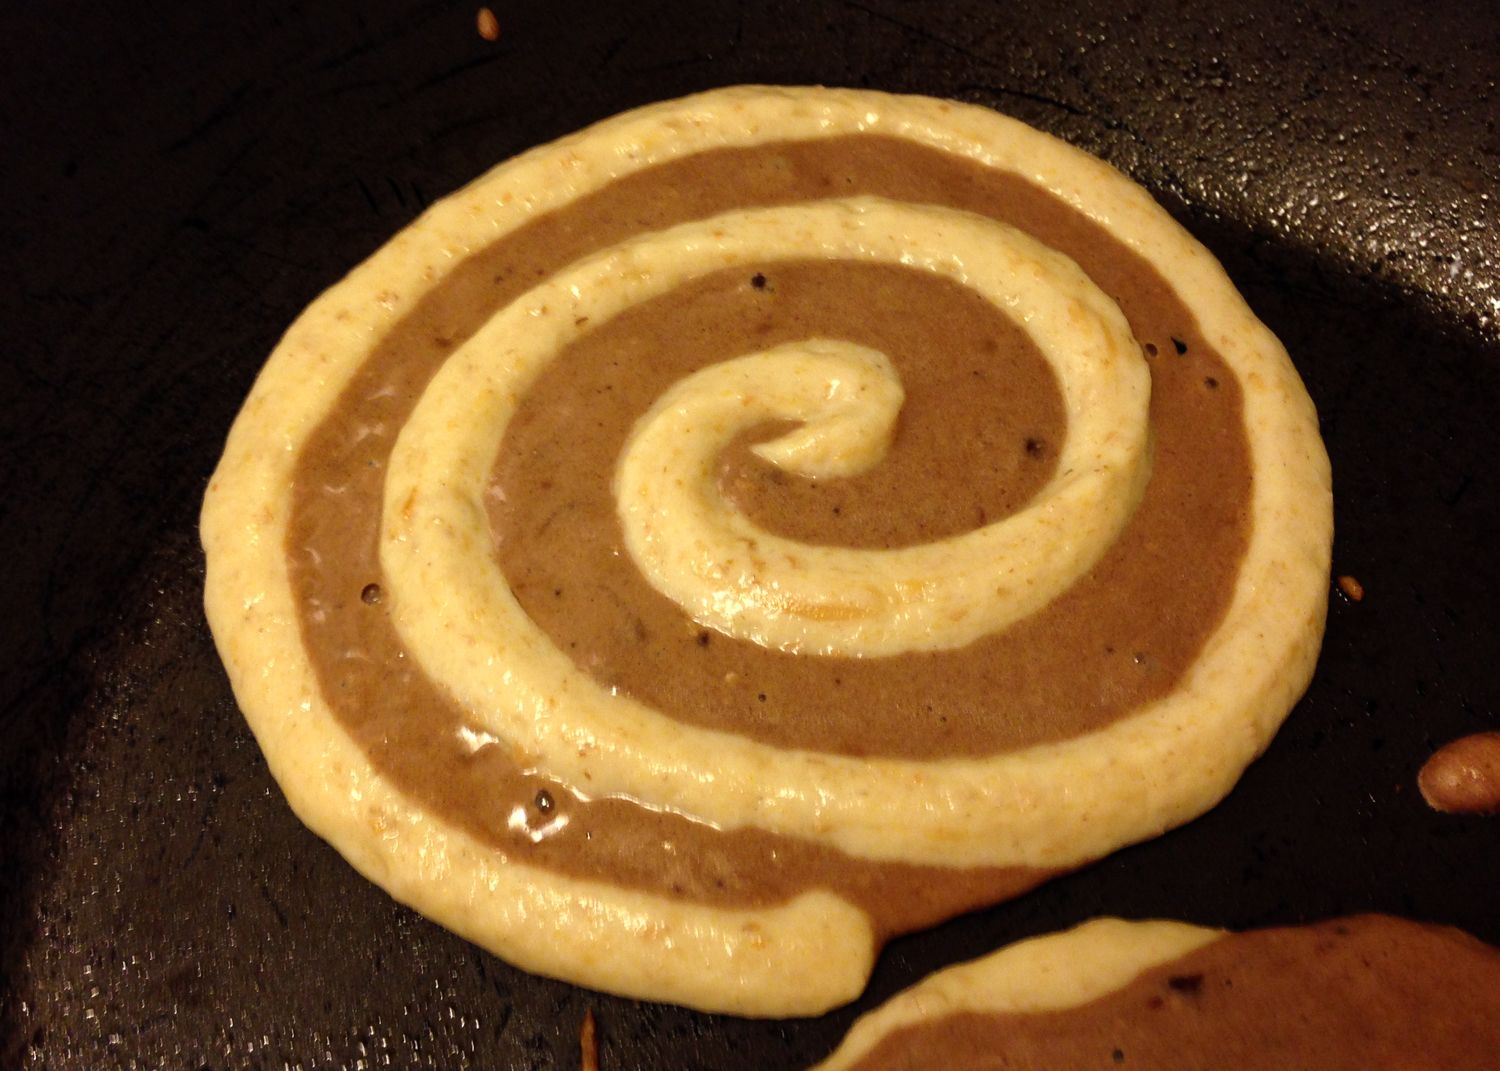
These really are no harder than regular pancakes because the chocolate and peanut butter batters are basically the same, the only difference being the addition of cocoa for the chocolate batter versus peanut butter for the peanut butter batter (duh, I know).  Because the peanut butter batter is thicker, you'll pour the chocolate into your pan first in a pancake shape, then swirl the peanut butter batter on top just using a simple ziplock bag.

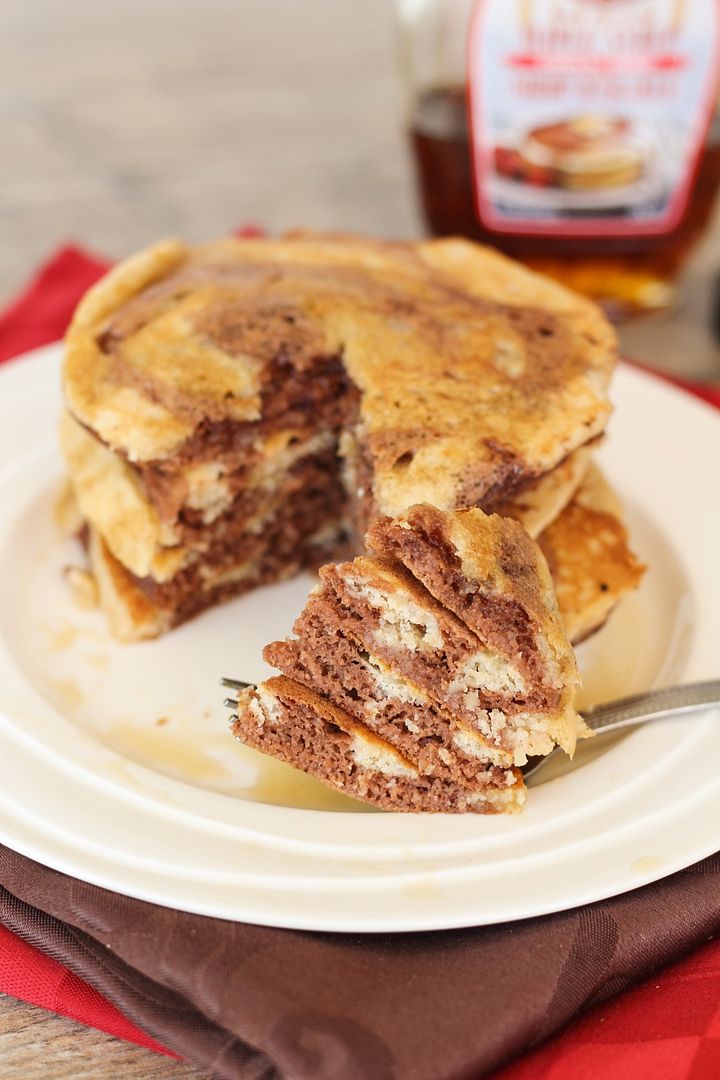
The browning of the pancakes hides the swirl a little, but I still love the contrast in colours you see, and the balance of peanut butter and chocolate in the taste is absolutely perfect - I love that you can taste both equally!

Chocolate Peanut Butter Swirl Pancakes

These may just be my new favourite pancakes, and with a certain peanut butter loving fiance's birthday coming up this weekend, I think I have the perfect excuse to make them again soon!

Chocolate Peanut Butter Swirl Pancakes

Chocolate Peanut Butter Swirl Pancakes

Recipe by Once Upon a Cutting Board but peanut butter pancake batter adapted from Food.com

Makes around 10 pancakes

Ingredients:
For the Chocolate Batter:
1/4 cup all-purpose flour
1/4 cup whole wheat flour*
1 teaspoon baking powder
1/4 teaspoon salt
1 tablespoon sugar
1 tablespoon cocoa powder
1/2 large egg, lightly beaten
1/2 cup milk (I used almond milk)
1 tablespoon vegetable oil
1/2 teaspoon vanilla extract

For the Peanut Butter Batter:
1/4 cup all-purpose flour
1/4 cup whole wheat flour*
1 teaspoon baking powder
1/4 teaspoon salt
1 tablespoon sugar
1/2 large egg, lightly beaten
1/2 cup milk (I used almond milk)
1 tablespoon vegetable oil
1/2 teaspoon vanilla extract
1/4 cup smooth peanut butter

*note: feel free to replace the whole wheat flour with all-purpose flour if you don’t have whole wheat

Directions:

Prepare the chocolate and peanut butter batters separately, but notice that the batters contain almost identical ingredients (the chocolate batter has cocoa and the peanut butter batter has peanut butter), so you can prepare them side by side, making it easy. Add all your dry ingredients to two separate bowls for the separate batters and whisk the mixture together, then add the wet ingredients to each bowl and gently whisk or fold just until the wet and dry ingredients are combined. Note that for the egg, you can lightly beat one egg then divide it in two for the two batters. Transfer the peanut butter batter to a squeeze bottle or a Ziplock bag with a small corner cut off.

Heat two large non-stick skillets over low-medium heat and spray with non-stick cooking spray if needed. To make the pancakes, you’ll pour the chocolate batter into a pancake then swirl the peanut butter on top because it’s a thicker batter. Pour chocolate batter by about 1/4 cup full onto the pan, then immediately swirl peanut butter batter on top. It will look something like this:

chocolate peanut butter swirl pancakes

Cook for a couple minutes until bubbles form on top, then cook for one to two minutes on the other side, until cooked through. If you let the pancakes brown too much, it will hide the swirl, so you want to try to cook these over low heat, which may require a bit more time than usual. Repeat with remaining pancake batter; you will end up with more peanut butter batter leftover so just use that to make a few plain peanut butter pancakes. You can serve those in the middle of your stacks to help balance out the chocolate flavour.

Serve pancakes warm, with pure maple syrup if desired. 

July 12, 2013

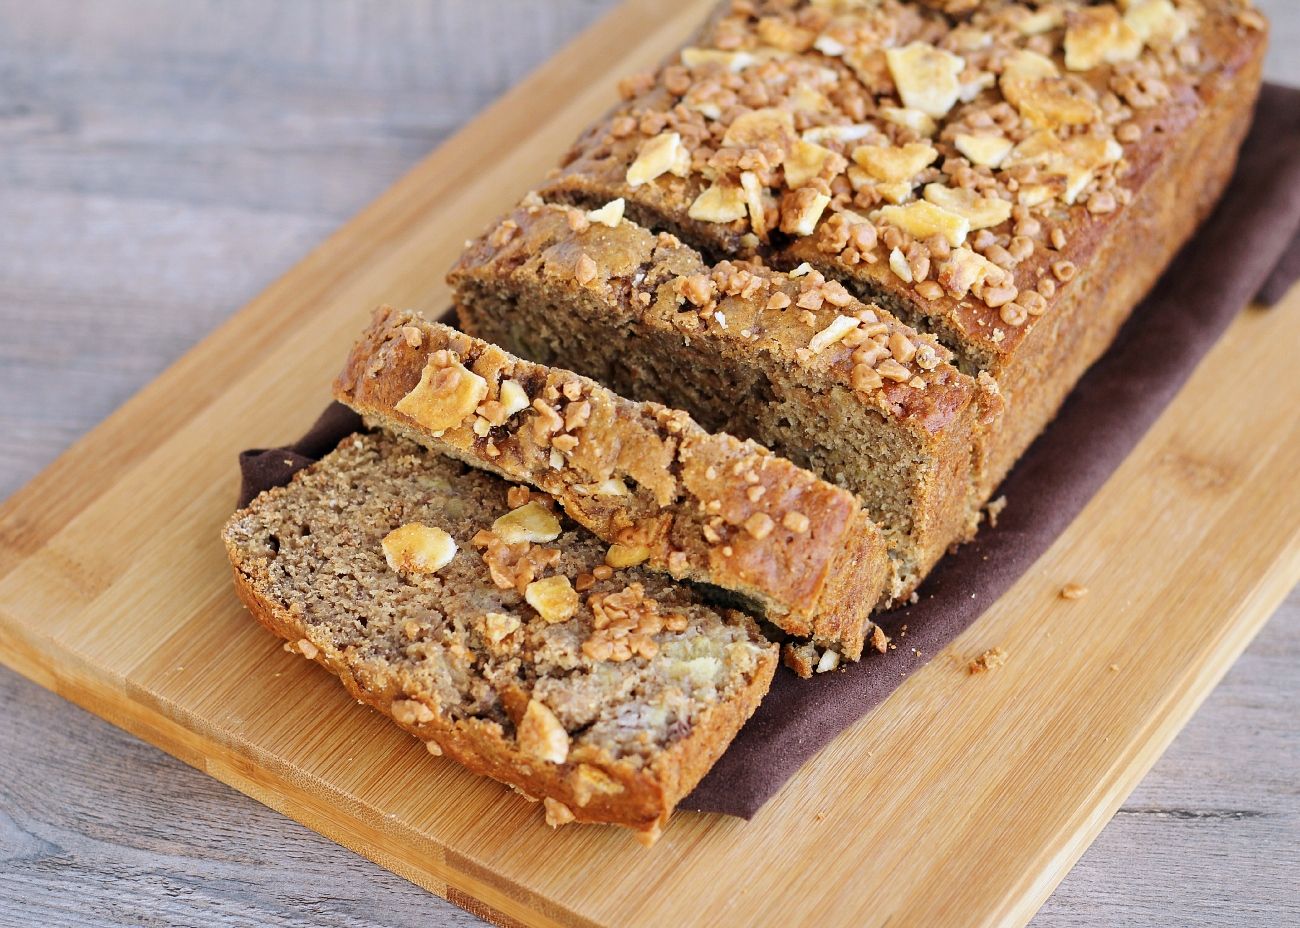
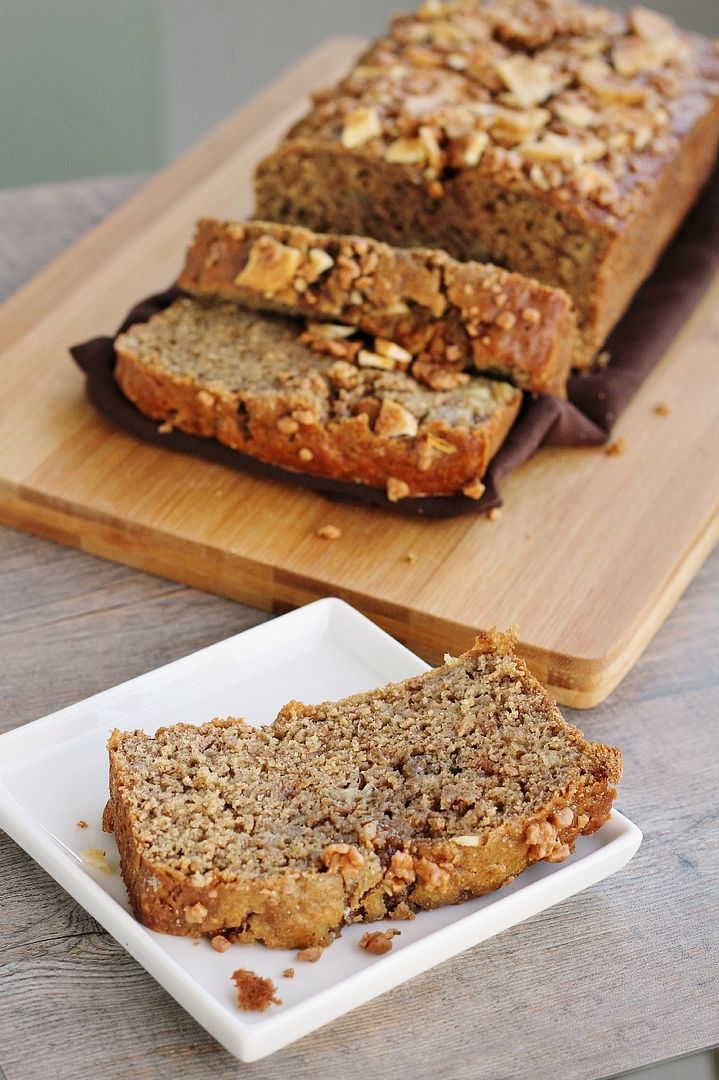
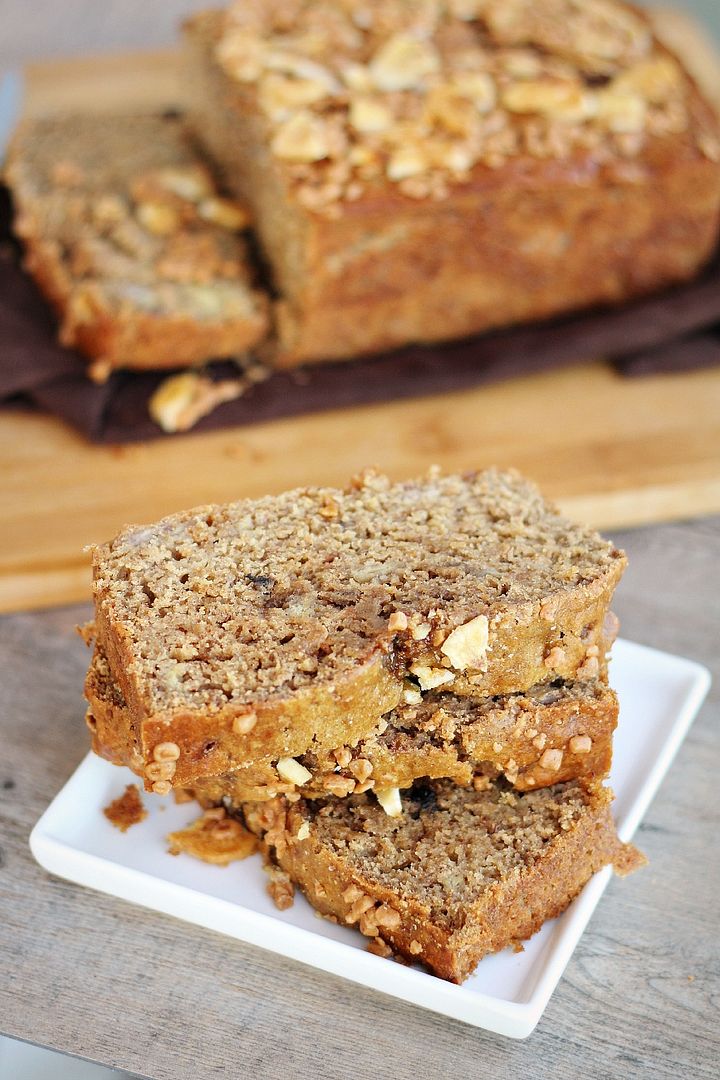
Coffee Toffee Banana Bread

Coffee Toffee Banana Bread

Has anyone else been thinking that it’s already July 12th, which means it’s almost halfway through July, which means summer is halfway over already?! I swear summer JUST started (which is practically true considering the weather we had in June), so I'm freaking out that it’s going by way too fast! I think I’ve only managed to make it to the farmer’s market once so far, I’ve hardly made any summer recipes (especially with berries – and I completely missed strawberry season somehow), I’ve only gone to the beach once, and stores are already starting to clear out their summer clothes before I’ve had the chance to look at them! I think I say this every year, but slow down, summer!

With that being said, I’ll try to make the rest of this post short so I can finish my work then make an effort to get outside for a bit this afternoon to enjoy the sunshine :) Our city has a classic car show today where all the classic cars gather in the park for display, then drive down the streets of downtown and park on the sides of the road, so when you walk downtown it feels like you’ve been transported to the 50’s.  Not the most exciting event for someone who doesn’t appreciate cars (like me), but I’m still looking forward to doing something summery!

Coffee Toffee Banana Bread

This banana bread has a subtle coffee taste along with a subtle toffee taste that not only give it a rhyming name, but make it a little more special than regular banana bread. The original recipe included 1/2 cup of melted butter and all white flour, so to lighten it up a bit I increased the amount of banana and used 1/4 cup of olive oil instead of the butter, and replaced half the flour with whole wheat. I also used dark brown sugar instead of regular sugar, and added cinnamon and instant espresso to boost the flavour. The result is a moist banana bread with a fun flavour twist that goes perfectly with your morning coffee!

Hope you all have a great weekend and do something to enjoy summer!

Coffee Toffee Banana Bread

Coffee Toffee Banana Bread


Makes one 9x5-inch loaf

Ingredients:

3 large ripe bananas, mashed (about 1-1/4 cup)
1/2 cup brewed strong coffee
1 cup all-purpose flour
1 cup whole wheat flour
2 teaspoons baking powder
1/2 teaspoon baking soda
1/2 teaspoon salt
1/2 teaspoon cinnamon
1/4 teaspoon nutmeg
1 tablespoon instant espresso
1/4 cup extra-virgin olive oil
3/4 cup packed dark brown sugar
2 large eggs
1-1/2 teaspoons pure vanilla extract
1/2 cup + 2 tablespoons toffee bits (such as Skor or Heath bits, found in stores with the chocolate chips), divided
1/4 cup chopped banana chips (optional)

Directions:

Preheat oven to 350°F and spray a 9 x 5-inch loaf pan with non-stick spray.

Mix banana and coffee in a small bowl.

In a medium bowl, whisk together the all-purpose flour, whole wheat flour, baking powder, baking soda, salt, cinnamon, nutmeg, and instant espresso.

In a large bowl, whisk together the olive oil and brown sugar.  Add eggs one at a time, mixing well after each addition.  Add the vanilla extract and the banana-coffee mixture and stir until combined.

Slowly add the dry ingredients to the wet ingredients, stirring with a wooden spoon or a spatula until just incorporated.  Fold in 1/2 cup toffee bits. 

Pour mixture into prepared loaf pan and bake for 25 minutes.  Remove from oven, sprinkle the top of the loaf with the remaining toffee bits and banana chips, then return to oven for an additional 25 to 30 minutes, until a toothpick inserted in the middle comes out clean.  *Don't worry about getting all the banana chips on top of the loaf if they don't all fit; you don't want to weigh down the top of the loaf too much to make sure it bakes evenly inside.*  Let stand in pan 10 minutes before transferring to a wire rack to cool completely, then slice.

March 12, 2013

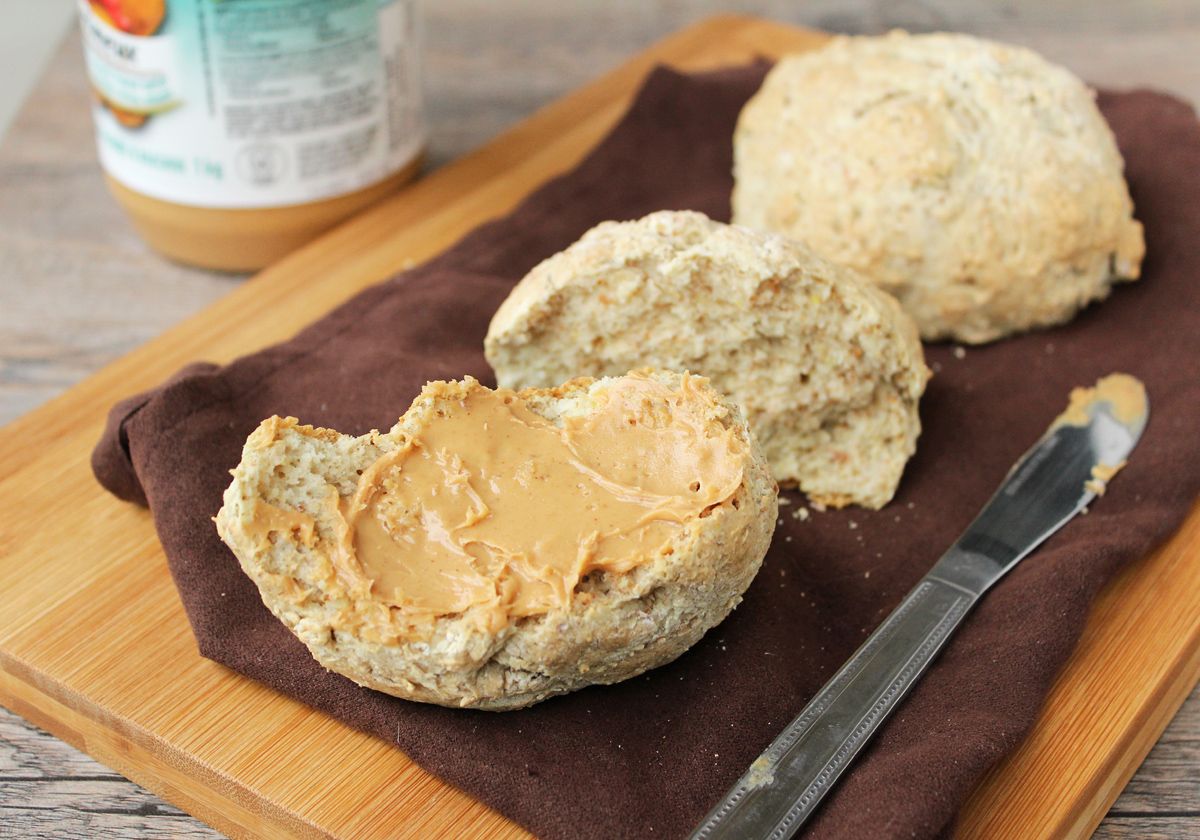
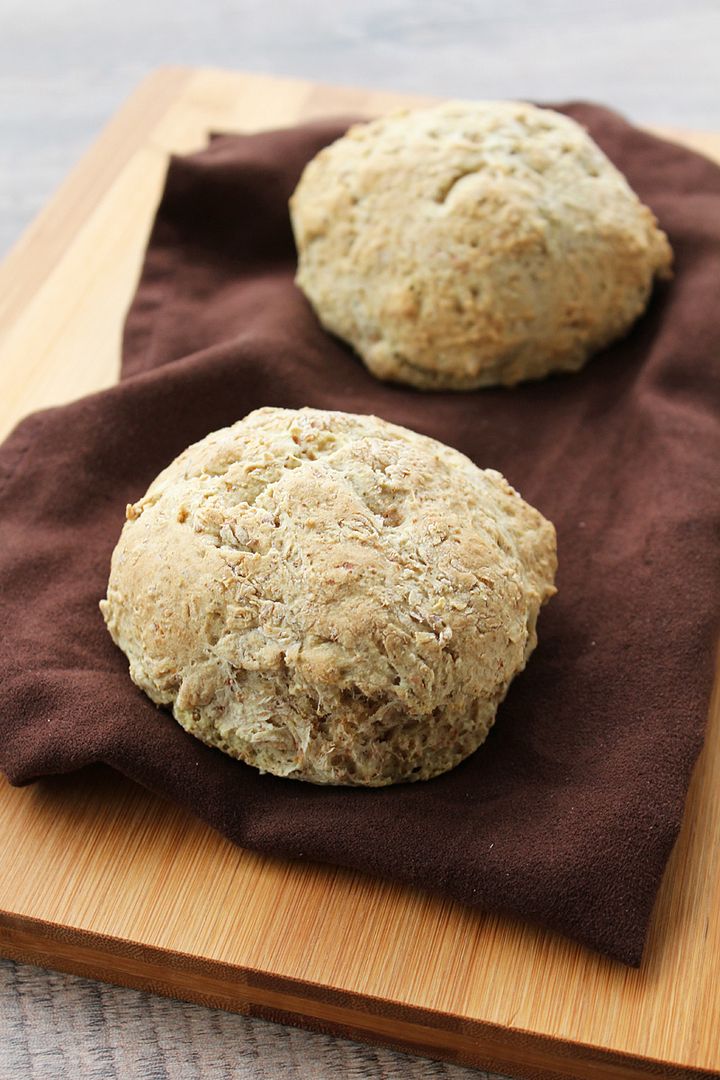
Mini Irish Soda Breads for Two

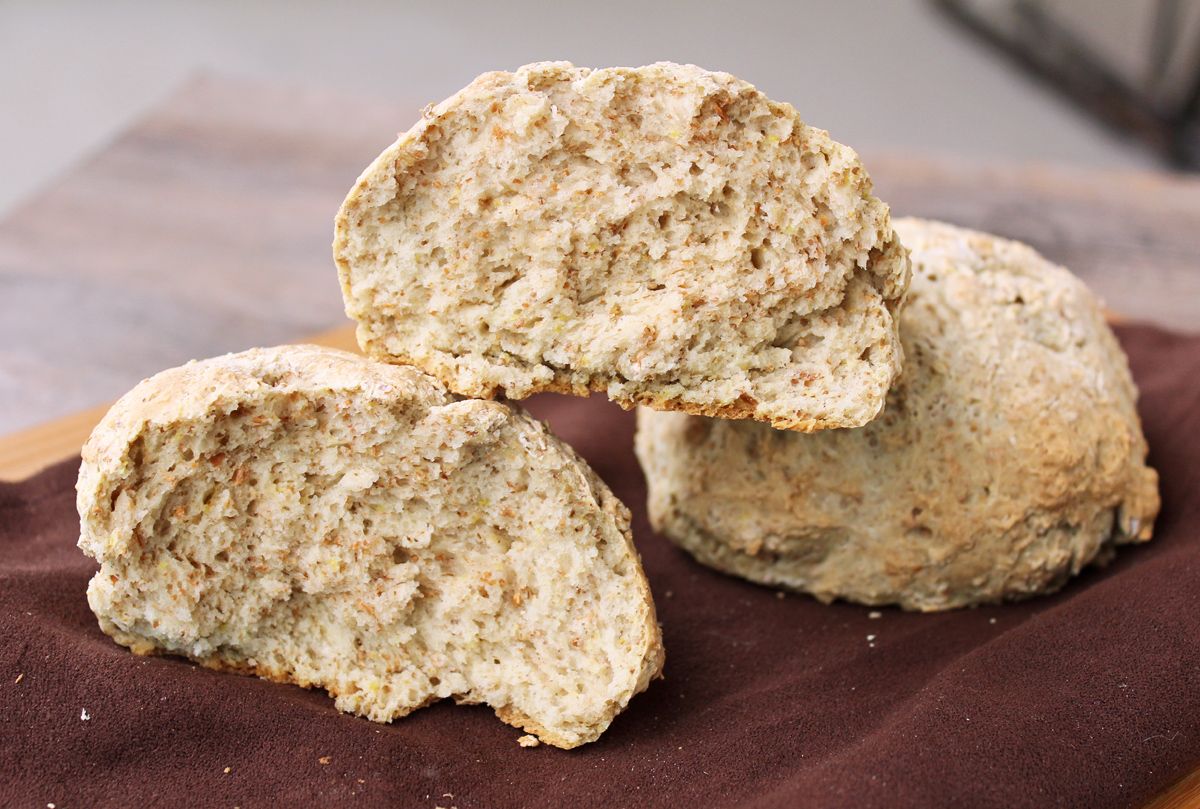
Mini Irish Soda Breads for Two (vegan and half whole-wheat)

So I know you've probably seen a hundred Irish soda bread recipes before and they're popping up all over your feeds lately with St. Patrick's Day coming up, but don't turn away quite yet - this one's different, I swear!

First of all, this recipe only feeds two people (or four if you like sharing, but you probably won't want to share these).

Second, these are vegan if you use almond milk like I did (though I've also tried it with dairy, which works too), and they use half whole-wheat flour, so they have some nutritious quality to them!

Third, they're ridiculously easy to make!  I know that's true of most soda breads because the whole point is that you use baking soda as your leavening agent instead of waiting for yeast to rise, but these are even easier and so much faster than a regular loaf because they're mini-sized.  So while an average soda bread needs to bake for about 45 minutes, these only take 15 minutes to bake (and only 5-10 minutes to make)!

Convinced?  Good - then read on!

Mini Irish Soda Breads for Two (vegan and half whole-wheat)

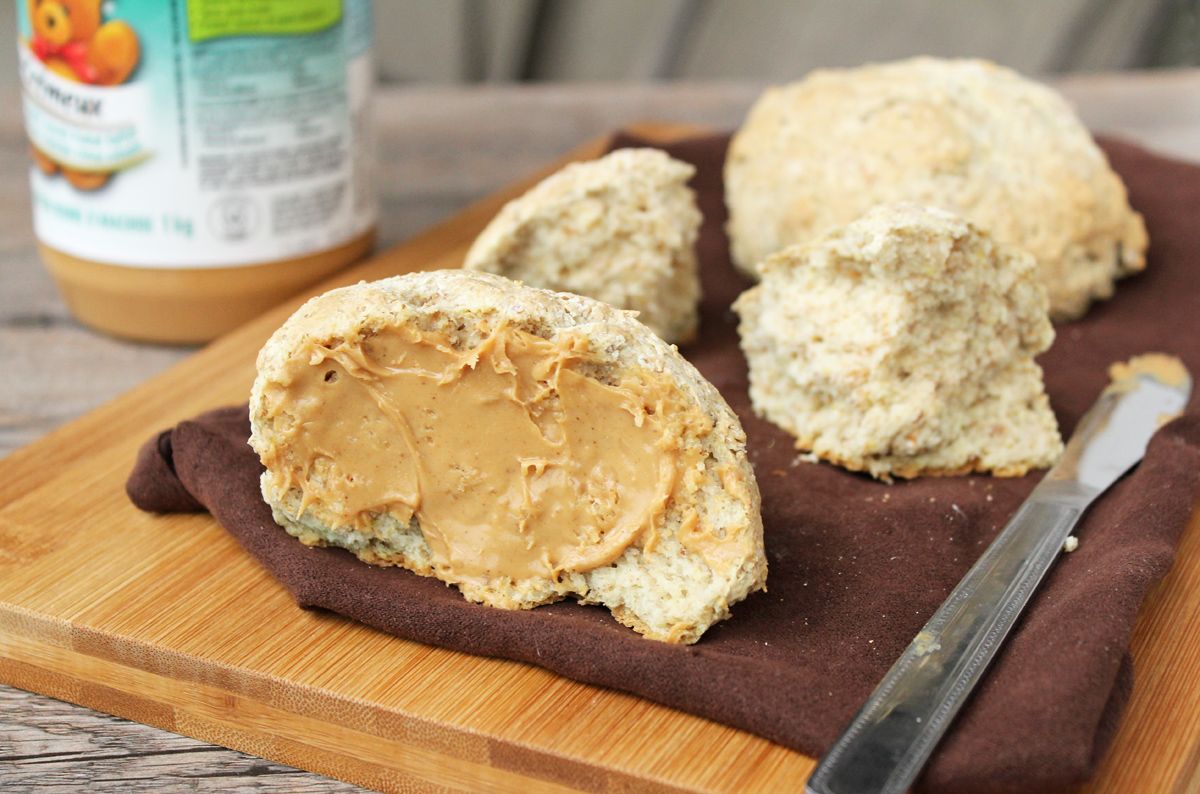
The first time I made these was actually not for St. Patrick's Day at all but because I had absolutely nothing to eat for breakfast one morning.  For some reason, I recalled that Irish soda bread is pretty easy to make, so I found a recipe for mini versions then reworked it to feed only two people and use ingredients I had on hand (aka not buttermilk).

I didn't have high hopes for these at the time because I was just desperate for something to spread peanut butter on and fill my empty stomach, but I absolutely loved them!

Mini Irish Soda Breads for Two (vegan and half whole-wheat)

These are perfectly crunchy and golden on the outside, and soft and dense on the inside, with a hearty texture and flavour from the addition of whole wheat flour.  They make a great base for peanut butter or jam in the morning, but would also work as a side for your dinner with a little pat of butter!

If you've seen a hundred soda bread recipes but have never actually tried it yourself, you really have to give this a try - it's so easy, takes no time at all, won't give you leftovers to deal with, and is "in season" for St. Paddy's, so there are no excuses!

Mini Irish Soda Breads for Two (vegan and half whole-wheat)

Mini Irish Soda Breads for Two

Adapted from Baking Bites

Makes 2 biscuit-sized soda breads

Ingredients:

1/2 cup + 2 tablespoons milk – almond milk or dairy milk both work
1/2 tablespoon vinegar
3/4 cup all-purpose flour
1/2 cup whole wheat flour
1/2 teaspoon salt
3/4 teaspoon baking soda
1/2 tablespoon sugar

Directions:

Preheat oven to 425°F.  Line a baking sheet with parchment paper.

Combine milk and vinegar in a small bowl or measuring cup, stir, and let sit for about 5 minutes until milk thickens slightly.

Whisk together the two flours, salt, baking soda, and sugar in a large bowl.  Form a well in the middle and pour the milk mixture into the center.  Stir together with a wooden spoon or flexible spatula just until combined.  Dough will be sticky.

Divide dough in half and drop each half onto the prepared baking sheet.  Wet your hands and shape each dough into a circle if necessary.  Cut an ‘x’ shape into the top of each ball of dough, cutting about halfway into the dough.  Bake for about 15 minutes in preheated oven, until golden brown.  Remove from oven and let cool slightly before eating.  Serve with peanut butter, jam, butter, or your favourite spread.

October 12, 2012

Harvest Snack Cake

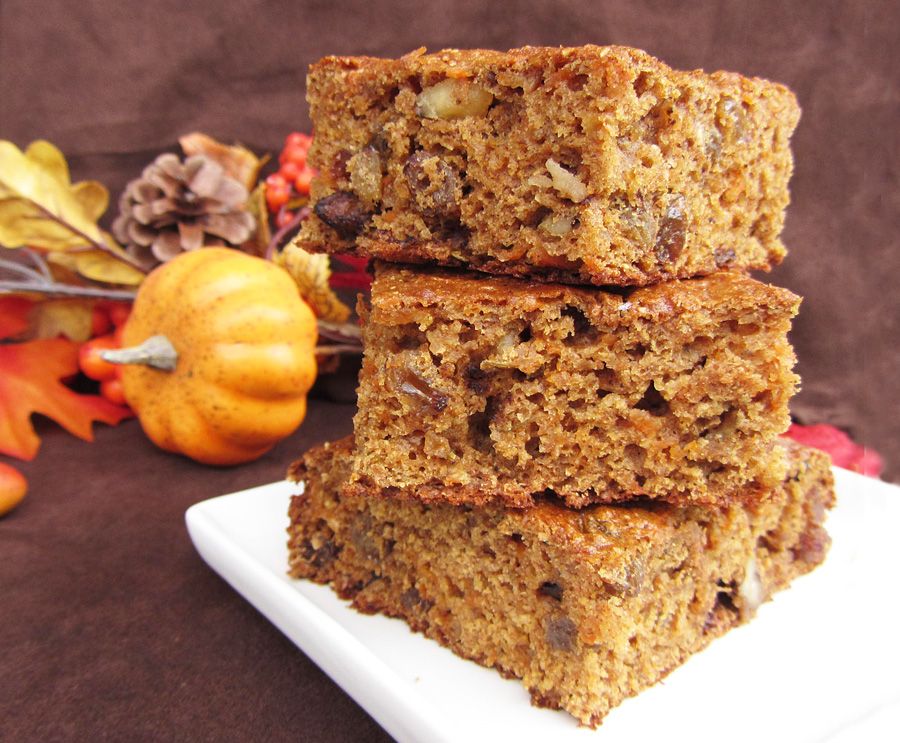
Harvest Snack Cake

I probably should have posted this recipe a little closer to Thanksgiving (which was this past weekend), because it would have tied in with it with perfectly, but I just haven’t been very organized lately! 

Canadian Thanksgiving is a celebration to give thanks for “the bountiful harvest with which Canada has been blessed” (source), along with all the other good things in our lives, especially our family and friends.  I love that there is a holiday specifically dedicated to celebrating the harvest and all the amazing food we are lucky to have readily available here!

Harvest Snack Cake

I’d love to tell you that I made this cake in honour of the harvest and Thanksgiving, but I honestly didn’t make the connection until now.  Still, this harvest snack cake is a great way to celebrate fall food and flavours!

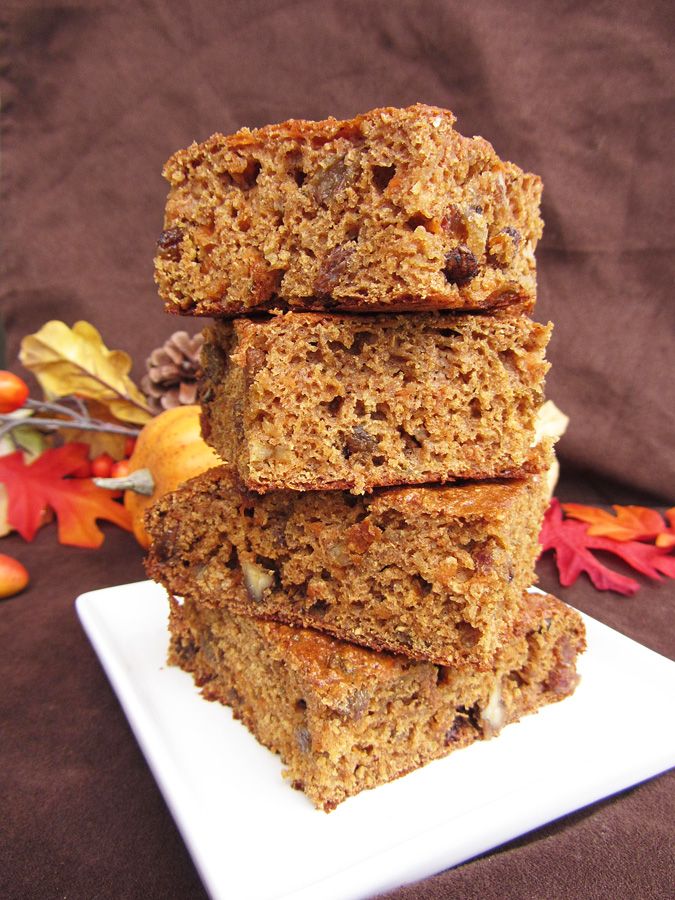
This cake is easy to make, will fill your kitchen with the smell of fall, and is full of good-for-you ingredients like carrots, apples, and walnuts.  Plus, it uses whole wheat flour and contains no butter or oil, so in my books that makes it a pretty healthy snack.  Of course, there’s still sugar in it, so I’m not putting “healthy” in the title, but I certainly don’t feel guilty about eating a piece for my snack every day!

Harvest Snack Cake

Harvest Snack Cake

Adapted from Taste of Home

Makes about 16 squares

Ingredients:

2 cups whole wheat flour
1 cup packed brown sugar
2 teaspoons baking powder
1 teaspoon cinnamon
1/2 teaspoon nutmeg
1/4 teaspoon ground ginger
2 large eggs
1/2 cup unsweetened applesauce
1 teaspoon vanilla extract
3/4 cup grated carrot
3/4 cup grated apple (about 1 large apple – if one apple doesn’t reach ¾ cup, you can increase the amount of carrots so total grated carrots + apples = 1.5 cups)
1 cup raisins
1/2 cup chopped walnuts

Directions:

Preheat oven to 350°F.  Line the bottom of a 13x9 baking pan with parchment paper and spray lightly with cooking spray.  Soak your raisins in hot water for 5-10 minutes so they won't absorb the moisture from your cake during baking (drain your raisins before using them).

Whisk together the dry ingredients (flour to ginger) in a large bowl.  In a separate medium bowl, whisk the eggs, applesauce, and vanilla.  Add the wet ingredients to the dry ingredients and fold together with a spatula until just incorporated.  Fold in the carrots, apples, raisins, and walnuts.

Spread the batter evenly into the prepared pan, and bake in preheated oven for 30-35 minutes, or until toothpick inserted in the middle comes out clean.  Cool on a wire rack.

Note: I knew I wouldn’t eat all of this in a few days, so I kept about half of the squares in the freezer and found that they froze well.

November 06, 2011

Pumpkin Chili in Pumpkin Bread Bowls

pumpkin chili in pumpkin bread bowlWhile everyone else started posting pumpkin recipes as soon as September rolled around, I waited until October because I was trying to stretch out the summer recipes as long as I could. Now I can't believe that a new season is already beginning, as stores have put up their Christmas displays, holiday ads are playing on tv, and recipes with candy cane and gingerbread are starting to pop up all over the blogosphere. And yet here I am, still posting pumpkin recipes! I do want to switch over to holiday recipes soon, but not before I share a few more delicious pumpkin recipes with you guys!

Fortunately, this recipe is something that can be enjoyed all winter long. Chili is one of my favourite things to make in the winter because it's easy, it's healthy and filling, it makes a ton, and it packs well for lunches. Ever since I saw a recipe for a pumpkin bread bowl on Breadworld I'd been dreaming about how good a pumpkin chili would taste inside a pumpkin bread bowl. The answer? Amazing!

The bread bowl has a subtle pumpkin flavour and is soft but sturdy enough to hold up to the chili. The dough was easy to make and form into buns, which you then tear out the center of to fill with the chili. You could probably save the inside of the buns for breadcrumbs or another purpose, but I couldn't stop myself from eating all the dough as I tore it out because I have no self control when it comes to fresh bread. I think if you have kids they would have a lot of fun preparing their chili bowls themselves, and getting to eat them after they finish their chili. Of course, there's nothing wrong with adults enjoying this just as much!

The chili I made had a very subtle pumpkin flavour, and not a lot of add-ins because I went grocery shopping for it very early in the morning when my brain wasn't fully turned on yet, so all I could think to buy was kidney beans. But feel free to add in whatever you like (as I've suggested in the recipe below), the recipe is really a base that you can customize to your own liking.

While the meal is a bit time consuming to make overall, there isn't a lot of hands on cooking time involved. Make it on a Sunday and have the leftovers for lunch the rest of the week - a bowl of this chili fills me up for the rest of the afternoon.

What about you guys, are you ready for the holiday recipes already or still hanging on to Fall a little while longer?

pumpkin bread bowl
Pumpkin Bread Bowls

Adapted from Breadworld

Makes 6 bread bowls

Ingredients:

1/2 cup milk
1/2 cup water
2 tablespoons butter
1/4 cup sugar
1 teaspoon kosher salt
1 envelope active dry yeast
1/4 cup warm water (100° to 110°F)
1 cup canned pumpkin puree
2-1/2 cups bread flour
2 to 2-1/2 cups whole wheat flour

Directions:

Heat milk, 1/2 cup water, butter, sugar and salt in a small saucepan just until butter is melted. Cool to between 100° to 110°F.

Dissolve yeast in 1/4 cup warm water in a large mixing bowl or bowl of an electric mixer. Stir in the milk mixture, pumpkin and 1 cup of each flour. Beat until smooth. Mix in remaining bread flour and enough whole wheat flour to make a soft dough.

Turn dough onto lightly floured surface and knead until smooth and elastic, about 6 to 8 minutes. If using an electric mixer, just leave the dough in the bowl and use the dough hook to knead the dough for 6 to 8 minutes. Transfer dough to a large greased bowl. Cover with heavy tea towels and let rise in a warm, draft-free place for about 1-1/2 hours.

Punch down dough. Divide into six portions and form each into a flattened ball. Place on a greased baking sheet, cover and let rise until doubled, about 30 minutes. Bake at 400°F for 15 minutes.

To serve: Cut off the top of each bowl and hollow out the center. Fill with your favourite soup or chili recipe, such as the pumpkin chili recipe below.

pumpkin chili in pumpkin bread bowl
Pumpkin Chili

Serves 6 with bread bowls

Ingredients:

1 tablespoon olive oil
1 large onion, diced
1 green pepper, diced
2 cloves garlic, minced
1 (14-oz) can crushed tomatoes
1 (14-oz) can fire roasted diced tomatoes
1 (24-oz) can kidney beans, drained and rinsed
2 cups canned pure pumpkin puree
1 tablespoon pumpkin pie spice
3 tablespoons chili powder
2 teaspoons cumin
1 teaspoon cayenne
1 tablespoon cocoa powder
2 teaspoons cinnamon
1 tablespoon sugar
1 teaspoon salt

Optional: add in black beans, extra kidney beans, or ground turkey/beef for more protein; corn or red peppers for extra vegetables; chicken, veggie, or beef broth for more liquid; or any other desired add-ins.

Directions:

Heat oil in a large saucepan over medium-high heat. Add onion, green pepper, and garlic and sauté until soft, about 5-8 minutes. Add crushed tomatoes, diced tomatoes, kidney beans, and pumpkin puree and stir. Add all spices and stir to mix. Reduce heat, cover, and simmer about 1 hour. Serve warm, spooned into pumpkin bread bowls. Top with shredded cheese if desired.

October 04, 2011

Thanksgiving Week Day 3 - Hearty Sweet Potato Braids

sweet potato bread
For Day 3 of Thanksgiving Week, I decided to share this recipe for hearty sweet potato braids. Bread is an essential part of any meal, but especially the Thanksgiving meal. I think there are two types of bread people – the first likes to eat their bread on the side of their meal, and the other uses it to construct a sandwich out of everything else on their plate. I used to be in the former category, until I discovered how amazing all the components of Thanksgiving dinner (turkey, cranberry sauce, potatoes, stuffing) taste when mixed together on top of a slice of thick bread. But either way you like to eat it, this sweet potato bread is delicious!

This is not a light and fluffy bread – it’s dense and moist, hence the word ‘hearty’ in the title. It’s also not a sweet bread as you might expect from having the sweet potato in there – the addition of the thyme makes it a savory bread, but you could always adjust any of the spices to your own taste! I really enjoyed this bread as is, and I think it would be a great addition to a Thanksgiving meal on its own. But it would also work really well as a base for the spicy pumpkin hummus appetizer I shared yesterday (I tried this and they paired really well together)!

sweet potato bread
The recipe makes two loaves, and while one would be enough to feed a crowd, you might as well make two loaves because it would be tricky to divide a package of yeast in half. This also means you get to keep a whole extra loaf all to yourself – just slice it, wrap it up well and pop it in the freezer after you bake it, then you can pull out a slice or two to thaw anytime you want! One of my favourite dinners last week consisted of a few slices of this bread topped with a ton of roasted garlic with salt and pepper – amazing!

As with any yeast bread, this does take a while to make, but most of it is “hands off” time, freeing you up to work on your other Thanksgiving dishes! This was my first time making a braided bread, and it was actually much easier than I thought! If you’ve ever braided hair, then it’s just like that (although a little heavier and doughier!) After dividing your dough into six equal portions, you roll each one into a 20” rope – if you have a pastry mat with measurements on it, then this part is really easy! Ryan’s mom gave me one and it makes rolling out pie dough and other dough so much easier than my old method of trying to line up a bunch of rulers on the counter. It also makes clean up much simpler too!

sweet potato bread

I tried two methods for braiding the dough. First I tried braiding from the centre of the ropes:

sweet potato bread

For my second loaf, I tried braiding from the end of the ropes:

sweet potato bread
Both worked, but as you can see from the pictures, the first method resulted in a slightly more even braid, so I think I’d recommend you try the braiding from the middle method.

If you don’t have time to make a yeasted bread on Thanksgiving, then check out the Thanksgiving Week recipe for rosemary sweet potato cornbread over at Vanilla & Spice!

sweet potato bread
Hearty Sweet Potato Braids

Adapted from Taste of Home

Makes 2 loaves

Ingredients:

1 package (1/4 ounce) active dry yeast
1/4 cup warm water (110° to 115°)
1/2 teaspoon sugar
~1.5 lbs sweet potato, peeled and cubed (from about 1 large or 2 medium sweet potatoes)
1 cup warm skim milk (110° to 115°)
1/4 cup canola oil
3 tablespoons honey
1 cup all-purpose flour
1/2 cup yellow cornmeal
2 teaspoons kosher salt
1 teaspoon dried thyme
1/2 teaspoon nutmeg
2-3/4 to 3-1/4 cups whole wheat flour

Directions:

Bring a large pot of water to a boil. Add the sweet potato cubes and simmer about 15 minutes, until tender. Drain and rinse with cold water, then transfer to a bowl and mash the sweet potatoes with a fork. Let cool to room temperature.

In a small bowl, dissolve the yeast into the warm water. Add the sugar, stir, and leave for 10 minutes. Mixture should foam and double in size – if it doesn’t, the yeast is no longer active, and you’ll have to start again with a new pack.

Pour the yeast mixture into the bowl of an electric mixer, or a large bowl. Add the mashed sweet potatoes, milk, oil, honey, all-purpose flour, cornmeal, salt, thyme, nutmeg, and 2 cups of the whole-wheat flour. Beat until smooth. Stir in enough of the remaining whole wheat flour to form a firm dough.

Attach the dough hook to the mixer and knead for 6-8 minutes until smooth and elastic. If you don’t have a dough hook, knead the dough by hand on a floured surface. Add more flour as you’re kneading if the dough is too sticky.

Transfer the ball of dough into a large, lightly oiled bowl. Cover and let rise in a warm place until doubled, about 1 hour.

Punch down dough and divide into six equal portions (a scale is helpful here). Shape each portion into a 20-inch rope. Place three ropes side by side on a baking sheet that has been lightly greased or lined with parchment paper. Braid the three ropes and pinch each end to seal, tucking under the braid. Repeat with the remaining ropes to form two braids. Cover and let rise in a warm place until doubled, about 35 minutes. Meanwhile, preheat oven to 350°F.
Bake loaves together at 350°F for 30-35 minutes or until golden brown. Remove to wire racks to cool. Slice diagonally.

-------------------------------------------------------------------------------------------------------------------------------
For other Thanksgiving bread ideas, check out these links:

Perfect dinner rolls from Mel’s Kitchen Café
Buttermilk cluster from The Fresh Loaf
Soft garlic knots from Annie’s Eats
Parmesan pull-apart rolls from Picky Cook
Cranberry walnut bread rolls from La Tartine Gourmande
Pumpkin garlic knots from Handle the Heat
Rosemary pumpkin crescent rolls from Heat Oven to 350
-------------------------------------------------------------------------------------------------------------------------------

Ingredient Index

Related Posts Plugin for WordPress, Blogger...