Showing posts with label cheese - cheddar. Show all posts

October 28, 2014

Southwestern Quinoa Stuffed Pepper Jack O' Lanterns

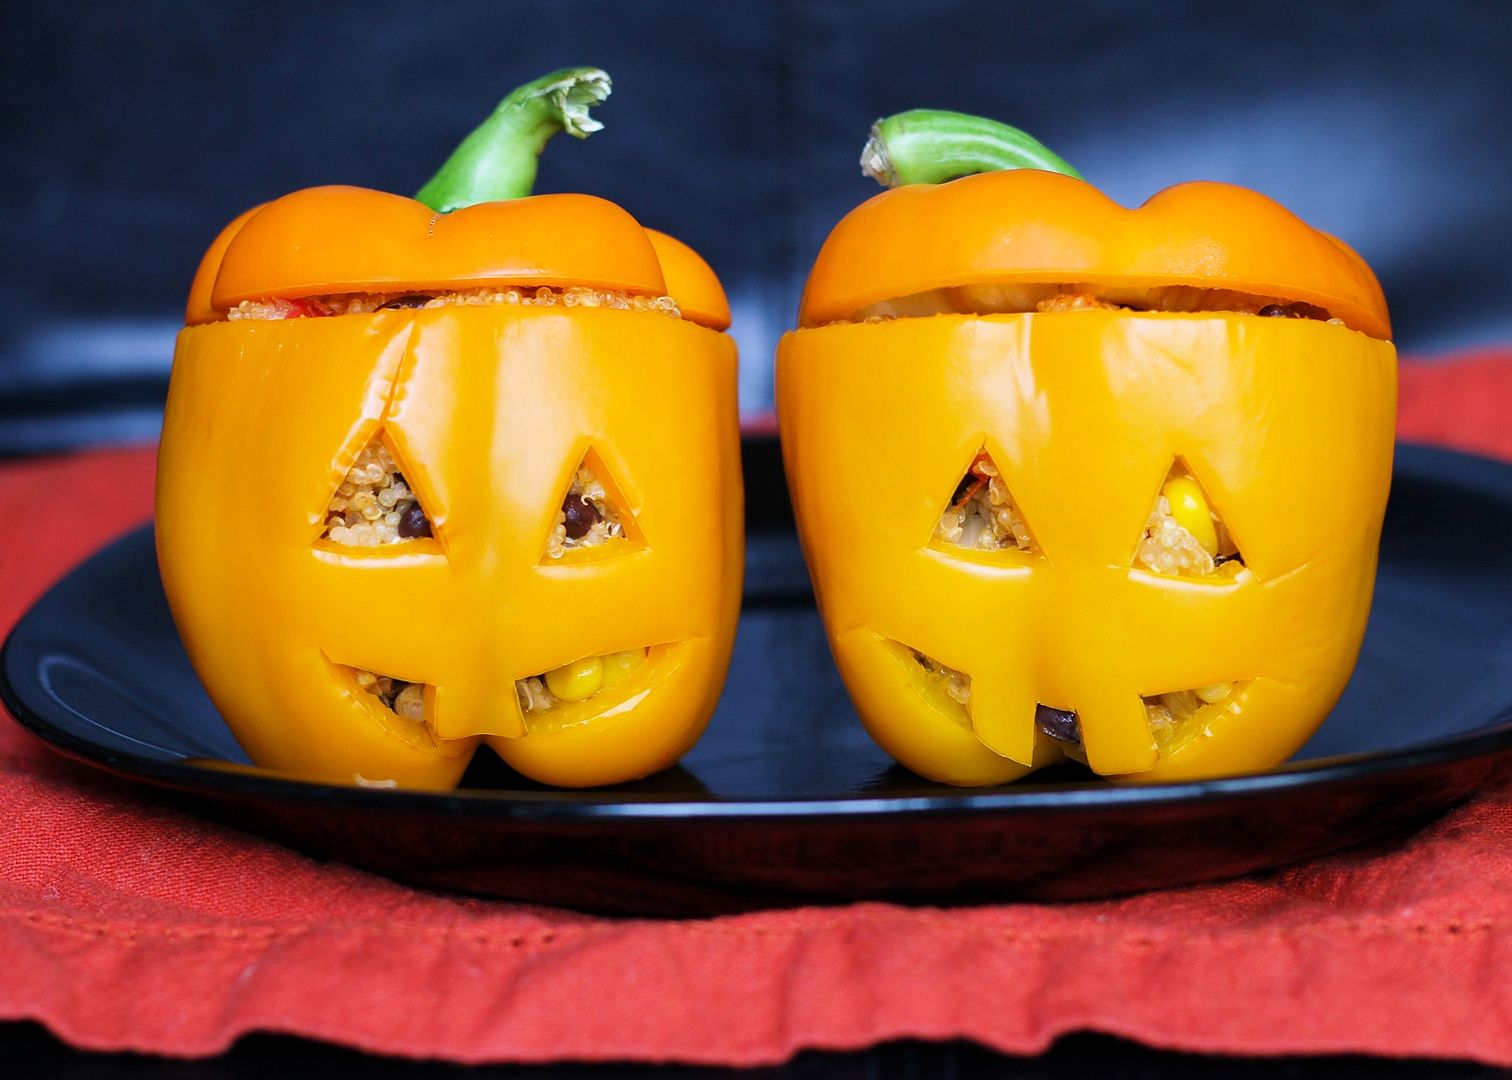
Southwestern Quinoa Stuffed Pepper Jack O' Lanterns - easy and fun dinner idea for Halloween!

I love making cute Halloween themed treats, and dinner ideas are even better since there are already so many sweets around this time of year.  I've seen the idea of carving stuffed peppers like jack o' lanterns on several blogs before and wanted to try it for myself this year.  Even though I'm certainly not the first to try these, they turned out so cute and tasty that I had to share them with you guys!
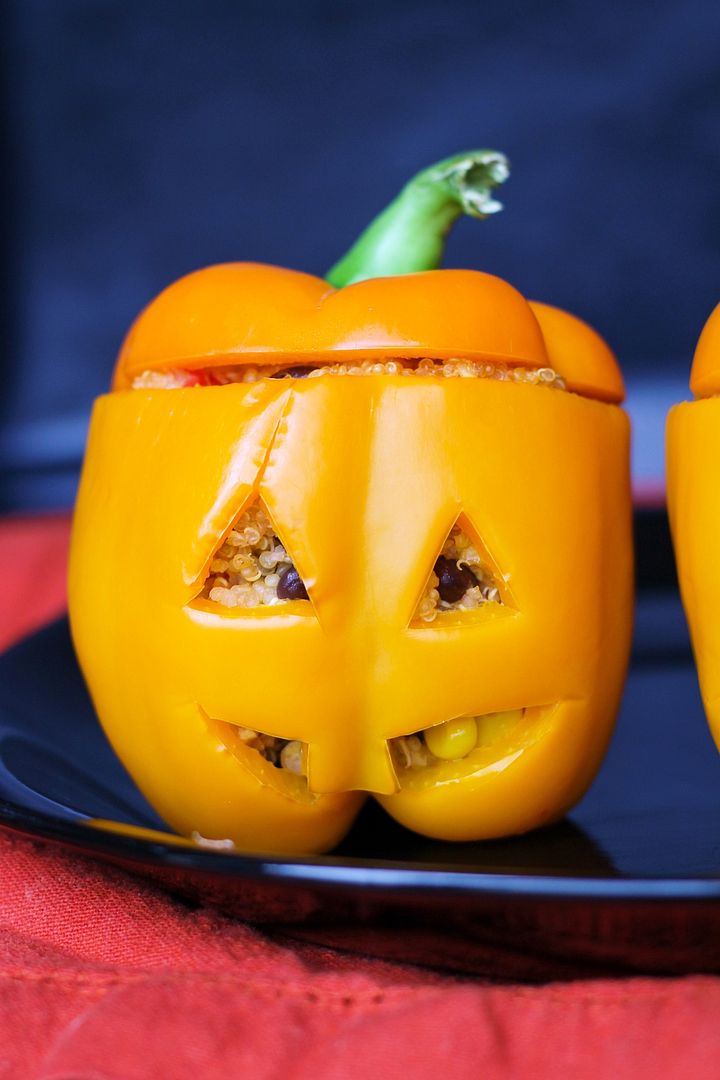
Southwestern Quinoa Stuffed Pepper Jack O' Lanterns - easy and fun dinner idea for Halloween!

These are also really easy to make and completely customizable!  Just find some orange peppers, cut the tops off and scrape out any seeds or ribs inside, then carve your jack o lantern face with a small knife.  You don't want to cut out too big of holes so that the filling could escape, but even though these are a lot smaller to work with than pumpkins, I found them much easier to "carve"!

After prepping your little pumpkin lookalikes, you make your filling, stuff the insides of the peppers, and bake them to soften the peppers.  I also like to parboil the peppers first to reduce the amount of time needed to soften the peppers in the oven later, which will also help save time if you're trying to make these on Halloween evening before trick or treating starts!
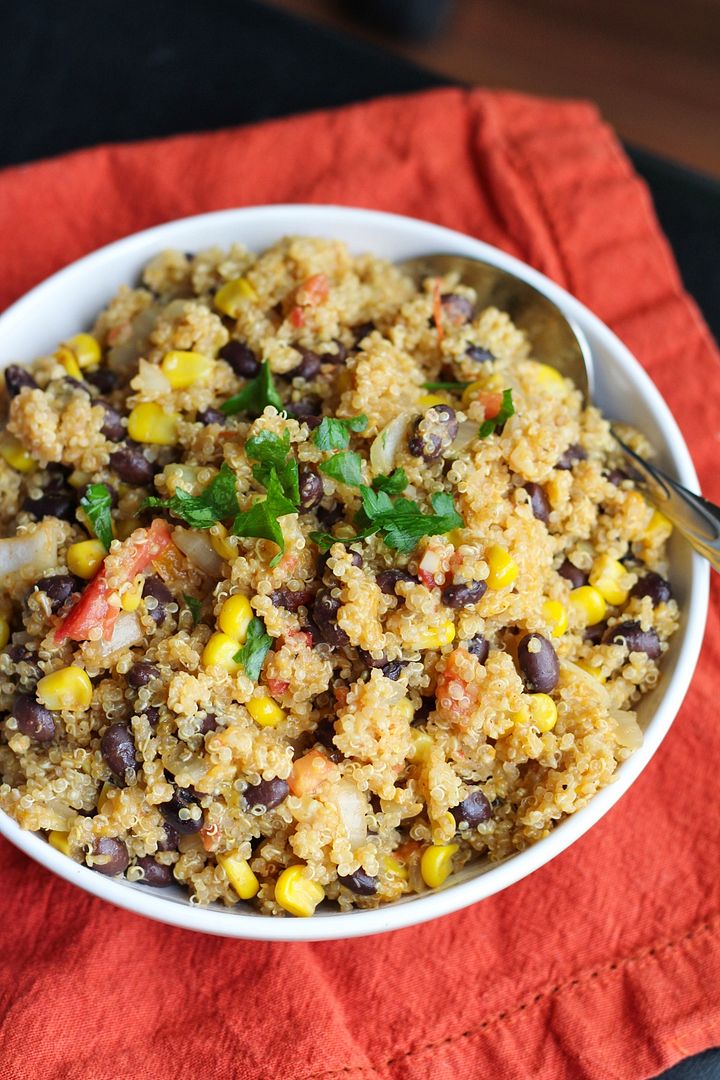
southwestern quinoa

I filled mine with one of my favourite southwestern-flavoured quinoa mixtures, which is vegetarian and pretty healthy too.  I cook the quinoa in vegetable broth which is important for giving it more flavour, then mix in some sauteed onion and garlic, tomatoes, black beans, corn, spices, and cheese.  You could add in more vegetables like spinach or mushrooms if you like, or leave out the spices if your kids won't like them.

I'm going to a Halloween potluck tomorrow and plan on making some scary cookies so if those turn out well I'll have another treat to share later this week!  Happy week of Halloween!
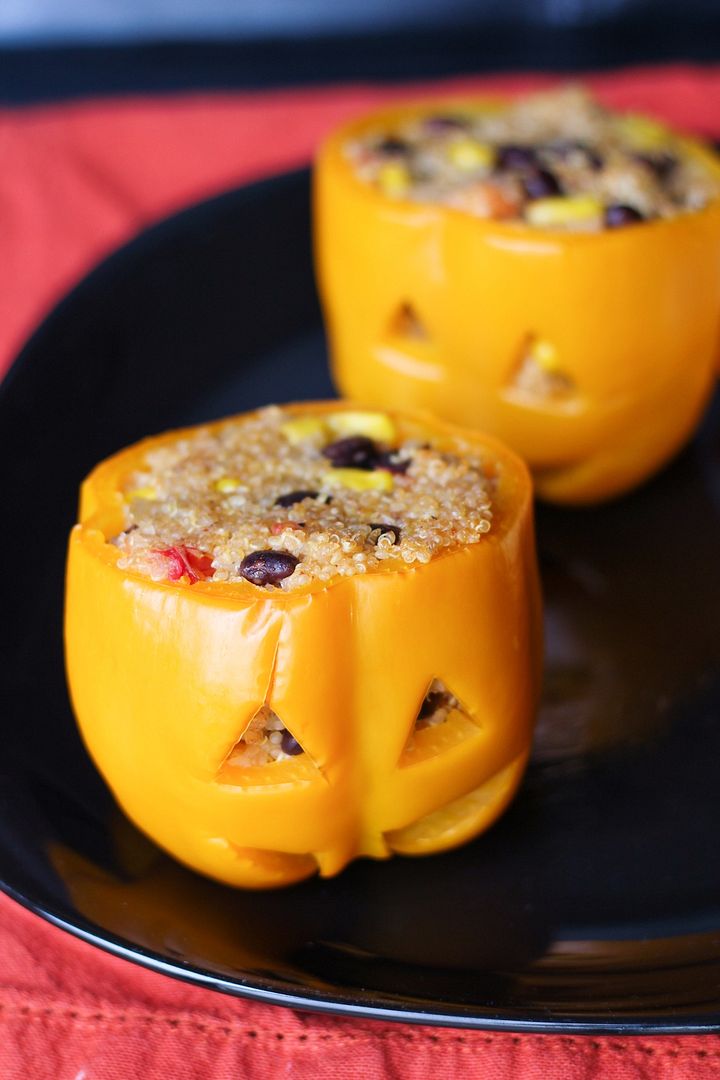
Southwestern Quinoa Stuffed Pepper Jack O' Lanterns - easy and fun dinner idea for Halloween!

Southwestern Quinoa Stuffed Pepper Jack O’ Lanterns

Serves 4-6

Ingredients:

2 cups vegetable broth
1 cup dry quinoa
4-6 orange bell peppers
1 teaspoon olive oil
1 yellow onion, diced
1 clove garlic, minced
2 small tomatoes, diced
1 (540mL) can black beans, drained and rinsed
1 cup corn kernels (thawed if frozen)
1 teaspoon cumin
1/2 teaspoon chili powder
Salt and pepper
1 cup shredded cheddar cheese (or Mexican or taco blend)

Directions:

Bring 2 cups of vegetable broth to a boil in a medium saucepan.  Add quinoa, cover, reduce heat to simmer and let simmer for 15 minutes.  Remove from heat and let sit, covered, for 5 minutes.  Remove lid and fluff with a fork.

Meanwhile, cut the tops off the bell peppers and use a knife to scrape out the remaining seeds and ribs of the pepper, leaving the pepper in tact (as seen in pictures).  Leave the tops aside if you wish to include them for presentation later.  Bring a large pot of water to a boil, with enough water to cover the peppers.  Add peppers and let simmer for about 4 minutes, until slightly softened.  Carefully remove and set aside.

Preheat oven to 350°F.

In a medium pan, heat oil over medium-high heat.  Add onion and saute for about 5 minutes, stirring often, until softened.  Add garlic and saute for 30 seconds, stirring. Add tomatoes, black beans, corn, cumin, and chili powder, and season with salt and pepper.  Stir and saute for a few minutes.  Remove from heat, stir in quinoa and cheddar cheese and mix until incorporated.

Spoon quinoa mixture into the peppers.  There should be enough to fill 6 peppers or you can really fill 4 peppers quite full, and might still have some quinoa leftover.  You could also just stop now and eat the quinoa on its own!  Leave tops off the peppers, spray a 9x13 glass baking dish with non-stick cooking spray, and place filled peppers standing up in the dish.  Cover with aluminum foil and bake in preheated oven for 25-35 minutes, until peppers are softened to your liking (I did 25 minutes as I was impatient but would have preferred 30).  Remove and serve with tops on the peppers if desired.  Eat by slicing everything up with a knife and fork and eating the quinoa and pepper together.


--------------------------------------------------------------------------------------------------
For more Halloween dinner ideas, try these:

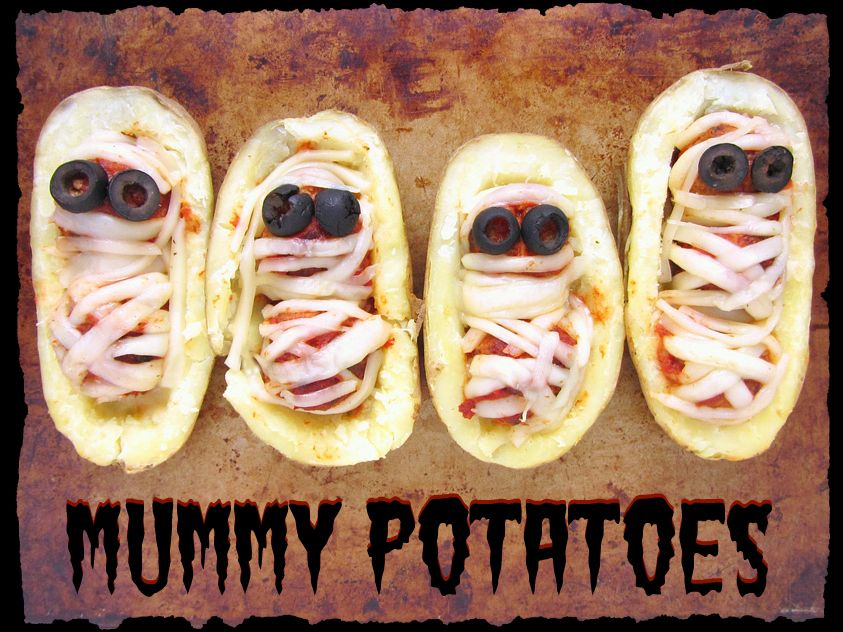
Halloween mummy potatoes with turkey meatballs

Halloween Mummy Potatoes with Meatballs

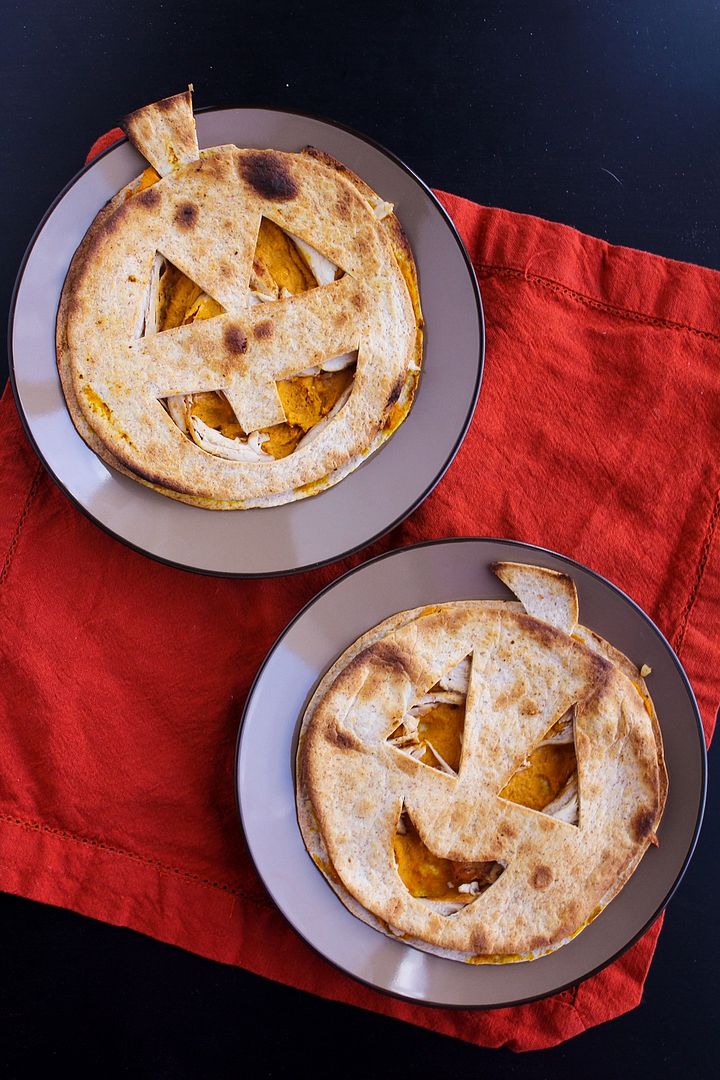
Pumpkin, chicken, & goat cheese quesadillas

Pumpkin, Chicken, & Goat Cheese Quesadillas(for Halloween!)

November 12, 2013

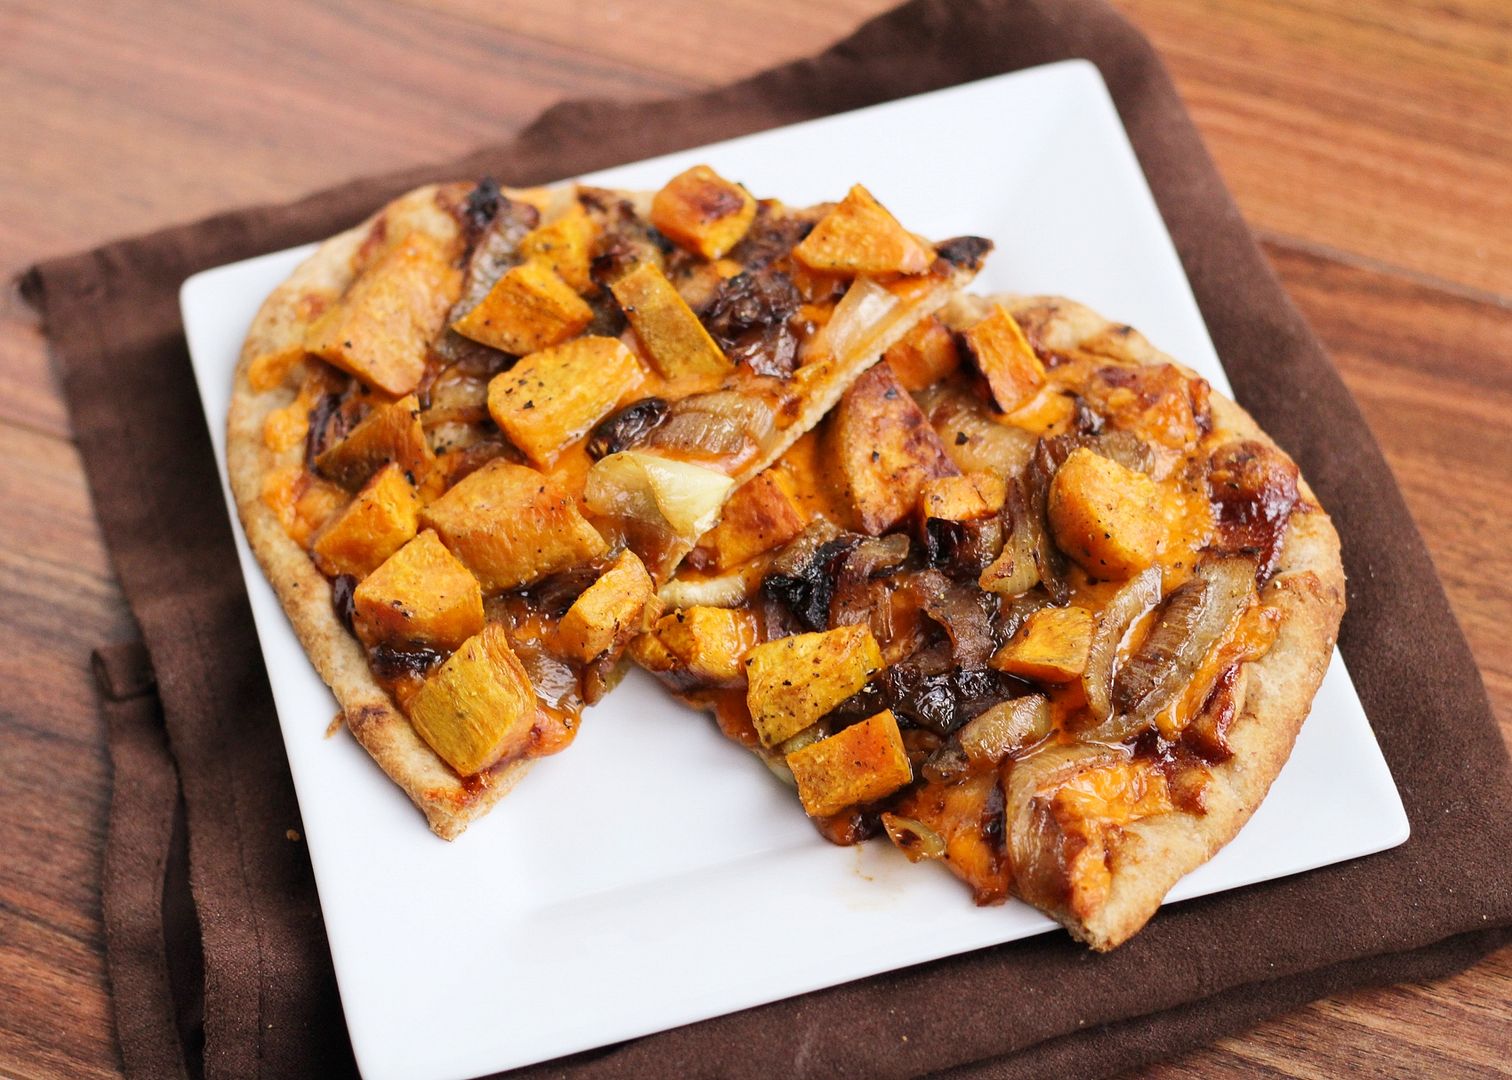
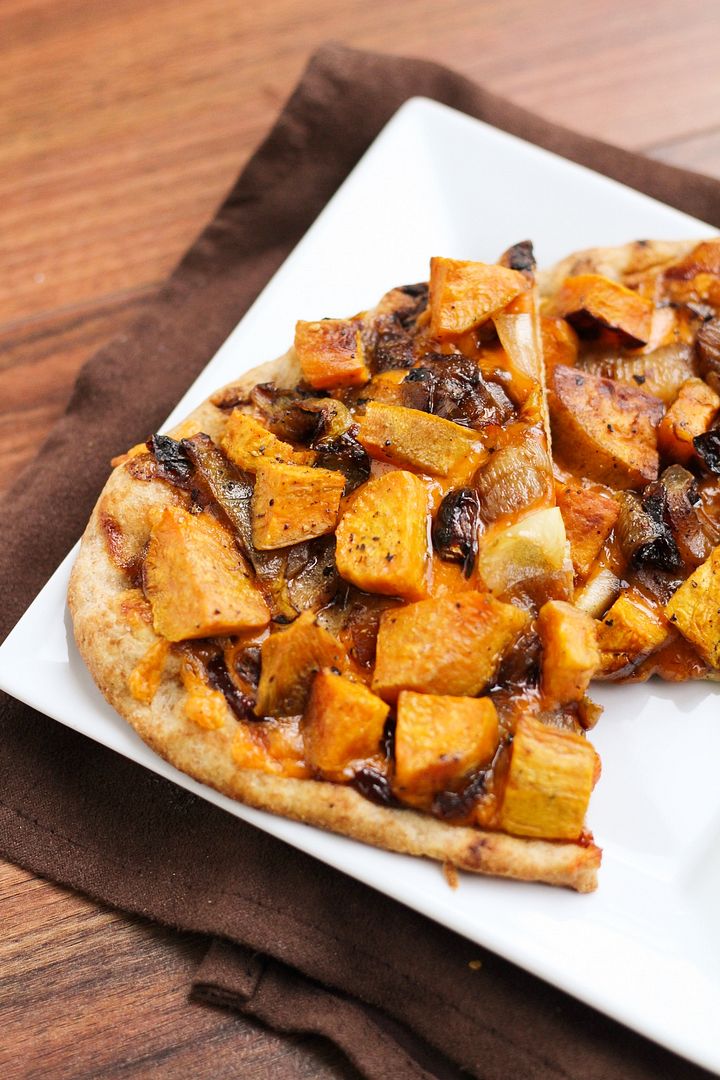
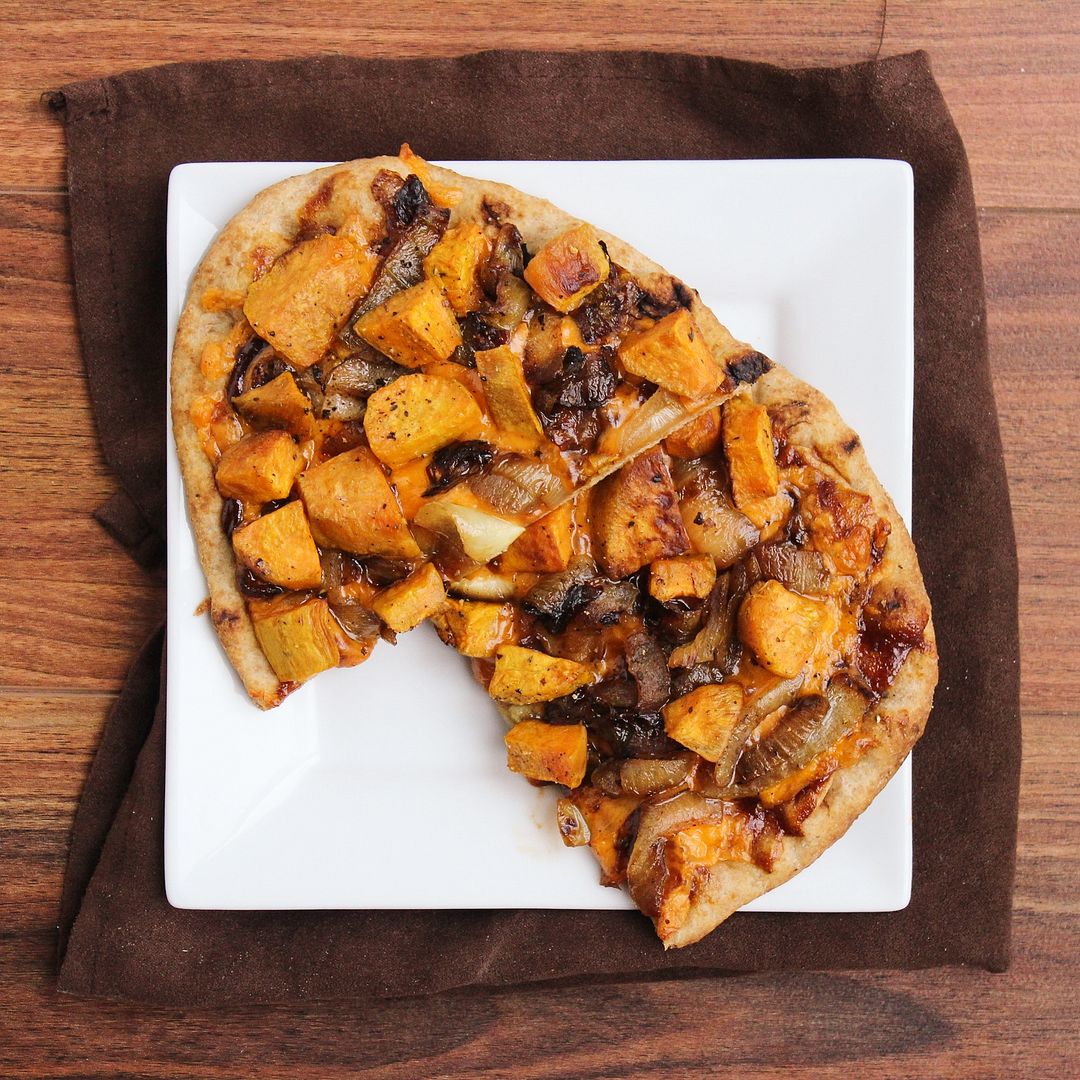
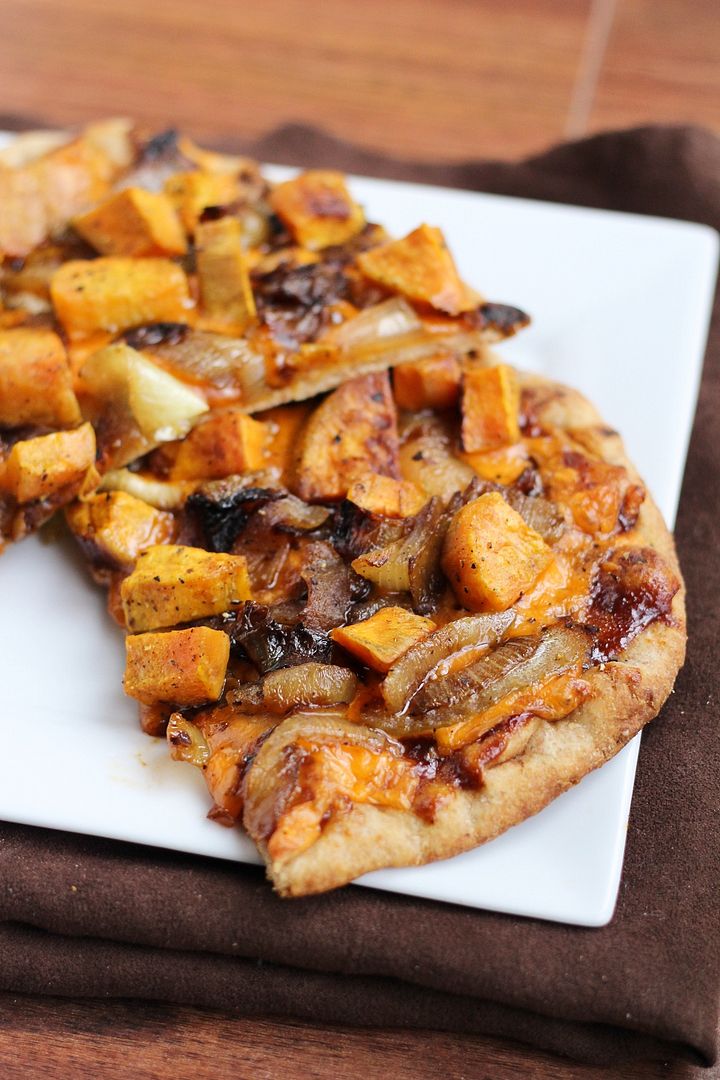
Sweet Potato & Caramelized Onion BBQ Cheddar Pizza

Sweet Potato & Caramelized Onion BBQ Cheddar Pizza

If you’ve been on Facebook or Instagram this morning, you’ve likely seen lots of pictures of snow – it seems like quite a few cities in both the US and Canada have experienced their first snowfall this week!  I usually split my time between two cities in Southern Ontario, and fortunately the one I’m in right now got less snow than the other one – just enough to coat all the leaves on the ground but not enough to stay on the sidewalks.  Even with only a light layer of snow though, it’s still been freezing cold outside this week so it seems that winter has officially arrived!

Sweet Potato & Caramelized Onion BBQ Cheddar Pizza

With the colder weather, I’ve been craving warm and comforting food a lot more lately, and this pizza fit the bill perfectly!  It’s full of hearty, savoury flavours including roasted sweet potatoes, caramelized onions, and a bold barbeque sauce in place of tomato sauce.  It might sound like a kind of strange combination, especially with the cheddar cheese, but trust me that it all works so well together! 

When I brought up the idea for dinner a while ago to Ryan, he rejected it then because the idea of sweet potatoes on pizza was a little too out there for him, but I couldn’t get the idea out of my head so I went ahead and made it the other day and even he admitted “it was really good”.  I would add one extra "really" on to that myself!

Sweet Potato & Caramelized Onion BBQ Cheddar Pizza

I know I’ve been making a lot of naan pizzas lately, and I swear I had intended to make this one a real pizza instead, but the store I went grocery shopping at didn’t have any pizza dough (except for those pre-made circles of cardboard) and I didn’t have time to make my own dough, so I grabbed some whole wheat naan.  But naan is cheaper than pizza dough (at least at my grocery stores) and allows you to make the perfect individual sized pizzas whenever you want, so I really love them!  

If you're cooking for more than a couple people though (or don't like naan bread for some crazy reason), feel free to use regular pizza dough with the same toppings - the recipe I provide is more of a guide anyway so you can adapt it to whatever type of base you like!

Sweet Potato & Caramelized Onion BBQ Cheddar Pizza

Sweet Potato & Caramelized Onion BBQ Cheddar Pizza

This is just a rough guide for a large pizza or 4 naan pizzas – all ingredients are estimates and can be adjusted as you see fit.

Ingredients:

1-2 tablespoons olive oil
2 medium sweet potatoes, peeled and chopped into about ½-inch pieces
Salt and pepper
2 large sweet onions, peeled and sliced into half moons
1/2 teaspoon sugar
1 ball of pizza dough or 4 pieces of whole wheat naan bread
Your favourite BBQ sauce (I used a bold bbq sauce – try to use a thicker one with flavour)
Shredded cheddar cheese

Directions:

Preheat oven to 375°F.  Toss sweet potatoes with a couple teaspoons of olive oil or enough to coat them, and season with salt and pepper. Spread in an even layer on a foil-lined baking sheet and roast in preheated oven for about 25-30 minutes, or until tender.

Meanwhile, heat another tablespoon of oil in a large skillet over medium heat.  Add onions, stir to coat with oil, and season with salt and pepper.  Spread onions out evenly across the pan and let cook, stirring only occasionally, until softened, about 15-20 minutes.  Add sugar (this is to help them caramelize; I don’t always do this step), stir to coat, and let cook for an additional 10-15 minutes, stirring only occasionally.  Once they are caramelized to your liking, remove from pan and set aside.

Preheat oven to desired temperature for cooking your pizza – this depends on what type of dough you’re using: a recipe for pizza dough will give cooking instructions, a storebought ball of pizza dough also will, and if you’re making naan pizzas, I cook mine at 425°F for about 10-12 minutes.  Prepare pizzas by spreading a thin layer of bbq sauce as the base of the pizza, top with a thin layer of cheddar cheese (or desired amount of cheese), followed by the cooked sweet potatoes and onions.  Season lightly with salt and pepper if desired, and bake.  Serve warm.

November 06, 2012

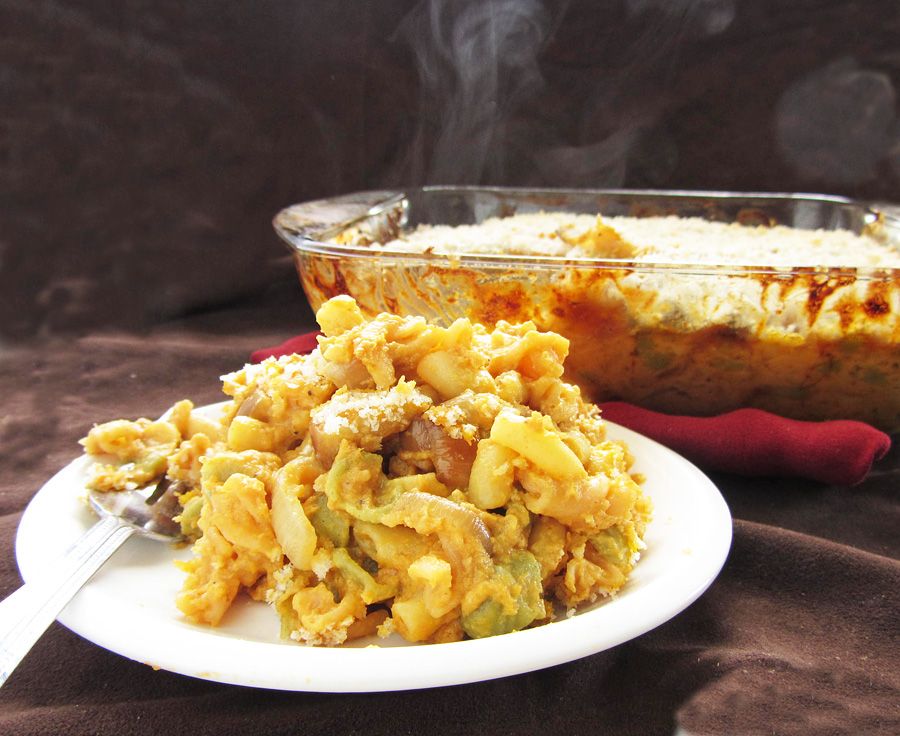
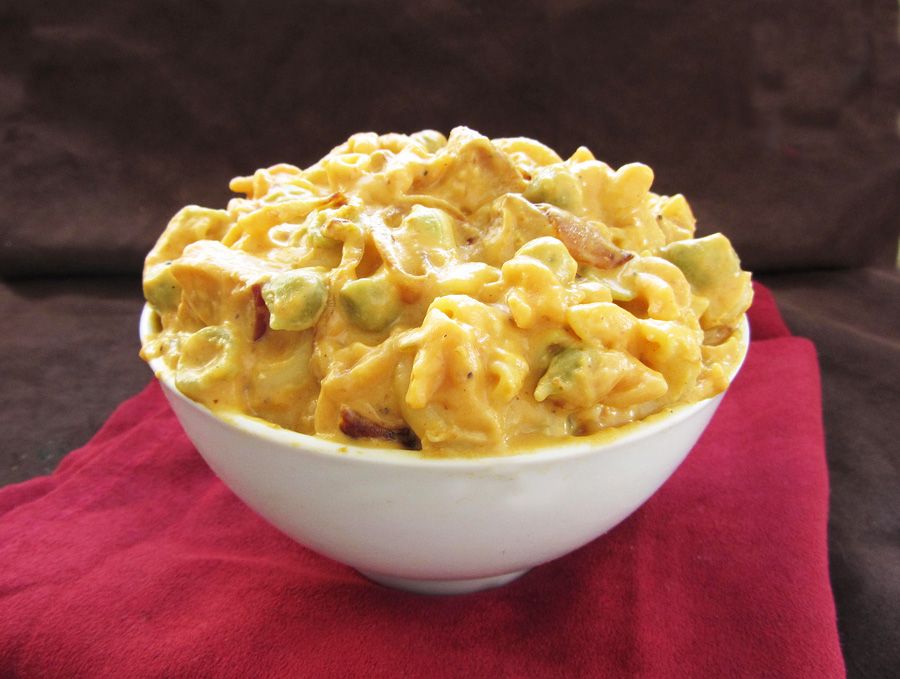
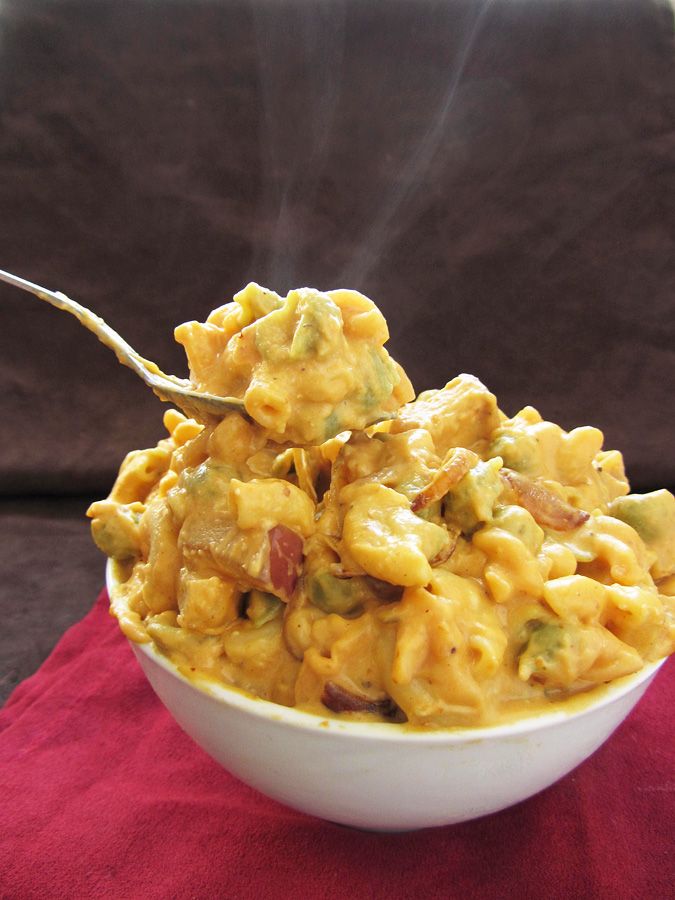
Pumpkin Mac & Cheese with Apples and Caramelized Onions

Pumpkin Mac & Cheese with Apples and Caramelized Onions

Now that I’ve seen my first official snowfall of the season and have broken out my winter hat and gloves, all I can think about are warm and cozy meals, and when it comes to comfort food, it doesn’t get much better than mac and cheese!

But as you’ve probably guessed from the title, this is no ordinary mac and cheese! And even though it might sound a little weird, I promise that it works!

Pumpkin Mac & Cheese with Apples and Caramelized Onions

This mac and cheese has a ton of flavour going on – there’s pumpkin puree, pumpkin beer, sautéed apples, caramelized onions, and smoked applewood cheddar cheese – and it all works together so well!

I can never decide if I prefer stovetop or baked mac and cheese, so I tried this both ways. I stopped after cooking it on the stovetop and dug in to test it out. You'll probably want to do the same thing because it’s so hard to resist at this point, and I certainly wouldn't blame you!

Pumpkin Mac & Cheese with Apples and Caramelized Onions

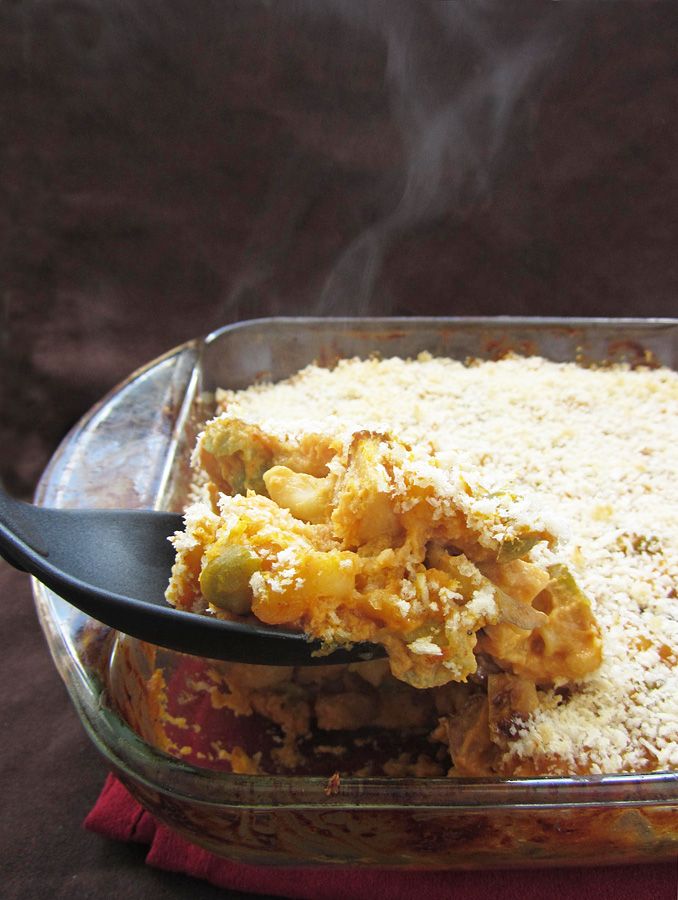
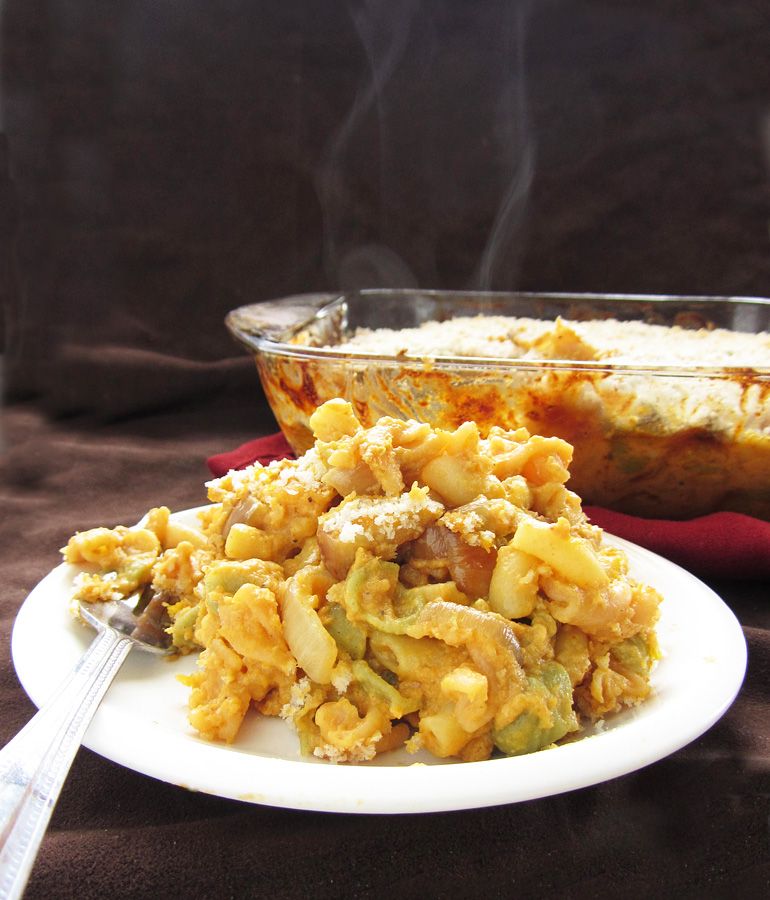
Or you could keep going; sprinkle some breadcrumbs on top and throw it in the oven so you get a crunchy topping with cheesy goodness underneath - it really just depends on how you like your mac and cheese. I loved it both ways!

Pumpkin Mac & Cheese with Apples and Caramelized Onions

I loved that the dash of maple syrup and addition of apples added a touch of sweetness to cut the richness of the cheese, but there wasn’t an apple in every bite so it was like a fun surprise every time you ate one! I also like the smokiness that the applewood smoked cheddar added, but if you don’t like smoky cheeses (my sister complained about the smell every time I heated it up), you could just use a regular sharp cheddar cheese, or I think gruyere would work well too!

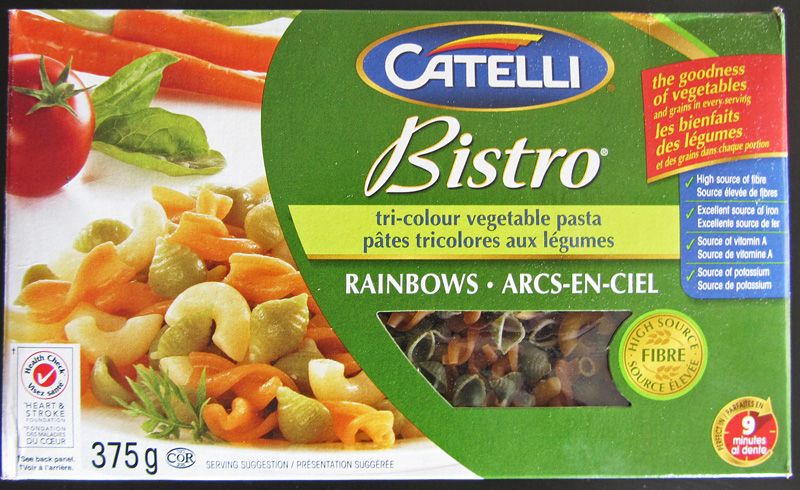
You’re probably wondering why there are strange green things in my pasta, but that’s just because I used this tri-colour vegetable pasta:

vegetable pasta

I realize this isn’t exactly a healthy meal, but with the vegetable pasta instead of regular pasta, the addition of pumpkin, apples, and onions, and using low fat milk, I like to think that it’s at least better for you than a lot of other mac and cheese recipes.

And I certainly had no problem finishing this whole dish by myself (though not all at once, of course!)

Pumpkin Mac & Cheese with Apples and Caramelized Onions

Pumpkin Mac & Cheese with Apples and Caramelized Onions

Adapted from Her Campus, who adapted from Rachel Ray

Serves 4-6

Ingredients:

8oz dry macaroni pasta (I used tri-colour vegetable pasta)
1 tablespoon olive oil
1 large onion, thinly sliced
1 apple, diced (I used Red Delicious)
2 tablespoons unsalted butter
1-1/2 tablespoons all-purpose flour
1/2 cup pumpkin beer
1 tablespoon pure maple syrup
1/2 cup evaporated 2% milk (regular 2% milk would work too)
1/2 teaspoon mustard powder
1/4 teaspoon nutmeg
Salt and pepper
1 cup pumpkin puree
1-1/4 cups grated sharp cheddar cheese (I used applewood smoked cheddar and I used 1-1/2 cups to use it up)
~1/4 cup panko bread crumbs, optional

Directions:

Preheat oven to 350°F.

Cook pasta in a large pot of salted boiling water, according to package directions.  Drain and set aside.
Meanwhile, heat olive oil in a large skillet over medium heat.  Add onions, stir to coat with oil, and let cook, stirring occasionally, about ten minutes.  Season with salt and pepper.  Let cook another 5 minutes or so and then add the chopped apples.  Continue to cook apples and onions, stirring occasionally, for an additional 15 minutes or so, until onions are caramelized and apples are softened and golden brown.  Set aside.

About ten minutes before your onions and apples are done cooking, you can start the roux.  Add butter to a medium saucepan and let melt over medium heat.  Add flour to the melted butter and whisk continuously for about a minute. Raise heat a bit and add the beer.  Reduce until almost evaporated and mixture is quite thick, then whisk in the maple syrup and milk.  Season with mustard powder, nutmeg, and salt and pepper.  Let cook until thick enough to coat the back of a spoon.  Whisk in the pumpkin then whisk in the grated cheese until incorporated.

Stir together the pasta, cheese sauce, onions, and apples.  At this point, you can serve the mac and cheese as is for a stovetop version, or you can bake it.  If you choose to bake it, spread it into an 8x8 glass baking dish and sprinkle breadcrumbs on top.  Bake in preheated oven for about 30 minutes, let cool slightly, then serve.

October 09, 2012

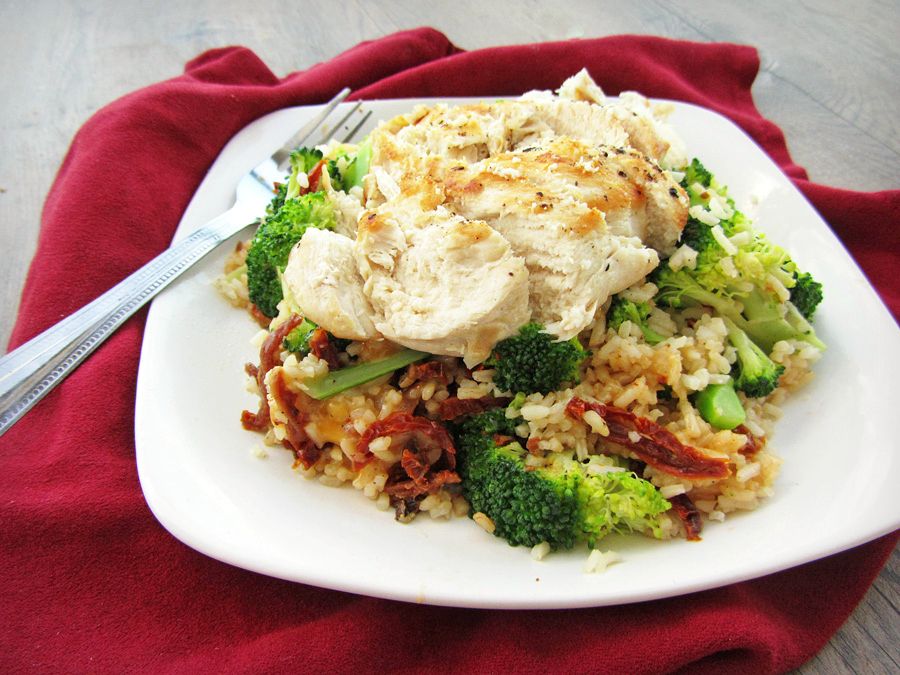
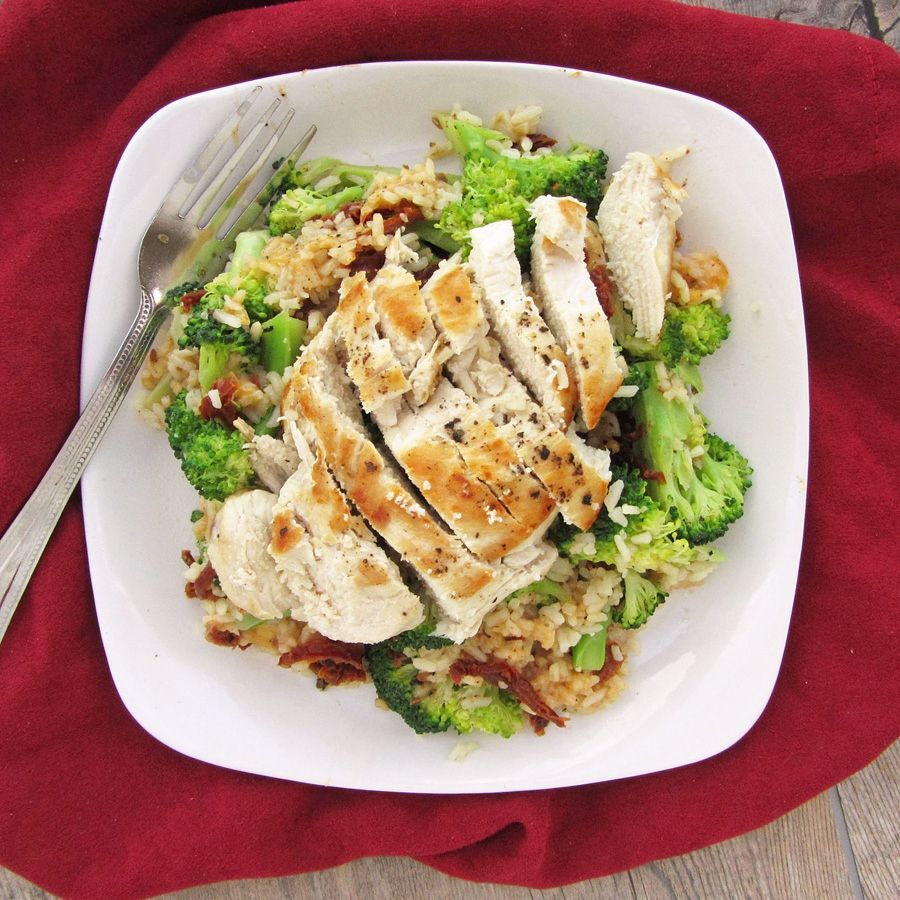
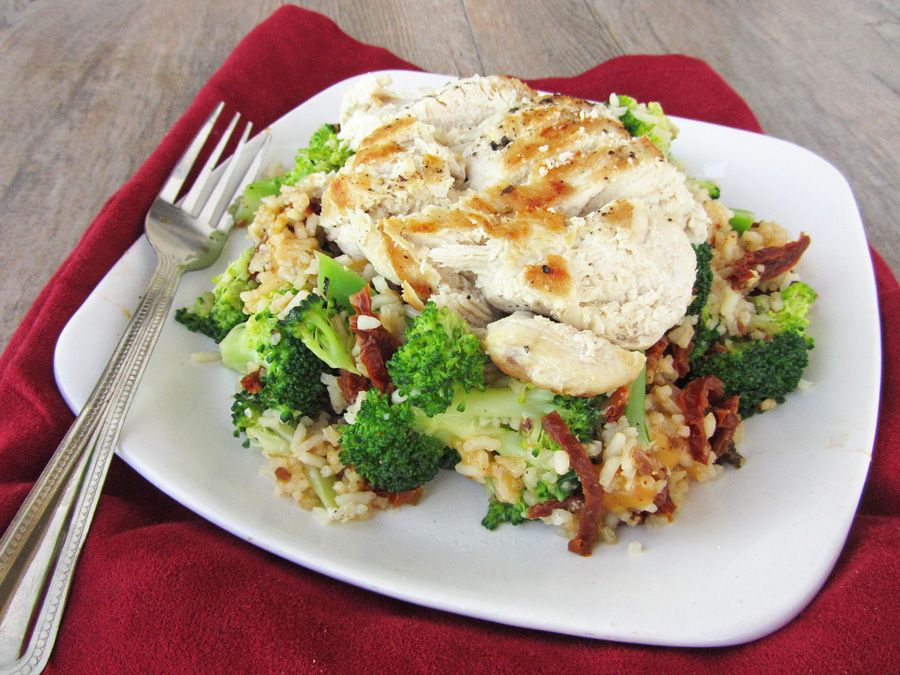
Chicken & Cheesy Rice with Broccoli and Sundried Tomatoes

Chicken and Cheesy Rice with Broccoli & Sundried Tomatoes

I hope all my Canadian readers out there had a great Thanksgiving weekend!

I enjoyed a fabulous Thanksgiving meal with my family - everyone pitched in with favourite classics like turkey and stuffing along with some new dishes like a spicy root vegetable curry.  We had four different types of dips as an appetizer; turkey with homemade gravy, stuffing, cranberry sauce, scalloped potatoes, blue cheese and walnut salad, and the curry as our main meal; followed by pumpkin pie and a pumpkin cheesecake ice cream pie for dessert!  I also contributed this apple and pear sparkling sangria and sweet potato honey dinner rolls.  I was stuffed by the end of the night but had such a great evening spending time with my family, and I still enjoyed plenty of leftovers the next day!

Chicken and Cheesy Rice with Broccoli & Sundried Tomatoes

Now it's time to get back into regular weekday meals - and there's certainly nothing wrong with that, especially when it's something like this chicken with cheesy rice, broccoli, and sundried tomatoes!

This dish doesn't use too many ingredients, doesn't dirty many dishes, is reasonably healthy, and you might even have most of the ingredients in your house already.  And of course, it's ridiculously good and so comforting!

As much as I love Thanksgiving dinner, I don't think I could handle more than two nights of it in a row; this, however, I could eat every night and still love just as much!

(Please ignore my horrendous slicing of the chicken in these pictures - the light was quickly fading outside so I was in a hurry to finish it so I could go take pictures!)

Chicken and Cheesy Rice with Broccoli & Sundried Tomatoes

Chicken and Cheesy Rice with Broccoli and Sundried Tomatoes

Adapted from Heat Oven to 350, Originally from Cooks Illustrated Best 30-Minute Meals

Serves 2-3

Ingredients:

2 boneless, skinless chicken breasts
Salt and pepper
2 teaspoons vegetable oil
1/2 large head of broccoli, chopped into florets
2 oz (about 1/2 cup loosely packed) sundried tomatoes, not packed in oil (from a bag)
3/4 cup instant enriched white rice (feel free to use brown rice if you prefer)
3/4 cup low-sodium, fat-free chicken broth
1/2 cup shredded cheddar cheese

Directions:

Trim any fat off the chicken breasts and season with salt and pepper.  Heat oil in a large nonstick skillet over medium-high heat.  Brown chicken well on one side, about 4-5 minutes, then transfer to a plate.

Meanwhile, bring water to a boil in a medium or large saucepan.  Add the broccoli florets and sundried tomatoes and blanch for 2 minutes.  Rinse with cold water and drain.  Chop sundried tomatoes into quarters, depending on the size.

After browning chicken, add rice and chicken broth to the skillet.  Nestle chicken into the rice with the browned side facing up.  Cover and cook over medium-low heat until liquid is absorbed, rice is cooked, and chicken is cooked through (thickest part of chicken registers 160 degrees), about 8-10 minutes.

Transfer chicken to a clean surface and slice into thin pieces.  Add the broccoli, sundried tomatoes, and cheddar into the rice mixture and mix until cheese is melted.  Season with salt and pepper to taste.  Divide rice mixture among plates and top with the sliced chicken.  Serve immediately.

July 03, 2012

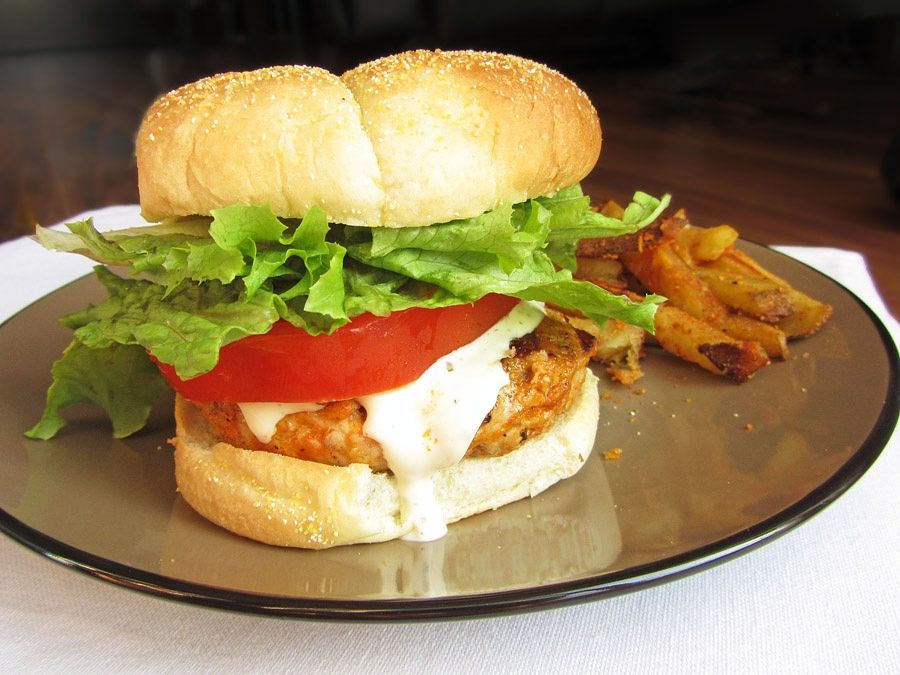
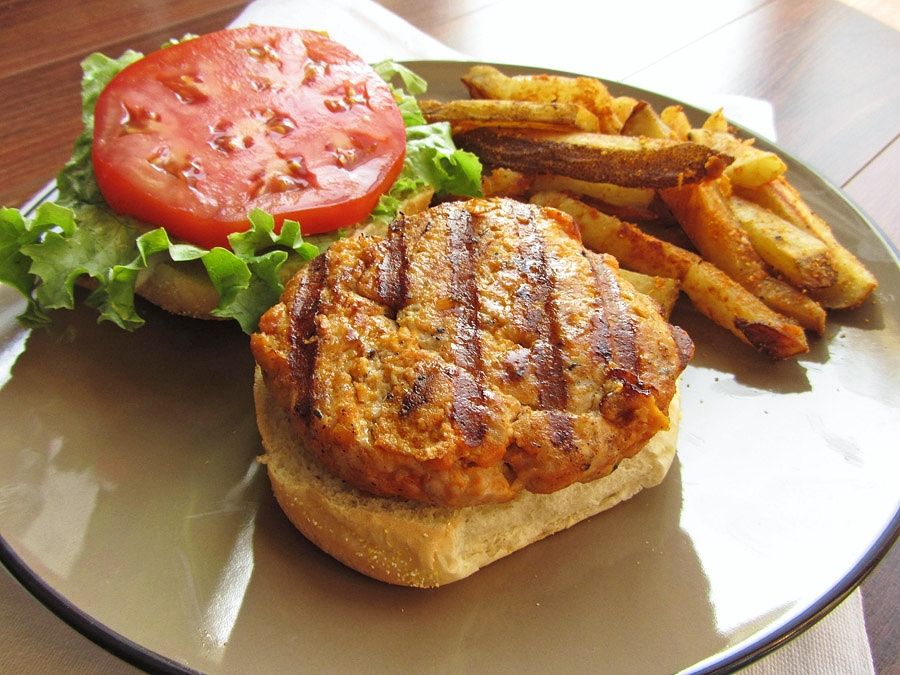
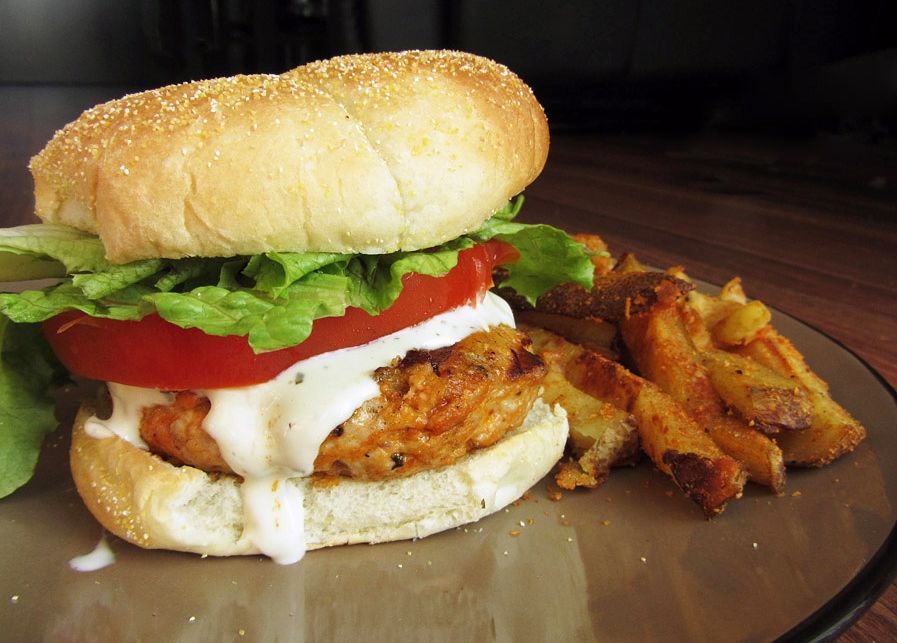
Buffalo Chicken Burgers

Buffalo Chicken Burgers

I had a great long weekend this past weekend, including a Canada Day party, fireworks, plenty of time in the sun relaxing with family and Ryan, and lots of great food!  The best thing I ate this weekend had to be these buffalo chicken burgers that are one of Ryan and my favourite meals.  And with 4th of July barbecues likely in store for many of my American readers tonight and tomorrow, I thought this would be a great recipe to share today!

These are ridiculously easy to make, and Ryan and I always love them every time we make them.  We’re both big fans of anything buffalo wing flavoured, so infusing that flavour into a juicy homemade chicken burger with fresh toppings and lots of sauce makes for a pretty amazing dinner, and so much better than any storebought frozen chicken burgers, which we have not had good experiences with!

Buffalo Chicken Burgers

I know the pictures of this burger don’t do it justice, but this was one of those times when I just wanted to eat my dinner while it was still hot, without having to worry about styling it, finding good lighting to photograph it in, taking a million shots to get the best angle, and then reheating it before eating because by that time it would be ice cold.  Instead, I took a few quick pictures right before I ate it, so they’re not great but at least you know I didn’t spend forever making my burger look as pretty as possible but not at all how it would look in real life.  What you see is what you get!  (Well, except that when I took the pictures, I’d forgotten to add the extra buffalo sauce, which for me is a must!)

If you’re looking for a new and exciting way to eat chicken burgers this summer, or a healthier alternative to a beef burger, give these a try!  If you’re a buffalo wing fan, you won’t be disappointed! 

And happy Independence Day to my friends south of the border!

Buffalo Chicken Burgers

Buffalo Chicken Burgers

Adapted from How Sweet It Is

Serves 4

Note: I have made these many times as both chicken and turkey burgers - both work!

Ingredients:

For the burger patties:

1 lb (450g) ground lean or extra-lean chicken (or ground lean turkey may also be used!)
1/2 teaspoon salt
1/2 teaspoon pepper
1/2 teaspoon italian seasoning
1/2 teaspoon paprika
1/4 cup buffalo wing sauce or Frank's red hot sauce
1/4 cup breadcrumbs
1/4 cup grated parmesan cheese

For the rest of the burgers:
4 whole wheat burger buns
Lettuce
Tomato
Buffalo sauce
Low-fat ranch or blue cheese dressing
Cheddar cheese (optional)

Directions:

Mix up all ingredients for the chicken (or turkey) patties in a large bowl (using a fork, potato masher, or clean hands) until well blended, but being careful not to overmix. Form into four patties and press a small indentation in the center of each patty. Always be sure when making burger patties not to press hard on the meat or you will end up with tough patties - be as gentle as possible with every step!

If cooking on the barbecue: Preheat grill to medium to medium-high heat and lightly oil or spray. Grill for 4-5 minutes per side, or until the internal temperature reaches 165°F. In the last couple minutes of cooking, place cheese on burger to melt, if desired.

If cooking on the stovetop: Preheat two large non-stick skillets over medium-high heat. Cook the patties in the skillets for about 8-10 minutes total, flipping halfway, until cooked through. In the last couple minutes of cooking, place cheese on burgers to melt, if desired.

Place burgers on buns and top with lettuce, tomato, and desired sauces.

I like to serve these with baked sweet potato fries or as pictured above, Emeril Lagasse's oven baked parmesan paprika fries.

May 15, 2012

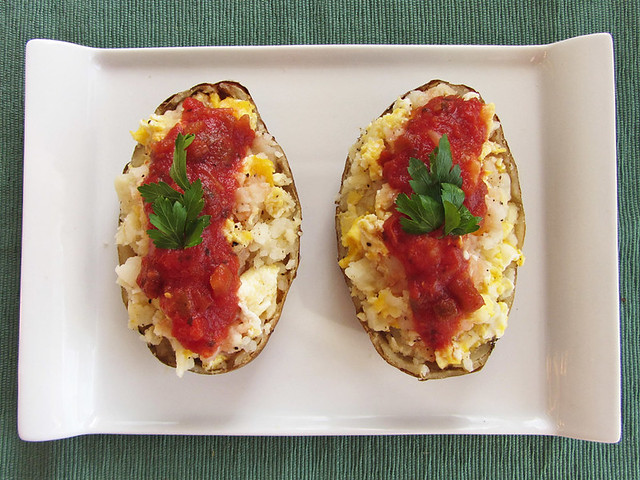
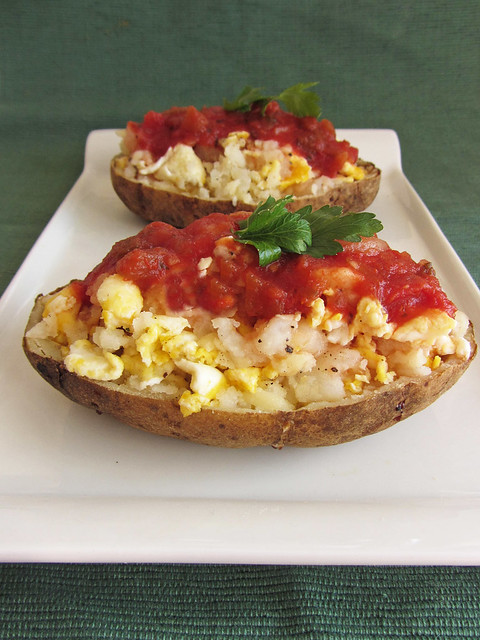
Breakfast Potato Boats

Breakfast Potato Boats

The other day I posted a barbeque chicken baked potato recipe and mentioned how much I love using a simple baked potato as the base for a delicious and easy dinner.  Well it turns out that baked potatoes also make for a pretty amazing breakfast that is still easy enough to prepare for yourself on a weekday morning, or elegant enough to serve to guests for brunch!

I first saw the idea for a breakfast potato boat on Inn Cuisine a while ago, but their version calls for hollowing out a potato, filling it with scrambled eggs, cheese, and bacon, and using the scooped-out potato to make hashbrowns on the side.  I thought it was a pretty creative breakfast idea, but that it might be even better to use the scooped out potato as part of the potato filling, mixed in with the eggs and cheese, kind of like a breakfast version of a twice-baked potato.

I couldn't wait to try this out for myself, but leaving out the bacon for a vegetarian version, using less eggs since I was using potatoes in the filling to make up for it, and adding salsa to liven the whole thing up a bit!

Breakfast Potato Boats

These turned out so much better than I'd even hoped!  While the components are simple - fluffy baked potato mixed with scrambled eggs, melted cheese, and some salsa - the taste was amazing and made for a fun twist on breakfast.  The dish also made for a nice presentation, so I think it would be great to make a big batch of these to serve to guests.  As I mentioned at the start of this post though, you can also quickly make them for yourself by baking the potato the night before, then all you have to do in the morning is cook the egg and mix everything together, then give it a quick reheat in the  microwave!

You could also get really creative with these if you want something a bit fancier - try adding in black beans and a spicy cheese for more of a tex-mex flair, add bacon or sausage for a meat version, or add spinach and other veggies for a more nutritious breakfast!

After a successful Mother's Day breakfast of crepes and fruit on Sunday, I'm already thinking ahead to Father's Day and thinking that these might be a nice addition!  That reminds me that I'll have to share some of the amazing food we enjoyed for Mother's Day soon - Hope you all spoiled your moms or were spoiled by your kids!  Did any of you have anything special to eat on Sunday?

Breakfast Potato Boats

Breakfast Stuffed Potato Boats

Inspired by Inn Cuisine

Serves 2

Ingredients:

1 large russet potato
2 large eggs
1/2 cup shredded cheese (I used cheddar but a Pepper Jack or Mexican blend would be good too)
Salsa
Salt & Pepper

Directions:

Preheat oven to 400°F.  Scrub potato, then pierce several times with a fork. Rub the skin with olive oil and a bit of salt.  Place directly on the middle rack of the oven, with a pan underneath to catch any drippings.  Bake for 1 to 1-1/2 hours, until cooked through and soft.

Let the potato cool slightly, then cut potato in half lengthwise.  Use a spoon to scoop out the insides of each half, leaving about 1/4” layer of potato on the skin.  Transfer the scooped out potato to a small bowl and mash with a fork.

Scramble eggs in a non-stick skillet until almost done but still slightly wet.  Transfer the eggs to the bowl with the mashed potato. Add cheese and season to taste with salt and pepper, then mix thoroughly. 

Spoon the mixture into the shelled out potato skins.  Heat potatoes in a microwave on high for 30 seconds to 1 minute, until potatoes are hot, cheese is melted, and eggs are completely cooked.  Spoon salsa on top, then serve (with additional salsa on the side, if desired).

*Note: I baked my potato the night before, then kept it in the refrigerator.  In the morning, I reheated it in the microwave then proceeded with the rest of the directions.

September 18, 2011

Reduced Fat Broccoli Cheese Soup

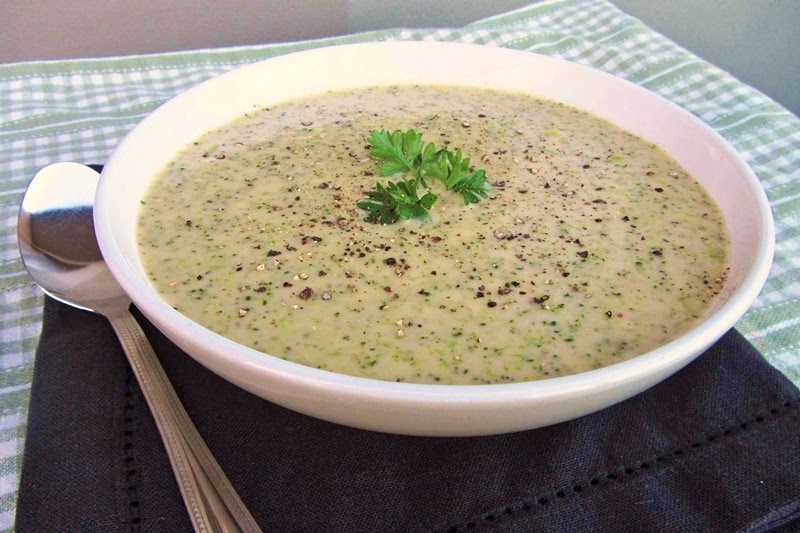
broccoli cheese soup
Since the weather has been getting colder, I’ve been craving warm and comforting meals for dinner, and nothing fits that craving better than a steaming hot bowl of homemade soup. Before I learned how to cook, boxed/canned soup was something that appeared frequently in my meals. Fortunately, I have since learned that making your own soup at home is so easy and tastes a thousand times better than the stuff that has been sitting on a shelf for who knows how long.

I’ve always loved broccoli cheese soup, but have never made it for myself. When I tried looking for recipes for it, I was a little shocked to see how much butter and cream went into most versions. I usually try to make my meals as healthy as possible when I’m just cooking for myself, and while broccoli cheese soup itself can never really be 100% healthy because cheese is an essential component, I knew I could at least find a lighter version. Fortunately, that’s where Cooking Light came in to save the day with the perfect recipe!

I still made quite a few changes to their recipe: I used sharp cheddar cheese instead of velveeta (which scares me a bit) and fresh broccoli instead of frozen; I replaced the 2% milk with skim milk, which I was worried wouldn’t work but the soup still came out really thick; and I doubled the garlic and pepper and added some mustard powder for extra flavour. I also processed all of the soup at the end instead of just a third of it as the recipe suggested, because I wanted the soup to be a little smoother.

The result was amazing! This soup was so cheesy, thick and comforting, and was also really easy to make. I was so amazed that a soup that is typically cream-based could still taste just as good when made with skim milk – I couldn’t even tell that it was low fat! I will definitely be making this often during the upcoming months – it’s the perfect thing to warm you up on a cold day!

broccoli cheese soup

This is my submission to Souper Sundays hosted by Deb at Kahakai Kitchen

Reduced-Fat Broccoli Cheese Soup

Adapted from Cooking Light

Serves 2-3

Ingredients:

1 tablespoon olive oil
1/2 cup chopped onion
2 garlic cloves, minced
1 1/2 cups fat-free, less-sodium chicken broth
3 cups chopped broccoli florets
1 1/4 cups skim milk
1/4 cup all-purpose flour
1/2 teaspoon black pepper
1/2 teaspoon mustard powder
1 1/4 cups shredded sharp or extra-sharp cheddar cheese

Directions:

Heat olive oil in a large non-stick saucepan over medium-high heat. Add onion and garlic and sauté 3 minutes or until soft. Add broth and broccoli. Bring mixture to a boil over medium-high heat. Reduce heat to medium and cook for 10 minutes.

In a medium bowl, whisk together the milk and flour until well blended. Add the milk mixture to the broccoli mixture in the saucepan. Cook for 5 minutes, stirring constantly, until mixture is slightly thick. Stir in pepper and mustard powder.

Remove from heat and stir in the cheese until it melts. Place the mixture in a food processor or blender (in batches if necessary) and process briefly, just until the large chunks are broken down so the mixture is smooth but with small chunks (an immersion blender would also work well here if you have one).

Serve immediately, topped with extra pepper and shredded cheese if desired.

Ingredient Index

Related Posts Plugin for WordPress, Blogger...