October 31, 2014

Severed Fingers Cookies & Happy Halloween!

Severed fingers cookies for Halloween

Happy Halloween!

Halloween is one of the best holidays for getting creative with your food. I think there's a tricky line between food that's creepy and food that's just too gross to eat (I don't think I could ever bring myself to eat a kitty litter cake, for example, though I'm sure it would be fun to watch people's reactions to it!) but I think these severed fingers have just the right amount of scare factor without pushing the limits too much, at least for an adult party!  I brought these to a Halloween potluck with my lab on Wednesday and received a few comments on how realistic and creepy they looked, which was my goal, but people were still eating them which was also important!

You've probably seen some version of severed fingers or witches fingers cookies on the web before but I had to share mine too because I think they're so great for a Halloween party if you still need any ideas for this weekend!

Severed fingers cookies for Halloween

These cookies are easy to make - the recipe is sort of a cross between a sugar cookie and shortbread cookie.  It's a bit time consuming to shape and decorate each cookie but I had a lot of fun with it.  I wouldn't say the taste is anything extraordinary as the recipe is pretty basic, but in this case I wasn't as concerned about the taste compared to the look!

I'll post a link to the recipe I used below along with some tips I've learned from making these a couple of times.  If you're looking for a Halloween party treat that will get your guests talking, these cookies are perfect!

I actually don't have very exciting plans for Halloween other than staying home to watch a scary movie and try to fight off a cold, but I hope you all have a safe and happy Halloween!

Severed fingers cookies for Halloween

Severed Finger Cookies

The recipe I used for these cookies can be found at Cook and Be Merry.

It's similar to a Taste of Home recipe which I've seen several people make, but uses a little more sugar and a little less salt, which I think improves the taste.

Some tips I have and small changes I made to the Cook and Be Merry recipe are:
  • I did not use green food colouring.  If you want these to look more like witches fingers, then feel free to colour them green!
  • I used sliced almonds for the fingernails rather than whole blanched almonds, which was only because I couldn't find the whole blanched almonds.  Either work, but I think the nails look a little more realistic with whole almonds rather than slices.  You can blanch your own almonds as the recipe gives instructions for.
  • To shape the cookies, I divided the dough in four.  Keep the sections you're not working with in the fridge.  I shaped each of the four sections of dough into 10 fingers.  Just break it into ten even pieces, roll each piece into a cylinder, then shape the knuckles, press the almond in for the nail, and use a knife to add wrinkles at the knuckle and below the fingernail.  The wrinkles are important to make these more realistic!
  • It's really important to keep the dough chilled to prevent it from spreading.  If you don't do this your fingers will spread too much and won't look realistic.  I kept the dough refrigerated, and after I shaped each section into fingers, I stuck the fingers into the freezer for a few minutes to chill them back up before going in the oven.  As your first set of fingers bakes, you can shape the next set then stick them back in the fridge/freezer so they're ready to go in the oven as soon as the other ones are done.
  • Watch the baking time!  My first batch I cooked for 22 minutes because other recipes had said to bake for 20-25 mins, and they ended up overbaked (dry).  After that I reduced to 20 then 17 minutes for subsequent batches, but they still ended up a bit dry.  Next time I would start with Cook and Be Merry's recommendation of only 15 minutes.
  • After baking the fingers, take each almond off one at a time, squeeze some red gel underneath, then place the almond back on so the red gel oozes out from behind the fingernail (and helps the almond stick).  Add some red gel to the bottom of each finger too to make it look severed.

October 28, 2014

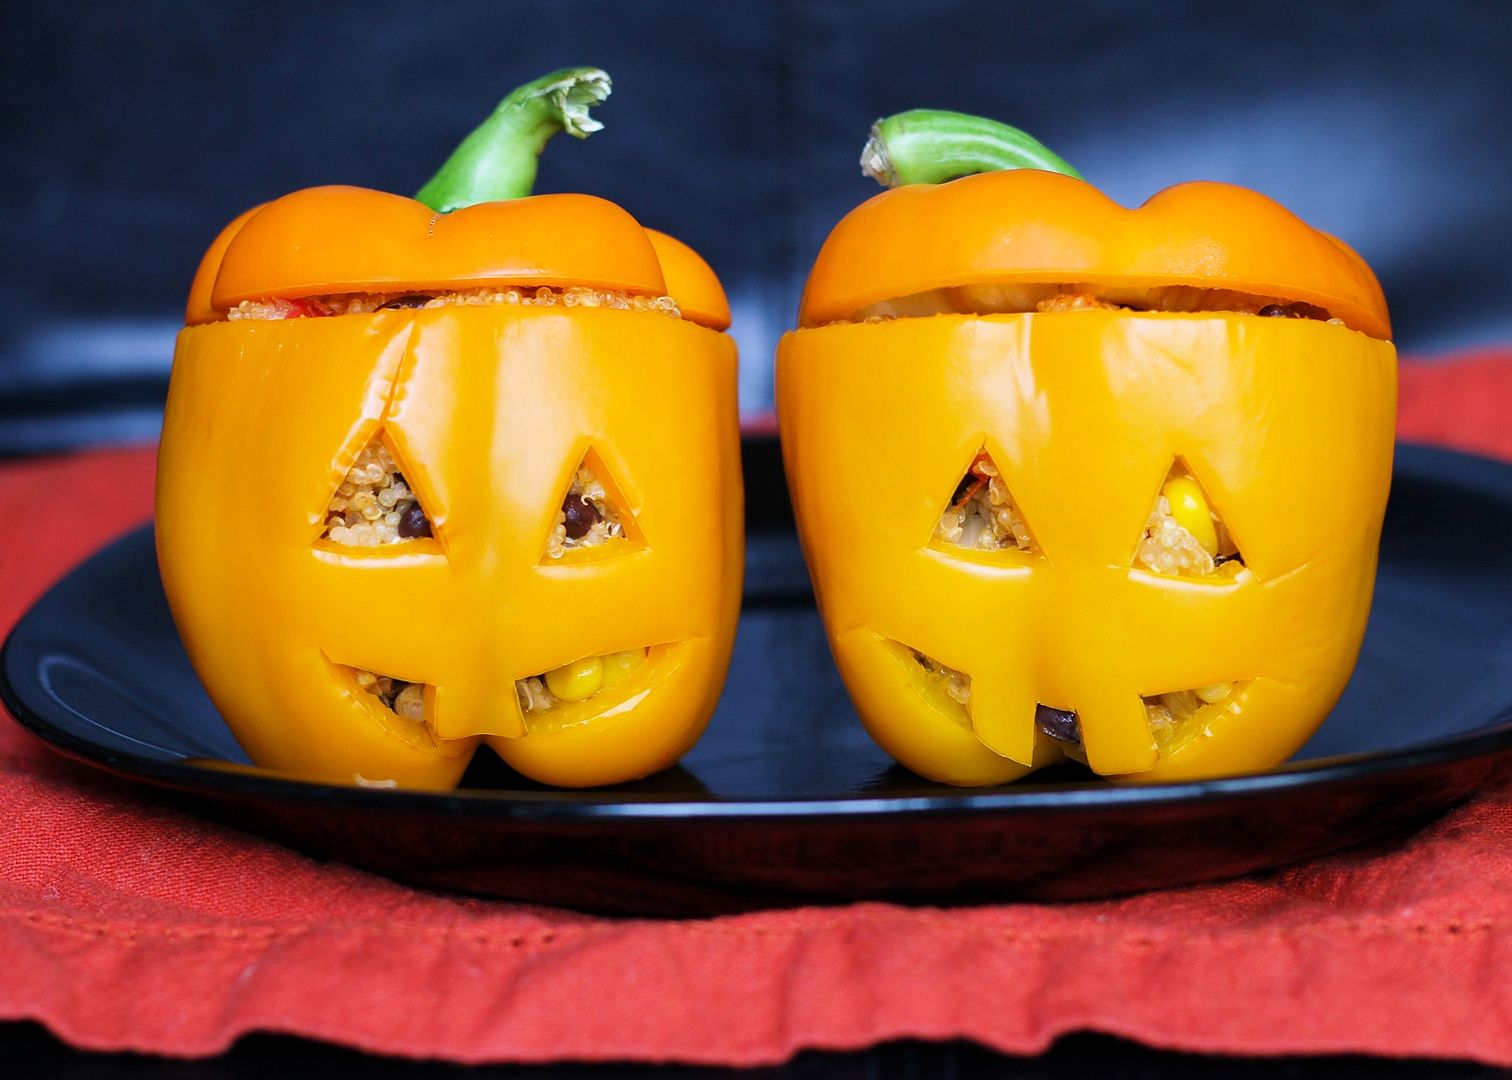
Southwestern Quinoa Stuffed Pepper Jack O' Lanterns

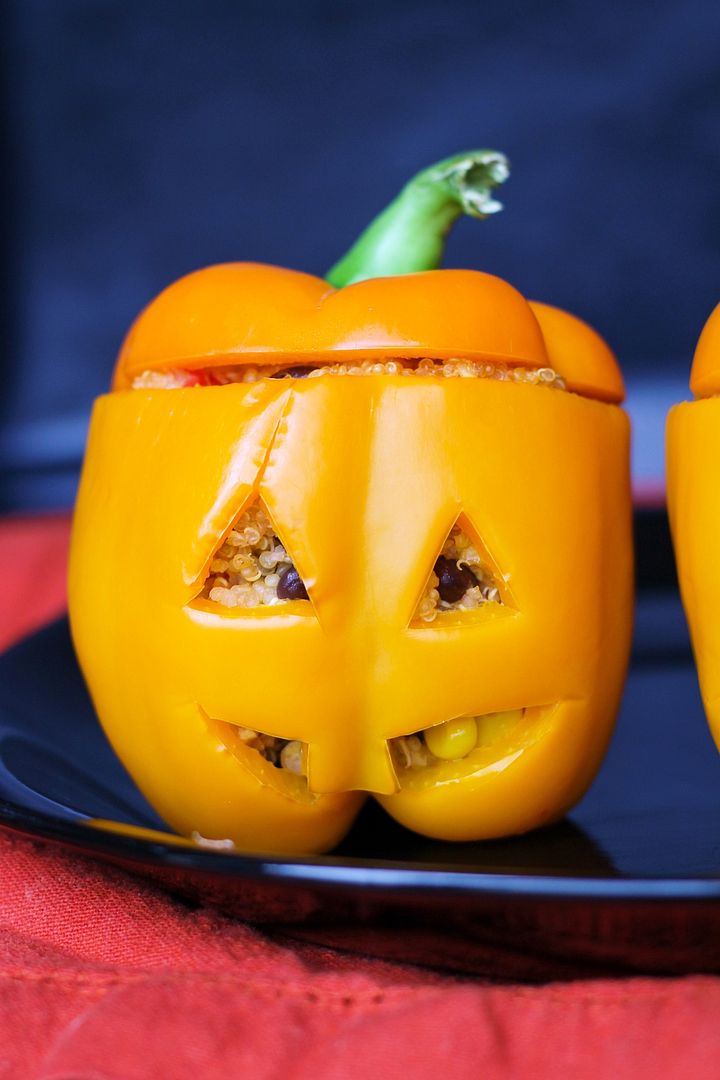
Southwestern Quinoa Stuffed Pepper Jack O' Lanterns - easy and fun dinner idea for Halloween!

I love making cute Halloween themed treats, and dinner ideas are even better since there are already so many sweets around this time of year.  I've seen the idea of carving stuffed peppers like jack o' lanterns on several blogs before and wanted to try it for myself this year.  Even though I'm certainly not the first to try these, they turned out so cute and tasty that I had to share them with you guys!

Southwestern Quinoa Stuffed Pepper Jack O' Lanterns - easy and fun dinner idea for Halloween!

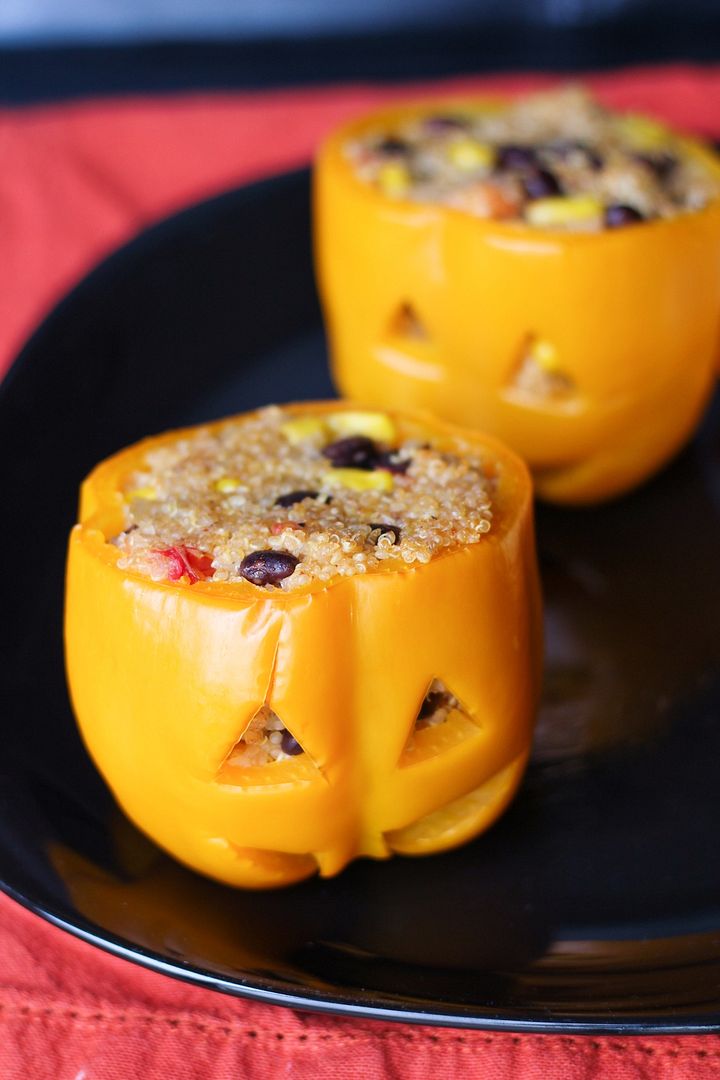
These are also really easy to make and completely customizable!  Just find some orange peppers, cut the tops off and scrape out any seeds or ribs inside, then carve your jack o lantern face with a small knife.  You don't want to cut out too big of holes so that the filling could escape, but even though these are a lot smaller to work with than pumpkins, I found them much easier to "carve"!

After prepping your little pumpkin lookalikes, you make your filling, stuff the insides of the peppers, and bake them to soften the peppers.  I also like to parboil the peppers first to reduce the amount of time needed to soften the peppers in the oven later, which will also help save time if you're trying to make these on Halloween evening before trick or treating starts!

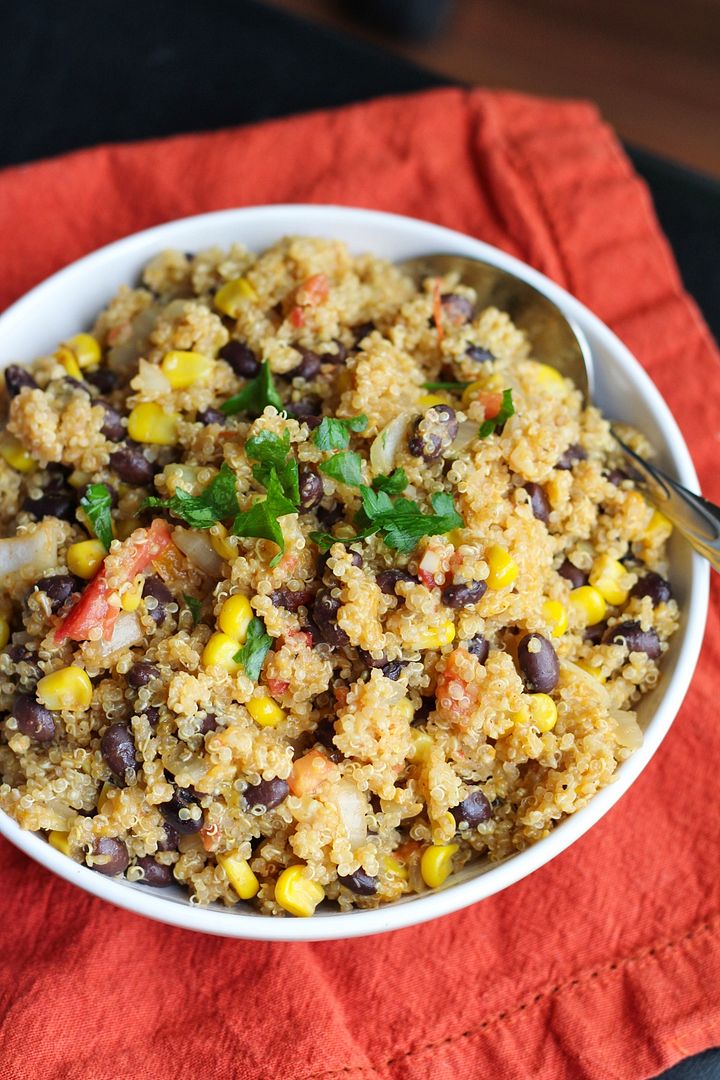
southwestern quinoa

I filled mine with one of my favourite southwestern-flavoured quinoa mixtures, which is vegetarian and pretty healthy too.  I cook the quinoa in vegetable broth which is important for giving it more flavour, then mix in some sauteed onion and garlic, tomatoes, black beans, corn, spices, and cheese.  You could add in more vegetables like spinach or mushrooms if you like, or leave out the spices if your kids won't like them.

I'm going to a Halloween potluck tomorrow and plan on making some scary cookies so if those turn out well I'll have another treat to share later this week!  Happy week of Halloween!

Southwestern Quinoa Stuffed Pepper Jack O' Lanterns - easy and fun dinner idea for Halloween!

Southwestern Quinoa Stuffed Pepper Jack O’ Lanterns

Serves 4-6

Ingredients:

2 cups vegetable broth
1 cup dry quinoa
4-6 orange bell peppers
1 teaspoon olive oil
1 yellow onion, diced
1 clove garlic, minced
2 small tomatoes, diced
1 (540mL) can black beans, drained and rinsed
1 cup corn kernels (thawed if frozen)
1 teaspoon cumin
1/2 teaspoon chili powder
Salt and pepper
1 cup shredded cheddar cheese (or Mexican or taco blend)

Directions:

Bring 2 cups of vegetable broth to a boil in a medium saucepan.  Add quinoa, cover, reduce heat to simmer and let simmer for 15 minutes.  Remove from heat and let sit, covered, for 5 minutes.  Remove lid and fluff with a fork.

Meanwhile, cut the tops off the bell peppers and use a knife to scrape out the remaining seeds and ribs of the pepper, leaving the pepper in tact (as seen in pictures).  Leave the tops aside if you wish to include them for presentation later.  Bring a large pot of water to a boil, with enough water to cover the peppers.  Add peppers and let simmer for about 4 minutes, until slightly softened.  Carefully remove and set aside.

Preheat oven to 350°F.

In a medium pan, heat oil over medium-high heat.  Add onion and saute for about 5 minutes, stirring often, until softened.  Add garlic and saute for 30 seconds, stirring. Add tomatoes, black beans, corn, cumin, and chili powder, and season with salt and pepper.  Stir and saute for a few minutes.  Remove from heat, stir in quinoa and cheddar cheese and mix until incorporated.

Spoon quinoa mixture into the peppers.  There should be enough to fill 6 peppers or you can really fill 4 peppers quite full, and might still have some quinoa leftover.  You could also just stop now and eat the quinoa on its own!  Leave tops off the peppers, spray a 9x13 glass baking dish with non-stick cooking spray, and place filled peppers standing up in the dish.  Cover with aluminum foil and bake in preheated oven for 25-35 minutes, until peppers are softened to your liking (I did 25 minutes as I was impatient but would have preferred 30).  Remove and serve with tops on the peppers if desired.  Eat by slicing everything up with a knife and fork and eating the quinoa and pepper together.


--------------------------------------------------------------------------------------------------
For more Halloween dinner ideas, try these:

Halloween mummy potatoes with turkey meatballs

Halloween Mummy Potatoes with Meatballs

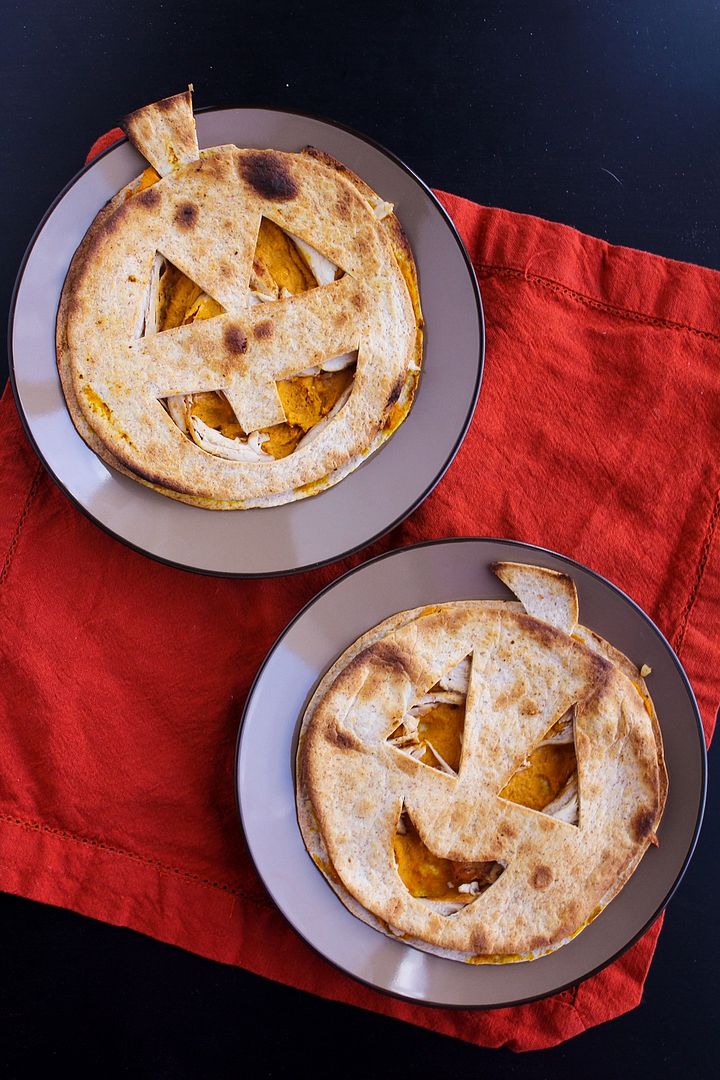
Pumpkin, chicken, & goat cheese quesadillas

Pumpkin, Chicken, & Goat Cheese Quesadillas(for Halloween!)

October 02, 2014

Smashed Chickpea, Blue Cheese, & Apple Sandwich

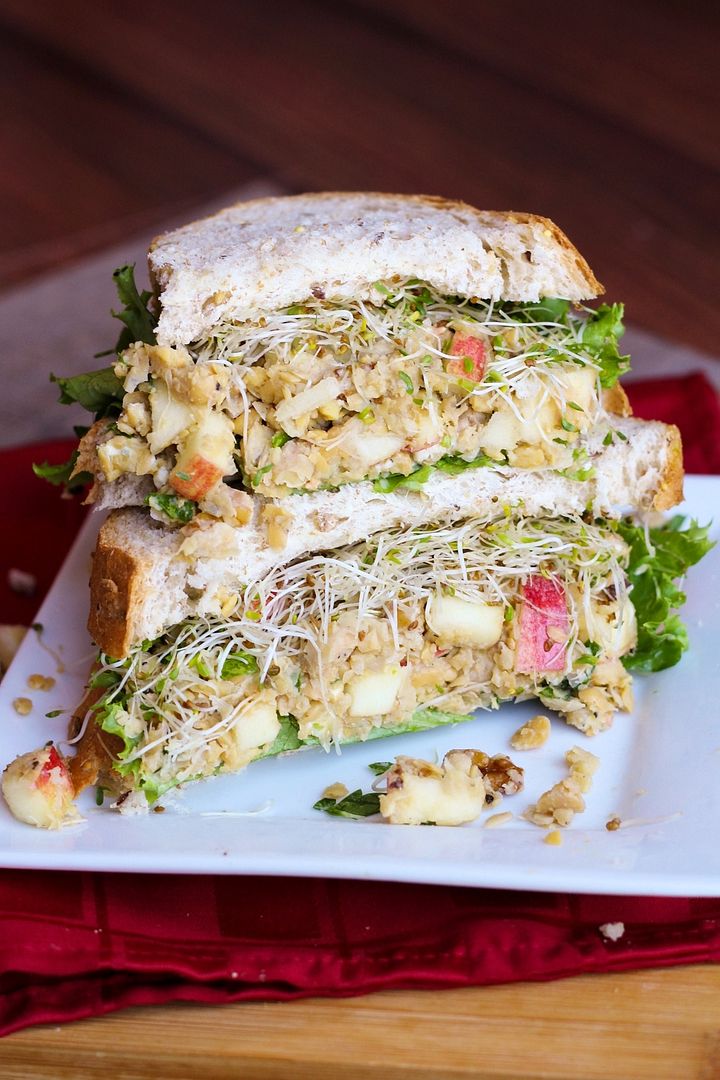
Smashed Chickpea, Blue Cheese, Apple, and Walnut Sandwich - a healthy and hearty vegetarian lunch idea!

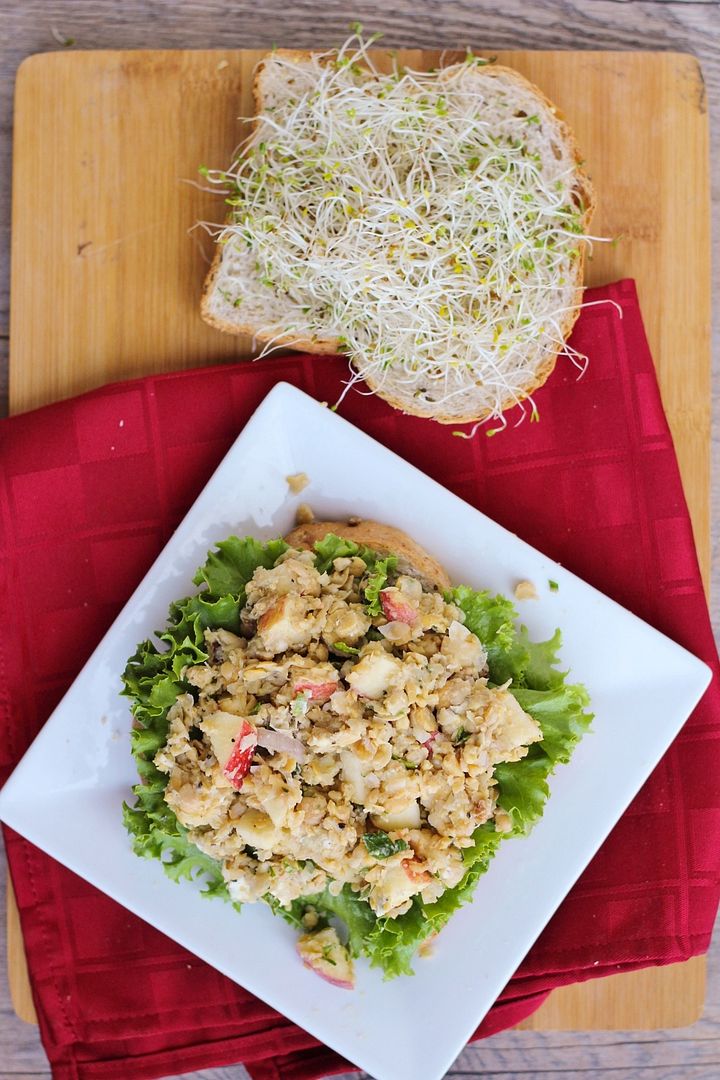
With fall well underway, I’ve been craving heartier meals that incorporate seasonal ingredients like pumpkin and apples. I’ve seen a lot of smashed chickpea or “chickpea salad” sandwiches around the web before and have wanted to try my own version for a while now. I knew I wanted the crunch of apples in there, and because I can’t get enough of the apples-blue cheese combination, I mixed my apples and chickpeas with blue cheese, throwing in some walnuts for more texture, and a quick mustard and apple cider vinaigrette for added flavour. Combined with thick slices of fresh 7 grain whole wheat bread, lettuce, sprouts, and a little extra mustard, this made for a really satisfying sandwich (when my dad saw my lunch one day he asked if I was Dagwood) that I loved!

Smashed Chickpea, Blue Cheese, Apple, and Walnut Sandwich - a healthy and hearty vegetarian lunch idea!

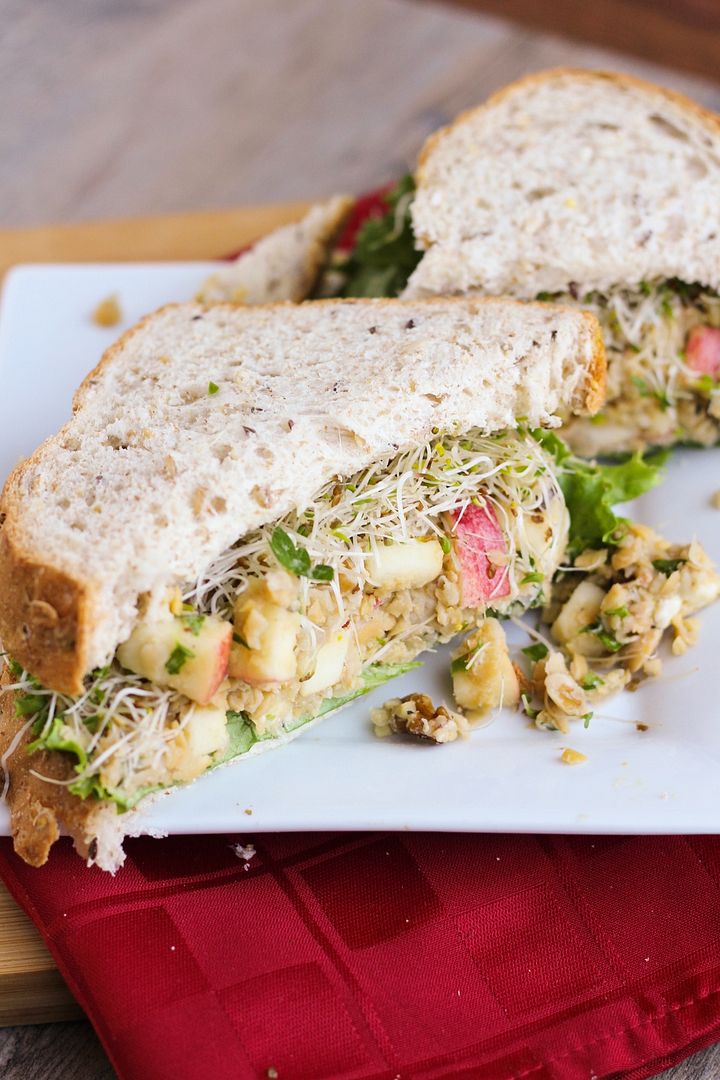
If I’d wanted it to be more of a chickpea salad sandwich, I could have added mayo, but I don’t ever have mayo around and I liked the flavour of the mixture on its own so I left it out. Without something like mayo to get everything to stick together, the filling is a bit messy in a sandwich, but that’s all part of the fun! You could try adding some if you prefer though, or even use a mixture of mayo and plain Greek yogurt to keep this on the lighter side.

And if blue cheese isn’t your thing, here are a few other chickpea sandwiches you could try!

Smashed chickpea salad from Smitten Kitchen
Smashed chickpea and avocado salad sandwich from Two Peas & Their Pod
Curried chickpea salad sandwich from The Simple Veganista
Cranberry walnut chickpea salad sandwich from The Simple Veganista
Herbed chickpea sandwich (with feta and dill) from Martha Stewart
Smashed chickpea & pesto sandwich from Bake Your Day
Pink chickpea smash salad from Happy Healthy Life

Smashed Chickpea, Blue Cheese, Apple, and Walnut Sandwich - a healthy and hearty vegetarian lunch idea!

Smashed Chickpea, Blue Cheese, & Apple Sandwich

Recipe my own but inspired by many other versions of smashed chickpeas that others have created!

Makes 4 sandwiches

Ingredients:

For the Chickpea Mixture:
1 (540mL) can of no-salt added chickpeas, drained and rinsed
1 large apple, cored and diced – any crunchy and sweet variety that you like will work
1/4 cup chopped walnuts
2 oz crumbled blue cheese
2 tablespoons chopped parsley
1 tablespoon extra-virgin olive oil
2 teaspoons apple cider vinegar
1 teaspoon Dijon mustard
1 shallot, minced
Salt and pepper

For the Sandwiches:
8 slices whole grain bread
Lettuce, and sprouts if desired
Extra mustard if desired (such as Dijon, honey mustard, or deli style mustard)

Directions:

In a small bowl, whisk together the olive oil, vinegar, Dijon, and shallot.  Let sit for at least 5 minutes (I find this takes some of the bite out of the shallots).

Smash chickpeas with a potato masher or large fork; they don’t have to be completely smashed, just partially.  I found it difficult to do with a fork so I pulsed mine several times in a food processor; this is quicker if you don’t mind washing an extra dish!  Mix the apples, walnuts, blue cheese, and parsley into the chickpea mixture.  Mix in the olive oil dressing and season mixture generously with salt and pepper.

Divide chickpea mixture evenly among 4 sandwiches, along with lettuce, sprouts, and extra mustard if desired (I liked these best with added mustard!).  Try to flatten or “smush” the chickpea mixture onto each sandwich so it sticks together.  Even still, these might be messy and I learned that it’s best to hold on to both ends of your sandwich as you’re eating to prevent the filling from falling out!

September 25, 2014

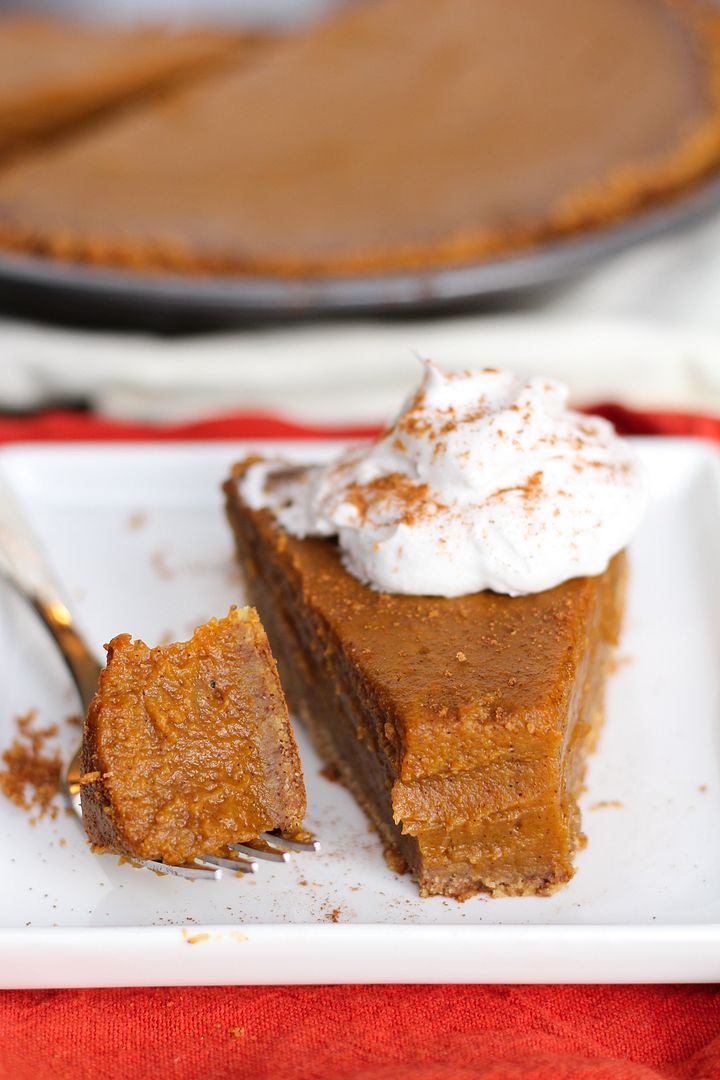
Vegan Pumpkin Pie

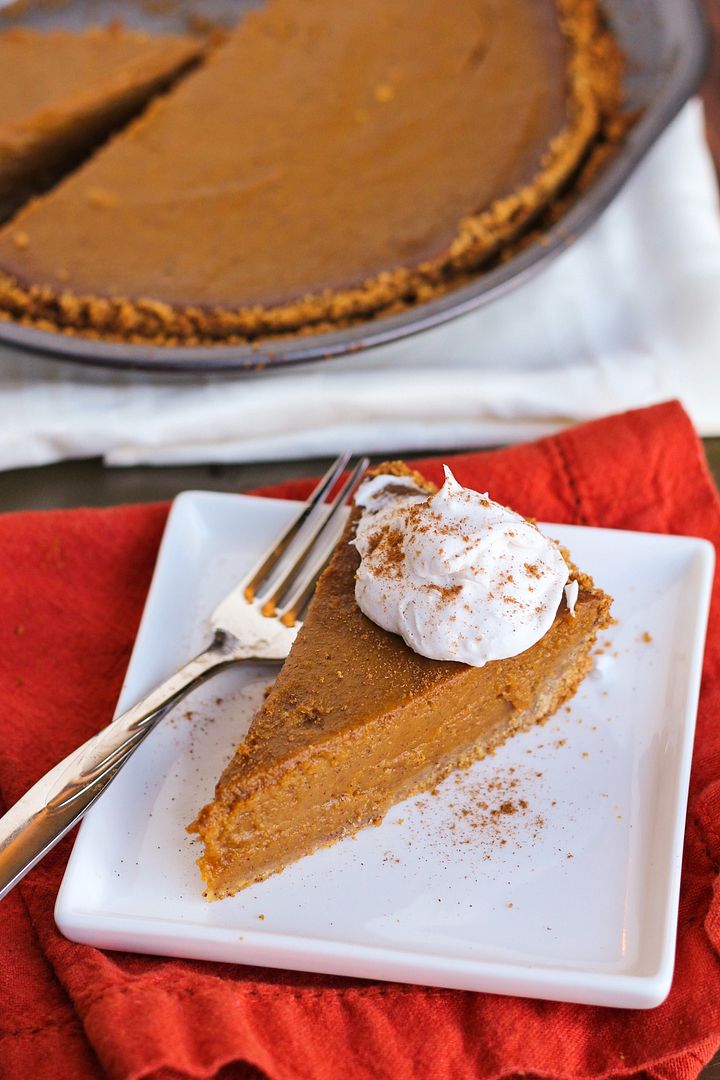
Healthy vegan pumpkin pie

Pumpkin pie is my (and a lot of people's, I'm sure) favourite type of pie, and the type I have the least self-control around because it's so easy to just take a little slice from the fridge, and then one more little slice, and suddenly you've eaten a whole pie just like that.  Ryan has been wanting to buy a pumpkin pie for weeks now but I told him that since it would just be the two of us eating it (and I intend on eating much more pumpkin pie in the coming months!) I wanted to try making a healthy pie that we wouldn't feel guilty about eating!

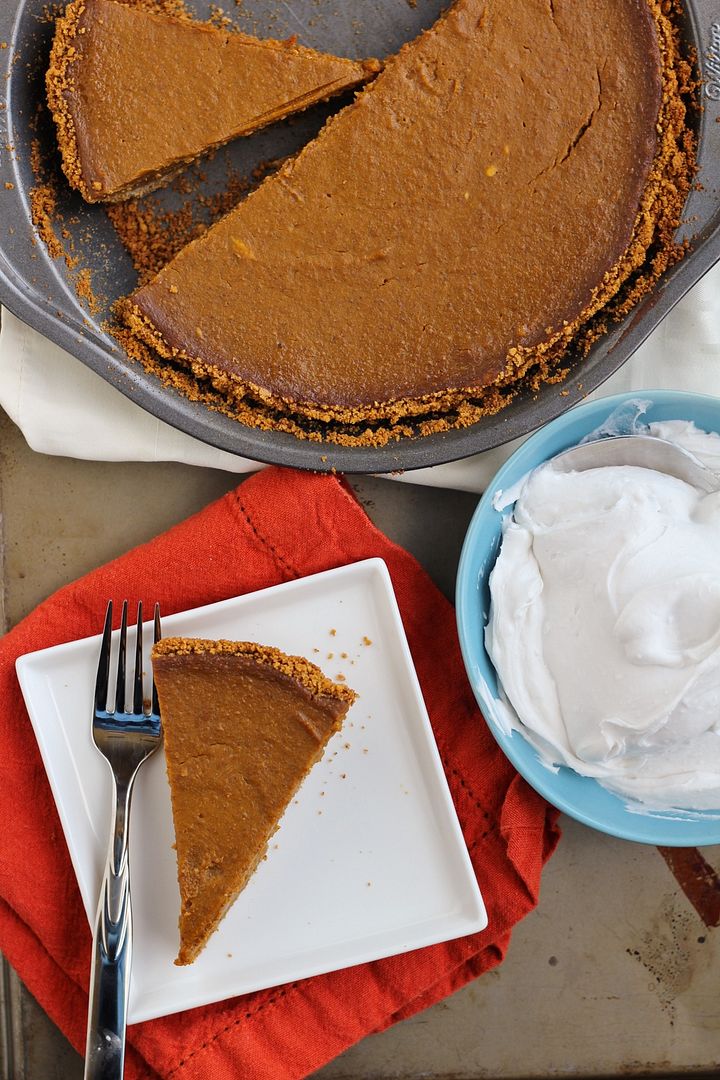
Healthy vegan pumpkin pie

This pumpkin pie is pretty healthy and also happens to be vegan.  The crust is made from low-fat graham crackers mixed with a bit of coconut oil, so the crust alone has a lot less "bad" fats than a typical butter or shortening-packed pie crust.  (Not that I have anything wrong with eating the occasional piece of traditional pie, but like I said, I wanted to make a healthier version!)  I could have made a healthier crust with nuts and dates but I wanted to keep this as easy and inexpensive as possible since we wanted it to be more of an every day dessert pie.

The filling is made up of pumpkin puree, unsweetened almond milk, no eggs, a reduced amount of brown sugar and some pure maple syrup for sweetening, cornstarch to help everything set, and of course the usual pumpkin spices.

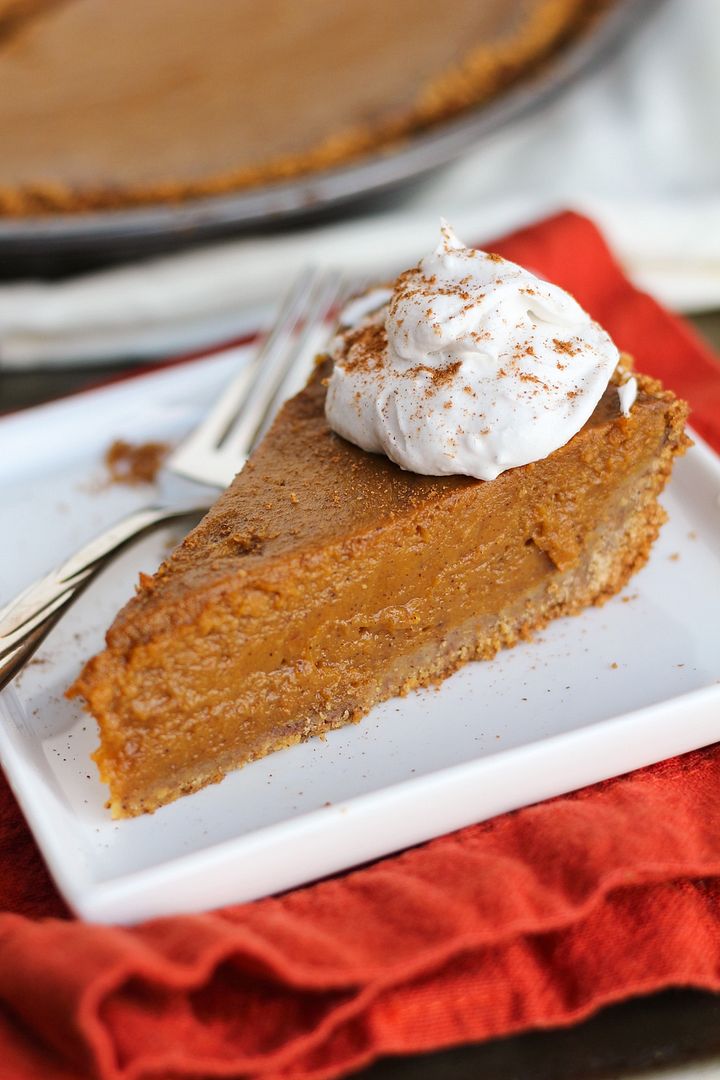
Healthy vegan pumpkin pie

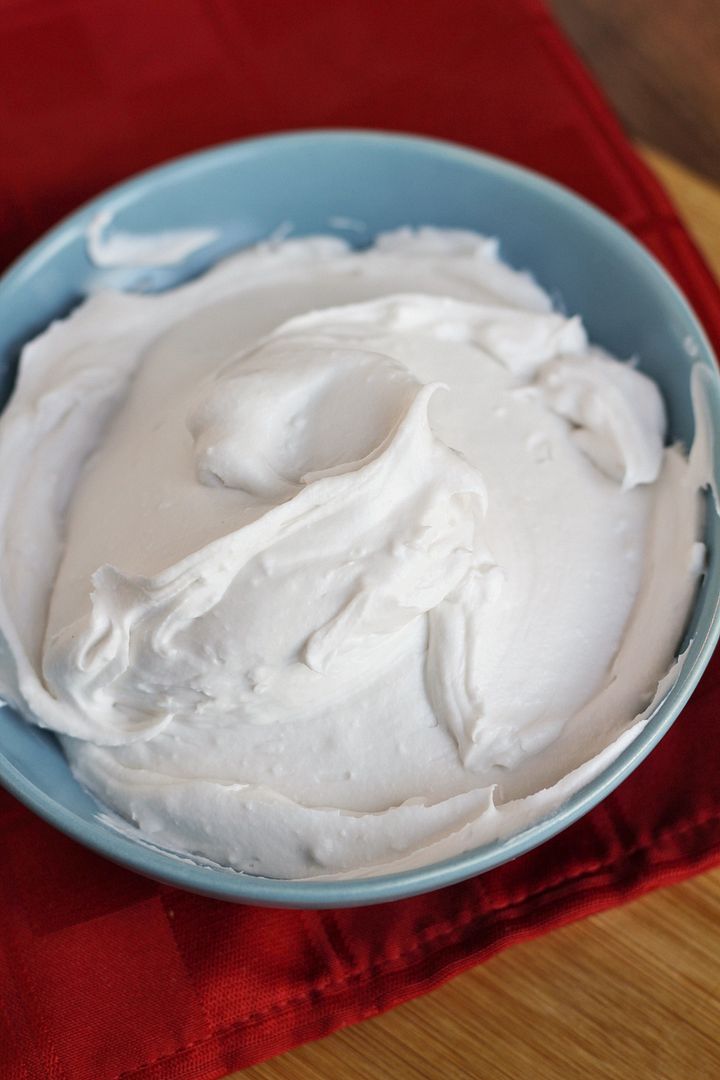
For a topping, I made a batch of coconut whipped cream, which is a great vegan alternative to traditional whipped cream!  To make it, you basically put a can of coconut milk in the fridge for a while so that the cream separates from the liquid, then you scoop out the coconut cream and whip it in a chilled bowl until it's fluffy.  It doesn't need much sweetener but I added a tiny bit of powdered sugar and vanilla extract to mine.  It tastes amazing and the slight coconut flavour really complements pumpkin pie!  Oh She Glows has a great tutorial for making whipped cream if you've never tried it before!

Coconut whipped cream

I was worried that either the taste or texture of this pie wouldn't turn out right but it turned out so much better than I'd even hoped!  It had a really nice bold pumpkin flavour from all the spices and addition of molasses (you can cut back if you don't like a lot of spice though!), the filling set perfectly and was smooth and creamy, and the crust sort of softened but stayed firm.  I won't say that it tastes exactly the same as a traditional pumpkin pie, but we both loved this and will likely be making it again soon!

With (Canadian) Thanksgiving quickly approaching, this would be a great dessert if you'll have any vegans at the table, or just want a lighter option after a big meal!

Healthy vegan pumpkin pie

Vegan Pumpkin Pie

Recipe inspired by and adapted from several sources, including Vegetarian Times, Minimalist Baker, and Oh She Glows

Makes one 9-inch pie

Ingredients:

For the Crust:
10 sheets of low-fat graham crackers (about 1.5 cups of crumbs)
1 teaspoon cinnamon
1/4 cup melted organic coconut oil

For the Filling:
2 cups canned pumpkin puree (not pumpkin pie filling)
1 cup unsweetened almond milk
3-1/2 tablespoons cornstarch
1/3 cup brown sugar
1/4 cup pure maple syrup
1 tablespoon molasses
1 teaspoon vanilla extract
1-1/2 teaspoons cinnamon
1/2 teaspoon ground ginger
1/4 teaspoon nutmeg
1/4 teaspoon sea salt

Directions:

Preheat oven to 350°F.  Lightly spray a 9” pie pan with non-stick cooking spray.

Pulse graham crackers in a food processor until they form fine crumbs. Transfer to a bowl and mix in the cinnamon with a whisk or a fork.  Add the melted coconut oil and mix together (I use a fork) until well combined.  Pour crumb mixture into the prepared pie pan and press evenly across the bottom and up the sides to form a pie crust.  Bake in preheated oven for about 7 minutes, then remove.  Leave oven on.
For the filling, mix all ingredients together in a large bowl, whisking together until just combined.  You could do the wet and dry ingredients separately if you like but I saved bowls and just mixed everything together in one.  Pour filling over the baked pie crust, return to oven, and bake for 55-60 minutes, until set. 
Remove from oven and let cool at room temperature for at least an hour, then transfer to refrigerator and let cool for 3-4 hours or overnight before slicing and serving.

Serve with coconut whipped cream, if desired.  Follow the link for instructions on making coconut whipped cream; note that your coconut milk will need to be in the fridge the day before so plan ahead!


September 19, 2014

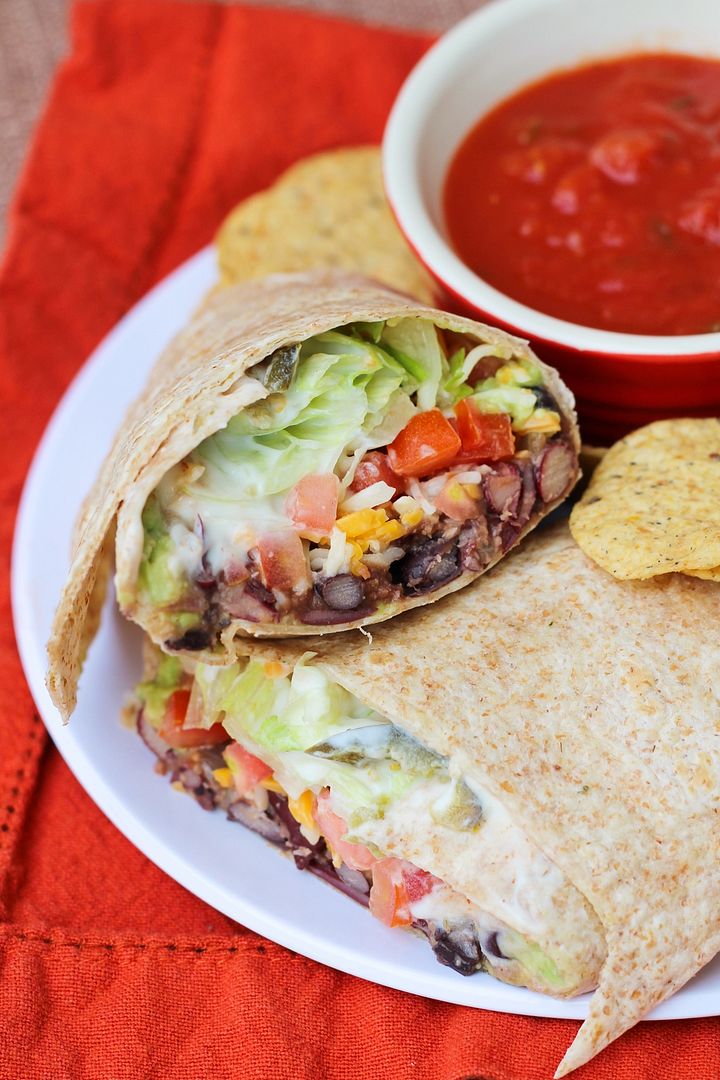
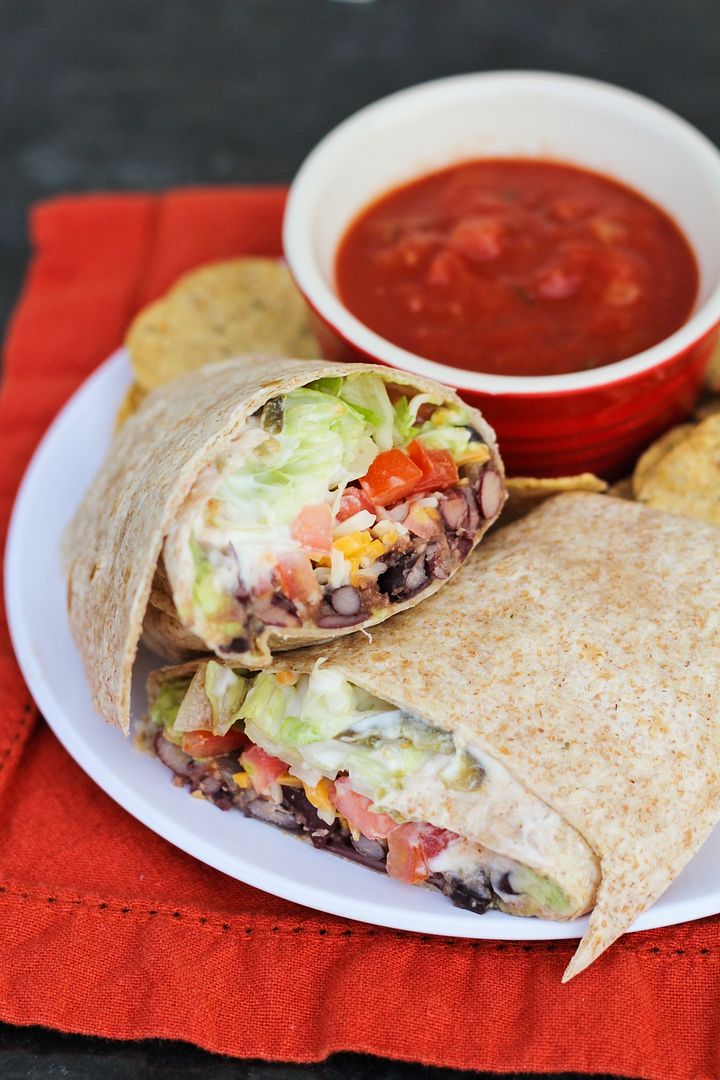
Chipotle Bean Burritos

Chipotle Bean Burritos

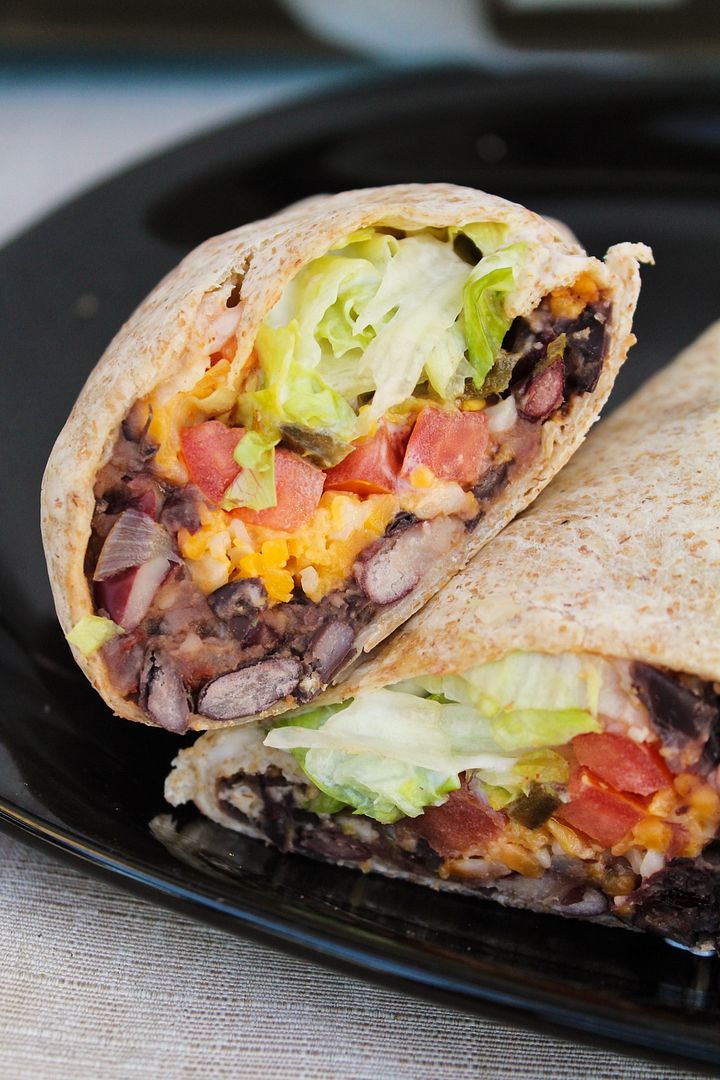
As much as I love cooking, I don’t like having to coordinate a bunch of dishes at once or cook multiple nights in a row, so meals that consist of one dish and make lots of leftovers are a favourite around here. And these burritos fit the bill perfectly!

I consider these a fairly healthy version of a burrito with beans instead of meat, some veggies, low-fat sour cream, not too much cheese, and whole wheat tortillas (which taste just as good as regular tortillas in my opinion!).

Chipotle Bean Burritos

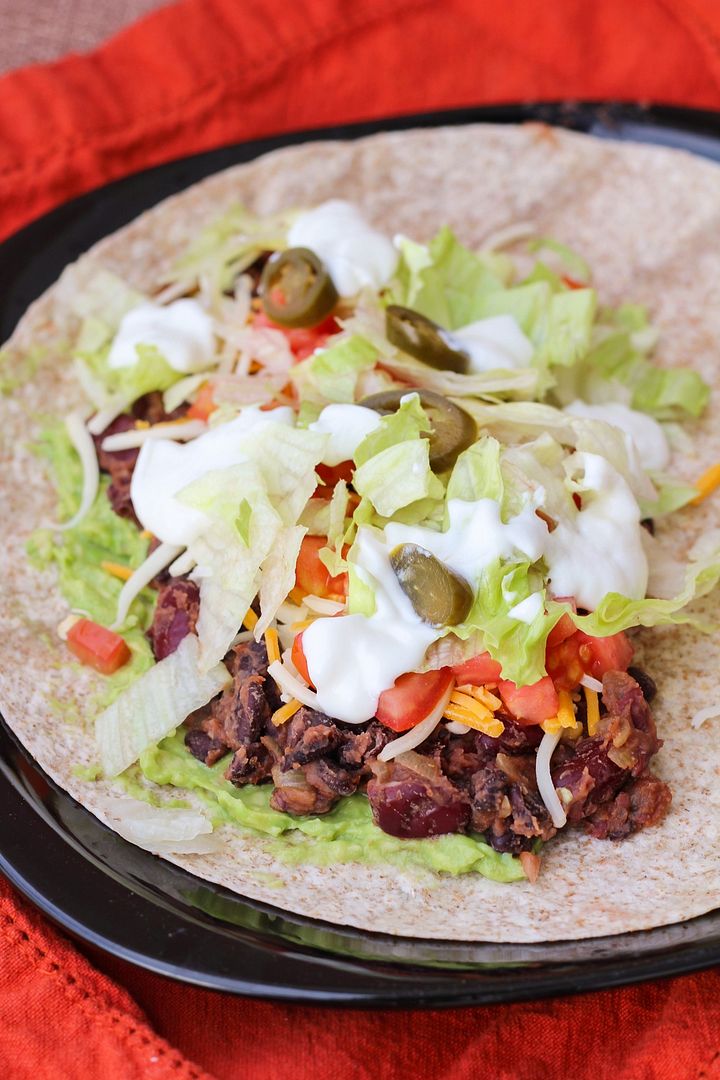
These also involve fairly minimal effort to make, and make six servings, which meant lots of leftovers for us!  To prepare them, a mixture of black beans and kidney beans gets cooked with some onion, garlic, vegetable broth, spices, chipotle sauce, and salsa to give it lots of flavour. It’s then rolled up with lettuce, tomatoes, mashed avocado, cheese, sour cream, a few pickled jalapenos, and some chipotle hot sauce for a packed and flavour-filled meal-in-one.

Chipotle Bean Burritos

We ate these three nights in a row this week and liked them more each time. That may have to do with my getting much better at rolling them with more practice (the last picture was the third night’s burrito which I thought looked much better than the first!)

Ryan commented on how good these are each time too and said they’re way better than beef burritos, and I’d have to agree! (though I don’t like beef anyway, so I’m a little biased)

Chipotle Bean Burritos


Chipotle Bean Burritos

Adapted from Cooking Light

Serves 6

Ingredients:

For the bean mixture:
1 teaspoon canola or olive oil
2 cloves of garlic, minced
1 small yellow onion, diced
1/2 teaspoon chipotle chile powder*
1/4 teaspoon salt
1/2 cup vegetable broth
1 (540mL) can black beans, drained and rinsed
1 (540mL) can kidney beans, drained and rinsed
1/2 cup chunky salsa – Mild or medium depending on your preference.  You could also use a chipotle salsa for more chipotle flavour!
2 teaspoons chipotle chile in adobo

Remaining burrito ingredients:
6 large (10-inch) whole wheat tortillas
2 large or 3 small ripe avocados
~1 cup shredded cheddar or monterey jack cheese (or a blend of cheese)
3 plum tomatoes, diced
1-1/2 to 2 cups shredded iceberg lettuce
~1/4 cup pickled jalapenos, optional
~6 tablespoons low-fat sour cream
Chipotle or regular hot sauce, optional

*I get chipotle chile powder at the bulk store.  If you can't find it, you can use a combination of regular chile powder and some cumin for spice.

Directions:

Heat oil in a large non-stick saucepan over medium heat.  Add onion and saute about 5 minutes, stirring often, until translucent and starting to turn golden brown.  Add garlic and saute for 30 seconds.  Add chile powder and salt and stir to coat for another 30 seconds.  Stir in vegetable broth and beans and bring to a boil.  Let simmer about 7-10 minutes, or until no liquid remains. Remove from heat and stir in salsa and chipotle sauce.  Partially mash mixture.

Warm tortillas up for about 30 seconds in the microwave, wrapped in damp paper towel, so they are easier to roll.  To form burritos, spread 1/6 of the bean mixture (so it divides evenly among 6 burritos) onto one half of the tortilla, leaving about a 1-inch border.  Top with avocado, cheese, tomatoes, lettuce, pickled jalapenos, sour cream, and hot sauce (again dividing evenly among 6 burritos).  Roll up the side closest to the filling, then fold in each end, and roll the burrito toward the empty side of the tortilla, wrapping the filling completely.  Others prefer to fold in the sides of the burrito first, then roll up from the bottom.  I've also seen starting with the filling in the middle.  Use whatever method works for you but make sure to roll tightly and keep the filling in!

Serve while filling is still slightly warm.  I like to warm my completed burrito up in the toaster oven for a couple minutes before eating to make sure it's warm throughout.

If you have leftovers, keep everything separate.  Warm bean mixture up in the microwave and then prepare burrito as before.

September 15, 2014

Monthly Recap - July/August 2014

 photo IMG_7896-2_zpsb776dfa2.jpg

As I mentioned in my last post, I spent much of the summer working on my dissertation, so I don't have a lot to share in the way of exciting activities or elaborate dishes, but we still enjoyed lots of summery meals and treats which I thought I'd share in a combined July and August monthly recap post!

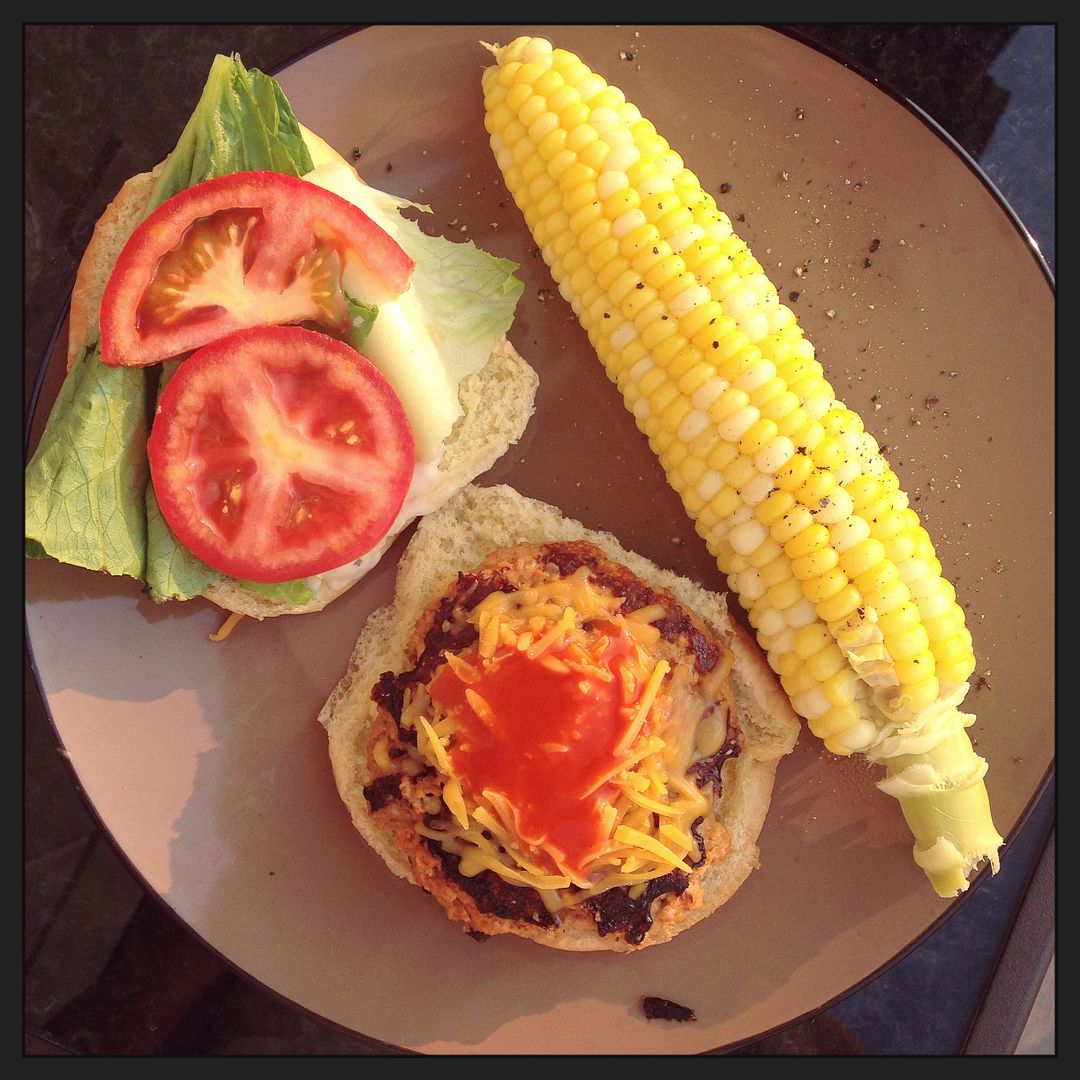
corn and turkey burger

Meals like this were a staple this summer - fresh, local corn on the cob and burgers. Turkey burgers are one of the easiest meals for me to make and they're pretty healthy too. These are my favourite buffalo turkey burgers that we make all the time!

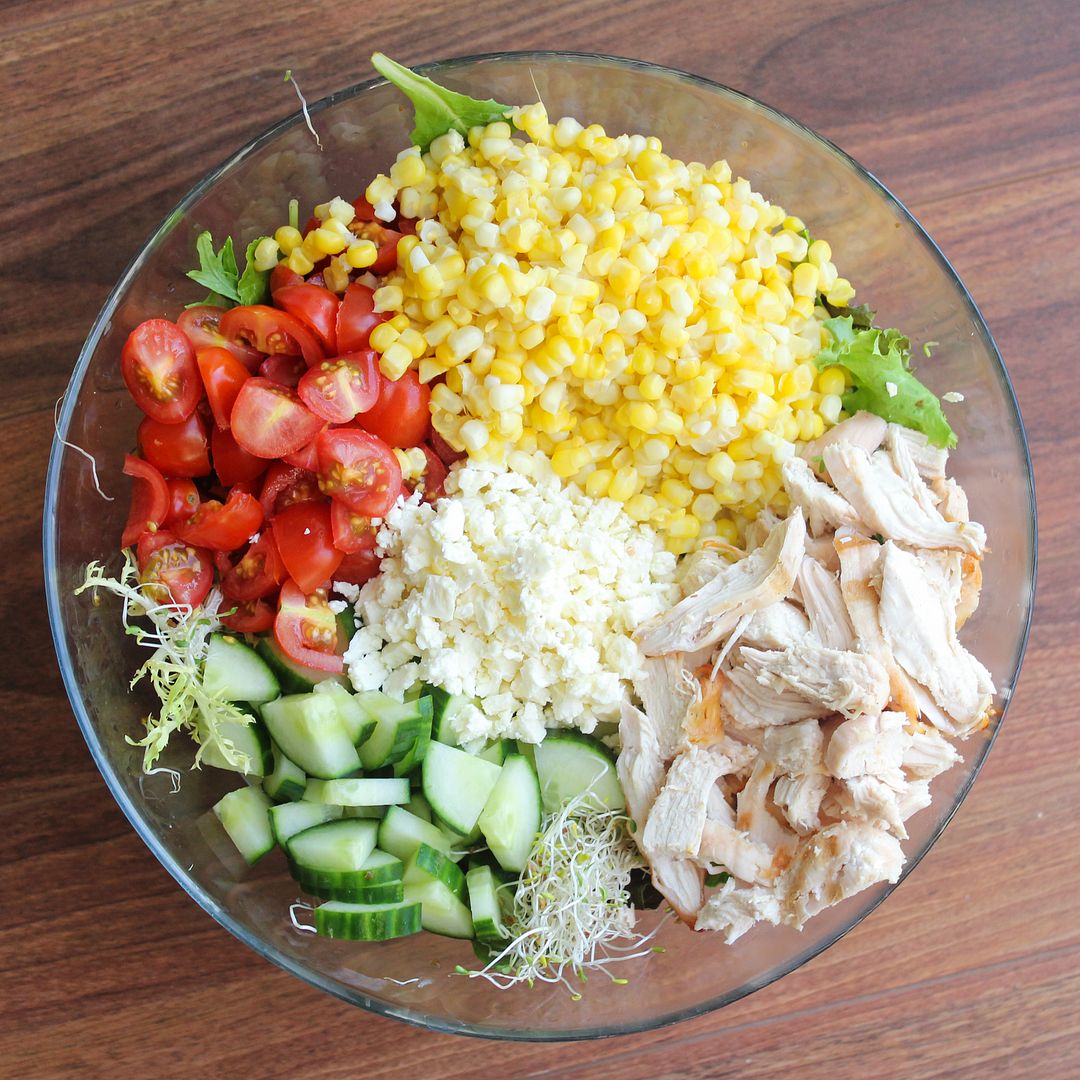
chicken tomato corn feta salad

Salads are also easy to make and let fresh summer produce shine through. I love this combo of chicken, corn, tomatoes, cucumber, and feta cheese.

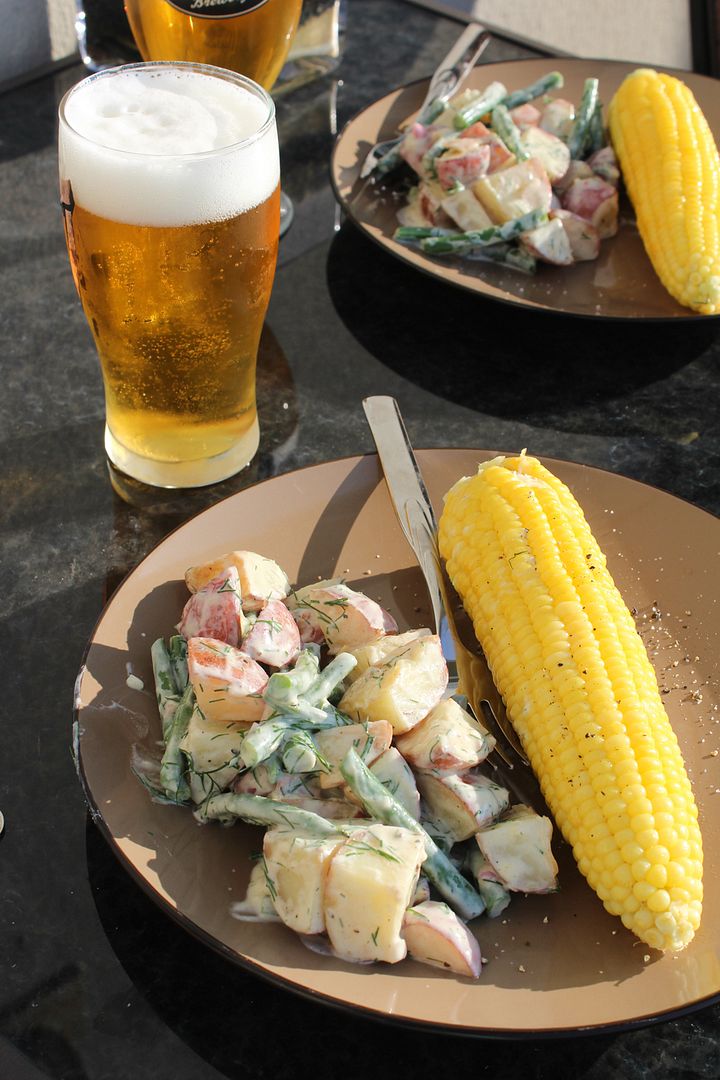
potato salad and corn

Here's another great summer meal, once again involving corn, with a variation on my warm dijon roasted asparagus and potato salad using dill instead of parsley and green beans instead of asparagus.  I love the mustard-yogurt dressing on this in place of mayo!

tex mex quinoa casserole

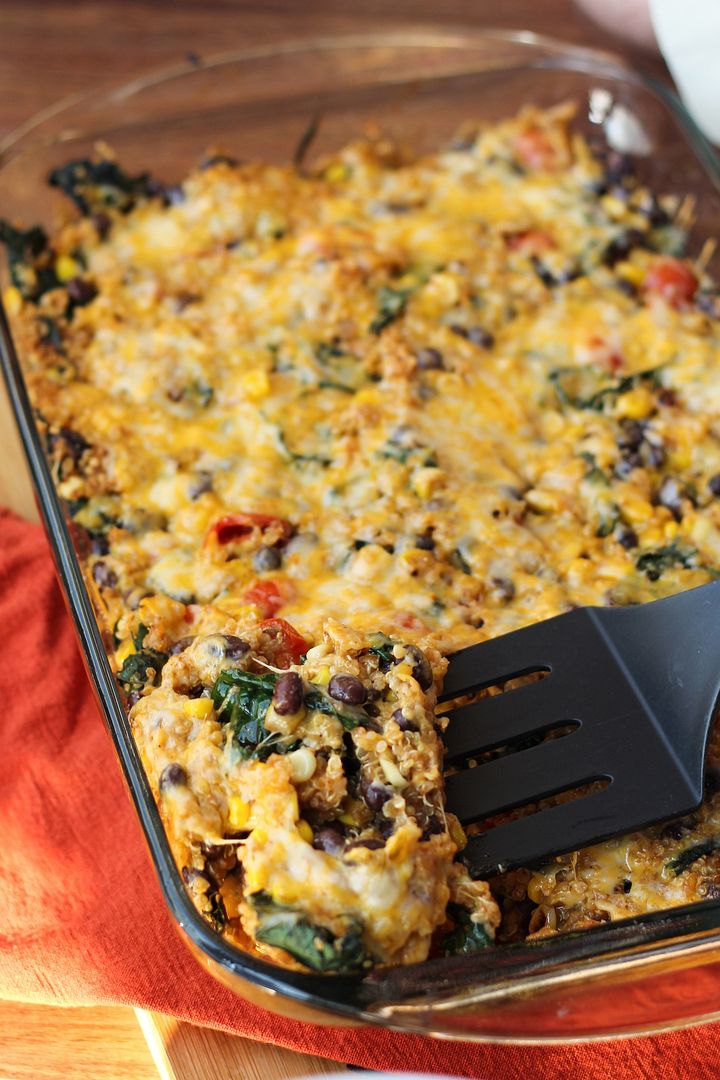
When I had time to cook I tried to make something that would give us a lot of leftovers (and thus days off cooking)! I loved this quinoa casserole I threw together with what we had in the fridge one night. I just cooked a box of quinoa in chicken broth then stirred in a little tomato paste, cumin, and chili powder. Then I sauteed some onion, garlic, corn, and kale in a separate pan, stirred in black beans, tomatoes, salsa, and more cumin and chili powder (and salt and pepper), stirred it all together with some shredded cheese, transferred it to a baking dish, topped with some more cheese, and baked in the oven for about 20 minutes (15 covered, 5 uncovered) at 375.  I plan on making something similar again soon so I can share it as an actual recipe!

baked pesto pasta

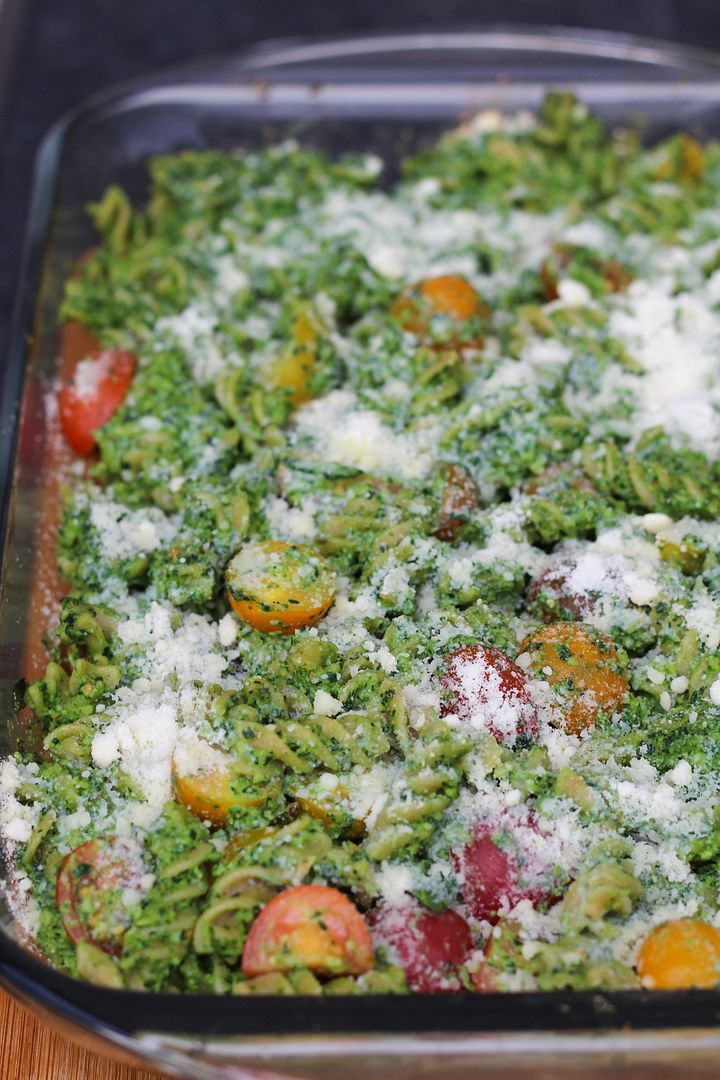
We also loved this baked pesto pasta from Pinch of Yum, which gave us lots of meals! The pesto was packed with spinach, kale, and basil, then tossed with whole wheat pesto, tomatoes, and a little cheese for a healthy and filling meal!

carrot salad with tahini dressing, crispy chickpeas, and baked turkey meatballs

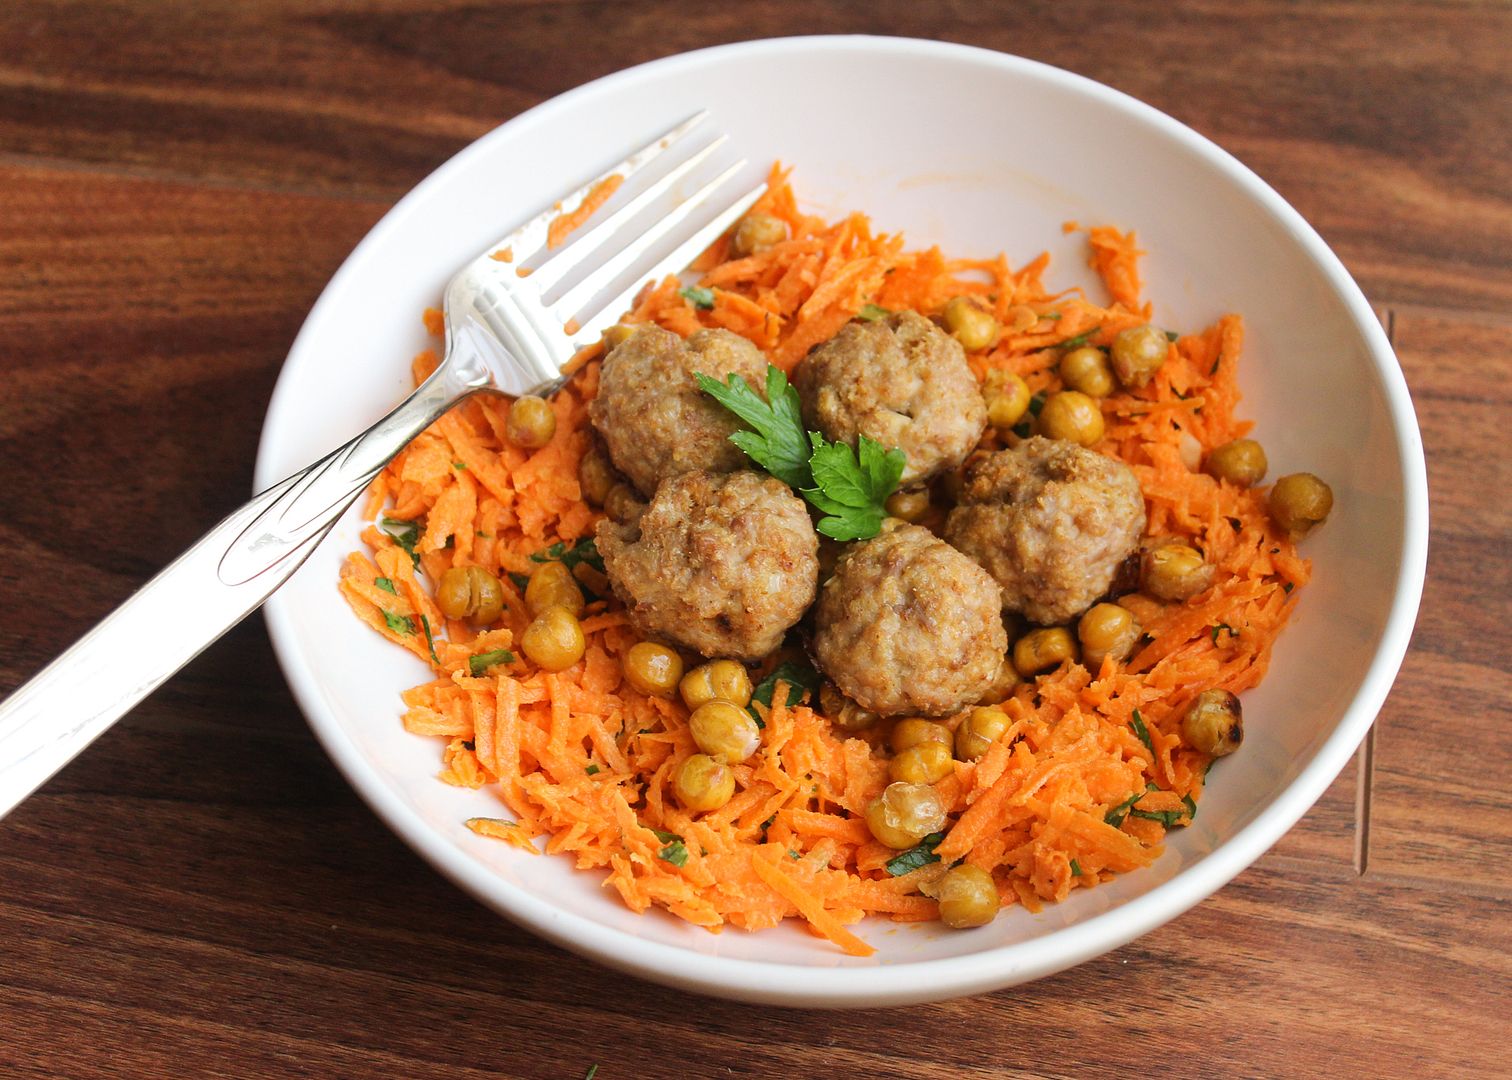
This carrot salad with a tahini dressing, crispy spiced chickpeas, and baked sesame turkey meatballs from Smells Like Home (click for the recipe) might sound a little weird but was one of my favourite new dishes I've tried recently. The flavours and textures all worked together so well and I loved that it was a balanced and healthy meal. I plan on making it again soon!

strawberry, feta, spinach quinoa salad

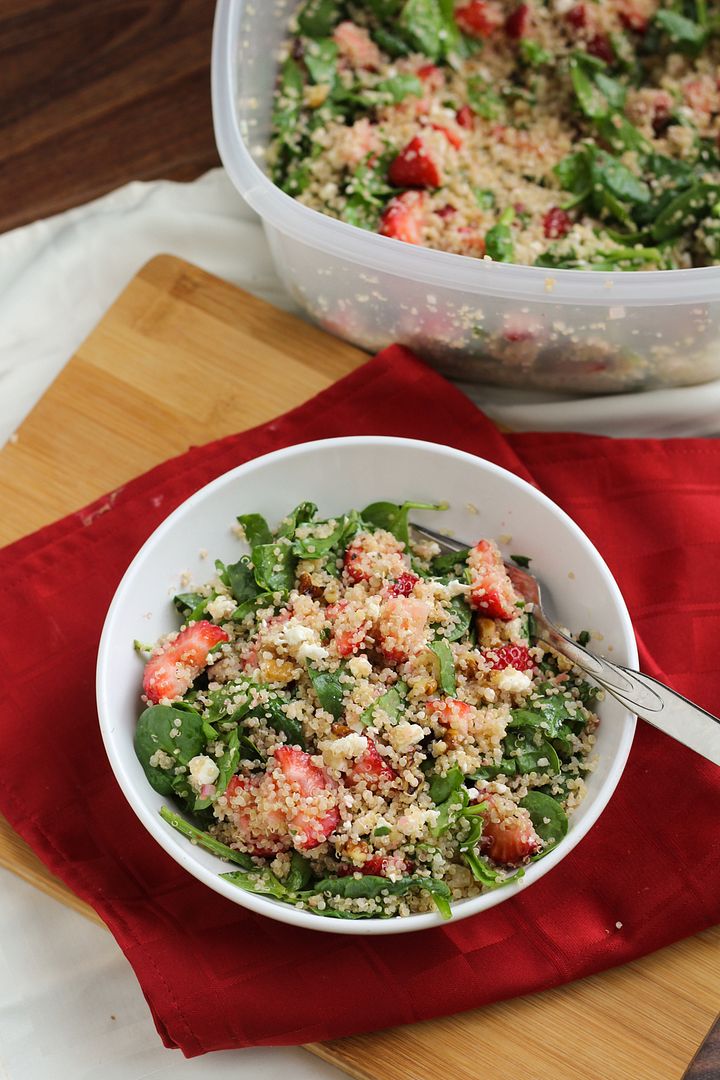
I made this quinoa salad with strawberries, spinach, feta, and pecans for a strawberry social potluck my lab held earlier this summer. It was light and tasty but I thought it needed a bit more flavour so I didn't share the recipe on here. I'll have to try again next summer; too bad strawberry season is so short!

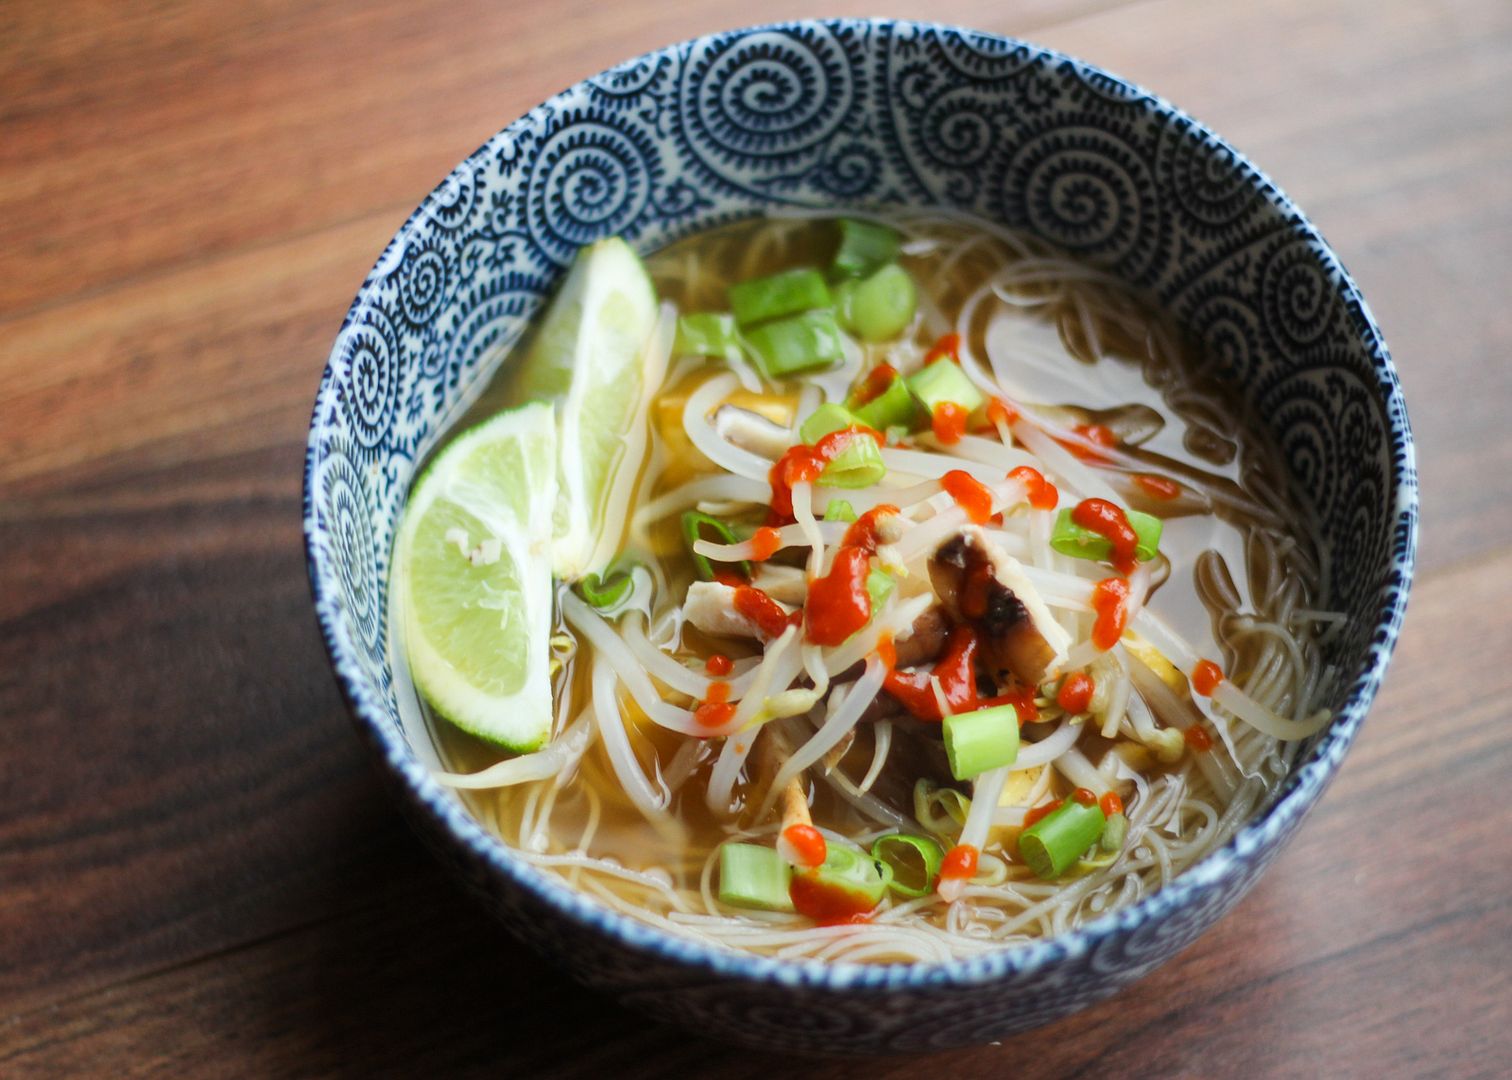
vegetarian pho

When my whole family started to come down with colds in August, I made a big batch of vegetarian pho to try to fight it off. I haven't tried a traditional pho before, mostly because I'm not a fan of the meat that comes in it, so it was hard to compare this version but I didn't think it tasted quite right (though we did manage to fight off our colds!). If anyone has a great vegetarian pho recipe, please share!

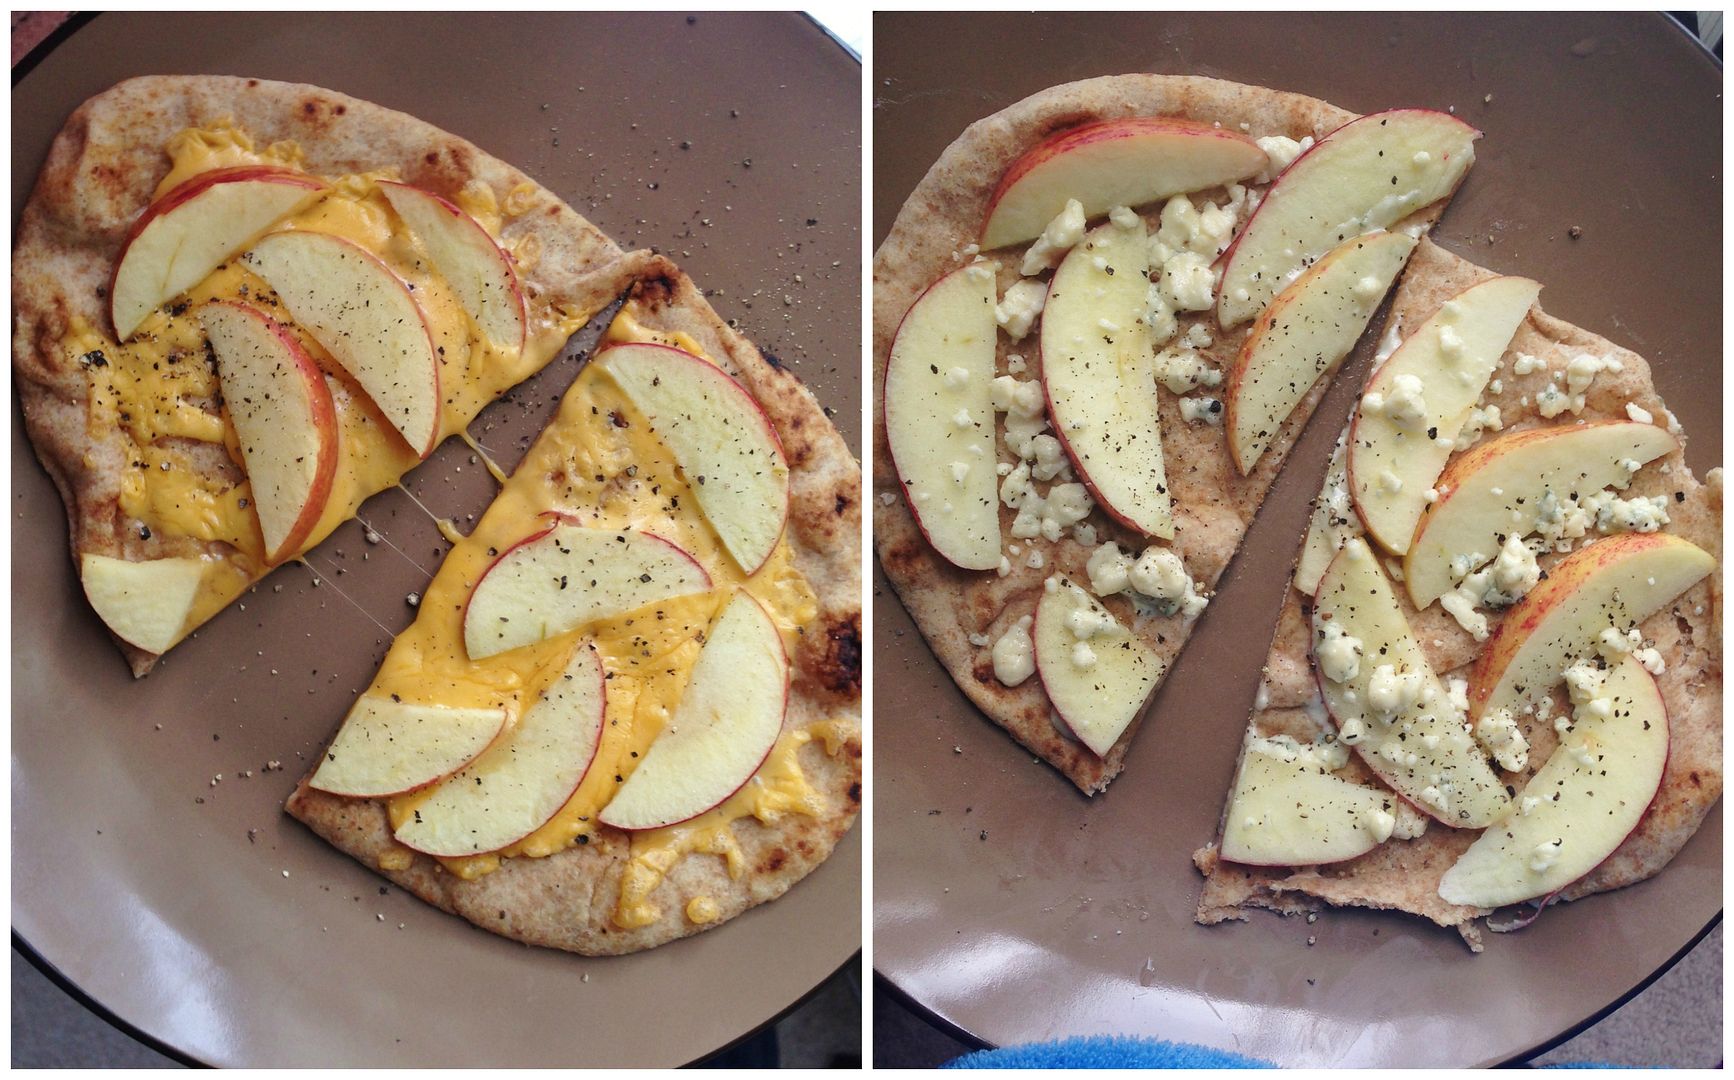
 apple and cheese naan pizzas

Naan pizzas are one of my go-to quick and easy light meals when I don't have time to cook. I love the combo of apples and cheese!

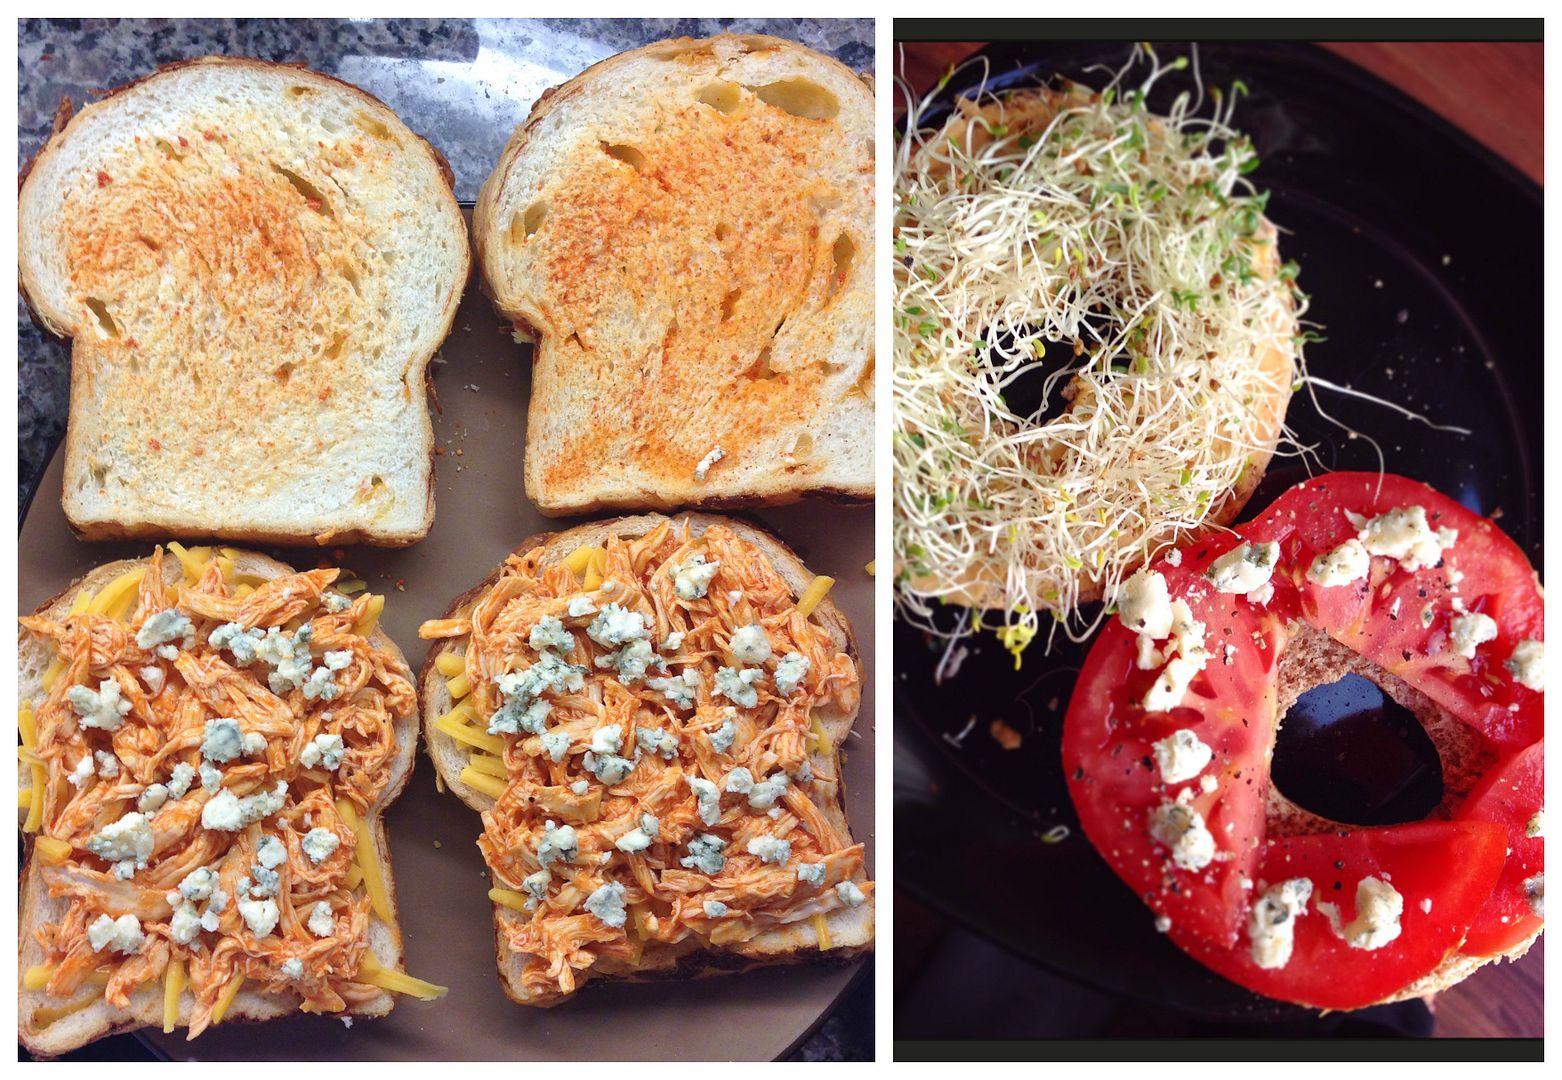
buffalo chicken sandwich and tomato hummus bagel sandwich

I also ate a lot of sandwiches. Pictured on the left above is a buffalo chicken and blue cheese grilled cheese, and on the right is a whole wheat bagel sandwich with hummus, sprouts, tomatoes, and a little blue cheese. Both so good!

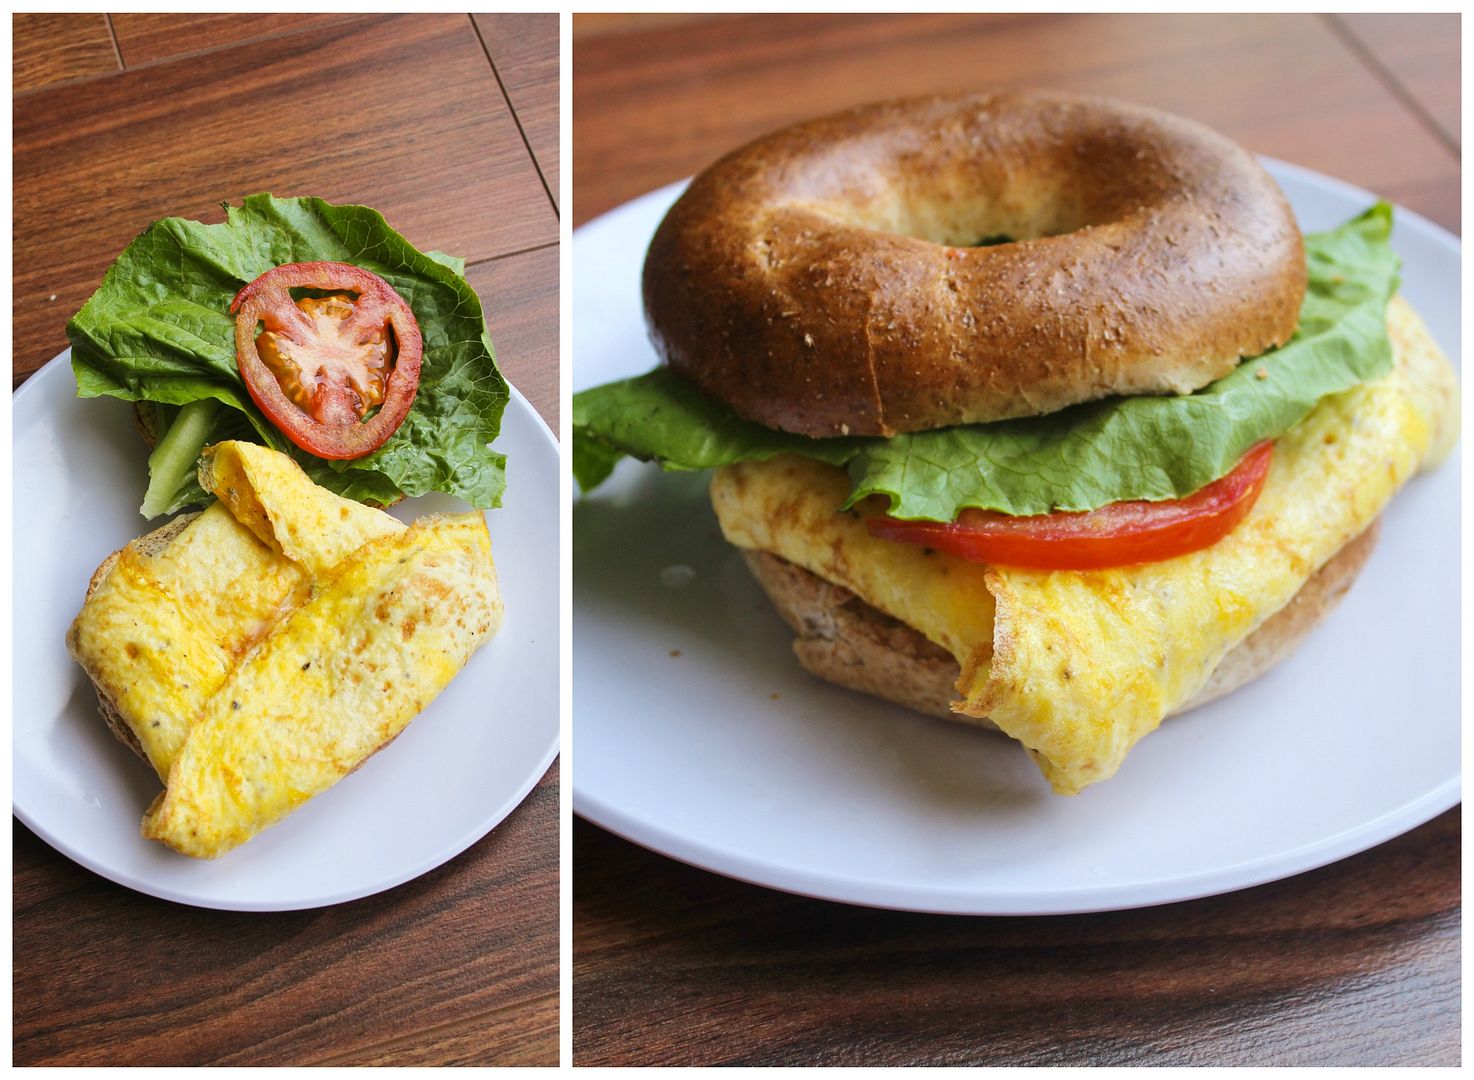
breakfast bagel egg sandwich

And a breakfast version of a bagel sandwich - I follow this method for making a little omelette and cheese egg that fits perfectly on a sandwich with a little lettuce and tomato!

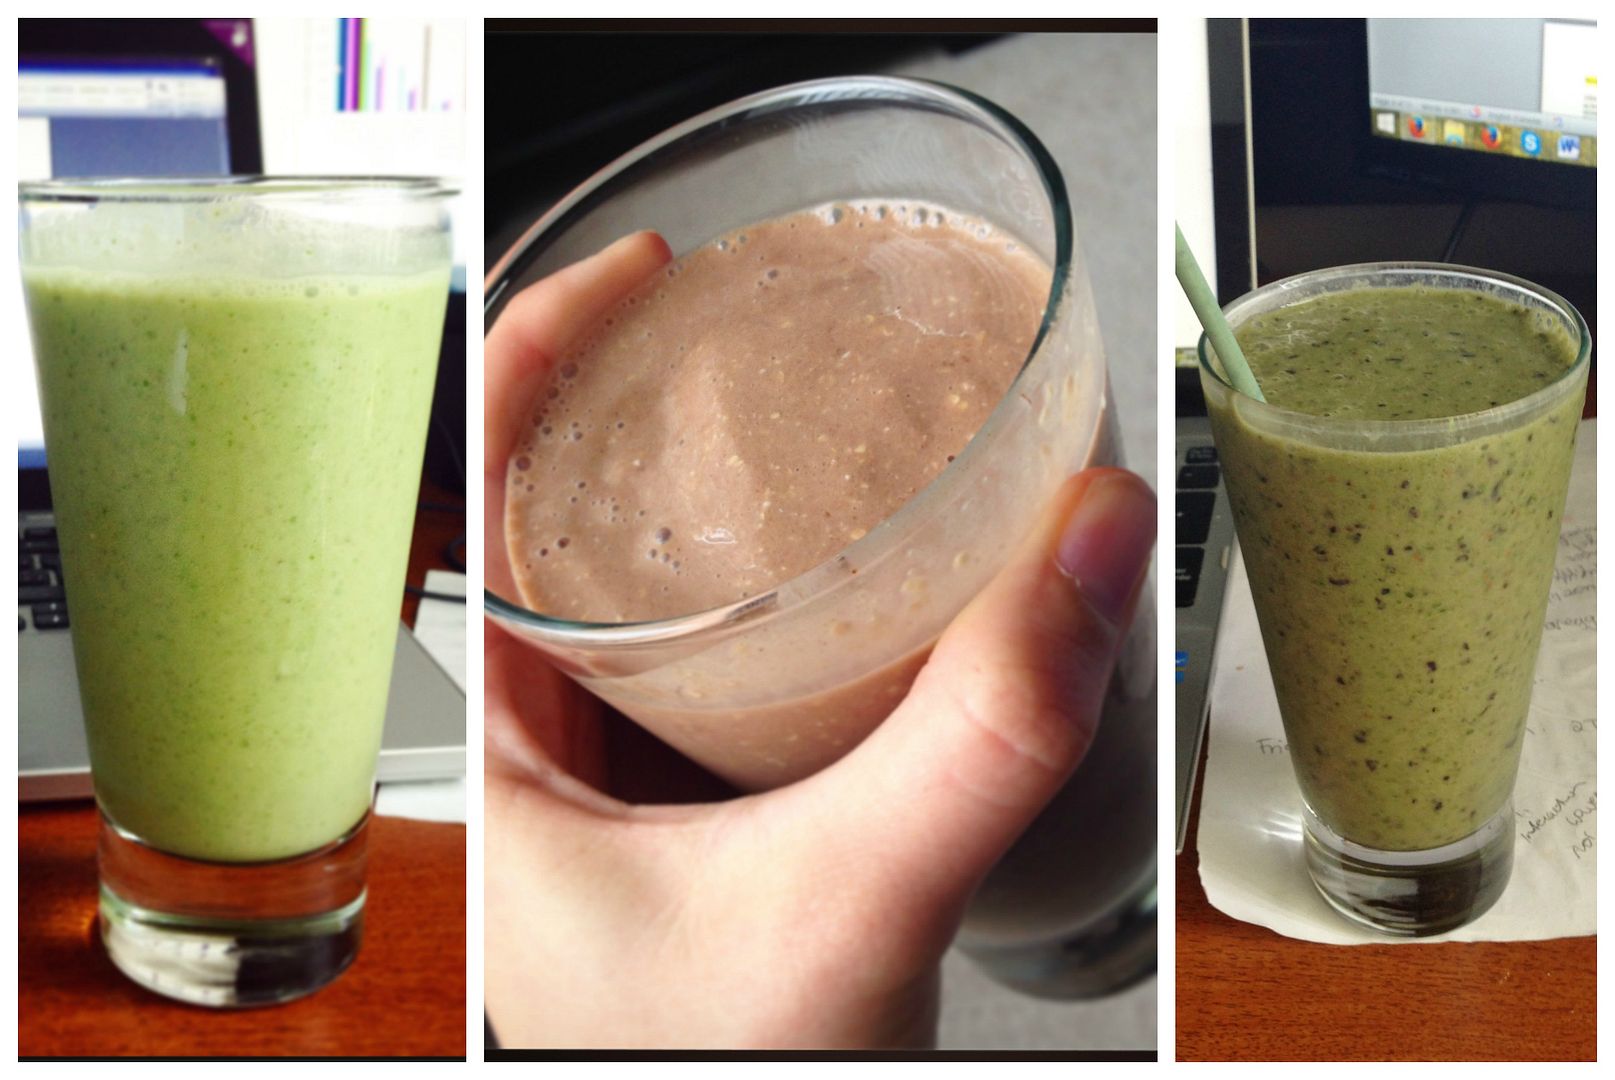
smoothies

When I was working from home I drank lots of smoothies to power me through! I always start with a frozen banana, oats, and almond milk, then I'll throw in some combination of powdered peanut butter, cocoa powder, raw honey, spinach, or berries. I also love adding instant coffee for a little pick me up!

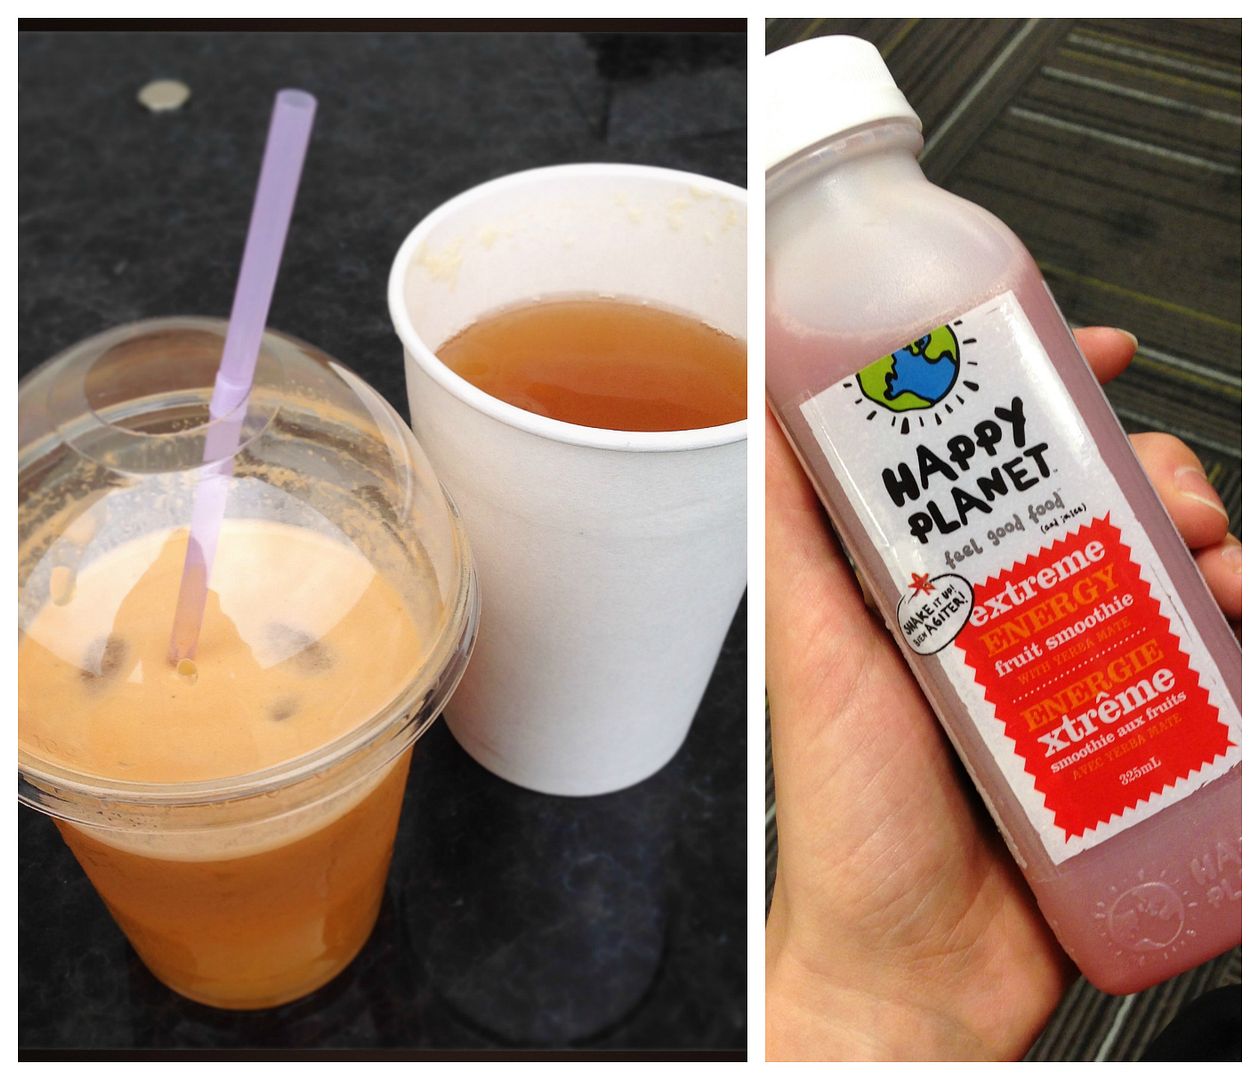
healthy juices

Fresh fruit juices (pictured is a beet, carrot, and cucumber juice), kombucha drinks, and fruit smoothies also gave me writing energy!

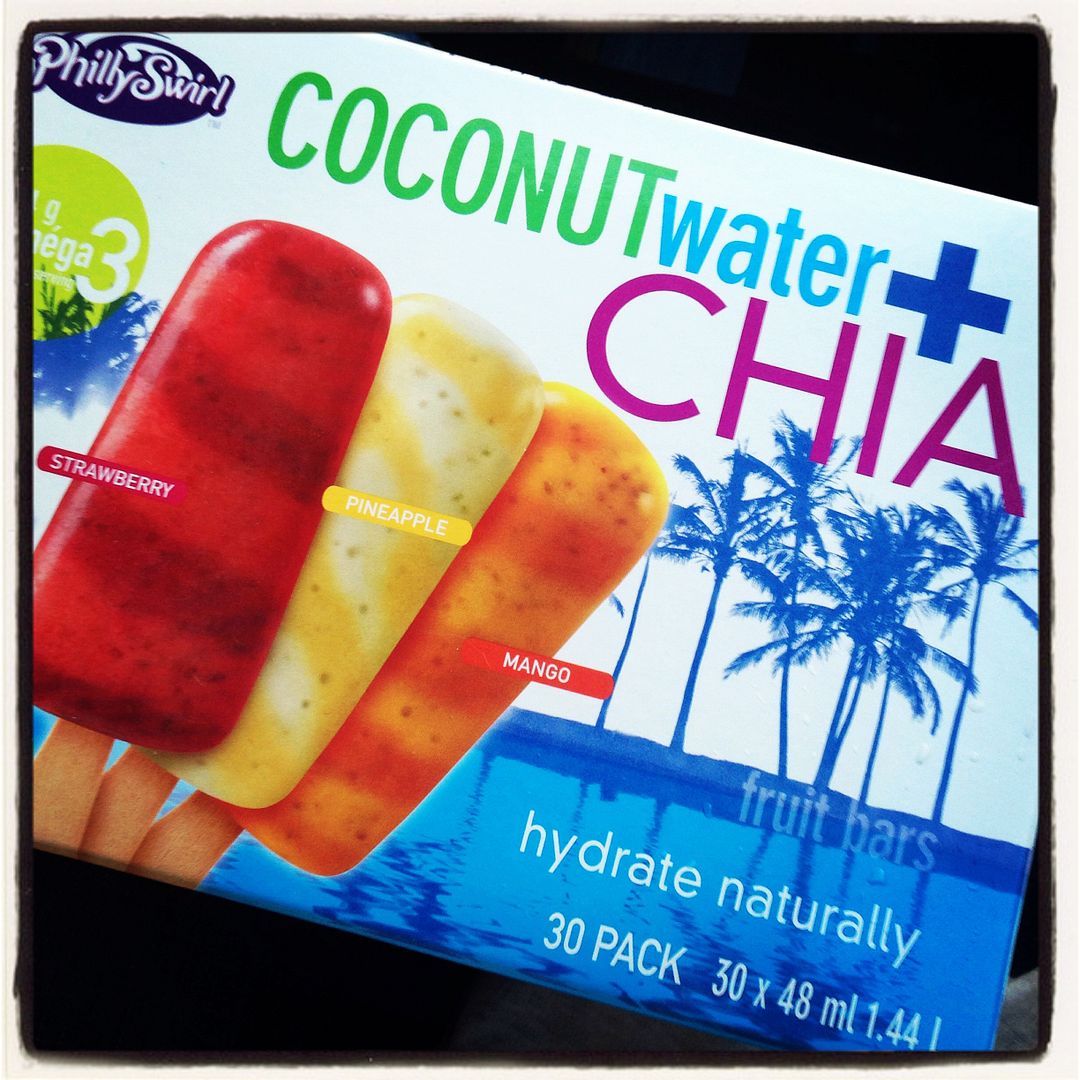
coconut water chia popsicles

These coconut water and chia popsicles I got at Costco were a great refreshing snack!

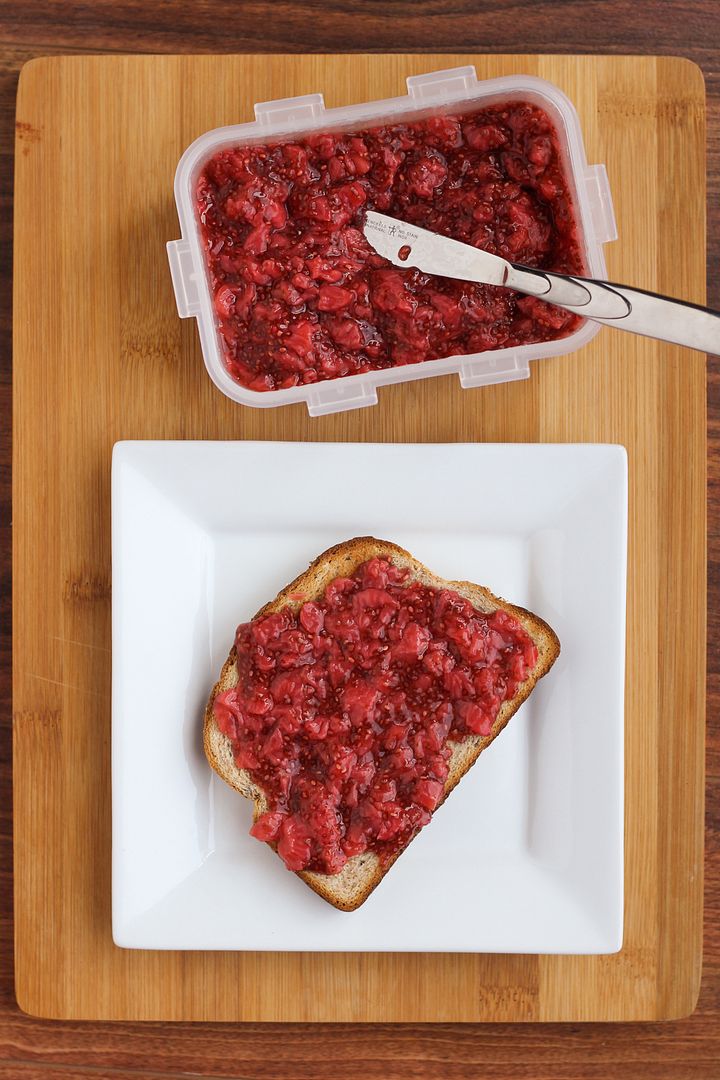
strawberry chia jam

I love chia seed jam because it uses so much less sugar than traditional jam and adds in the nutritional benefits of chia seeds. I only made one batch this year (using local strawberries, some raw honey, and chia seeds) but wish I'd made more!

I made a few treats for social gatherings too...

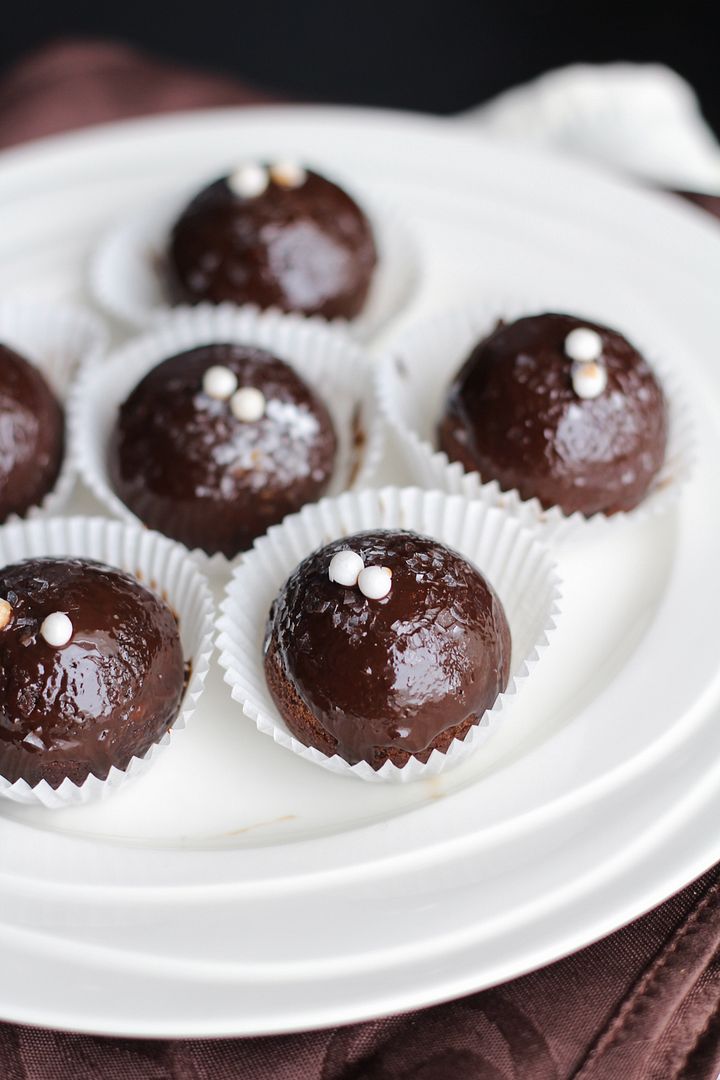
guinness chocolate cake balls

I finally used my babycakes cake pop maker to make some chocolate guinness cake balls using a recipe from their cookbook. No cake mix or canned frosting or having to roll the two together and put them on a stick like I've done with cake pops in the past - I loved these!

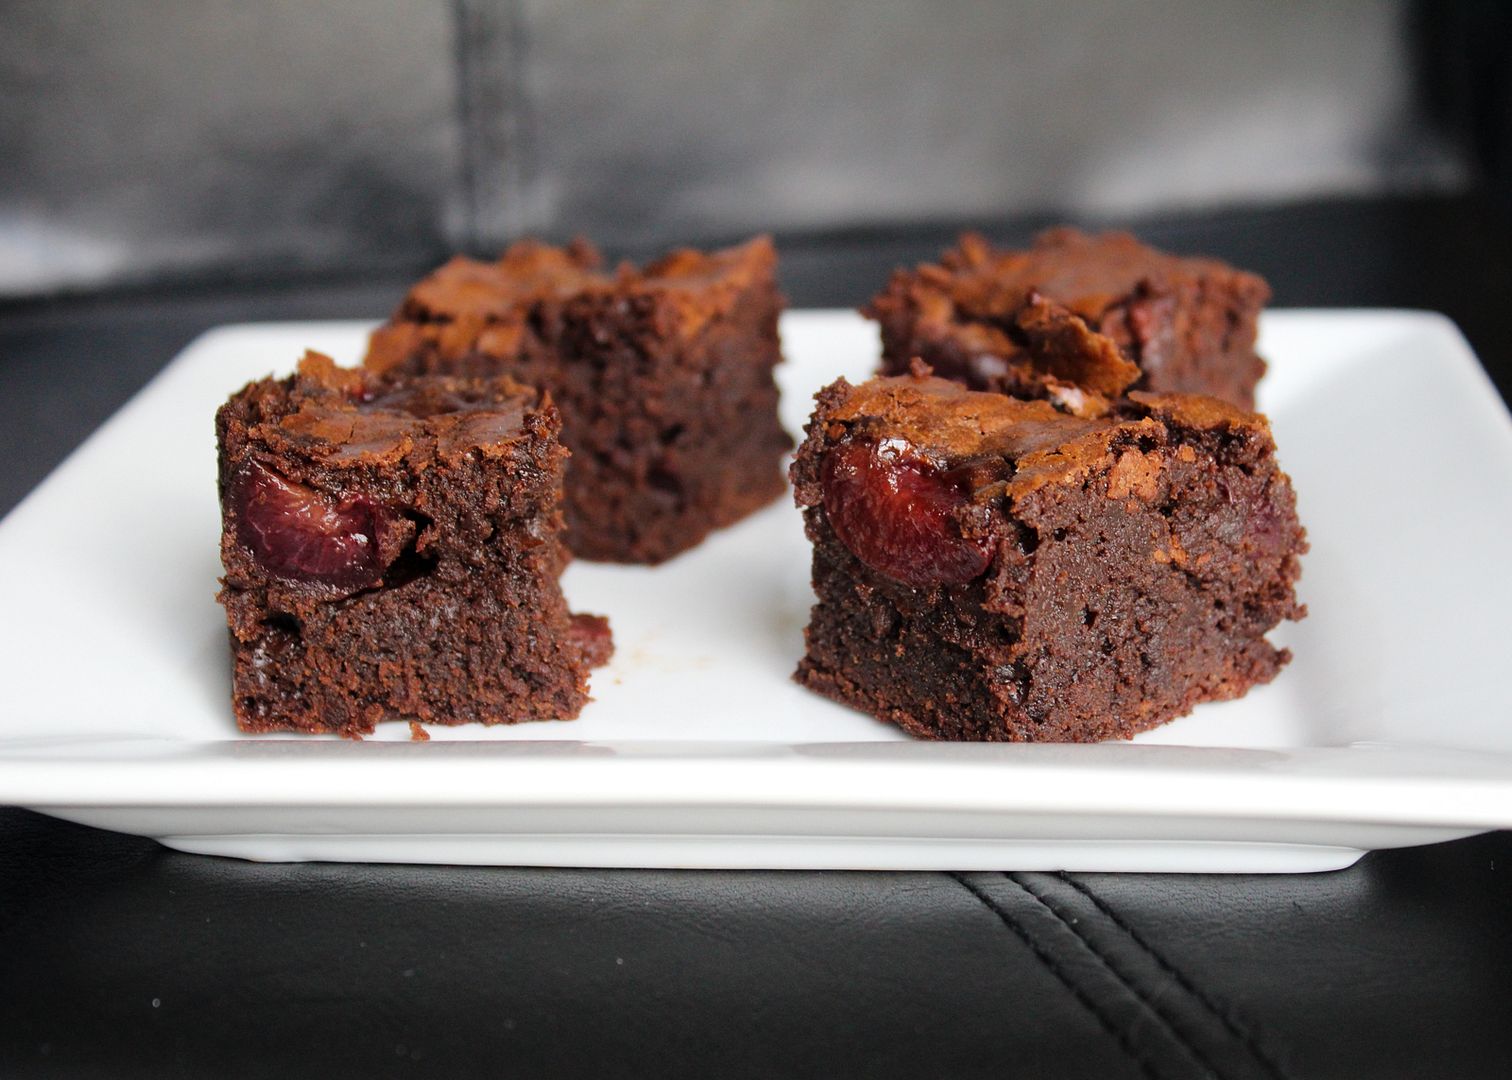
roasted cherry brownies

I've made these roasted cherry brownies in the past and made them again for an event this summer. They're rich, dense, and chocolatey but with bursts of sweet roasted cherries to balance them out.

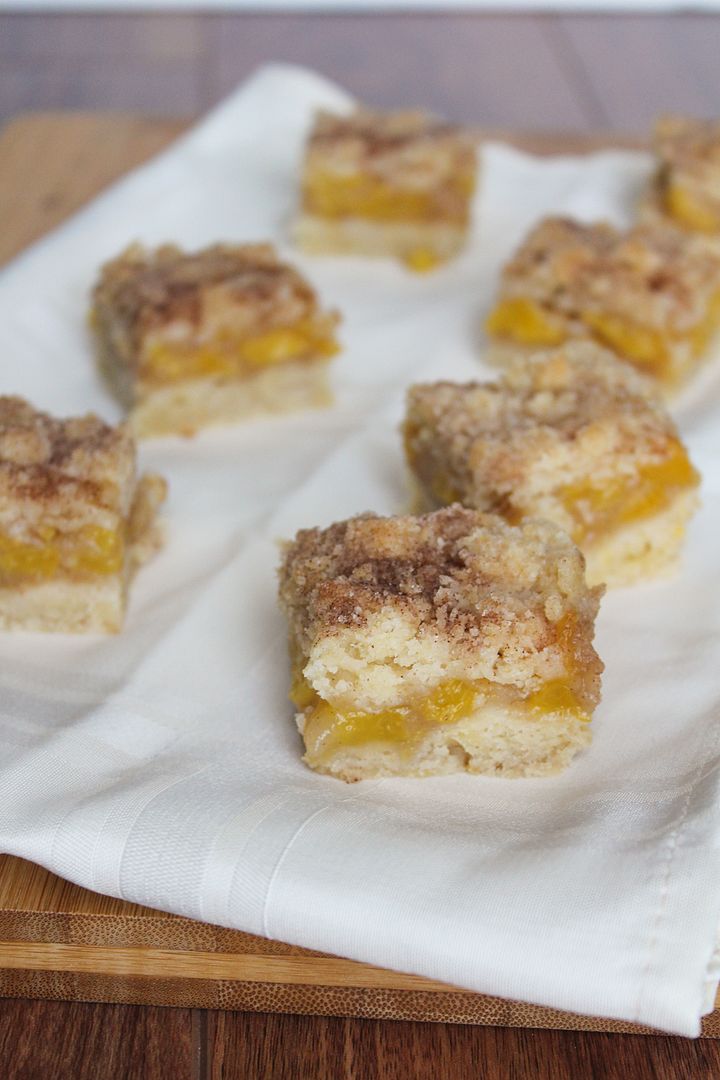
peach crumb cake bars

I tried these peach crumb bars from Two Peas & Their Pod for the first time and they were delicious (though I'd call them cake squares rather than bars). It's probably a little late in the year to be recommending them now but you should save this recipe to try for next peach season!

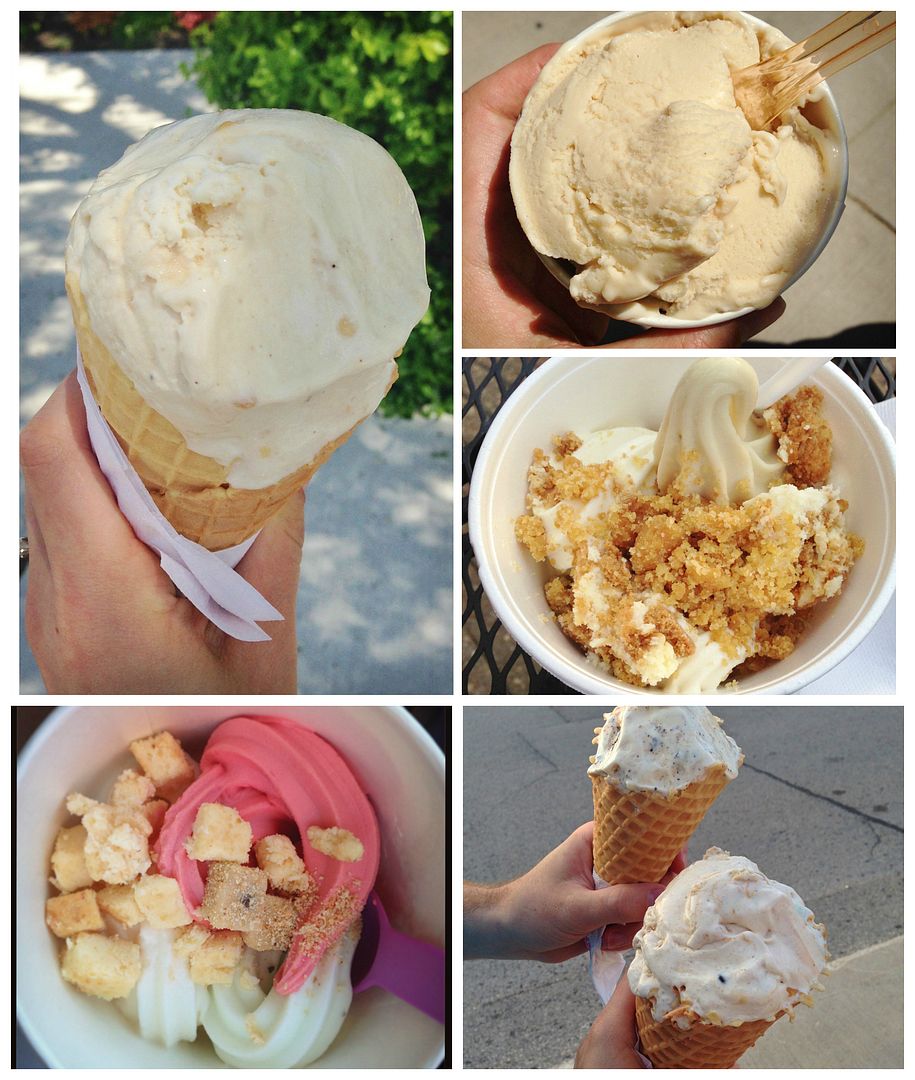
ice cream and frozen yogurt

I also treated myself to lots of ice cream/frozen yogurt breaks!

star trail photography

I tried star trail photography for the first time one summer night and loved how it turned out. It takes a few hours to get one picture though so I didn't get another chance to try it but look forward to doing it again next summer!

Looking back on all this food makes me wish for summer weather and food to come back and stay a little longer, but I'm also excited to start working with fall ingredients now! Hope everyone had a great summer!

September 09, 2014

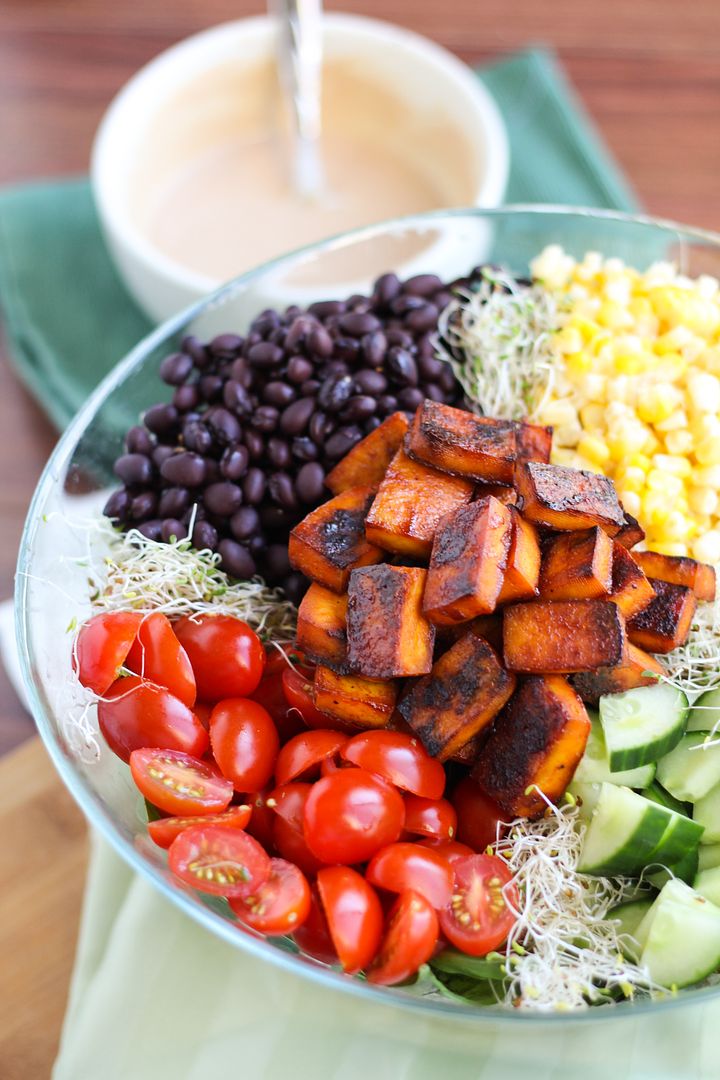
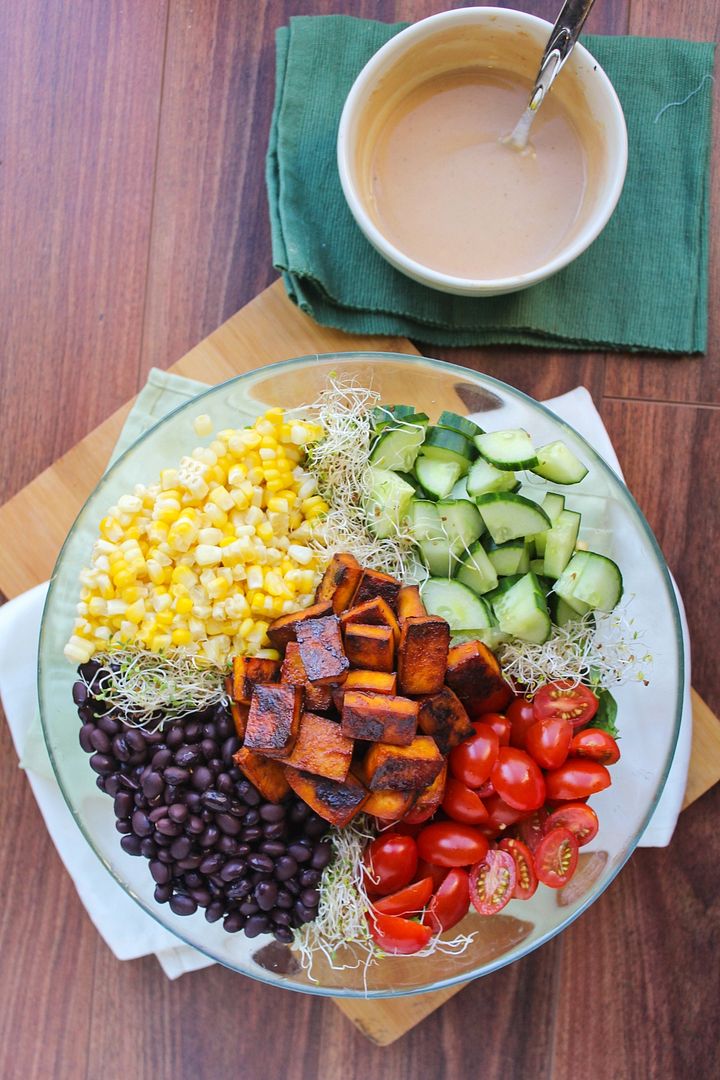
BBQ Tofu, Bean, Tomato & Corn Salad w/ BBQ Yogurt Dressing

BBQ Tofu, Bean, Tomato & Corn Salad with BBQ Yogurt Dressing

I'm back!

I didn't intend to take such a long absence from this blog, but my summer ended up being entirely taken over by working on my PhD dissertation, and I didn't have time to even go outside many days let alone create and photograph recipes or write blog posts.  Now that I've handed it in (one step down!) I'm hoping to have a little more time for blogging!

BBQ Tofu, Bean, Tomato & Corn Salad with BBQ Yogurt Dressing

Needless to say, most of my meals this summer consisted of quick and easy dishes, which included a lot of salads!

This bbq tofu salad was a little more time consuming because of the steps involved in preparing the tofu (pressing the water out, marinating it, and baking it), but it's worth it!  I follow Oh My Veggies' recipe for baked barbecue tofu which is my favourite way to eat tofu.  She calls it 'tofu for tofu haters' and I agree; I used to think I hated tofu until I tried it this way, so if you think you hate it too, give this a chance!

BBQ Tofu, Bean, Tomato & Corn Salad with BBQ Yogurt Dressing

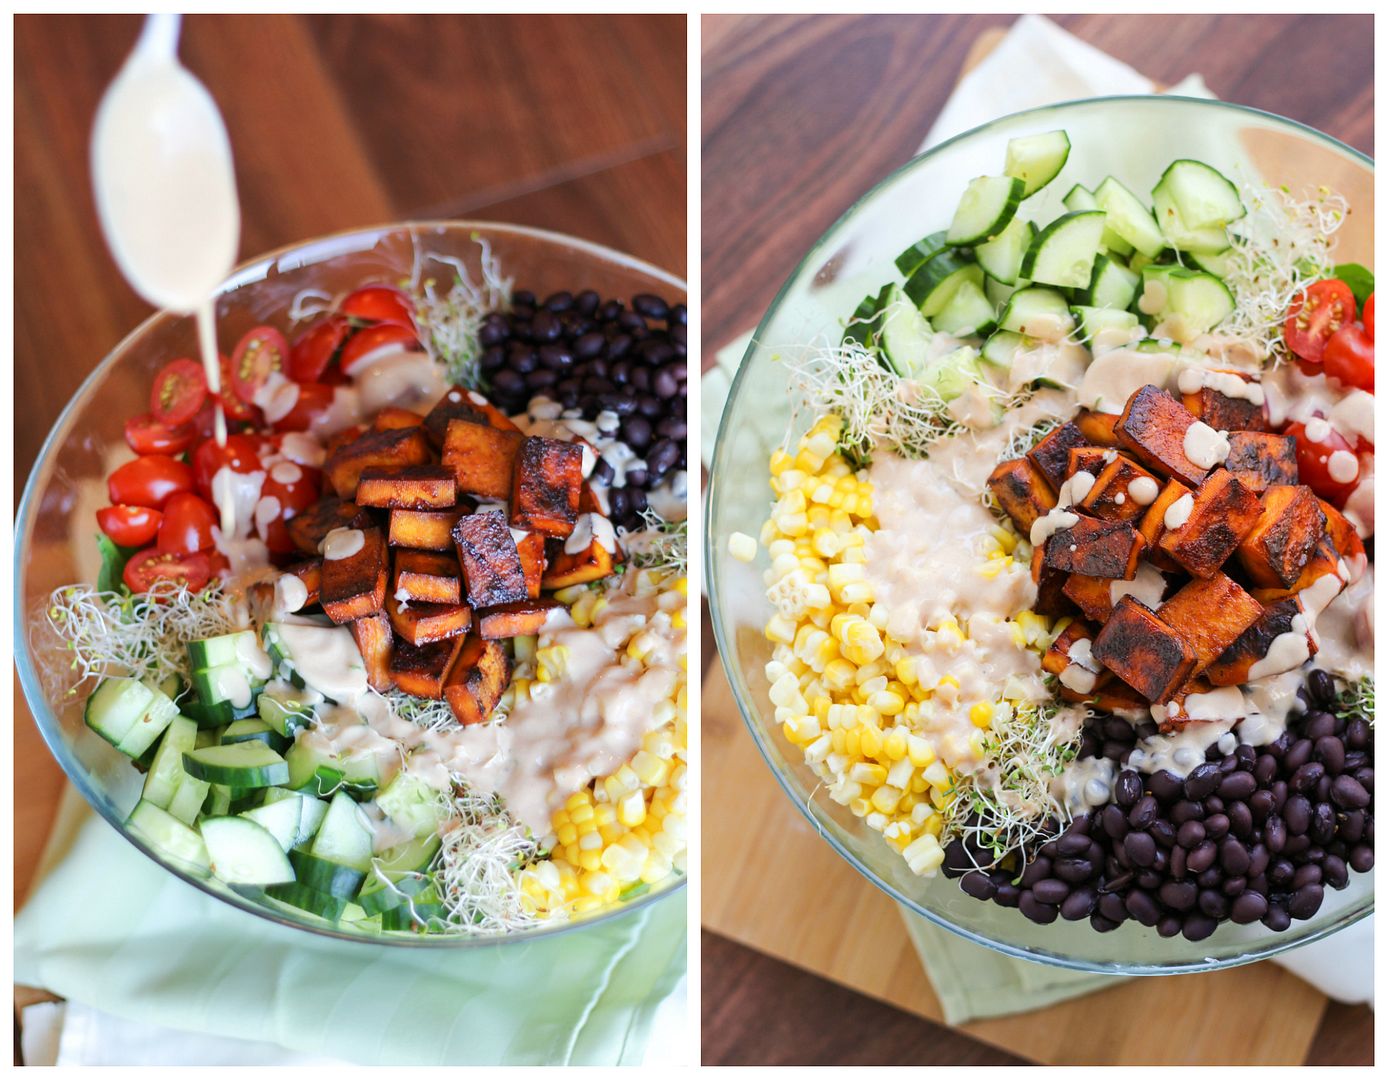
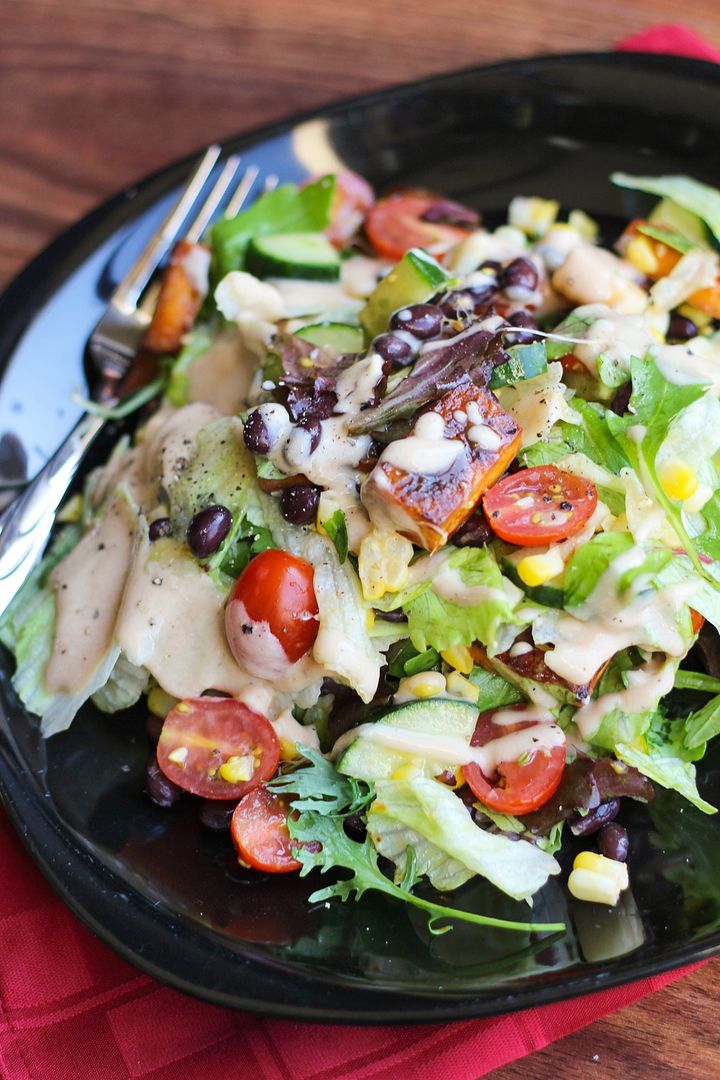
With the addition of fresh corn, tomatoes, cucumber, black beans, two types of lettuce, and sprouts, this salad has lots of crunch, flavour, and protein.  For the dressing, I whisked together some low-fat plain yogurt with a bit of bbq sauce, apple cider vinegar, and a couple spices for an easy, creamy, and light dressing that complemented the tofu.

And as with most salads, feel free to add in whatever else you like!  Avocado would have been great, I just couldn't find any ripe ones in time; mushrooms would work well too.

I'm hoping to share some of the other easy meals I was enjoying over the summer in a recap post later this week, then I can't believe it's already time to start thinking about fall recipes (which I admit I'm pretty excited about)!

BBQ Tofu, Bean, Tomato & Corn Salad with BBQ Yogurt Dressing

BBQ Tofu, Bean, Tomato & Corn Salad with BBQ Yogurt Dressing


Makes about 4 main course servings

Ingredients:

For the Tofu:
1 (12-14oz) package of extra-firm tofu
1/2 cup barbecue sauce

For the Salad:
2 cobs of fresh corn or around 1 cup of thawed frozen corn kernels
1 (540mL) can black beans, drained and rinsed
1 pint grape tomatoes, halved
Half to one cucumber, chopped (I used about 3/4 of one but it depends on its size)
1 ripe avocado, chopped (I couldn’t find a ripe one in time so it’s not included in pictures)
1 red pepper, chopped (I've added this in later versions but it's not pictured here)
1 head of romaine or iceberg lettuce, or your desired greens 
Handful of alfalfa sprouts, if desired

For the Dressing:
1/2 cup plain low-fat yogurt
2 tablespoons barbecue sauce
1/4 teaspoon garlic powder
1/4 teaspoon each salt and pepper
1.5 to 2 teaspoons apple cider vinegar (start with 1.5 and add more to taste if needed)

Directions:

Prepare baked barbecue tofu following directions from Oh My Veggies (be sure to allow enough time to press the tofu, marinate it, and bake it).

If using fresh corn, cook according to your liking if desired (I boil the cobs of corn in a large pot of boiling water for about 5 minutes, rinse with cold water, then slice off the kernels).  Prepare other salad ingredients.  

Whisk all ingredients for the dressing together in a small bowl, taste, and adjust any amounts to your liking. I sometimes add more yogurt or throw some mustard in.  You can add a bit of water to thin it out if necessary.

Toss together all ingredients with the dressing and serve.

July 22, 2014

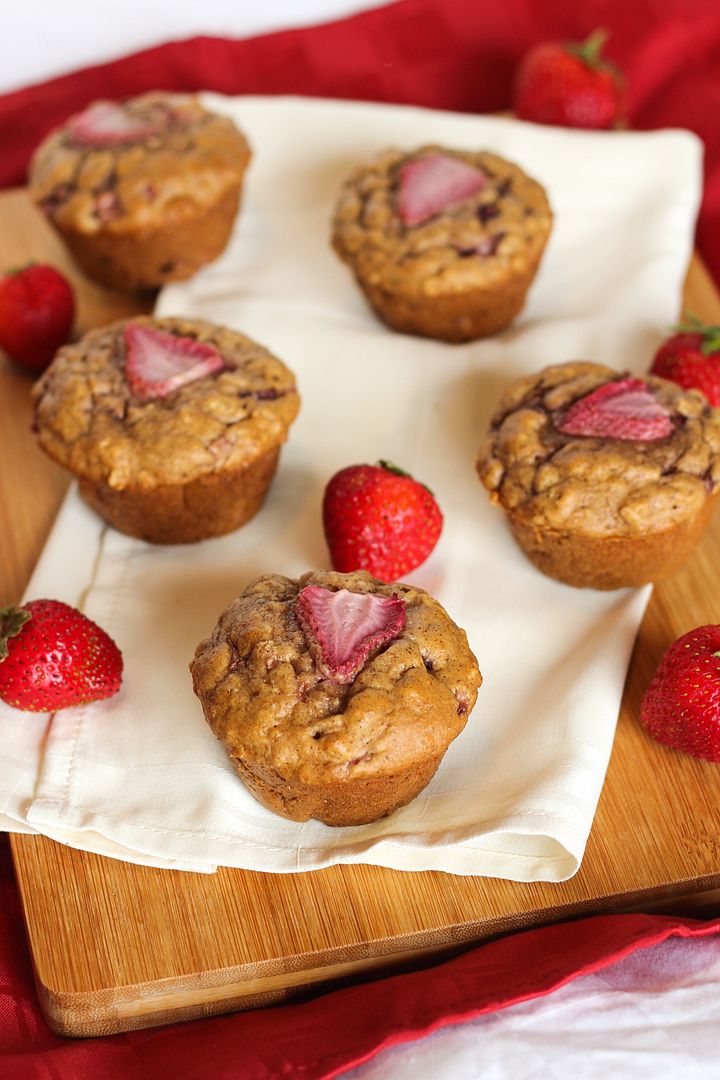
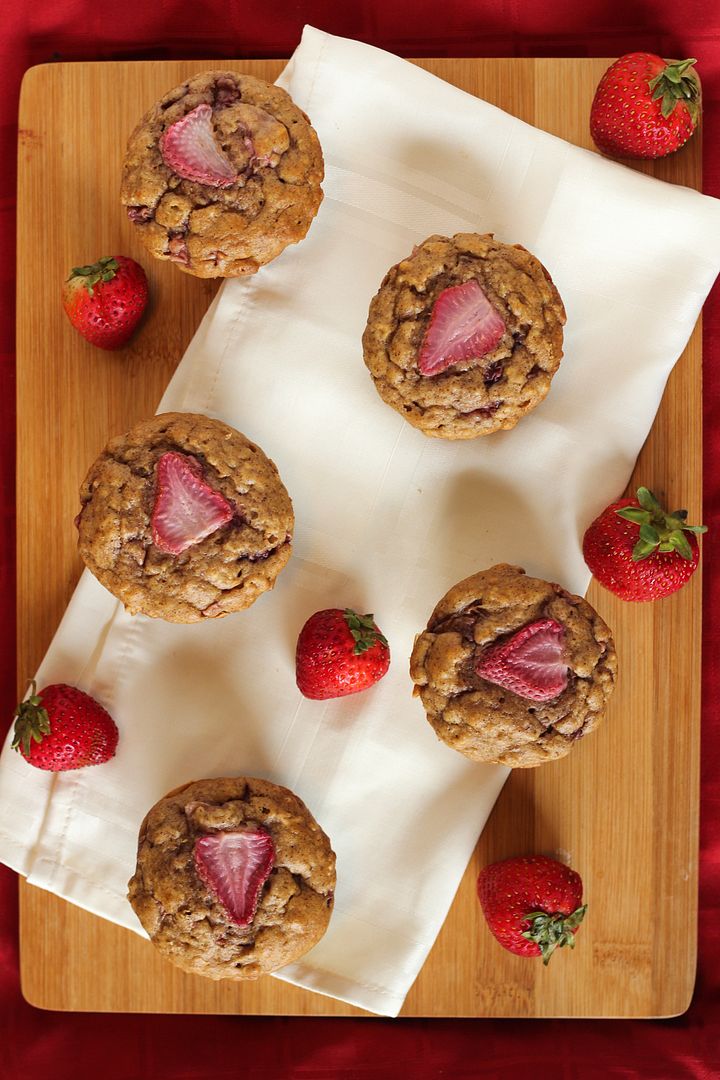
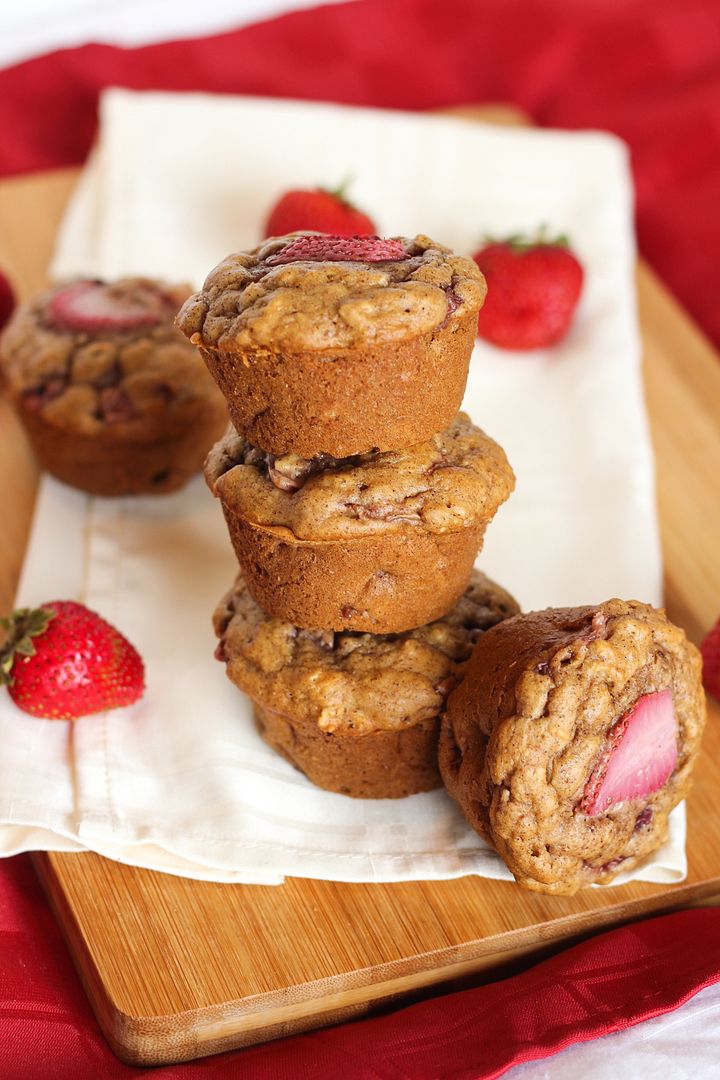
Strawberry & Peanut Butter Whole Wheat Oat Muffins

Strawberry & Peanut Butter Whole Wheat Oat Muffins

Somehow I always end up missing strawberry season because it seems to go by so quickly, so this year I was determined to bake at least one thing with strawberries. 

We don't really want a lot of desserts around right now though, so I decided to bake something on the healthier side.  And because we are only two people, I wanted something that can freeze well.  Enter muffins!

I had it in my head to make peanut butter and strawberry muffins, which surprisingly I could find almost no recipes for, so I decided to make up my own.  Peanut butter and jam goes together, so why not pb and fresh strawberries!

Strawberry & Peanut Butter Whole Wheat Oat Muffins

Because I wanted these to be on the healthier side, I used all whole wheat flour combined with oats, only a bit of pure maple syrup for sweetener instead of sugar, natural peanut butter, unsweetened almond milk, only a tablespoon of oil, and fresh strawberries instead of jam.

While they're not exactly low-fat because of the peanut butter, and not vegan because I included an egg (I haven't really had success with eggless baked goods in the past and don't have any problems personally with an egg being included), I still consider them a wholesome snack that is perfect for afternoon cravings as they satisfy hunger pretty well!

Strawberry & Peanut Butter Whole Wheat Oat Muffins

These were photographed over a day after making them, so the strawberries I had placed on top aren't looking so hot, but I assure you that these still turned out great!

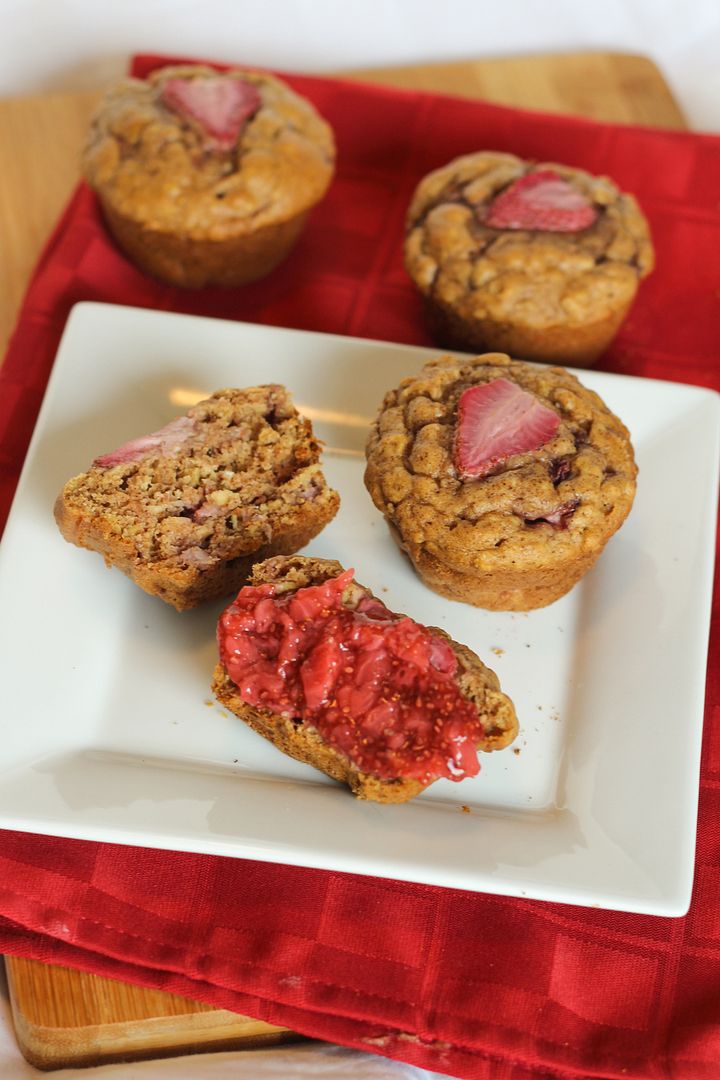
I also love slathering these in chia jam for more strawberry goodness.  If you've never made chia jam before, I encourage you to give it a try!  It's super easy and quick to make and so much better for you than regular jam.  I used the jam recipe from these strawberry oat squares by Oh She Glows, another strawberry recipe I'll have to try soon before the season is over!

Strawberry & Peanut Butter Whole Wheat Oat Muffins


Strawberry & Peanut Butter Whole Wheat Oat Muffins

Makes 12 muffins

Ingredients:

1-1/4 cups whole wheat flour
3/4 cups rolled oats
1 teaspoon baking soda
1 teaspoon baking powder
1 teaspoon cinnamon
1/4 teaspoon salt
1 large egg, lightly beaten
1 cup unsweetened vanilla almond milk
1/2 cup natural peanut butter, melted slightly to mix in better
1/4 cup pure maple syrup (or I used 2 T maple syrup + 2 T honey)
1 teaspoon vanilla extract
1 tablespoon extra virgin olive oil
1 cup diced fresh strawberries
12 slices strawberries for the tops, if desired

Directions:

Preheat oven to 350°F.  Spray a regular 12-cup muffin tin with non-stick cooking spray.

Whisk the dry ingredients (flour through salt) together in a medium bowl.  In a separate bowl, mix the wet ingredients until just blended (egg through oil).  Add the wet ingredients along with the diced strawberries to the dry ingredients and fold together until just combined.

Divide batter evenly among the 12 muffin cups.  If desired, add a strawberry slice to the top of each muffin.  Bake muffins in preheated oven for 18-20 minutes or until toothpick inserted in middle of a muffin comes out clean.  Let cool for a couple minutes in the pan then remove to a wire rack to cool completely.

Ingredient Index

Related Posts Plugin for WordPress, Blogger...