Showing posts with label banana. Show all posts

February 14, 2014

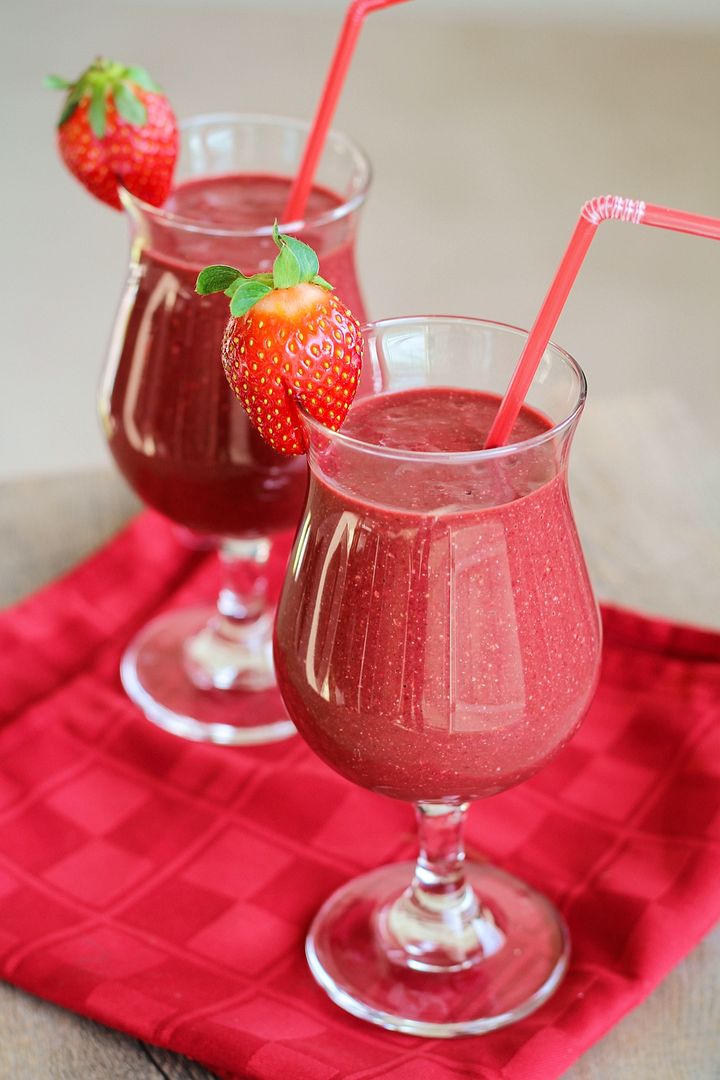
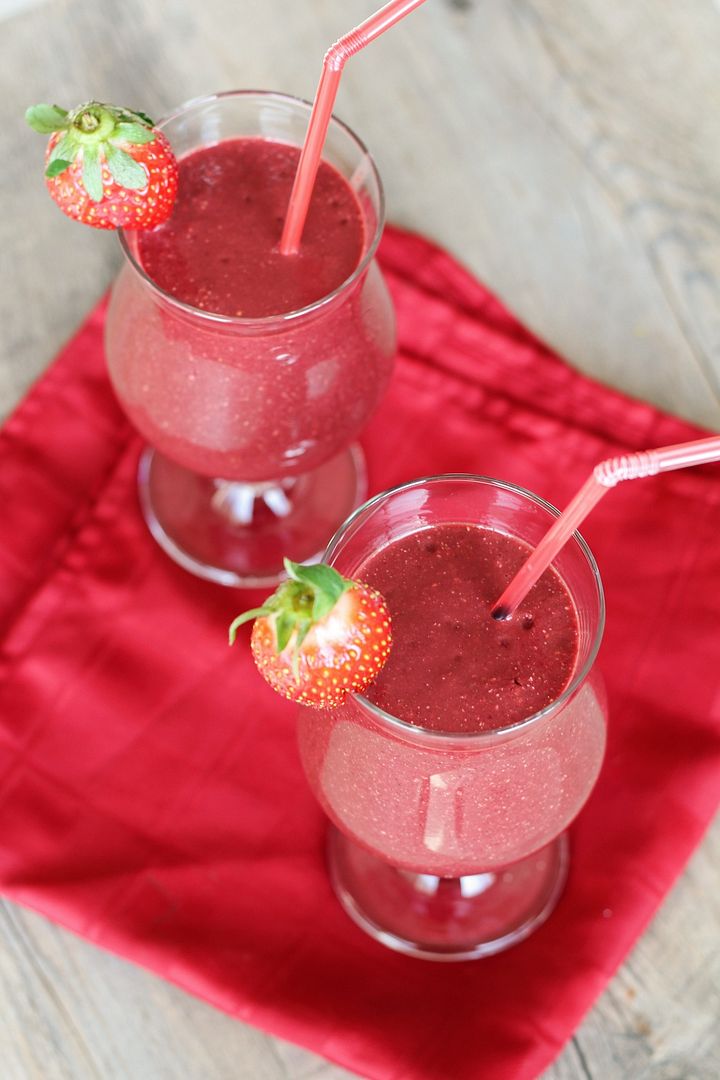
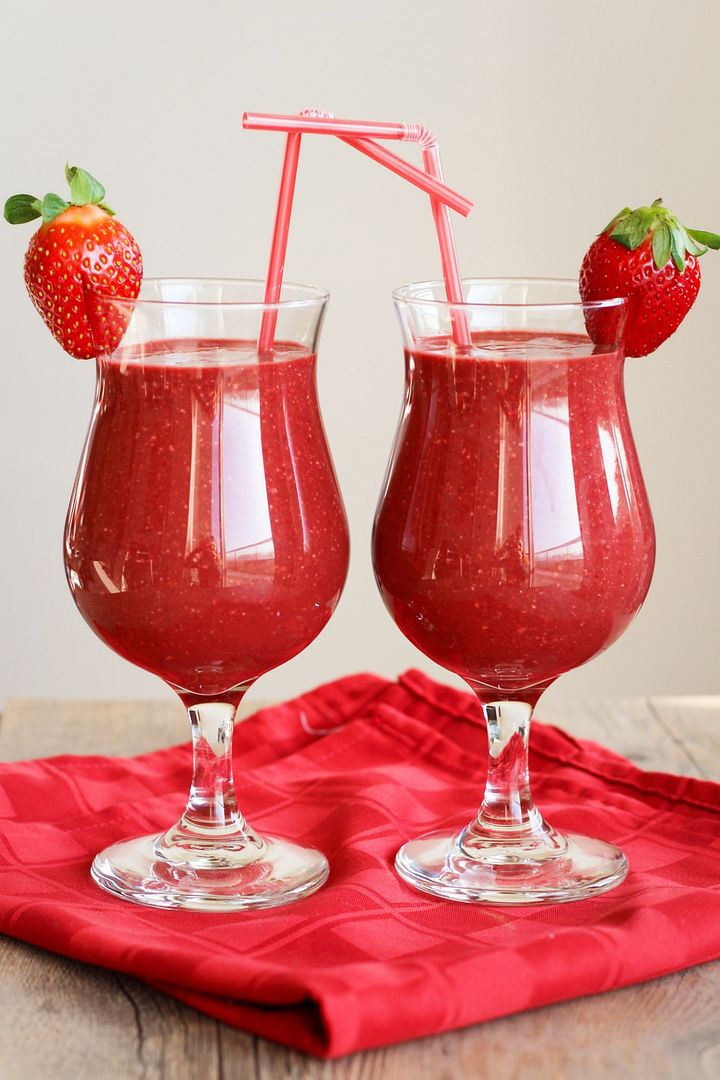
Strawberry Beet Chocolate Chia Smoothie

Strawberry Beet Chocolate Chia Smoothie

Happy Valentine’s Day!

Whether you celebrate the occasion or not, today is a great time to remember to show yourself some love in addition to the love you give out to others either today or any/every other day of the year! 

And what better way to treat yourself on Valentine’s Day than with this festive red chocolate flavoured smoothie that will feed your body with some of the good things it craves, especially during a time of year when many of us (definitely myself included) are indulging in a few more desserts than usual!

Strawberry Beet Chocolate Chia Smoothie

This smoothie gets its red colour from fresh strawberries and a roasted beet, darkened a bit by the cocoa powder which gives the smoothie a noticeable chocolate flavour that almost makes this feel more like dessert!  With the addition of chia seeds (aka little nutritional powerhouses), banana, almond milk, and oats, this is a great way to start your morning, or pick yourself up anytime of the day! 

If you’re worried about the beets, you could leave them out, but I gave one of these smoothies to Ryan when he woke up and he loved the strawberry and chocolate flavour, with absolutely no clue there were beets in it (which he claims not to like) until I told him after he drank the whole thing.  I love tricking him with vegetables!  I will make up for it tonight though by cooking a nice Valentine’s dinner (which I still need to figure out!). 

Hope you all have a great day!

Strawberry Beet Chocolate Chia Smoothie


Strawberry Beet Chocolate Chia Smoothie

Makes 2-3 smoothies

Ingredients:

1 medium beet, roasted* and chopped
2 cups milk of your choice – I used an almond/coconut milk blend
2 tablespoons chia seeds
1-1/2 cups chopped fresh strawberries
1 frozen banana, chopped
3 tablespoons cocoa powder
1/4 cup rolled oats

Directions:

*Before making this smoothie you will need to have a roasted or otherwise cooked beet on hand.  I roasted mine the night before: wrap the beet in foil, place on a baking sheet and roast in a 400°F oven for one hour or until tender.  Let cool then peel, chop, and transfer to refrigerator.   If you have a very powerful blender, you might be able to use the beet raw, but I haven’t been able to try this with my blender.

If you don’t keep frozen ripe bananas in the freezer (and you should, they are great for throwing in smoothies!), then be sure to put one in the freezer the night before too!

To make the smoothie, add all ingredients to a blender and puree until smooth.  Taste and adjust any amounts to your liking; you may wish to add a sweetener such as honey or agave depending on your tastes.  Pour into 2-3 glasses, garnish with a strawberry, and serve!

July 12, 2013

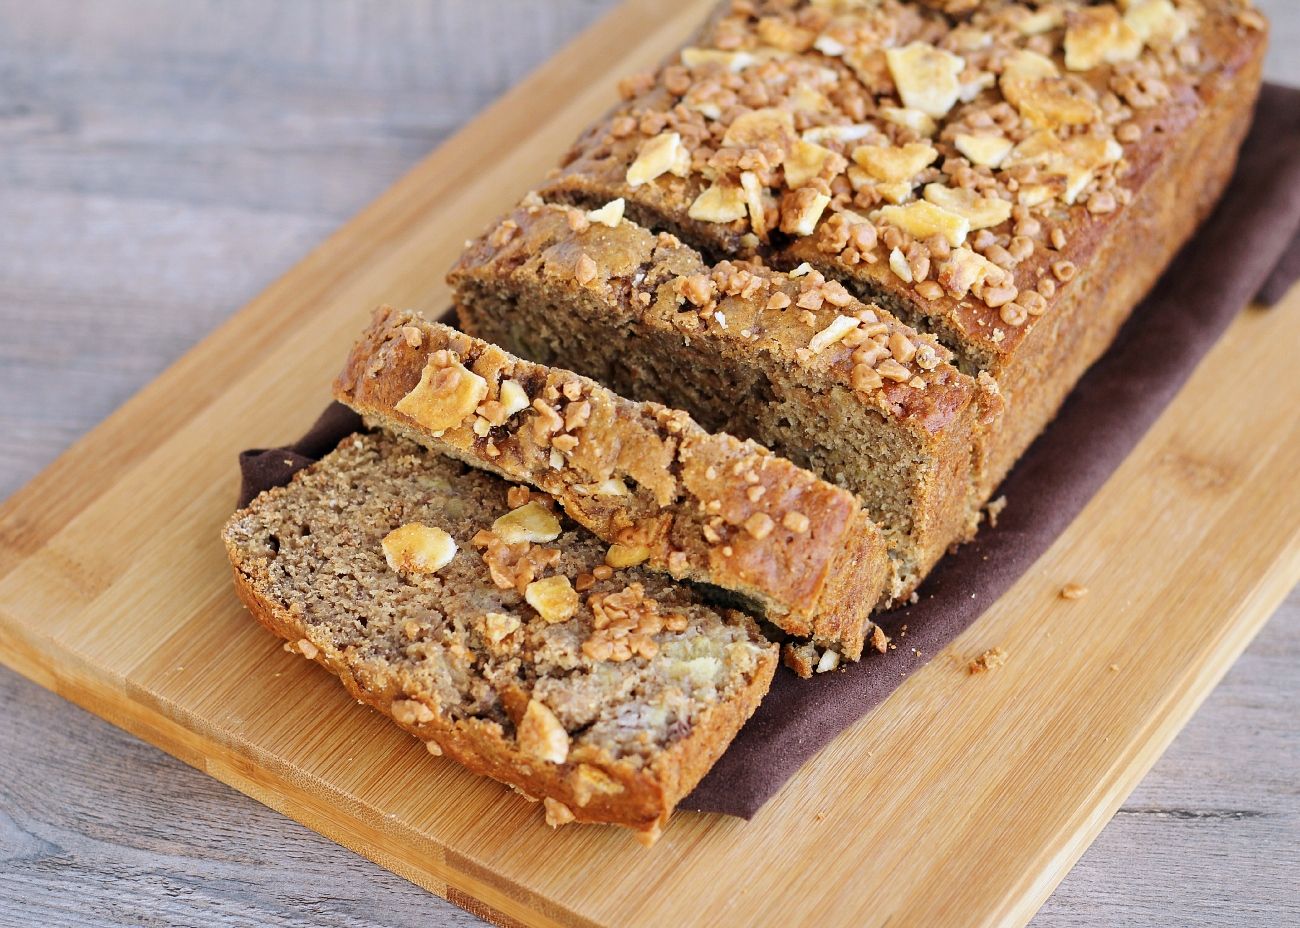
Coffee Toffee Banana Bread

Coffee Toffee Banana Bread

Has anyone else been thinking that it’s already July 12th, which means it’s almost halfway through July, which means summer is halfway over already?! I swear summer JUST started (which is practically true considering the weather we had in June), so I'm freaking out that it’s going by way too fast! I think I’ve only managed to make it to the farmer’s market once so far, I’ve hardly made any summer recipes (especially with berries – and I completely missed strawberry season somehow), I’ve only gone to the beach once, and stores are already starting to clear out their summer clothes before I’ve had the chance to look at them! I think I say this every year, but slow down, summer!

With that being said, I’ll try to make the rest of this post short so I can finish my work then make an effort to get outside for a bit this afternoon to enjoy the sunshine :) Our city has a classic car show today where all the classic cars gather in the park for display, then drive down the streets of downtown and park on the sides of the road, so when you walk downtown it feels like you’ve been transported to the 50’s.  Not the most exciting event for someone who doesn’t appreciate cars (like me), but I’m still looking forward to doing something summery!

Coffee Toffee Banana Bread

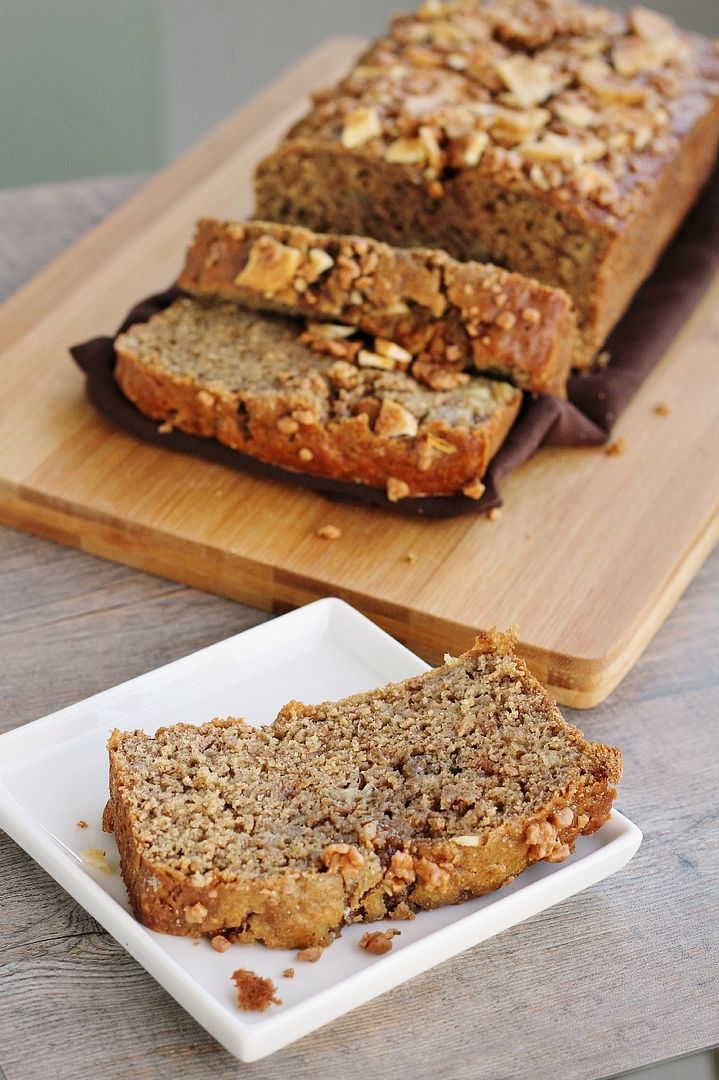
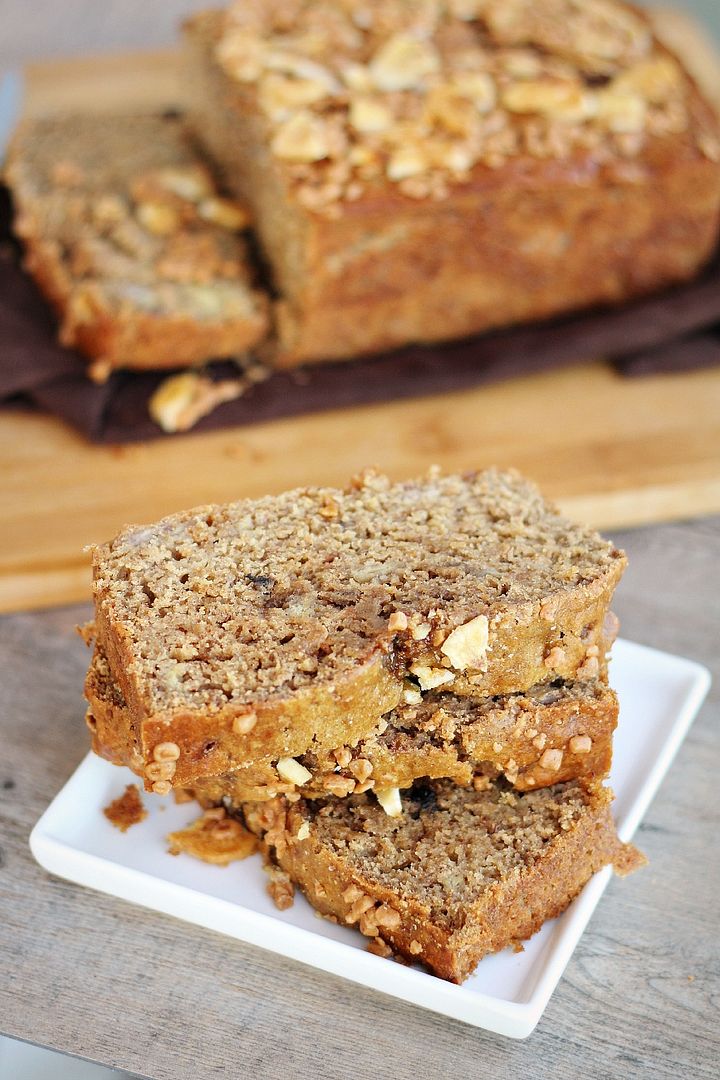
This banana bread has a subtle coffee taste along with a subtle toffee taste that not only give it a rhyming name, but make it a little more special than regular banana bread. The original recipe included 1/2 cup of melted butter and all white flour, so to lighten it up a bit I increased the amount of banana and used 1/4 cup of olive oil instead of the butter, and replaced half the flour with whole wheat. I also used dark brown sugar instead of regular sugar, and added cinnamon and instant espresso to boost the flavour. The result is a moist banana bread with a fun flavour twist that goes perfectly with your morning coffee!

Hope you all have a great weekend and do something to enjoy summer!

Coffee Toffee Banana Bread

Coffee Toffee Banana Bread


Makes one 9x5-inch loaf

Ingredients:

3 large ripe bananas, mashed (about 1-1/4 cup)
1/2 cup brewed strong coffee
1 cup all-purpose flour
1 cup whole wheat flour
2 teaspoons baking powder
1/2 teaspoon baking soda
1/2 teaspoon salt
1/2 teaspoon cinnamon
1/4 teaspoon nutmeg
1 tablespoon instant espresso
1/4 cup extra-virgin olive oil
3/4 cup packed dark brown sugar
2 large eggs
1-1/2 teaspoons pure vanilla extract
1/2 cup + 2 tablespoons toffee bits (such as Skor or Heath bits, found in stores with the chocolate chips), divided
1/4 cup chopped banana chips (optional)

Directions:

Preheat oven to 350°F and spray a 9 x 5-inch loaf pan with non-stick spray.

Mix banana and coffee in a small bowl.

In a medium bowl, whisk together the all-purpose flour, whole wheat flour, baking powder, baking soda, salt, cinnamon, nutmeg, and instant espresso.

In a large bowl, whisk together the olive oil and brown sugar.  Add eggs one at a time, mixing well after each addition.  Add the vanilla extract and the banana-coffee mixture and stir until combined.

Slowly add the dry ingredients to the wet ingredients, stirring with a wooden spoon or a spatula until just incorporated.  Fold in 1/2 cup toffee bits. 

Pour mixture into prepared loaf pan and bake for 25 minutes.  Remove from oven, sprinkle the top of the loaf with the remaining toffee bits and banana chips, then return to oven for an additional 25 to 30 minutes, until a toothpick inserted in the middle comes out clean.  *Don't worry about getting all the banana chips on top of the loaf if they don't all fit; you don't want to weigh down the top of the loaf too much to make sure it bakes evenly inside.*  Let stand in pan 10 minutes before transferring to a wire rack to cool completely, then slice.

August 10, 2012

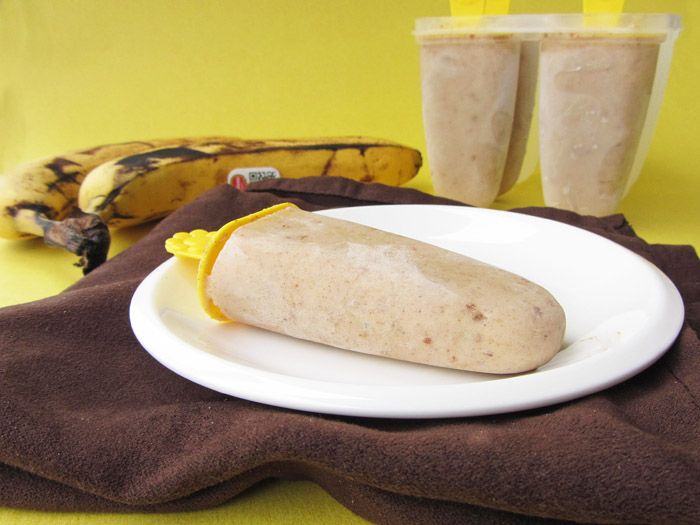
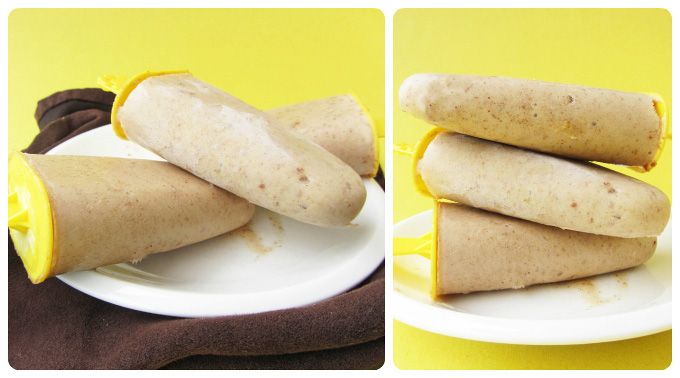
Peanut Butter Banana Popsicles

Peanut Butter Banana Popsicles

This is now the third post I've had to write on a borrowed laptop while mine is being fixed, and I've been so lost without my usual programs and editing software!  I don't usually do a lot of editing to my photos - just adjusting the brightness, contrast, and sharpness - but it's been especially difficult with the screen I'm working with now because the picture seems to change depending on what program I'm viewing it with; I'll try adjusting a photo in an online editing program, then I open it in a picture viewer and it has completely different colouring - so frustrating!  So I have no idea what these photos are looking like to you, and I apologize if what I think is a picture of a light brown popsicle is actually purple or green! (Okay so I'm exaggerating, but seriously, why can't all computer screens be the same?  I hate when I think I have a great looking photo and then look at it on a different computer program and it looks completely different!)

Quick update on my laptop while I'm on the topic (mostly because I'm whiny, but also because there's a lesson in here for others in a similar position) - the good news is that I found out it has been fixed and there was actually quite a lot wrong with it, but the bad news is that the manufacturer apparently needed to reset my laptop to factory settings, thus deleting everything on my computer.  I'm so thankful that I backed up all my documents before I sent it away, but I wasn't planning on having all of my programs deleted, so it's going to be a fun week ahead trying to find all my old cds and serial numbers and reinstall everything!  Thinking of how long it first took me to just to configure my laptop to be able to print to the wireless printers at school makes me want to cry, but I'm trying to look on the bright side that my computer should be faster and better now!  So lesson learned to anyone else about to send a computer away to be fixed: make sure you back everything up first (and make sure you're always backing everything up on a regular basis!) and make sure you keep all your cds and programs in one place so it's easy to reinstall them - so far I've only found one and I'm cursing myself for not keeping them organized!

Peanut Butter Banana Popsicles

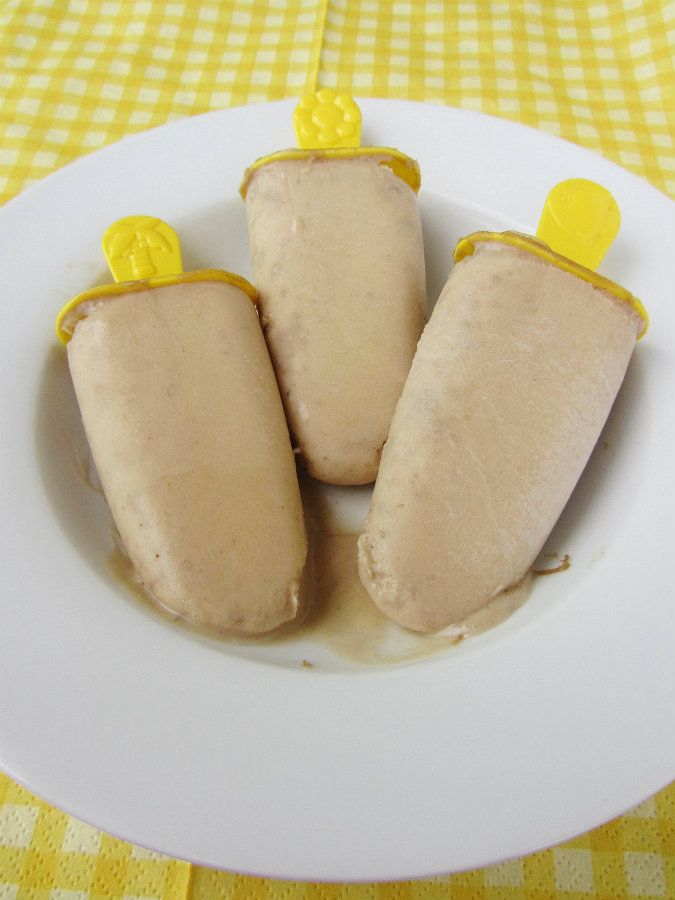
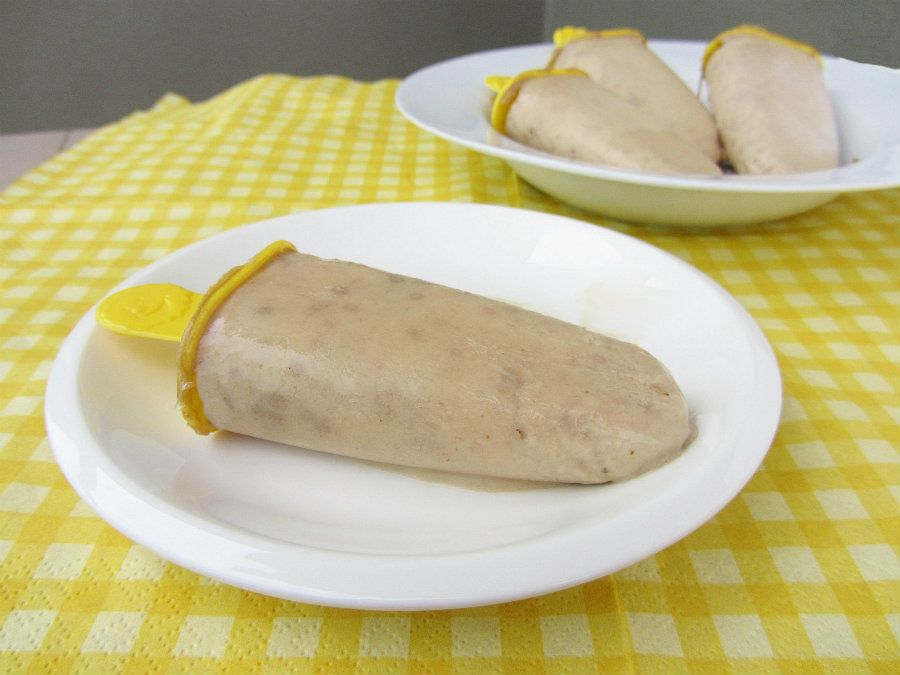
Moving on from my small first-world problems,  I have another popsicle recipe for you guys today!  I love the combination of peanut butter and banana, so I decided to find out how the flavours would work together in a cool and creamy popsicle.  These are ridiculously easy to make - there are only three ingredients - but they combine to make a creamy, smooth popsicle with a sweet banana flavour and hint of peanut butter that is so good!

These make a great healthy summer snack - they're a little more filling than regular popsicles but I love knowing that I'm filling myself up with vitamins, calcium, potassium, protein, and other good stuff beyond just sugar and water!

Peanut Butter Banana Popsicles

Peanut Butter Banana Popsicles

Makes at least 5-6 popsicles, depending on size of popsicle mold

Ingredients:

3 small bananas (or 2 large)
1/2 cup vanilla almond milk
1/4 cup smooth peanut butter

Directions:

Add all ingredients to a blender and blend until smooth.  Pour into popsicles molds (mine filled 6) and freeze.

Notes – if you're using unsweetened milk instead of vanilla almond milk, you may wish to add sweetener and a splash of vanilla extract, though I haven't tested the recipe this way!

June 05, 2012

Banana Date Popsicles

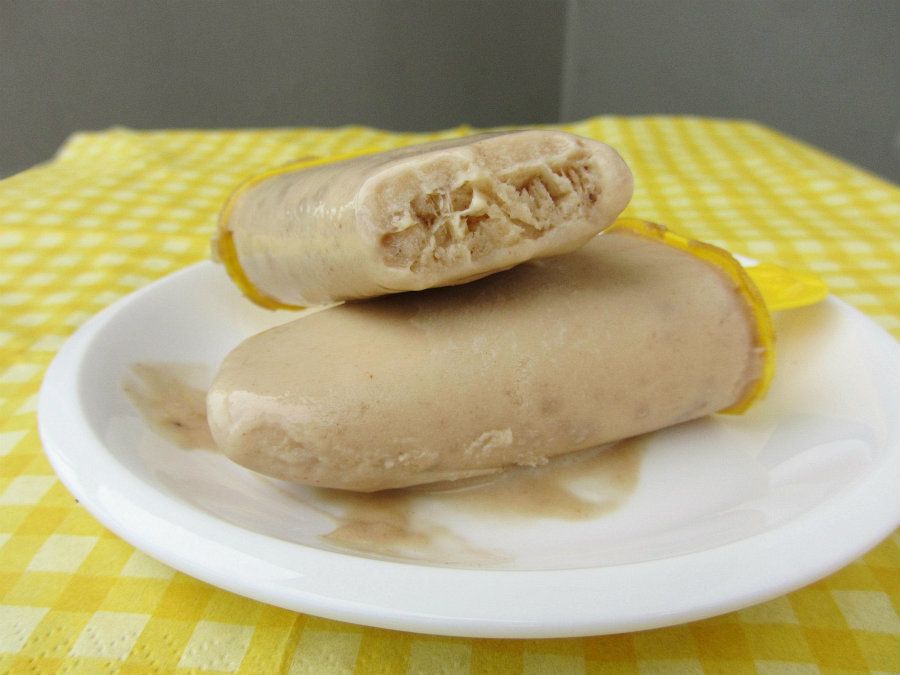
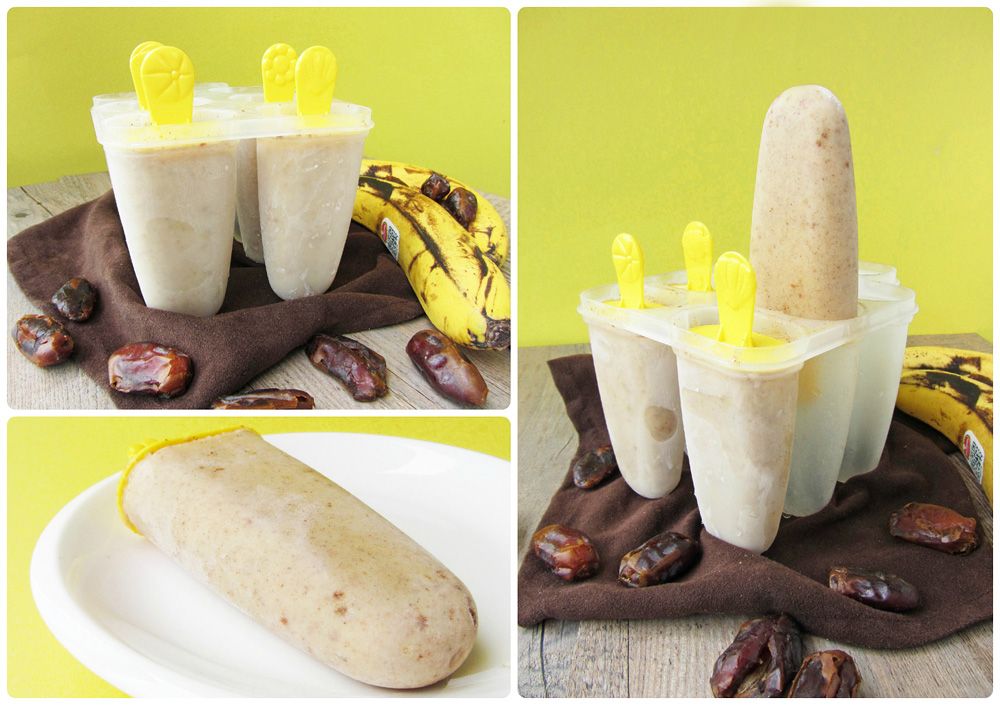
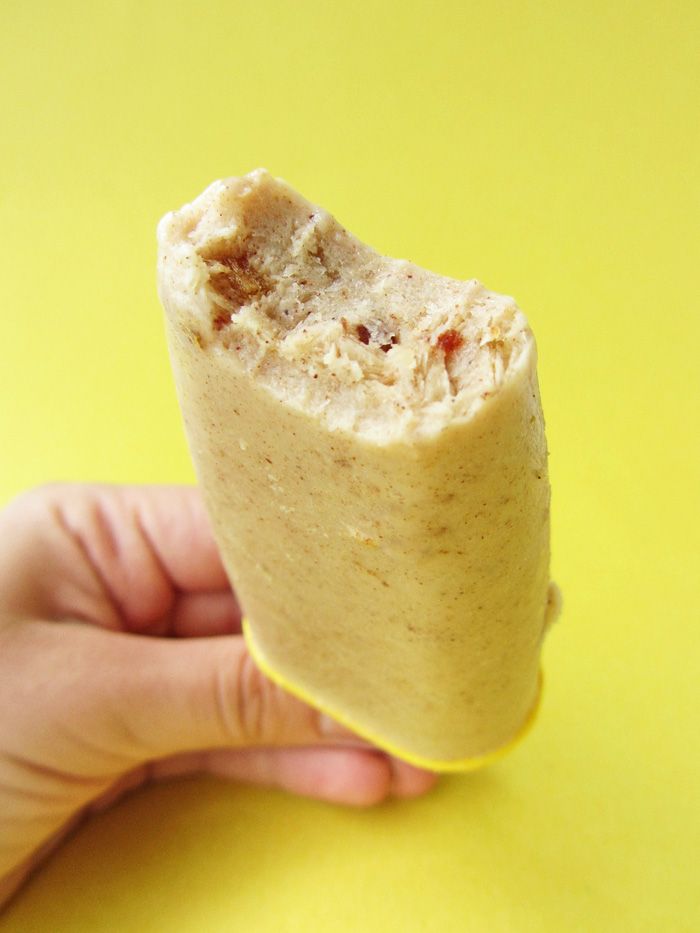
Banana Date Popsicles with Cinnamon & Vanilla

It has never really occurred to me before to make my own popsicles, probably because I'm not really much of a popsicle-eater in the first place.  I much prefer smooth, creamy ice cream or frozen yogurt over hard, messy popsicles.

This year though, there seems to be more and more recipes for homemade popsicles popping up on blogs, and I was surprised to see that you can create beautiful, tasty, and healthy popsicles at home with often only a few ingredients.  So when I saw a popsicle mold for only two dollars at the grocery store, I went for it!

Banana Date Popsicles with Cinnamon & Vanilla

Surprisingly, for my first adventure in popsicle making I didn't choose a bright and beautiful strawberry or mango popsicle recipe, but a recipe that used dates as the main ingredient.  I happen to like dates and was intrigued by the idea of using them in a healthy, creamy popsicle that was different from a lot of the fruit-based recipes out there.

I still ended up adding some fruit in the form of banana because I thought it would pair well with the dates, and I used vanilla Greek yogurt along with some added vanilla extract and cinnamon for flavour.  I used coconut milk beverage as the liquid because that's what I had in the fridge at the time, but I bet these would be even better with vanilla almond milk. 

Banana Date Popsicles with Cinnamon & Vanilla

I'm happy to report that my first-ever popsicle experiment was a huge success!

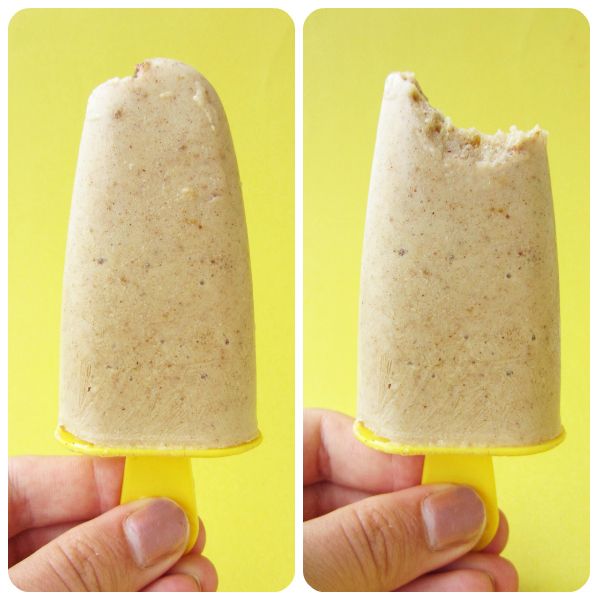
The main taste in them was definitely banana, but they were nicely spiced from the cinnamon, and the vanilla and dates added the perfect touch of sweetness.  I only made five popsicles and went through them pretty quickly!  I loved being able to grab a homemade popsicle from the freezer for a healthy but satisfying dessert, knowing exactly what ingredients were in it.

Banana Date Popsicles with Cinnamon & Vanilla

Now that I've christened my popsicle mold, I can't wait to break it in some more with lots of other flavours!  My goal this summer is going to be to try to always have some healthy popsicles ready to eat in the freezer, and to try to resist the temptation to buy every other type of mold out there!  I saw some rocket pop molds at the store the other day and had to try reeeally hard not to add them to my cart! 

You can probably expect to see many more popsicle recipes here this summer, but if you can't wait, I've started a Pinterest board of frozen treats with some of the recipes I've been eyeing!

Banana Date Popsicles with Cinnamon & Vanilla

Banana Date Popsicles with Cinnamon & Vanilla

Based on these date shake popsicles from Whole Living

Makes 5 popsicles

Ingredients:
 
10 pitted dates
1/2 cup low-fat vanilla Greek yogurt
1 large ripe banana, peeled and chopped
1/2 cup milk – I used coconut milk but almond milk or dairy milk would also work
1/2 teaspoon cinnamon
1/4 teaspoon pure vanilla extract

Directions:

Soak dates in hot water for about 5 minutes to soften them, then remove from water and chop them into very small pieces.  Add all ingredients to a blender and blend until smooth.  Pour into 5 popsicle molds and freeze.

Note: I had just barely enough mix to fill 5 standard popsicle molds so you may want to add a touch more yogurt and milk to the mixture to make sure there is enough, depending on the size of your popsicle molds.

April 29, 2012

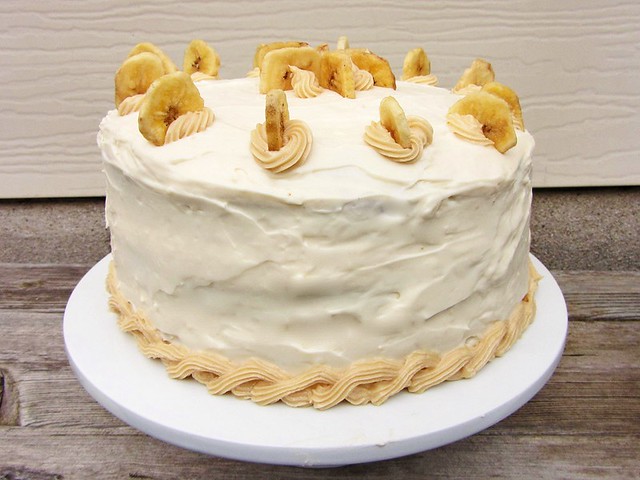
Banana Layer Cake with Peanut Butter Cream Cheese Frosting

banana birthday cake

As I mentioned in my recap of my birthday weekend, my twin sister Genevieve and I always look forward to making our own separate cakes for our shared birthday.  We each love choosing a recipe, making it our own, baking the cakes, and best of all, decorating them!  We also love that it's the only time of year when we can make a cake exactly designed for our own tastes (aka NO chocolate) without worrying about whether or not everyone else will like it!

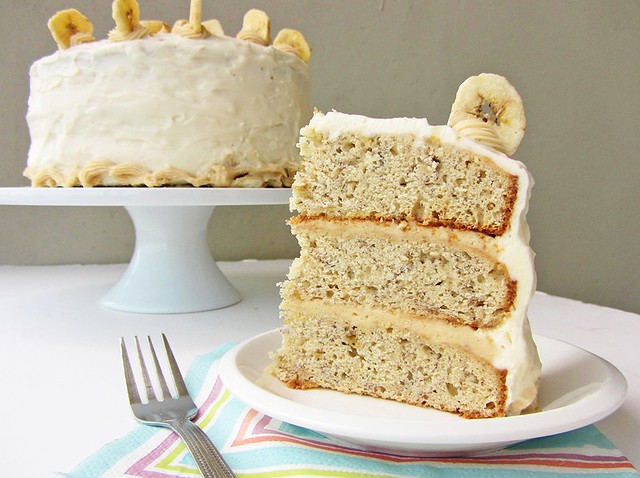
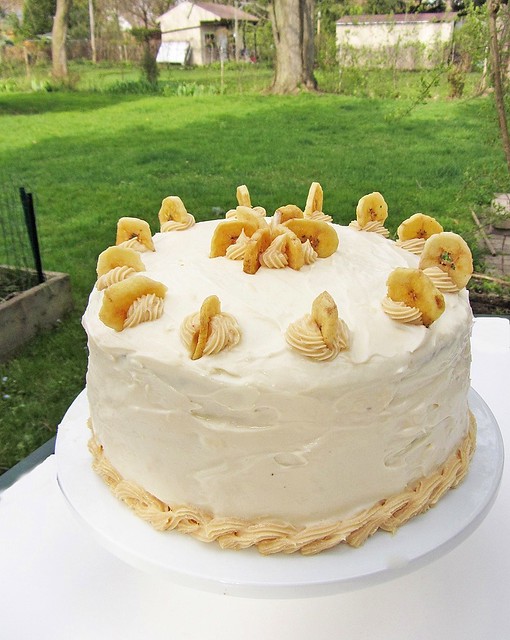
This year, Gen made a delicious vegan pina colada cake, and I chose to make a banana layer cake with peanut butter cream cheese frosting on the inside and a whipped cream cheese frosting on the outside.

banana layer cake

Whenever the highly anticipated birthday-cake-choosing time of year rolls around, I always think that I want a banana cake but never have any bananas that could be ripe on time to bake it.  This year, I was well prepared ahead of time to ensure that I could finally make my banana birthday cake!

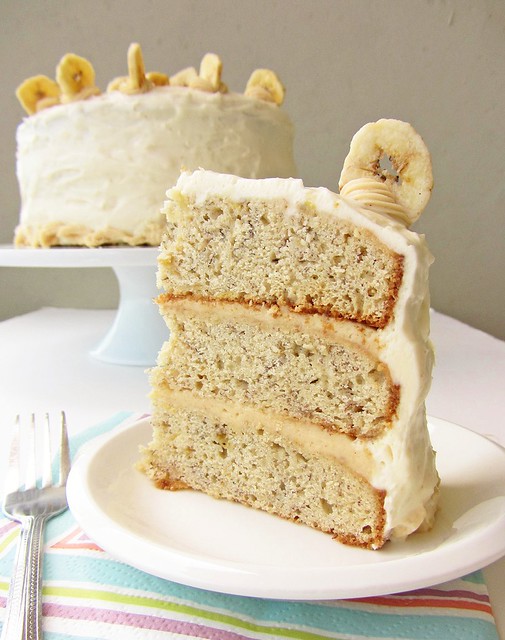
I wanted a three-layer banana cake (three seemed birthday-worthy) that somehow incorporated peanut butter, because peanut butter & banana sandwiches are one of my favourite things in the world.  I didn't want the peanut butter to be too overpowering though, so I chose to incorporate it into a cream cheese frosting that would go in between the cake layers.  I decided to frost the outside of the cake with a plain cream cheese frosting (because I hate buttercream frosting), then decorate it with the remaining peanut butter frosting and some banana chips.

banana layer cake

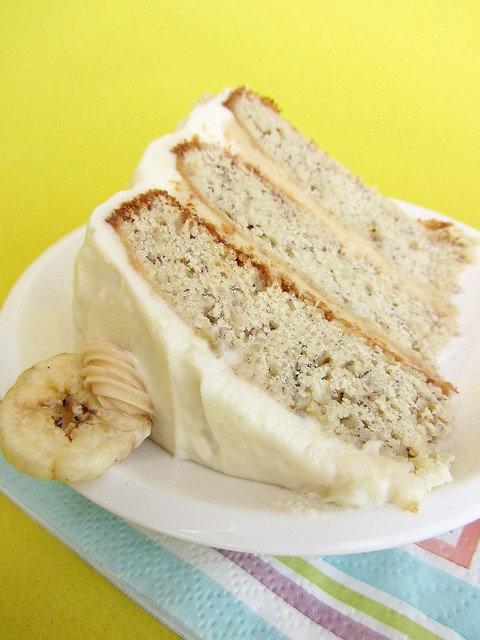
Cutting the first slice of a layer cake is always so nerve-wracking because you can't exactly take a sneak peek or taste before it's time to serve all your guests.  Fortunately, this cake not only looked impressive but tasted amazing too!

banana birthday cake 4

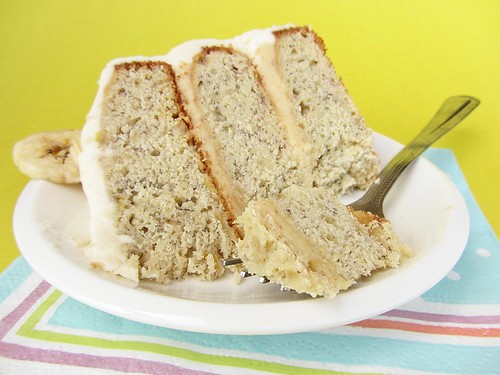
The cake itself had a very strong banana taste and was dense like banana bread, which is exactly what I wanted.  It's definitely not light and fluffy, so if that's what you're looking for then you might want to choose a different recipe!

The peanut butter taste was subtle but delicious whenever you got a bite of it.  It complemented the banana really nicely, as did the cream cheese frosting on the outside of the cake.  If you want a stronger peanut butter flavour, you might want to use the peanut butter frosting on the outside of the cake as well, or try adding peanut butter chips to the cake.

banana birthday cake

If you're a chocolate fan, you could try adding chocolate chips to the cake or even make it a peanut butter-chocolate-banana cake by adding a chocolate frosting to the inside of the cake and using the peanut butter frosting on the outside.  There are lots of variations you could try with this cake, but it's delicious as is too!

This served a lot of people and everyone who tried it really liked it.  I'm so happy I finally got to have my banana cake after all these years of wishing for it!  I don't want to have to wait another whole year before I can try another one, but since everyone else I make a cake for seems to request chocolate, it might be a while!  I'm actually baking a chocolate cake for my dad's birthday today, so I'll let you all know how that turns out!

banana birthday cake


Banana Layer Cake with Peanut Butter Cream Cheese Frosting

Sour Cream Banana Cake Recipe

Adapted from Margaret Wehling via All Recipes and also seen on Food Mayhem

1 cup unsalted butter, at room temperature
1 cup packed brown sugar
1 cup granulated sugar
4 large eggs
4 large ripe bananas, mashed
1 cup sour cream (I used low-fat)
2 teaspoons vanilla extract
4 cups sifted cake flour
1 teaspoon baking soda
1/4 teaspoon salt

Preheat oven to 350°F.  Spray three 9” round cake pans with non-stick baking spray and set aside.

Cream butter and sugars together with an electric mixer until fluffy, about 3 minutes.  Add eggs one at a time, beating well after each addition.  Add bananas, sour cream, and vanilla, and beat until just combined.

In a separate bowl, combine the flour, baking soda and salt.  Sift through a sieve at least once.  Add to the wet ingredients in three additions, folding with a spatula until just combined.

Pour the batter equally into the three prepared pans.  Weigh each pan to ensure that they are equal, and spread the batter in each pan as evenly as possible.  Bake in the preheated oven for about 30 minutes or until a toothpick comes out clean, rotating pans halfway through.  Let cool in the pans for 10 minutes then invert onto a wire rack to cool completely before frosting.

Peanut Butter Cream Cheese Frosting

Adapted from multiple sources

1 8-oz package cream cheese, at room temperature (I used reduced fat)
1/3 cup unsalted butter, softened
1/2 cup smooth peanut butter
Pinch of salt
1 cup icing sugar

Beat the cream cheese with an electric mixer until smooth and creamy, about one minute.  Add the butter and beat for another minute until smooth, scraping down the sides of the bowl as needed.  Add the peanut butter and pinch of salt and beat until combined.  Slowly add the icing sugar and mix on low until incorporated. Taste and add more icing sugar if it’s not sweet enough for your tastes.  Store in the refrigerator until ready to use, but remove from fridge at least 10 minutes before frosting so it is easier to spread.

Cream Cheese Frosting

Adapted from Bon Appetit via Epicurious

1 8-ounce package cream cheese, at room temperature (I used reduced fat)
1/3 cup unsalted butter, at room temperature 
1 teaspoon vanilla extract
1-1/2 cups icing sugar, divided 
3/4 cup chilled heavy whipping cream

Beat cream cheese with an electric mixer until smooth, about one minute.  Add butter and beat for another minute until smooth.  Add vanilla and 3/4 cup icing sugar, and mix on low until smooth.

In a separate bowl, whisk whipping cream and remaining 3/4 cup icing sugar until medium-firm peaks form.  I did this by hand but you could use an electric mixer to make it easier.

Gently fold whipped cream into cream cheese mixture in 3 additions.  Cover and chill in the refrigerator for at least one hour.

Assembling the Cake
  1. Trim the tops of the cakes with a large serrated knife or cake leveler to level them, if necessary (I just took a bit off the top centers).  Place one cake layer on a cake stand or large plate and insert strips of wax paper or parchment paper underneath for easy clean-up later.
  2. Spread about 1 cup of peanut butter frosting over the cake.  Try to make it thicker around the edges.
  3. Top with second cake layer, then spread another 1 cup of peanut butter frosting on top, and top with third cake layer.  Make sure you're lining the cakes up evenly.  You should have a bit of leftover peanut butter cream cheese frosting which you can save for decorating the cake later.
  4. Spread a thin layer of cream cheese frosting over the top and sides of cake to form a crumb coat.  Refrigerate for at least 15 minutes. 
  5. Spread remaining cream cheese frosting over the top and sides of cake, smoothing it out as evenly as possible with a spatula.  Decorate with reserved peanut butter cream cheese frosting and banana chips, if desired.  Remove wax paper strips from base of cake.
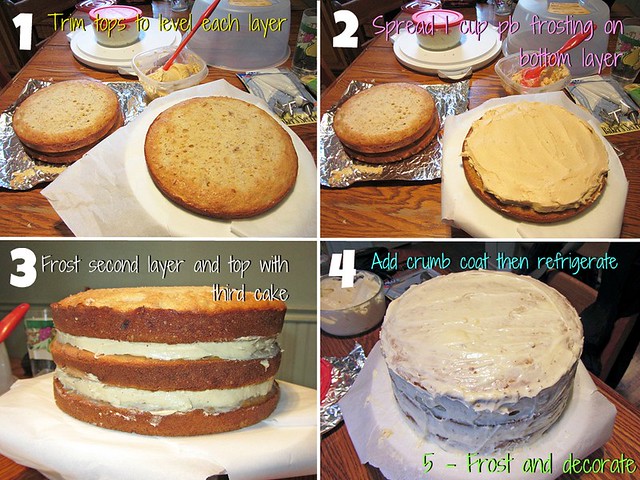
making cake

November 27, 2011

Mini Banana Chocolate Chip Cupcakes

mini banana chocolate chip cupcakes
I recently realized that I hadn’t posted a dessert recipe in an awfully long time, and it just so happened that a wonderful colleague was celebrating her birthday last week, creating the perfect opportunity to bake something sweet (with the help of my sister Genevieve)!

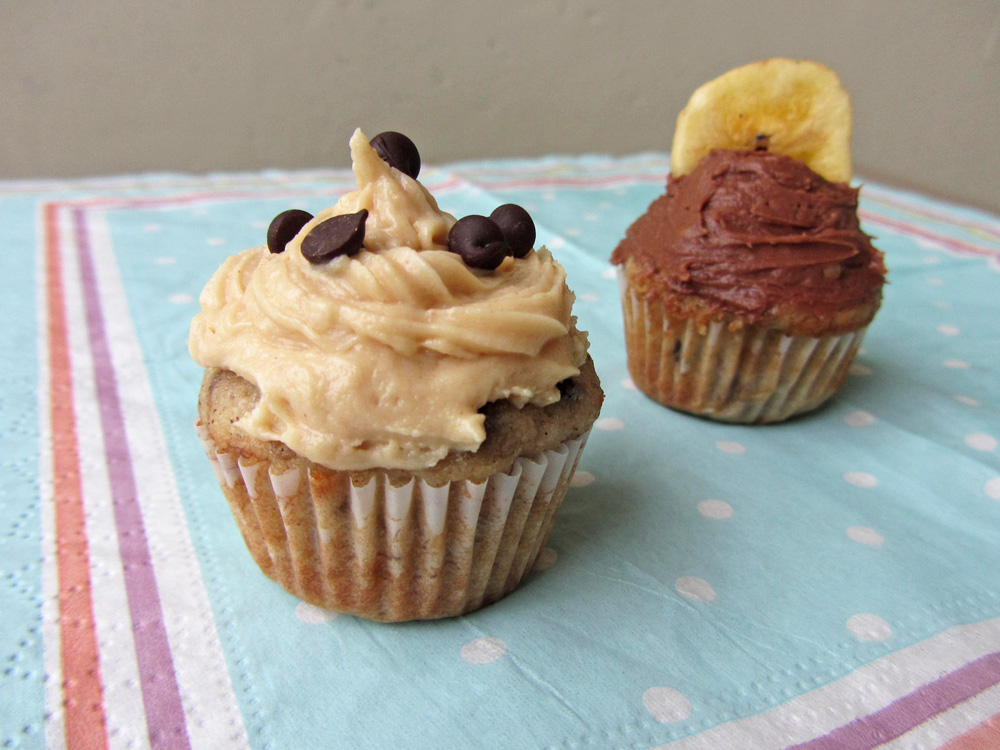
Gen and I wanted to make cupcakes because they seemed most appropriate for a birthday, but because everything is cuter in mini form, we decided to make mini cupcakes! We chose a fail-proof Martha Stewart recipe for banana cupcakes, which seemed like a crowd-pleasing flavour, but threw in some mini chocolate chips for the chocolate lovers (which Gen and I are not). And because in our view, cream cheese frostings are the only way to go, we made two kinds of cream cheese frostings: peanut butter and chocolate. 

chocolate cream cheese frosting cupcake
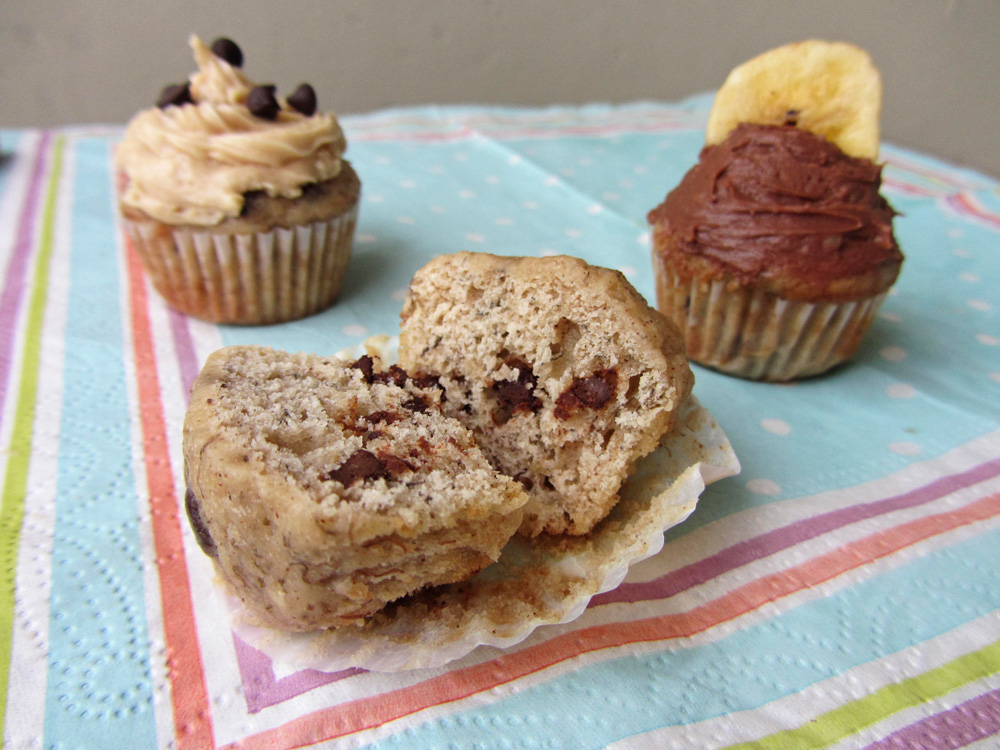
The cupcakes were so easy to make and they were the perfect two-bite treat to bring to a crowd, all of whom loved them! The cupcakes themselves had a strong banana flavour with just the right hint of chocolate from the mini chocolate chips, but the frosting was definitely the best part! Both frostings were so good that Gen and I couldn’t decide which one we liked better, although the chocolate ones did seem to disappear faster than the peanut butter (much to my dismay, as I was the one in charge of the peanut butter frosting – ha!)

These are the perfect little treat to celebrate a birthday, or just to have around to brighten up any other day. I’m loving making mini things lately and can’t wait to find another use for my mini muffin pan, so if you have any ideas, send them my way!

peanut butter cream cheese frosting cupcake
Mini Banana Chocolate Chip Cupcakes

Makes 3 dozen mini cupcakes

Banana Chocolate Chip Cupcakes

Adapted from C&C Cakery, who adapted from Martha Stewart

1 1/2 cups all-purpose flour
1/4 cup brown sugar
1/2 cup white sugar
1 teaspoon baking powder
1/2 teaspoon baking soda
1/4 teaspoon salt
1/2 teaspoon cinnamon
1/2 cup unsalted butter, melted and cooled
1 1/2 cups mashed ripe bananas (about 3-4 large bananas)
2 large eggs
1 teaspoon vanilla
6 tablespoons mini semisweet chocolate chips
---
Chocolate cream cheese frosting & Peanut butter cream cheese frosting (recipes below)
About 18 banana chips and a handful of mini chocolate chips for topping
---
Preheat oven to 350°F.
In a large bowl, whisk together the dry ingredients (flour, two sugars, baking powder, baking soda, salt, cinnamon).

In a medium bowl, whisk together the wet ingredients (melted butter, mashed bananas, eggs, vanilla).

Stir the wet ingredients into the dry ingredients until almost incorporated. Add chocolate chips and stir until just incorporated. Do not overmix. Spoon mixture into a mini muffin pan that has been lined with mini muffin liners. Fill each cup almost to the top of the liner. Bake for 10-15 minutes or until the cupcakes are golden and a toothpick inserted in the middle comes out clean. Cool before frosting.

Frost half the cupcakes with the peanut butter cream cheese frosting, and half with the chocolate cream cheese frosting. Top with banana chips or mini chocolate chips if desired.

Chocolate Cream Cheese Frosting

Adapted from Cupcake Project

4 oz (half a block) cream cheese, softened (we used reduced fat)
2 tablespoons unsalted butter, softened
1 to 1 ½ cups icing sugar
3 tablespoons cocoa powder

Beat cream cheese and butter until smooth. Add icing sugar (start with less and add more if needed, depending how sweet you want it) and cocoa powder and beat until smooth.

Peanut Butter Cream Cheese Frosting

4 oz (half a block) cream cheese, softened (we used reduced fat)
2 tablespoons unsalted butter, softened
1/4 cup smooth peanut butter
1/2 to 3/4 cup icing sugar
1/4 teaspoon vanilla
1 teaspoon milk (optional)

Beat the cream cheese and butter together until smooth. Mix in the peanut butter, followed by the icing sugar (start with less and add more if needed) and vanilla, and beat until smooth. Add milk if you need to thin out the frosting a little.

mini banana cupcakes inside

Ingredient Index

Related Posts Plugin for WordPress, Blogger...