Showing posts with label zucchini. Show all posts

September 05, 2013

Cauliflower Crust Pizza with Corn, Zucchini, & Goat Cheese

Cauliflower Crust Pizza with Corn, Zucchini, & Goat Cheese

If you read blogs regularly or look at food on Pinterest, you've probably noticed at least a few recipes for cauliflower crust pizza before.  I've been seeing it all over the place for a while now and keep adding it to my list of things I need to try, but for some reason it took me until now to finally make it.  I admit I was skeptical that this was another fad that people go crazy for because it sounds good but in reality tastes disgusting (*cough*egg baked in an avocado*cough*), but I'm happy to report that this tastes as good as it sounds! (unless you think it sounds gross, like a certain boyfriend who shall remain unnamed, in which case you are wrong!)

If you have no idea what I'm even talking about when I refer to cauliflower crust pizza, I'll give a quick explanation of what it is.  Basically it's a breadless pizza crust that's made by mixing pulverized cauliflower with cheese, egg, and spices (if you like) to form a "crust" that is then baked and topped with any pizza toppings you like.  So it's healthier than pizza in the sense that there is actually some nutrition in the crust instead of empty carbs, but I should be clear that it's also not some sort of miracle calorie-free pizza because there is a lot of cheese in the crust, if that's what you're concerned about!

Cauliflower Crust Pizza with Corn, Zucchini, & Goat Cheese

There are lots of different recipes for cauliflower crust floating around, but I used one from The Lucky Penny Blog (with a few small changes), which Jessica from How Sweet It Is recently affirmed is the best cauliflower crust pizza recipe around, and though I haven't tried any other versions, this one worked so well that I know I won't need to (though she does have a cheese-free version if you're interested in trying it)!

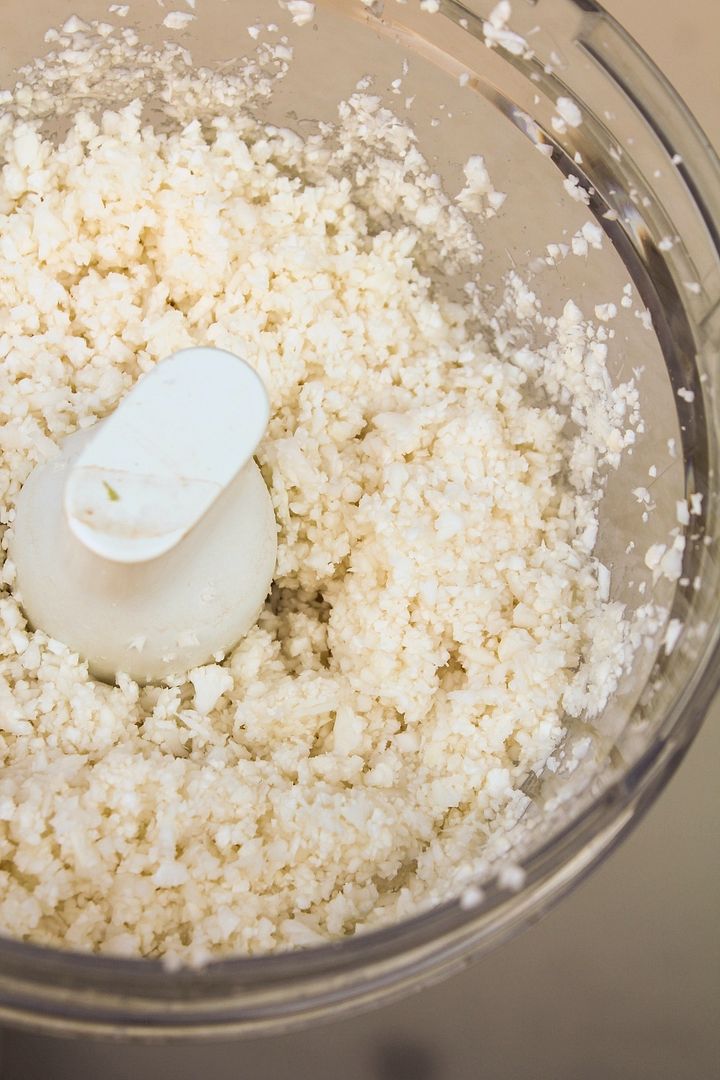
Making the crust is pretty simple.  You start by pulsing your cauliflower florets in a food processor until you get a bowl of fluffy snow-like "crumbs":

Making cauliflower crust pizza

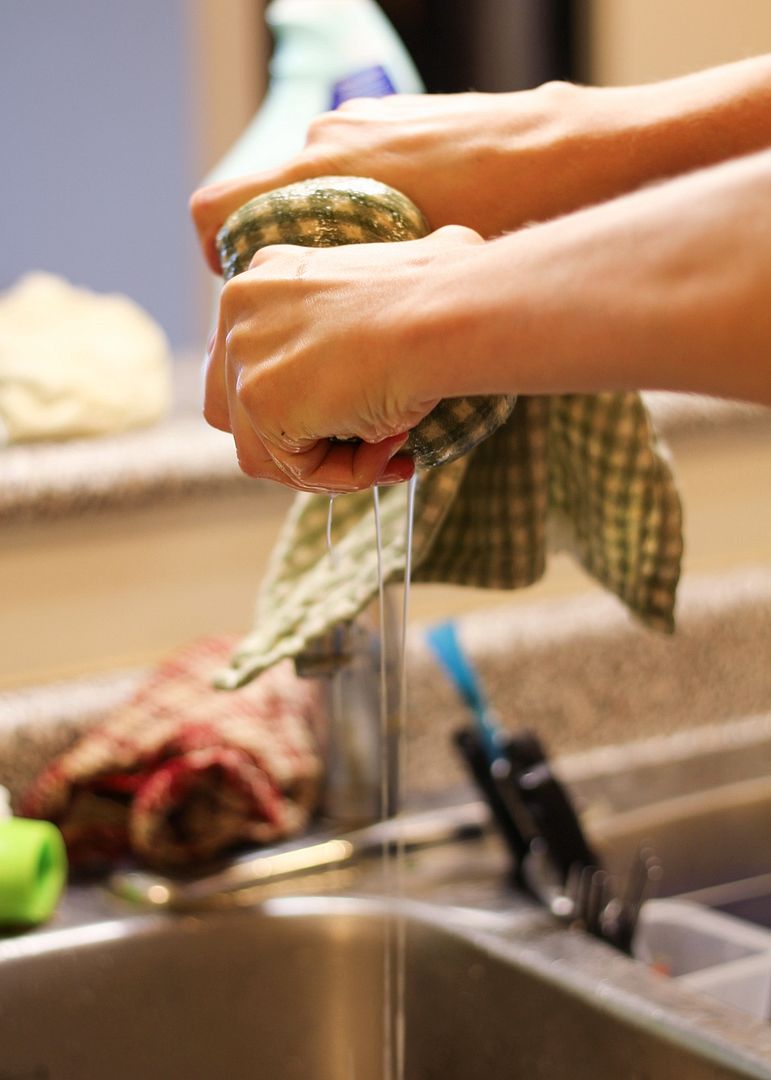
You then cook the "crumbs" in the microwave, let them cool, then transfer them to a towel to wring out all the water.  This is probably the most important step, as it will help make sure your crust stays together later.  You'll be surprised at how much water comes out - and you'll get a bit of an arm workout during the process!

Making cauliflower crust pizza

After you wring out all the moisture, the cauliflower will look completely different and if you smoosh it together with your hands it should actually stay together in clumps:

Making cauliflower crust pizza

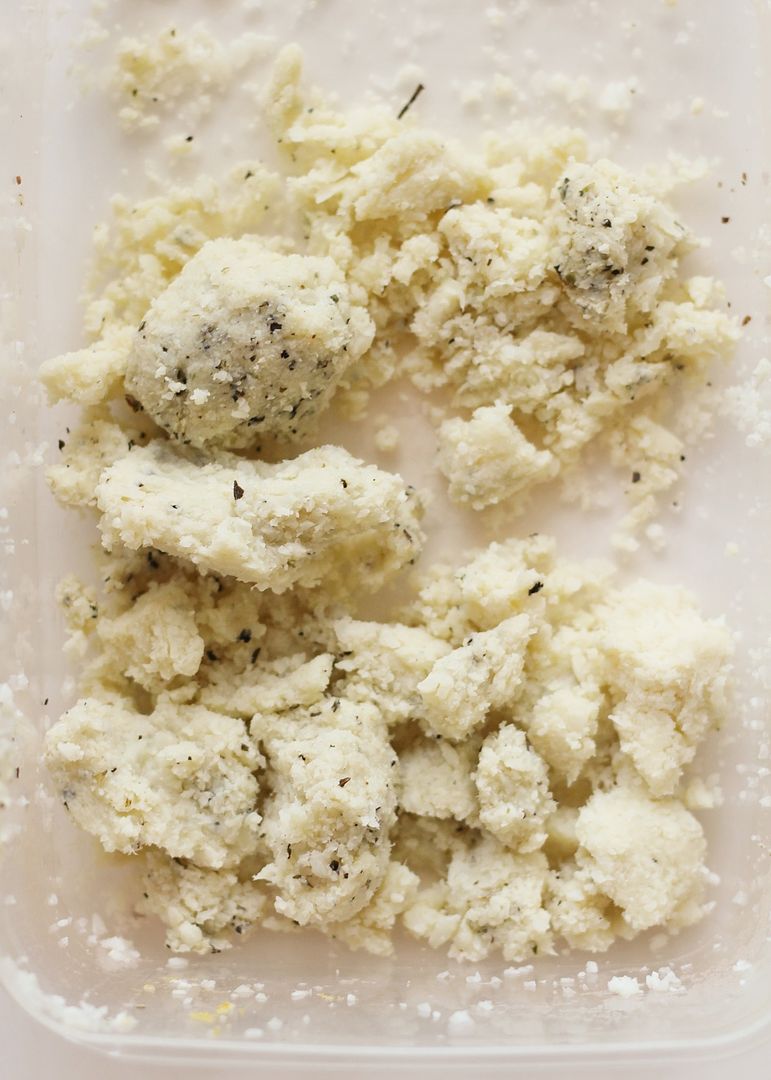
You then mix in your cheese, egg, and seasonings (if you like - I added dried basil, oregano, salt, pepper, and nutritional yeast for added cheesy flavour).  Then you pat the mixture into a pizza crust shape:

Making cauliflower crust pizza

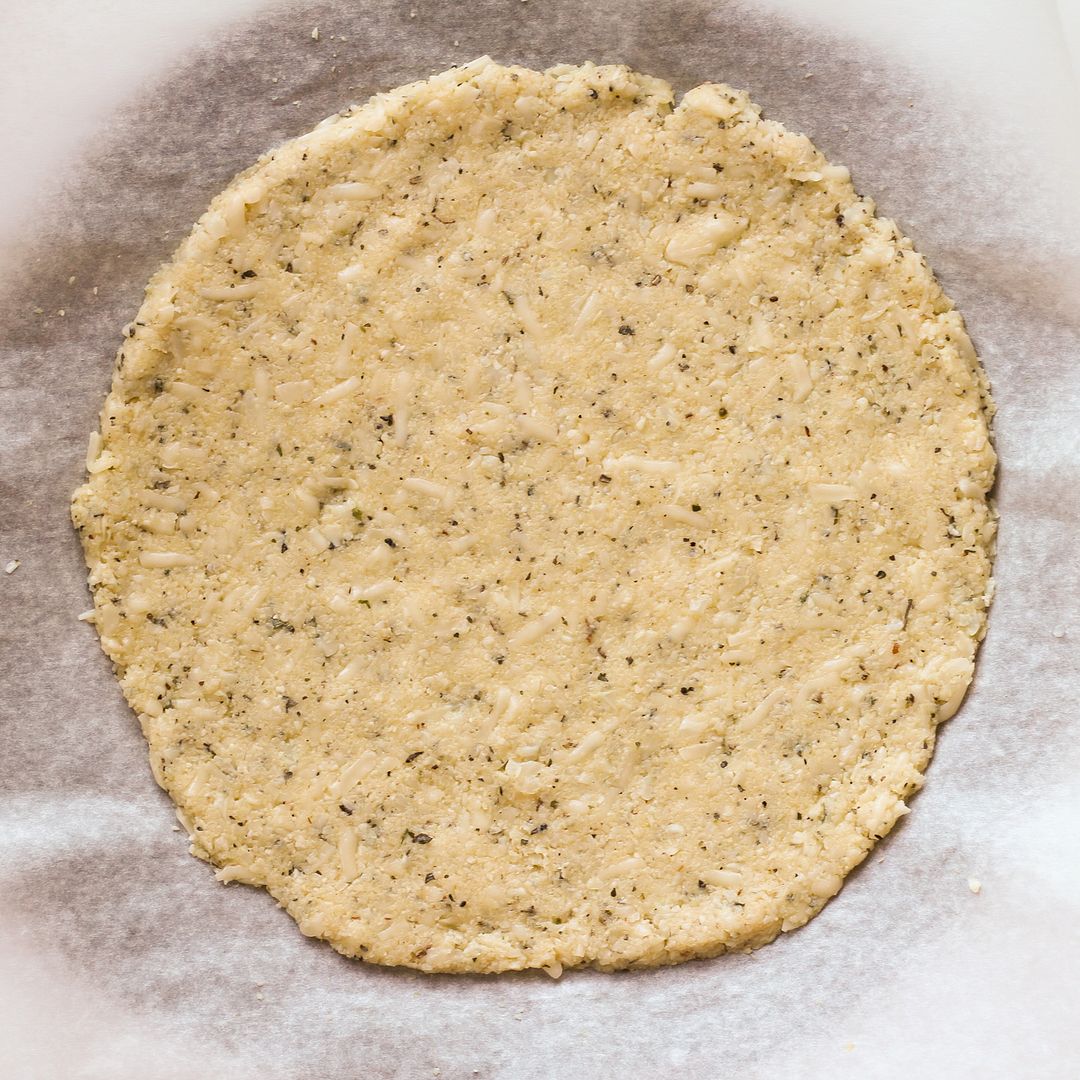
You'll need to prebake your crust, during which time you can get all your toppings ready, then return the pizza to the oven with the toppings, wait very impatiently for it to be ready, and eat!

Cauliflower Crust Pizza with Corn, Zucchini, & Goat Cheese

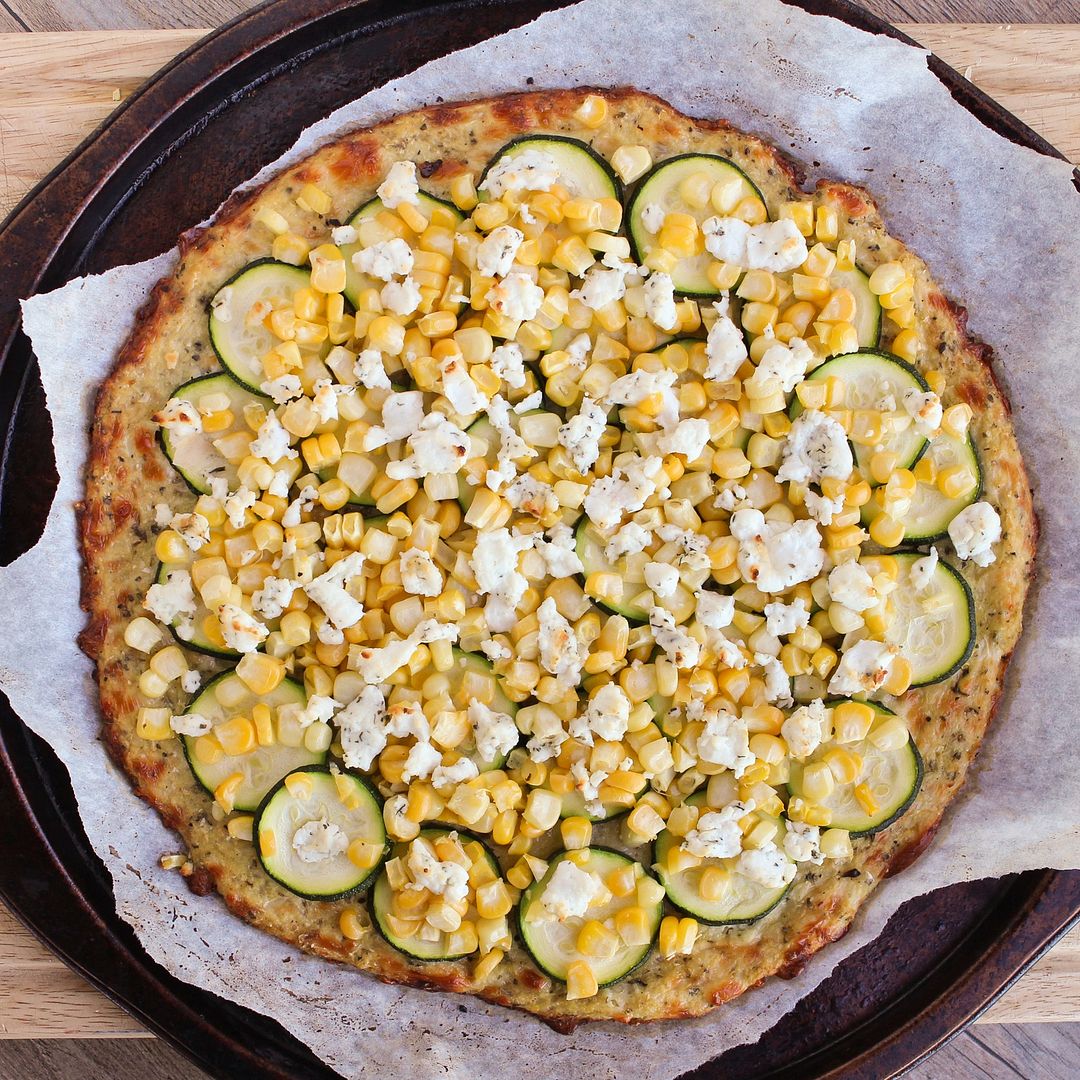
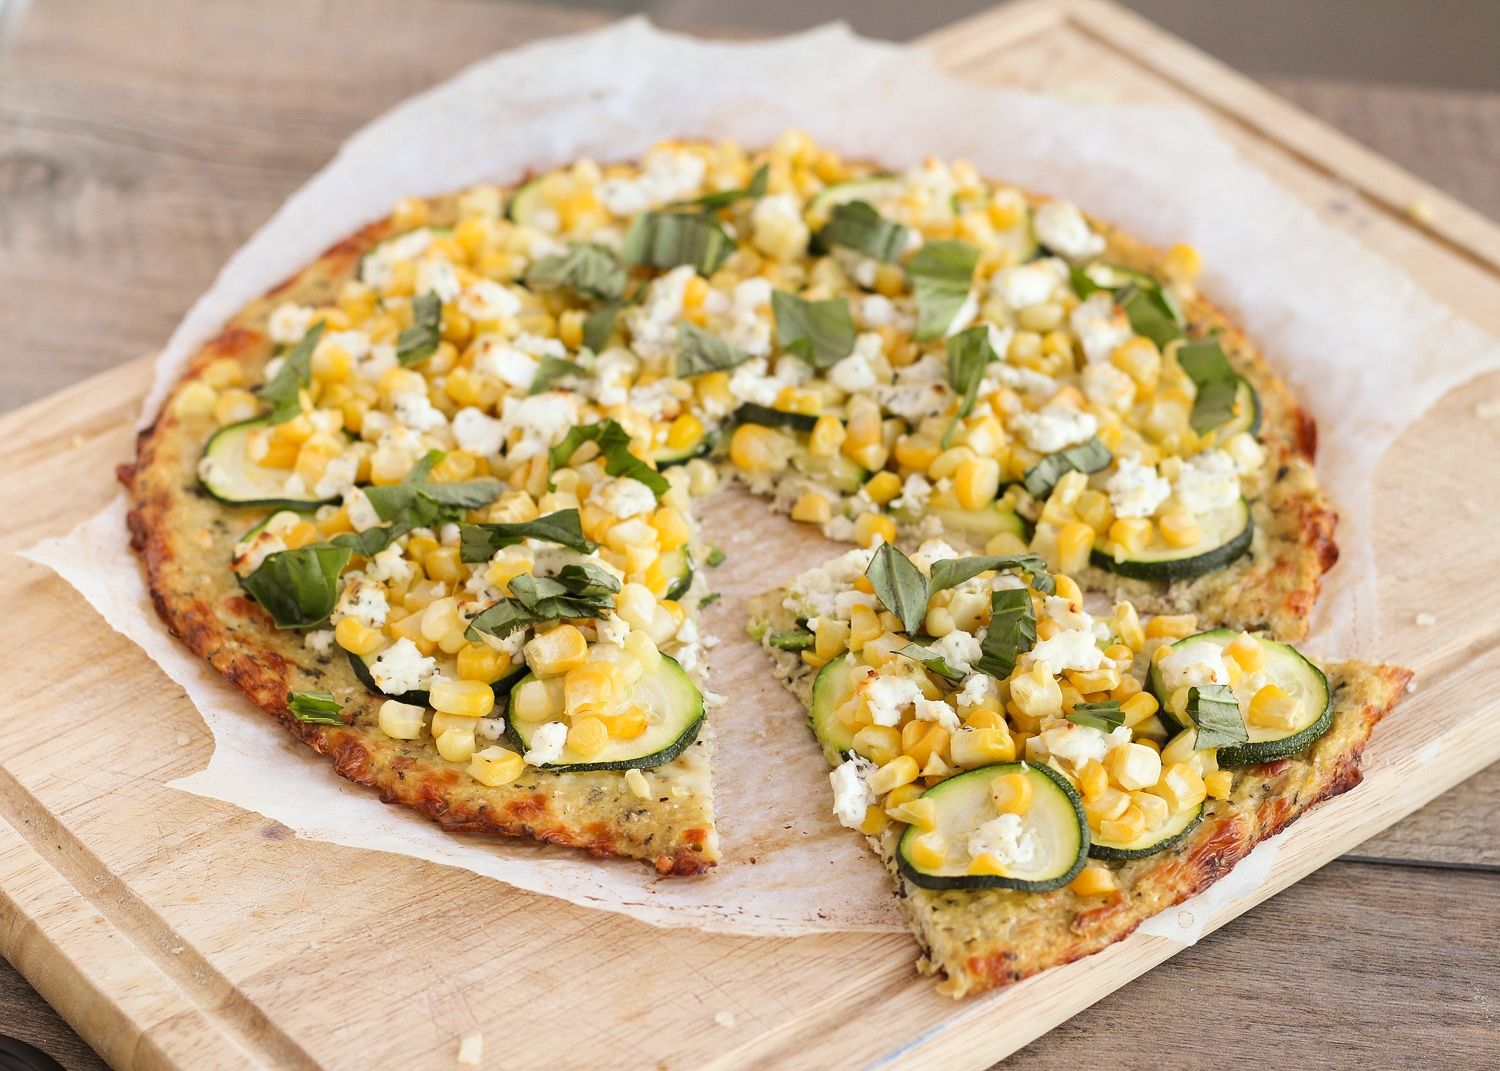
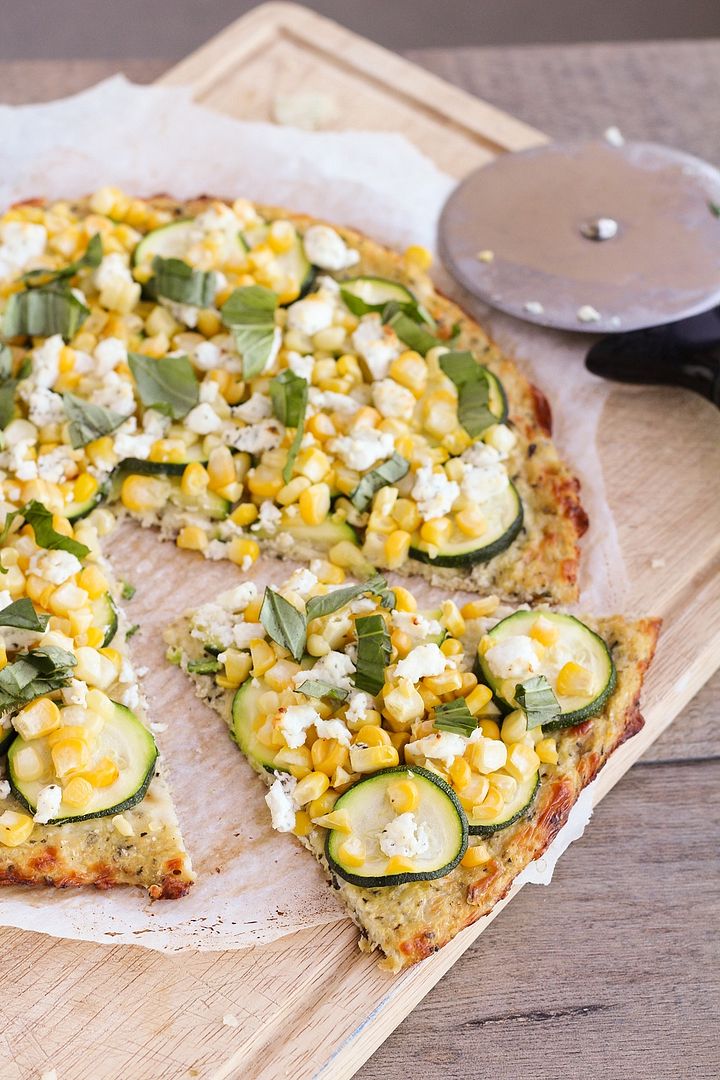
I decided to keep my toppings light and summery with corn, zucchini, and basil.  Even though the air is definitely getting chillier around here, it's still summer and there's still lots of corn and zucchini available!

I didn't use a sauce or cheese except for the goat cheese on top, as there's already cheese in the crust and I didn't want this to be too heavy.  Everything worked so well together and tasted fresh, which I loved!

Cauliflower Crust Pizza with Corn, Zucchini, & Goat Cheese

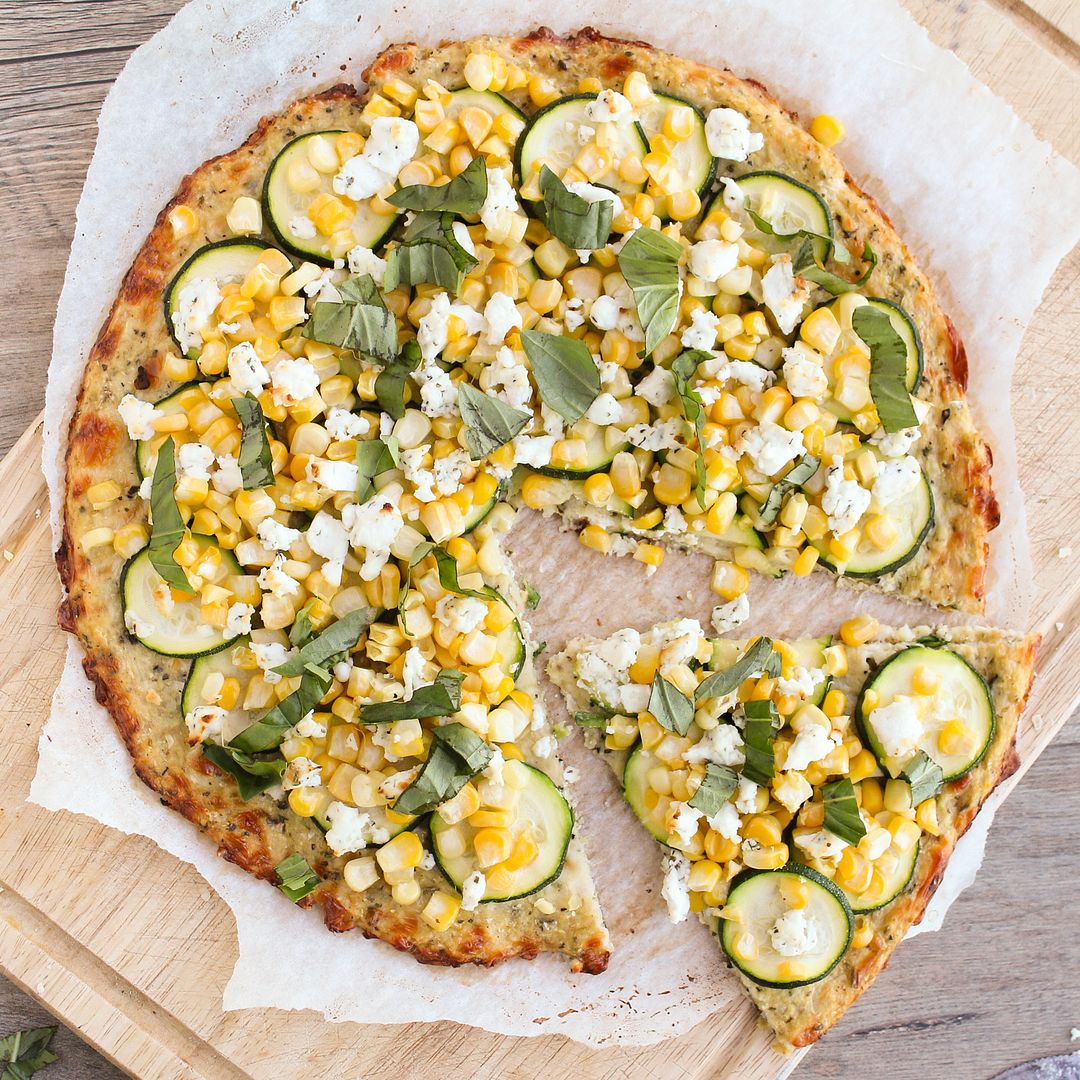
The crust was also way better than I expected!  It definitely doesn't taste anything like traditional pizza crust, so if that's what you're expecting then you'll be sadly disappointed.  Instead, it's chewy and flavourful and cheesy, and I think I actually might like it even better than regular crust!

Not that this will be replacing regular pizza for me as there's definitely still a time and place for that, but it's nice to have an alternative!

Cauliflower Crust Pizza with Corn, Zucchini, & Goat Cheese

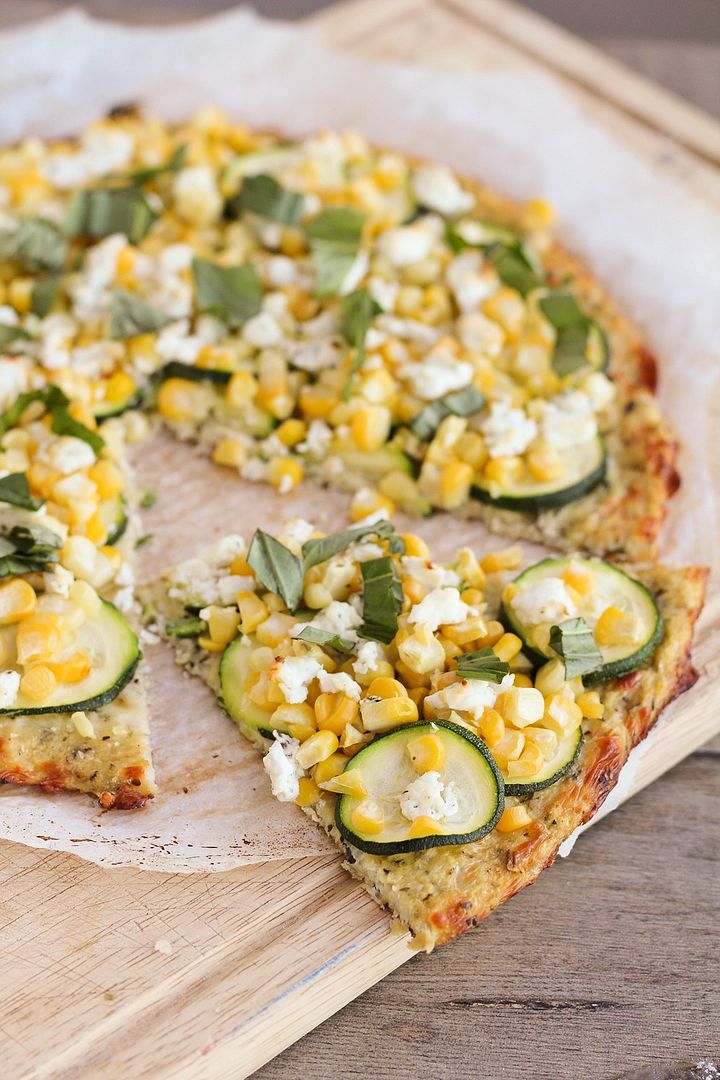
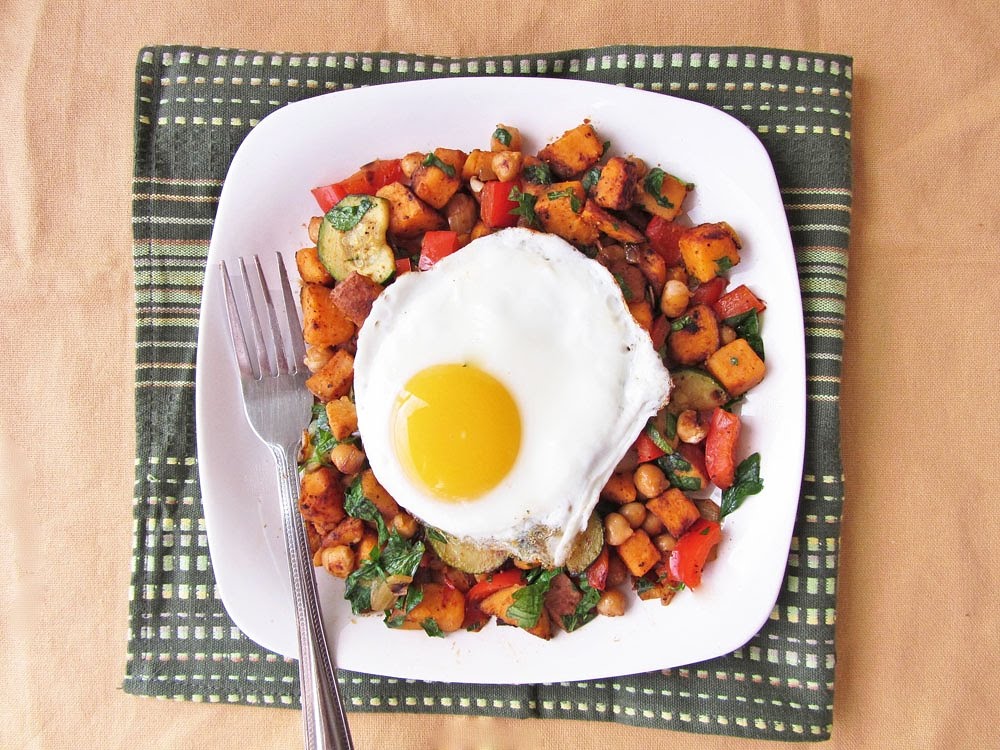
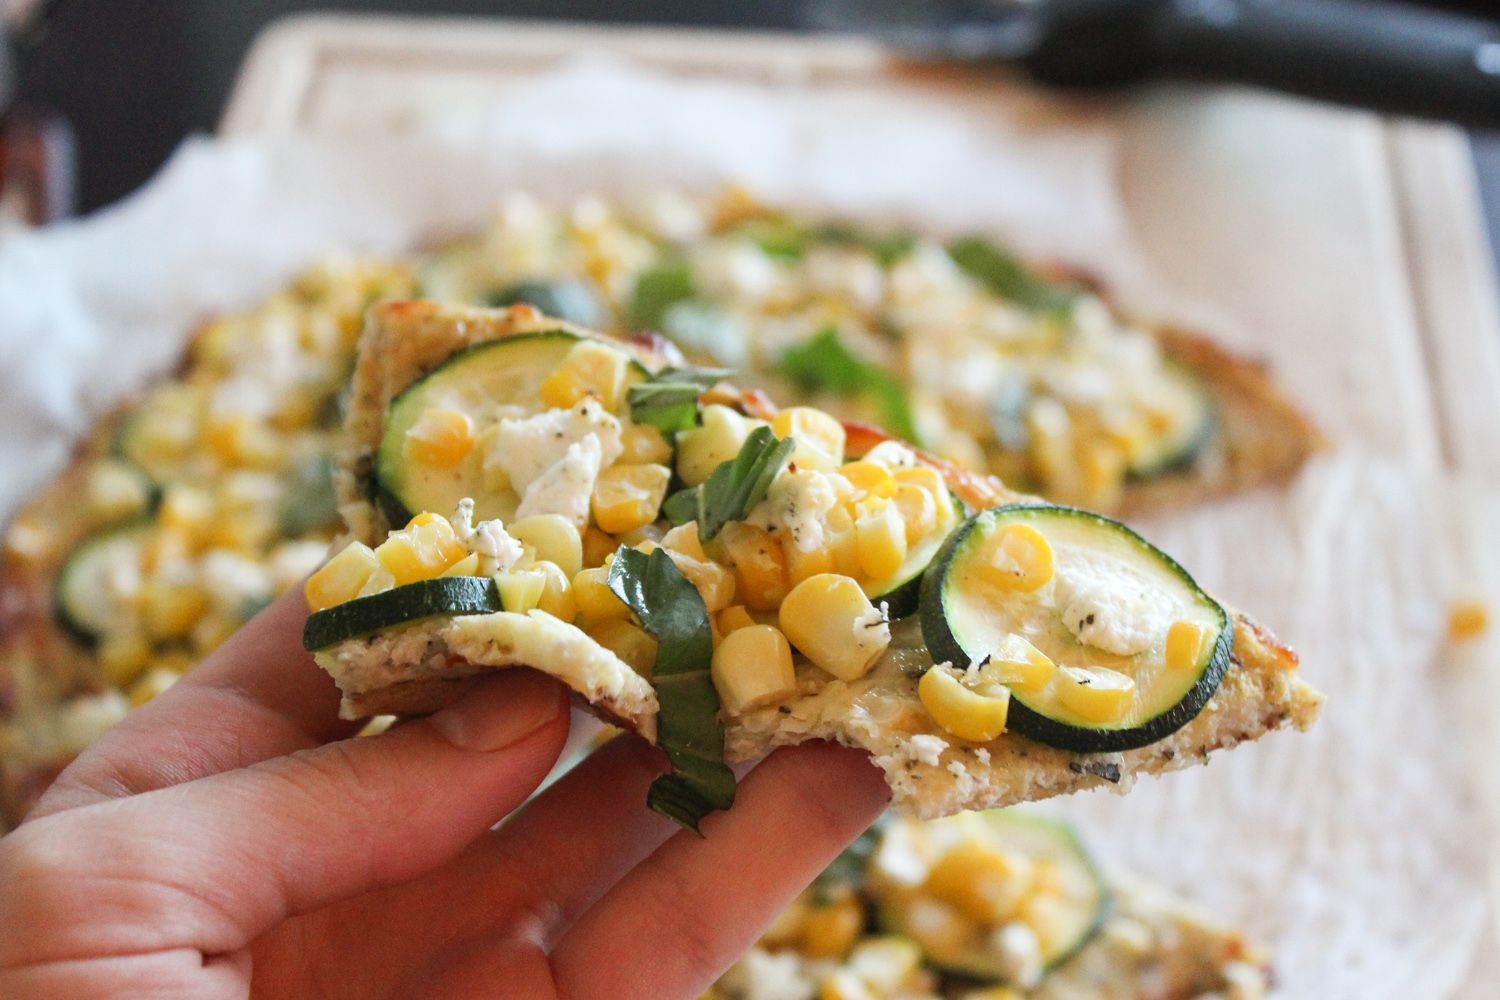
The only problem some people have noted is that the crust isn't super sturdy, so it can be hard to pick it up and eat it with your hands like regular pizza.  I found that I could still pick up the slices of pizza (see picture below for an idea - sorry it's so dark, I didn't think to take a picture until I'd already started eating), but because I chose corn as a topping, it was a bit hard to keep everything in place!  But as long as you don't mind getting a bit messy, it's worth it!  (and you can always eat with a knife and fork if you prefer!)

Cauliflower Crust Pizza with Corn, Zucchini, & Goat Cheese

Cauliflower Crust Pizza with Corn, Zucchini, & Goat Cheese

Crust recipe adapted from The Lucky Penny

Serves 2-3

Ingredients:

For the Crust:
1 medium head of cauliflower
1 cup grated part-skim mozzarella cheese
1/2 teaspoon dried basil
1/2 teaspoon dried oregano
1/2 teaspoon salt
1/4 teaspoon pepper
1 teaspoon nutritional yeast (optional)
1 large egg

For the Toppings:
1 small zucchini, sliced into thin rounds
1 ear of corn, kernels removed
2 oz herbed goat cheese (or plain goat cheese)
A few leaves of fresh basil, sliced thinly

Directions:

Preheat oven to 450°F and line a baking sheet with parchment paper.

Chop the cauliflower into florets (try to remove the stems).  Place in the large bowl of a food processor and pulse for about 30 seconds, just until all of the florets have been pulsed into very fine crumbs.  You should have about 3 cups of crumbs.  Transfer to a microwave safe bowl, cover, and microwave on high for 4 minutes.  Remove and let cool slightly.  Transfer to a clean tea towel (don’t use paper towels - they will shred), wrap up tightly in the towel, and wring all the water out of the cauliflower over the sink.  You will be surprised at how much water comes out!  Keep wringing to get as much water out of the cauliflower as you can – this will prevent the crust from crumbling.  Combine dried cauliflower with the cheese, basil, oregano, salt, pepper, nutritional yeast, and egg.  Mix to combine (I just used my hands).  Transfer to prepared baking sheet and form into a 10” thin circle.  Bake in preheated oven for 10-11 minutes.

Once crust has precooked, remove from oven and top with zucchini, corn, and goat cheese (you might not be able to fit all of the zucchini or corn kernels, depending on how big the zucchini and ear of corn were).  Top with crumbled goat cheese.  Return to oven and bake for another 15-20 minutes.  Remove from oven, top with sliced basil, season with additional pepper if desired, and serve!

Note that this is best eaten fresh - it doesn't keep very well.

September 14, 2012

Eggplant & Zucchini Pasta with Chickpeas and Feta

Eggplant & Zucchini Pasta with Chickpeas, Olives and Feta

Because it's Friday, I'm sure you guys would rather hear me talk about something entertaining rather than making this entire post about pasta, right?  If you answered no, then skip down towards the end where I will tell you all about this lovely pasta dish, but if you answered yes, then you are about to hear about my first adventure in celebrity stalking!

Last Saturday, my sisters and I went to the vegetarian food festival in Toronto (which my sister Genevieve wrote all about on her blog Vanilla & Spice, if you're interested).  The Toronto International Film Festival (TIFF) also happened to be on, which is a pretty big deal and draws lots of celebrities.  Before we left for Toronto in the morning, I quickly researched if any big celebs would be there at the same time as us, and noted the time for a Johnny Depp red carpet!  We ended up heading over there half an hour early, thinking we would have a great spot if he did show up, but little did we know that people show up super early to these things, and it was already packed!  I knew I would never see anything down on the ground, so I found a lovely spot up a bit higher, in the middle of a bush.  Literally, I stood in the middle of a bush, in a pile of mud, with branches in my hair, and a guy blowing cigarette smoke directly in my face from beside me, for half an hour, waiting to catch a glimpse of Johnny Depp.  And guess what?  It paid off!  I got to see him (and Natalie Maines from the Dixie Chicks) from about 15-20 feet away and took lots of pics - it was so exciting being part of a big crazy screaming crowd and being so close to such a big celebrity!

I guess celebrity stalking is addicting, because my sister and I decided to head back to Toronto Monday evening after we heard that Ben Affleck was going to be at a red carpet premiere.  We arranged it so that we would take a Greyhound that would arrive in Toronto at 5:30, we'd walk a block to one premiere where we would arrive in plenty of time to see Bill Murray and Laura Linney before their movie premiering at 6:30, then walk another block to the 7:00 premiere featuring Ben Affleck and Rachel McAdams, then head back home.  It involved a lot of bus riding, but we knew it would be worth it!

Eggplant & Zucchini Pasta with Chickpeas, Olives and Feta

Unfortunately, this plan didn't work out so well.  The bus ended up being an hour late arriving in Toronto.  ONE WHOLE HOUR!!  I was fuming!  So when we finally pulled in at 6:30 (after leaving our home over 3 hours earlier), we sprinted past the first theatre, which already had no one left outside, and continued on to Ben's theatre, praying we didn't miss him.  There was still a humongous crowd, which was a good sign!  As I stood balanced against a filthy pole (which I didn't realize was staining my butt until later), we overheard others in the crowd talking about how they had already seen Bill, Laura, and Rachel, but that Ben still hadn't arrived, so we were counting on him to save our night and make this trip worth it.  We waited .. and waited ... and waited .. until we were pretty much the only ones left waiting and realized that Ben had decided not to show up after all. 

Our friend in Toronto ended up saving our night by taking us out for a delicious feast of all-you-can-eat sushi, but we were still pretty disappointed about Ben.  I'm veeeery tempted to go back tonight to see Matthew McConaughey, who is supposed to be making an appearance, but I'm too worried that things won't work out again (especially trying to get to Toronto with Friday rush hour traffic), so I think I'll play it safe and spend the weekend resting and recovering from this cold!

Eggplant & Zucchini Pasta with Chickpeas, Olives and Feta

My story really didn't have a point except to distract you from your work for a while, and it has nothing to do with this pasta either, so I'm not even going to try to connect the two here!

If you just want to hear about this pasta, here's what you need to know: This is a fresh and healthy vegetarian dish that you may think is just an ordinary pasta, but a few unusual ingredients like chickpeas, olives, and feta, make this unique and flavourful.  It might look like a few more steps than a regular pasta, but it's worth it (especially for the amount of leftovers, if you're cooking for one like me!), and it's a great way to use up some of that end-of-summer zucchini and eggplant you might still have in your garden!

Has anyone else been celebrity stalking at TIFF (or elsewhere)?  I'd love to hear your stories!

Eggplant & Zucchini Pasta with Chickpeas, Olives and Feta

Eggplant & Zucchini Pasta with Chickpeas, Olives, and Feta

Adapted from Clean Eating magazine, April/May 2012

Serves 4-6

Ingredients:

2 medium zucchinis
1 small eggplant
2 tablespoons olive oil
Salt & Pepper
1 pound tri-colour vegetable rotini pasta (or whole wheat rotini)
1 (398mL) can fire-roasted diced tomatoes
1 (340mL) jar roasted red peppers (or 2 roasted red peppers), drained and rinsed, chopped
1/2 teaspoon dried basil
Pinch red pepper flakes (optional)
1 (540mL) can chickpeas, drained and rinsed
1/2 cup sliced green olives
4-5 oz low-fat feta cheese, crumbled
1/4 cup chopped parsley

Directions:

Preheat oven to Broil.  Quarter zucchinis lengthwise, then cut into 1/4-inch thick slices.  Cut eggplant into ½-inch rounds, then slice into bite-sized pieces.  Toss chopped zucchini and eggplant with olive oil, and season with salt and pepper.  Spread into one layer on a foil-lined baking sheet and broil in the top-third of the oven for 10-15 minutes, tossing halfway through, until golden brown and soft.

Bring a large pot of salted water to a boil, and cook pasta according to package directions.  Drain and rinse, reserving a bit of pasta water.

Meanwhile, add diced tomatoes, roasted red peppers, basil, and red pepper flakes to a medium saucepan, bring to a simmer, and cook over medium-low heat while the pasta is cooking, about 10 minutes.  Season to taste with salt and pepper.  Transfer to a blender, remove plastic stopper from lid, cover loosely with a kitchen towel, and puree briefly into a slightly chunky sauce.  Add a bit of the pasta water to thin out the sauce, if necessary.

Combine cooked pasta, roasted vegetables, tomato sauce, chickpeas, and olives in a large saucepan and cook over low heat 1-2 minutes to heat through.  Serve and top each portion with 1 oz crumbled feta and 1 tablespoon chopped parsley.  Season with additional pepper, if desired.

August 30, 2012

Eggplant & Zucchini Involtini with Ricotta Filling and Tomato Sauce

Eggplant and Zucchini Involtini

What is involtini you ask?  Good question, and one that even after much Googling, I’m not 100% sure I know the correct answer to.

You see, involtini are little roll-ups common in Italian cooking, that are usually made of a thin slice of meat rolled around a filling and baked with a sauce, but can also be made vegetarian using eggplant instead of meat.  The confusion lies in the fact that ‘rollatini’ seems to have the same definition.  According to Wikipedia, rollatini and involtini are actually the same thing – the dish is called involtini in Italy but over here it’s called rollatini.  That seems to clear things up except that rollatini recipes seem to more often be made with eggplant and that eggplant also seems to often be breaded.

Eggplant and Zucchini Involtini

And now I’ve gone ahead and made things even more confusing for you by throwing zucchini into the mix!  I rolled up thin slices of eggplant and zucchini around a seasoned ricotta filling, then baked them in an easy homemade tomato sauce topped with parmesan cheese.  They’re comforting and warm while being light and summery at the same time, with flavours reminiscent of eggplant parmesan or lasagna.  Whether or not this should be named involtini or rollatini may be up for debate, but I don’t care because all I know for sure is that they’re really tasty!

I couldn’t decide which I liked better.  This was the eggplant roll-up – a bit more classic and comforting tasting:

Eggplant Involtini

And the zucchini version is pictured below – it was more fresh and light tasting and looked a little prettier! 

Have you heard of involtini/rollatini before?  I'm curious to hear what you call it!

Zucchini Involtini

Eggplant & Zucchini Involtini with Ricotta Filling and Easy Tomato Sauce

Adapted from Cooking Light and The Fig Tree

Serves 4 (four involtini each)

Ingredients:

1 large eggplant
1 large zucchini
Cooking spray
Salt & Pepper

For the Tomato Sauce:
1 tablespoon olive oil
1-1/2 pounds ripe tomatoes, roughly chopped
2 garlic cloves, crushed
1/2 tablespoon balsamic vinegar
Salt & Pepper

For the Filling:
1 large egg
300g (~10oz) light ricotta
1/4 cup grated parmesan cheese
1/4 cup breadcrumbs (I used Italian seasoned breadcrumbs)
1/4 cup chopped basil
1 teaspoon lemon zest
1 teaspoon lemon juice
1/2 teaspoon salt
Pepper

For Topping:
1/4 cup grated parmesan
Sprinkle of chopped basil

Directions:

Preheat oven to broil and adjust oven rack to top third of oven.  Slice the eggplant and zucchini lengthwise into thin (1/4-inch thick) slices, producing 16 slices total (8 of each, if desired).  I also sliced the skin off my eggplant slices because I'm not a big fan of the skin, but it's not necessary if you don't mind it.  Line a baking sheet with foil and spray with cooking spray.  Lay eggplant and zucchini slices on the baking sheet and sprinkle with salt and pepper.  Broil for about 3-5 minutes per side, flipping over before broiling the other side.

Note – with my zucchini, I just used a vegetable peeler to very thinly slice the zucchini, and didn’t bother pre-cooking it.  This resulted in a firmer texture, so if you prefer that, you can skip the broiling step for the zucchini.  I recommend broiling the eggplant though.

Meanwhile, prepare the tomato sauce by adding all ingredients (olive oil, tomatoes, garlic, balsamic, salt and pepper) to a medium saucepan, bringing to a boil, then reducing heat to a simmer and simmering for 15 minutes.  Remove from heat and let cool, then transfer to a food processor and puree.

Prepare the filling by mixing all ingredients (egg to pepper) together in a large bowl.

Reduce oven heat to 375°F.  Pour about a third of the tomato sauce into the bottom of an 8x8 glass baking dish.  Spread 2 tablespoons of ricotta mixture onto each eggplant and zucchini slice, then roll up like a jelly roll.  Place rolls seam side down into the baking dish, and top with remaining tomato sauce.  Sprinkle with 1/4 cup parmesan cheese, then bake for 25 minutes.  Sprinkle with fresh chopped basil and serve.

February 16, 2012

Sweet Potato & Chickpea Hash with Fried Eggs

sweet potato chickpea hash with fried eggBreakfast for dinner (or 'brinner', though I've never once used that word in real life) is one of my very favourite meals. When I used to stay at school really late during my undergrad days, I liked to treat myself to the all-day breakfast for dinner in the cafeteria. It was cheap and filling and I would savour every single bite of those deliciously greasy hashbrowns. These days I'm usually at home for dinner, but on the nights that I don't feel like cooking anything, my standby is always a scrambled egg and cheese sandwich. It takes about three minutes to make and seems to taste better every time I make it!

I made this sweet potato and chickpea hash for a late weekend breakfast recently, but it's one of those dishes that would work equally well for dinner. Any time of day you choose to eat it, it makes for a really tasty and satisfying meal that's full of veggies and protein, so it's pretty healthy too.

I topped mine with a fried egg but next time I'd probably use a poached egg because I prefer their texture (plus they're healthier!) - either way, you'll end up with a delicious runny yolk that blends in with the potatoes to make each bite taste rich and savoury. Of course, you could leave out the egg and serve the hash as a side dish to a different protein if you prefer, but I thought the egg paired well with the dish and turned it into more of a complete vegetarian meal.

The original recipe called for baking the sweet potatoes in the oven before frying them in the skillet, but I was too hungry to wait that long so I searched online for other methods. There appear to be lots of ways of cooking sweet potatoes for a hash - some boil the sweet potato for up to 15 minutes, others for just a few minutes; some bake the sweet potato first, others bake the whole hash in the oven together; and some just throw the raw potatoes right into the skillet. I decided to boil the sweet potatoes just long enough to make them tender, then finish them in the skillet so they could get crispy and golden but still be cooked through. I thought that method worked well, but feel free to experiment!

I made a big batch of this sweet potato chickpea hash on the weekend, then divided the leftovers into single portions to keep in the fridge. That way I could take out a portion of the potato mixture during the week, and heat it in the microwave while I cooked a fresh egg to serve on top, making for quick and easy breakfasts (and dinner!)

sweet potato chickpea hash with fried egg
Sweet Potato & Chickpea Hash with Fried Eggs

Adapted from LCBO’s Food & Drink Magazine, Winter 2012 Issue

Serves 4

Ingredients:

2 medium or 1 large sweet potato (500g total), diced
1-2 tablespoons olive oil
1/2 a medium yellow onion, peeled and diced (about 1/2 cup)
3 cloves garlic, minced
1 small zucchini, chopped (about 1 cup)
1 medium red bell pepper, chopped (about 1 cup)
1 cup chickpeas (from a can, drained and rinsed)
1/4 cup chopped fresh parsley
Large pinch each of smoked paprika, salt, and pepper (and other seasonings if desired)
4 large eggs

Directions:

Add diced sweet potato to a large pot and cover with cold water. Bring to a boil and cook until tender, about 5-7 minutes. Drain and leave aside.

Meanwhile, heat olive oil over medium-high heat in a large non-stick skillet. Add the chopped onion, garlic, zucchini, red pepper, and chickpeas (I didn’t have a pan quite big enough to fit everything, so I split everything into two pans). Cook 5-10 minutes until starting to brown, stirring often.

Transfer vegetables to a bowl, wipe out the pan and add a bit more oil. Add the sweet potatoes to the pan and spread out in a single layer. Let cook without stirring for about 5 minutes, or until browned on one side. Flip and cook another 3-5 minutes. Repeat a couple more times until all sides are lightly browned.

Add the vegetables back to the pan and toss with the sweet potatoes. Add the parsley and season with paprika, salt, and pepper to taste. Toss everything together, then remove from pan and divide among four plates.

Wipe the pan, spray with non-stick cooking spray (or use butter if that’s your preferred method for frying eggs) and set over medium-low heat. Crack 4 eggs into the pan, cover, and let cook about 3 minutes, until whites are set. Top each serving of sweet potato hash with a fried egg, and serve warm with additional salt and pepper if desired.

August 31, 2011

Summer Vegetable Tian

summer vegetable tian
I thought I would sneak in this recipe while I still can, considering it has the word summer in the title and summer is almost over! Even though the last day of summer is technically September 22, I feel like it unofficially ends after Labor Day, which is coming up ridiculously fast!

A tian is basically a dish of layered vegetables that’s baked like a gratin, with a topping of breadcrumbs and cheese. This tian is a great way to use up all your summer vegetables, but is also highly adaptable to whatever vegetables you happen to have on hand. I used zucchini, eggplant, tomato, and potatoes, then topped it with Italian breadcrumbs and parmesan. The topping is also pretty versatile – I’ve seen versions without any cheese on top and some that have a blend of multiple types of cheese all melted together (I bet that version would be amazing!)

Here's a picture to give you an idea of the size of the vegetables I used - I tried to pick ones that were roughly equal in diameter so they would stack together nicely.

summer vegetable tian
And here's a picture after they were all sliced up. I didn’t end up fitting all the zucchini into the dish, though I probably could have if I had tried hard enough.

summer vegetable tian
This was a really comforting dish that was full of flavour from the different types of roasted vegetables. It was also really easy to make – the hardest part was probably slicing all those vegetables, but if you’re lucky enough to own a mandoline then it would probably be a breeze! This would be a great warm side dish for the coming month when summer vegetables are still around but the weather is getting a little cooler.

I know the picture at the top of this post makes the dish look really boring and strange, but it was hard to make it look good once it got all covered up with the breadcrumbs. You’ll just have to trust me that this tastes much better than it looks! Here’s a pic of the veggies before they went in the oven – they were much prettier at this stage!

summer vegetable tian
Summer Vegetable Tian

Adapted from Budget Bytes and Williams Sonoma

Serves about 6 as a side dish

Ingredients:

3 tablespoons olive oil, divided
1/2 large yellow onion, chopped
1 clove garlic, minced
1 medium zucchini
2 white potatoes (or 1 russet potato)
2 medium tomatoes
1 medium eggplant
1 teaspoon dried thyme
1 teaspoon dried rosemary
Salt and pepper to taste (I used about 1/2 teaspoon each)
1/2 cup grated parmesan
1/2 cup Italian breadcrumbs

Directions:

Preheat oven to 400°F. Grease an 8x8 baking dish with cooking spray.

Heat 1 tablespoon olive oil in a medium skillet over medium-high heat. Add the chopped onion and garlic and sauté until onion is soft and translucent, 5-10 minutes. Spread mixture over the bottom of the 8x8 dish.

Thinly slice the zucchini, potatoes, tomatoes, and eggplant (no need to peel any of them). Toss all the sliced vegetables in a large bowl with 2 tablespoons olive oil and the seasonings (thyme, rosemary, salt, and pepper) until all vegetables are coated.

Layer the vegetables vertically in the dish in overlapping rows, in an alternating pattern. Cover the dish with foil and bake at 400°F for 30 minutes.

In a small bowl, mix the parmesan and breadcrumbs together. Once vegetables have cooked for 30 minutes, remove foil and top with the breadcrumb mixture. Return to oven and bake for another 15 minutes uncovered, until breadcrumb mixture is golden brown.

Let stand 5-10 minute before serving – vegetables will be hot!

summer vegetable tian

Ingredient Index

Related Posts Plugin for WordPress, Blogger...