January 31, 2012

Fudgy Chocolate Stout Brownies (Super Bowl Dessert Idea!)

football shaped chocolate stout browniesI usually don't think of desserts when I think about Super Bowl food, but when I saw this recipe for chocolate stout brownies in the Super Bowl section of Bon Appetit's latest magazine, I knew I had to make them. Beer goes well with football and brownies are always a crowd-pleaser, so combining them seemed like a fantastic idea. I even decided to go one step further and cut them into football shapes to make them extra special!


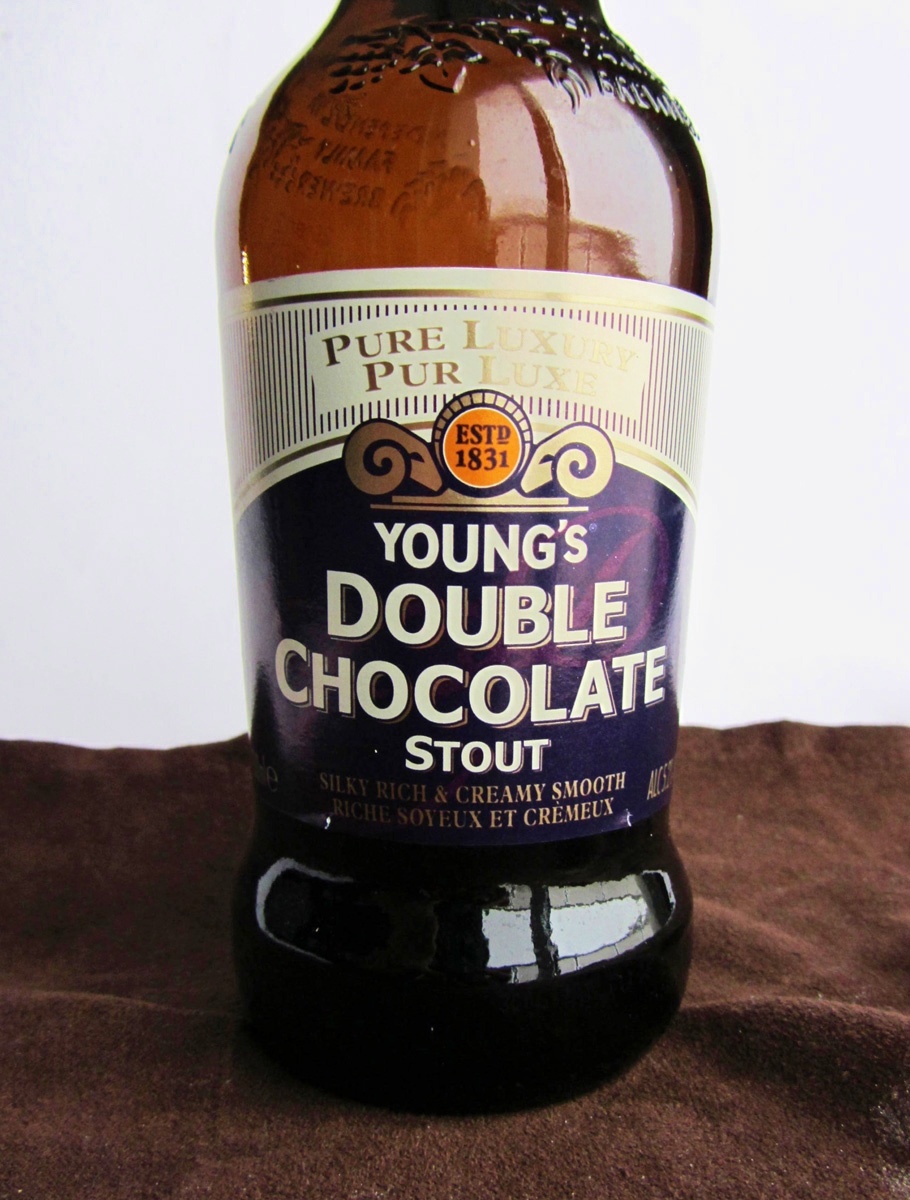
The original recipe called for any stout, but I used a chocolate stout because that just made sense to me. The brand I used was Young's Double Chocolate Stout, which is available at the LCBO here in Ontario, but I'm not sure about its availability elsewhere. There are lots of kinds of chocolate stouts out there, but if you can't find any, just use a regular stout like Guinness. You won't need a full bottle for the recipe, so choose a stout that you like so you can drink the leftovers!

chocolate stout beerI often hesitate to make brownies because I always seem to have a problem with underbaking them, but I've learned over the years that fudgy underbaked brownies are usually the best kind anyway! These brownies were definitely on the fudgy side, so if you're a cakey brownie fan, turn away now!

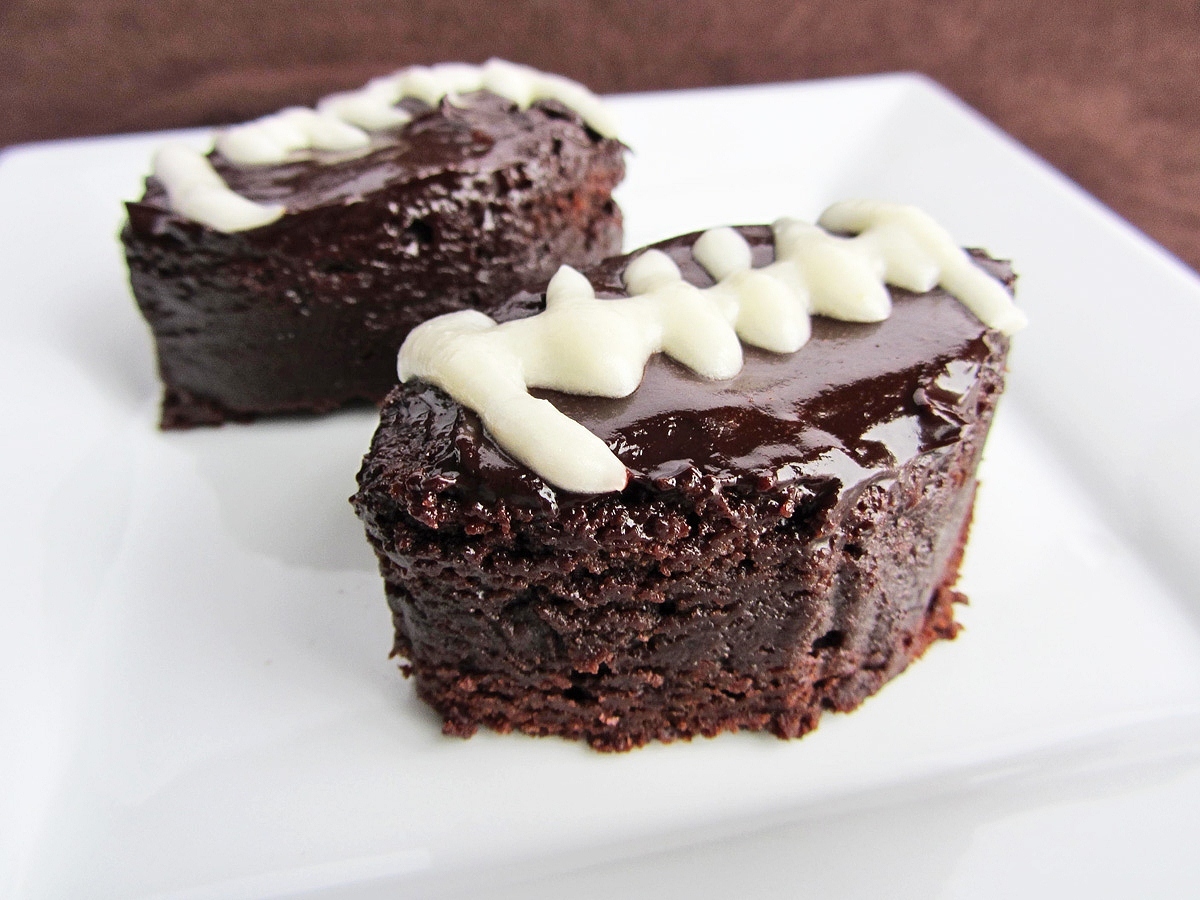
While I loved the soft, gooey texture of these, it unfortunately made my plan of cutting them into football shapes much harder than expected. After cutting out two football brownies, I gave up because it was getting too messy and difficult. The two I cut out did turn out quite cute though, especially after being decorated with a quick white icing.

football shaped chocolate stout browniesWith the rest of the pan, I just cut them into regular squares, which worked fine. You can go ahead and try to cut football shapes if you're more patient than I am, but squares will be a lot easier. Or you could do what I did and make two footballs as a center piece for your plate of brownies, then arrange the rest of the squares around them. Whatever shape you choose, just be sure to cut them small, because they're quite rich!

I haven't even told you how these taste yet, so in case you couldn't tell from the pictures, they were amazing! The flavour was so rich, dark, and complex, which I loved so much more than regular old brownies. You wouldn't know from eating one that they contain stout, but I definitely think the stout is what gives these their more "grown-up" feel. Everyone I gave them to loved them, especially Ryan, who hovered over me the whole time I was cutting them, quickly snatching up any piece that fell off!

I think these would be a great addition to your Super Bowl menu! And because I have so many other great Super Bowl recipes bookmarked that I haven't had time to make myself, I'll be back in a few days to do a roundup of other Super Bowl food that I think would be perfect for the big game, so stay tuned!

chocolate stout brownies
Chocolate Stout Brownies

Slightly adapted from Bon Appetit

Makes one 9x9 pan of brownies, or about 16-20 brownies

Ingredients:

1 cup chocolate stout
16 ounces semisweet chocolate, divided (I used two boxes of Baker’s semisweet chocolate, which contain 8oz each)
1 cup plus 2 tablespoons unsalted butter, softened
1-1/2 cups sugar
3 large eggs
1 teaspoon vanilla extract
3/4 cup all-purpose flour
1-1/2 teaspoons salt, divided

Directions:

Preheat oven to 350°F. Line a 9 x 9 x 2" square non-stick baking pan with foil, leaving a 2" overhang that will allow you to lift the brownies out of the pan later. Spray the foil with non-stick cooking spray.

Bring chocolate stout to a boil in a medium saucepan and let simmer until reduced to 1/2 cup. This may take around 10 minutes, but you can easily check by pouring the liquid into a glass measuring cup then transferring it back to the pot and continuing to simmer if it hasn’t reduced enough. When done, remove from heat and let cool. Divide into two 1/4 cup measurements - you will use half in the brownie batter and half in the glaze.

Chop 12 oz chocolate and 1 cup butter into pieces and combine in a medium metal bowl. Set the bowl over a small saucepan of simmering water and stir until melted and smooth. Remove from heat.

Whisk sugar, eggs, and vanilla in a large bowl until smooth. Gradually whisk in the melted chocolate mixture, then 1/4 cup of the reduced stout. Gently fold in flour and 1-1/4 teaspoon salt. Pour batter into the prepared pan.

Bake brownies until surface begins to crack and a tester or toothpick inserted into the center of the pan comes out with a few moist crumbs attached, 40-50 minutes. Transfer pan to a wire rack and let cool at least 20 minutes.

Add remaining 4 oz chocolate to a medium bowl set over a small saucepan of simmering water, and stir until melted and smooth. Remove from heat, add remaining 1/4 cup reduced stout, 2 tablespoons of butter, and 1/4 teaspoon salt. Whisk until well blended.

Pour warm glaze over brownies. Let stand at room temperature until glaze is set, at least 40 minutes. Using the foil overhang, lift the brownies out of the pan and cut into small squares (keep in mind that these are rich so you won’t want big pieces).

Valentine's Giveaway Winner!

The giveaway for the Wilton mini heart-shaped springform pan has now ended, and we have a winner!

The magic of random.org has chosen, and the winner is....


#23 Julie, whose favourite Valentine's dessert would be "..anything with chocolate or sugar. And no carrots. Sorry, carrot cake."

Congrats, Julie!

And thanks to everyone else who entered with all those mouthwatering descriptions of your favourite Valentine's desserts. It was hard to keep reading the entries every day without being able to eat them! I hope to have more Valentine's recipes for you over the next couple weeks, and hope to do more giveaways in the future!

January 27, 2012

Mini Heart Shaped Raspberry White Chocolate Cheesecake

mini heart shaped raspberry white chocolate cheesecake
With just over two weeks until Valentine’s Day, cute heart-shaped things are starting to pop up all over the blogosphere, and I couldn’t wait to join in! I’m actually not that big into mushy Valentine’s Day stuff and I certainly don’t need to receive any gifts (I always seem to kill flowers within a day and I don’t even like chocolate), but I do enjoy the spirit of the holiday, and am super excited to bake Valentine’s themed treats!

My first Valentine’s Day recipe this year was this mini heart-shaped white chocolate cheesecake, and it turned out so well that I almost want to quit now while I’m ahead, because I don’t think I can top this!

mini heart shaped raspberry white chocolate cheesecake plain
My mom got me this mini heart-shaped springform pan last year and I was eager to test it out last Valentine’s Day. At first I had a hard time finding any recipes online that would fit the pan, so I was excited when I found this gorgeous cheesecake from Pennies on a Platter, with raspberry swirls in a white chocolate batter over an Oreo crust.

I wanted to make something similar to hers because I love white chocolate and raspberry together, but her recipe was for an 8” cheesecake so I had to play around with the ingredients quite a bit to figure out how to make just the right amount for a 4” pan. I was close with my first try last year, but still ended up with too much leftover batter. The cheesecake was just as delicious as I expected though, so I was more than happy to give it another try this year!

mini heart shaped raspberry white chocolate cheesecake
This year, not only did I get the amount of ingredients just right for the mini pan, but I also discovered that spreading raspberry sauce across the top of the cheesecake (instead of swirling it into the batter) makes it even prettier! I loved the colour contrast of the red, white, and black together, but I loved the flavour even more! Each forkful gives you the perfect combination of raspberry, cheesecake, and chocolate, and the texture of the cheesecake was creamy and rich and everything a cheesecake should be.

mini heart shaped raspberry white chocolate cheesecake
After I started photographing the cheesecake I realized it needed something else on top, so I melted some white chocolate and wrote a simple Valentine’s message on it. Obviously chocolate isn’t the best choice for this type of thing because it hardens in the fridge, so you’ll probably want to use an icing instead, but the chocolate still worked well if you’re in a pinch!

Cut in half, this is just the right size to serve two people, making it perfect for a Valentine’s date. I actually cut each half in two so that I could share it with my sister and parents, and the smaller pieces were a nice size for a snack or light dessert that doesn’t leave you feeling stuffed, but we were all wishing for more after because it was so good!

I shared this link in Sweets for Saturday over at Sweet as Sugar Cookies.

mini heart shaped raspberry white chocolate cheesecake

Mini Heart-Shaped Raspberry White Chocolate Cheesecake


Makes one 4-inch cheesecake, Serves 2-4

Ingredients:

For the Oreo Crust:
1/2 cup Oreo cookie crumbs
1 tablespoon sugar
2 tablespoons melted butter

For the Cheesecake:
4 oz (half a brick) cream cheese
2 tablespoons sugar
1/2 a large egg (whisk one egg in a bowl first then divide in half)
2 tablespoons sour cream
1/2 teaspoon vanilla
2 oz melted white chocolate

For the Raspberry Sauce:
5oz raspberries
1 tablespoons sugar
1 teaspoon cornstarch
1/4 cup water

Directions:

For the Oreo Crust:

Preheat oven to 350°F.

Mix Oreo crumbs with sugar and melted butter in a small bowl, until all crumbs are all moistened with butter. Pour into a 4” heart-shaped springform pan and press down with your fingers to cover the bottom of the pan and slightly up the sides. I ended up with a bit of extra leftover crumbs.

Bake in preheated oven for about 7-10 minutes. Remove and leave on a wire rack to cool.

For the Cheesecake:

Mix cream cheese and sugar in a small bowl until completely softened and smooth. I just used a whisk and mixed this by hand, but make sure you mix the cream cheese well. Add the half egg and mix until combined.

Add the sour cream and vanilla and mix until combined. Lastly, add the melted white chocolate and mix until combined.

Transfer the cheesecake to the springform pan with the cooled crust. Bake at 350°F for 20-30 minutes, then lower oven temperature to 250°F and bake for another 45 minutes to 1 hour. Turn off oven and let cheesecake cool in oven for 1 hour or until it’s cool enough to touch. Remove and let cool at room temperature until completely cooled.

For the Raspberry Sauce:

Bring raspberries, sugar, cornstarch, and water to a boil in a small saucepan. Let boil about 5 minutes, until thickened. Press through a fine mesh sieve to discard the seeds.

Pour raspberry sauce over the cooled cheesecake and smooth with a spatula. Transfer cheesecake to a covered container and refrigerate at least 4 hours or overnight before serving.

mini heart shaped raspberry white chocolate cheesecake
Giveaway: (now closed)

Now I know a lot of you are thinking you won't be able to make this because you don't have the same pan I used. Well not to worry because all this lovey-dovey stuff has put me in a generous mood, so I'm giving one reader the chance to win their own Wilton mini heart-shaped springform pan!

How to Enter:
Leave a comment on this post telling me What would be your ideal Valentine's Day dessert?

Optional Additional Entries:
If you want the chance for up to 2 additional entries, you can do either or both of the following (just be sure to leave a separate comment here for each one, in addition to the comment mentioned above):
  • Like Once Upon A Cutting Board on Facebook and leave a separate comment on this post to say you do.
  • Subscribe to Once Upon A Cutting Board's RSS Feed and leave a separate comment on this post to say you do.
Rules and Details:
  1. This giveaway is only open to those with Canadian or U.S. shipping addresses.
  2. Include your name and a valid email address with each entry so that I can contact you (the comment system will ask for your email address but it will not be published).
  3. Entries must be submitted by Monday, January 30 at midnight EST.
  4. I will randomly choose the winning comment on Tuesday morning and email the winner. That person will have 48 hours to respond with their shipping address or a new winner will be selected.
Good luck!

This post/giveaway is in no way sponsored by or affiliated with Wilton. I just like this pan and want to share it with someone else!

UPDATE
:
The giveaway is now closed and a winner has been selected. Thanks to all for your entries!

January 25, 2012

Southwest Sweet Potato Dip

southwest sweet potato dip with crackerI’m always looking for new recipe sources and was happy to recently discover that Foodland Ontario has a lot of great recipes on their site. I’ve already made a couple that have turned out wonderfully - this southwest sweet potato dip being one of them!

I’ve made sweet potato hummus before but haven’t tried a regular sweet potato dip, let alone one with “southwest” flavours in it. I’ll admit I was a little skeptical about how this dip would turn out, but after my very first little taste I was hooked!

southwest sweet potato dipI couldn’t believe how flavourful it was, and I had to keep tasting and tasting in order to even figure out how to describe the flavour. I’m still not sure how because there’s so much going on in this dip – there’s sweetness from the potatoes, acidity from the lime, smokiness from the paprika, and spice from the cumin and cayenne. Just trust me that it all works really well together and tastes amazing!

It’s also really easy to make this dip because the sweet potatoes are cooked using the microwave, which saves a lot of time. If you want them to have a deeper flavour though, you could definitely roast them in the oven instead, it will just take a little longer before you get to enjoy the dip!

southwest sweet potato dip
This makes a great dip for crackers, pitas, or veggies, but it also works really well as a spread for a sandwich or bagel - I liked to eat it on a toasted thin whole wheat bagel as a light afternoon snack.

I also think this would be a great addition to a Super Bowl spread, especially for those who want some healthier options available!

southwest sweet potato dip on bagel
Southwest Sweet Potato Dip

Adapted from Foodland Ontario

Makes about 2 cups

Ingredients:

2 medium sweet potatoes
4 cloves garlic, minced
1/4 to 1/2 cup chopped cilantro (depending on your preference – I used 1/4 cup)
1/4 cup olive oil
1/4 cup fresh lime juice
1/4 cup water
1 tablespoon cumin
1 teaspoon salt
1 teaspoon chili powder
1 teaspoon smoked paprika
1/4 teaspoon cayenne pepper

Directions:

Pierce sweet potatoes in several places with a fork. Place on a paper towel and microwave on High for 5 to 9 minutes, or until tender. Cover with a towel and let stand about 5 minutes.

Once slightly cooled, peel back skin of sweet potato and scoop the flesh into the bowl of a food processor. Add all other ingredients to the food processor and process until smooth. Keep refrigerated for up to 3 days and serve at room temperature with chips, crackers, veggies, or as a spread on bread.

January 22, 2012

Mini French Toast Doughnuts

mini french toast doughnuts
I’ve been dying to try making doughnuts for a long time now, but anytime I saw a doughnut pan in a store, I always seemed to talk myself out of spending my money on something I knew I would very rarely actually use. Fortunately, my sister knows me well and bought me a doughnut pan for Christmas, and not just any old doughnut pan but a mini one! Mini baked goods are always ten times cuter than regular sized ones, so I was so excited to break in my new pan!

I had a lot of flavours to choose from when deciding what to make for my first ever doughnuts, but once I saw the idea of french toast doughnuts on Vegetarian Times, I was sold. Their recipe was vegan and I didn’t have a lot of those ingredients, so I decided to just take the idea of a cinnamon and nutmeg spiced batter with a maple glaze and cinnamon sugar coating, then use the recipe that came with my pan as a base to create my own version of (non-vegan) french toast doughnuts.

mini french toast doughnuts
The end result was even better than I’d imagined! Not only did they taste amazing, but they were also ridiculously adorable! I was surprised at how easy they were to make too; the batter is just like a muffin or pancake batter where you mix the wet and dry ingredients then combine them (no mixer required), then they only take 8 minutes to bake, after which you immediately glaze and top them, so they’re ready pretty quickly. You could easily have a plate of them on the table on time for breakfast, but they’re good any time of the day! I found that they tasted best fresh out of the oven, but still enjoyed them later in the day and even the following day, after a quick zap in the microwave to soften them up a little.

I like to think these are also not that bad for you, especially compared to a lot of other baked goods like cookies and muffins, or even compared to typical fried doughnuts. Of course, their mini size makes it easy to lose count of how many you’ve eaten, so in the end it probably all balances out!

After the success of my first doughnuts, I can’t wait to try other flavours now! Stay tuned for hopefully many more mini doughnut recipes – and if you don’t have a pan, don’t make the same mistake I made and wait for someone else to buy one for you – go get one now!

mini french toast doughnuts
Mini French Toast Doughnuts

Inspired by Vegetarian Times; Doughnut recipe adapted from my Fox Run mini doughnut pan

Makes 30-36 mini doughnuts

Ingredients:

For the Doughnuts:
2 cups all-purpose flour
3/4 cup sugar
2 teaspoons baking powder
1 teaspoon salt
1-1/2 teaspoons cinnamon
1/4 teaspoon nutmeg
3/4 cup milk
2 large eggs, lightly beaten
1 tablespoon melted unsalted butter
1 teaspoon vanilla extract

For the Glaze:
1 cup icing sugar
2 tablespoons milk
1-1/2 teaspoons maple extract
*You may wish to add pure maple syrup for a stronger maple flavour - taste and adjust as desired

For the Cinnamon Sugar:
1/4 cup sugar
1 teaspoon cinnamon

Directions:

Preheat oven to 325°F. Spray a mini doughnut pan with non-stick cooking spray.

In a large bowl, whisk together the dry ingredients for the doughnuts (flour, sugar, baking powder, salt, cinnamon, nutmeg). In a medium bowl, whisk together the wet ingredients for the doughnuts (milk, eggs, melted butter, vanilla). Add the wet mixture to the dry mixture and stir together until just incorporated.

Spoon the mixture into the doughnut pan, filling each hole 2/3 of the way full. Bake for 8 minutes, or until tops spring back when lightly touched.

Meanwhile, stir together the ingredients for the maple glaze in a shallow dish. Mix together the cinnamon and sugar in a separate small bowl.

When doughnuts finish baking, remove from pan and transfer to a wire rack with a pan or parchment paper underneath to catch drippings when you glaze them. Dip each doughnut in the maple glaze to coat the top, then immediately sprinkle cinnamon sugar on top of the glaze before it hardens.

When pan cools, wipe clean with a cloth or paper towel and continue filling with batter and baking until batter is used up.

Doughnuts are best served fresh and warm but will keep for a day or two (you may want to quickly reheat them before eating).

mini french toast doughnutsI shared this link in Sweets for Saturday over at Sweet as Sugar Cookies.

Ingredient Index

Related Posts Plugin for WordPress, Blogger...